 Ubuntu单Web服务器搭建与运维管理


一、设置主机名web02
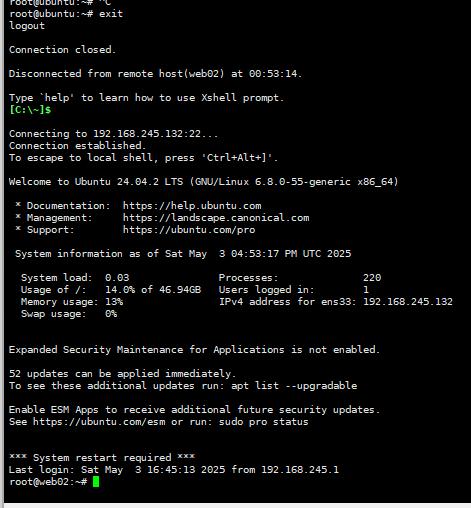
hostnamectl set-hostname web02验证:先输入exit退出,再重连,主机名改变如下图所示
二、设置静态地址
vim /etc/netplan/50-cloud-init.yaml
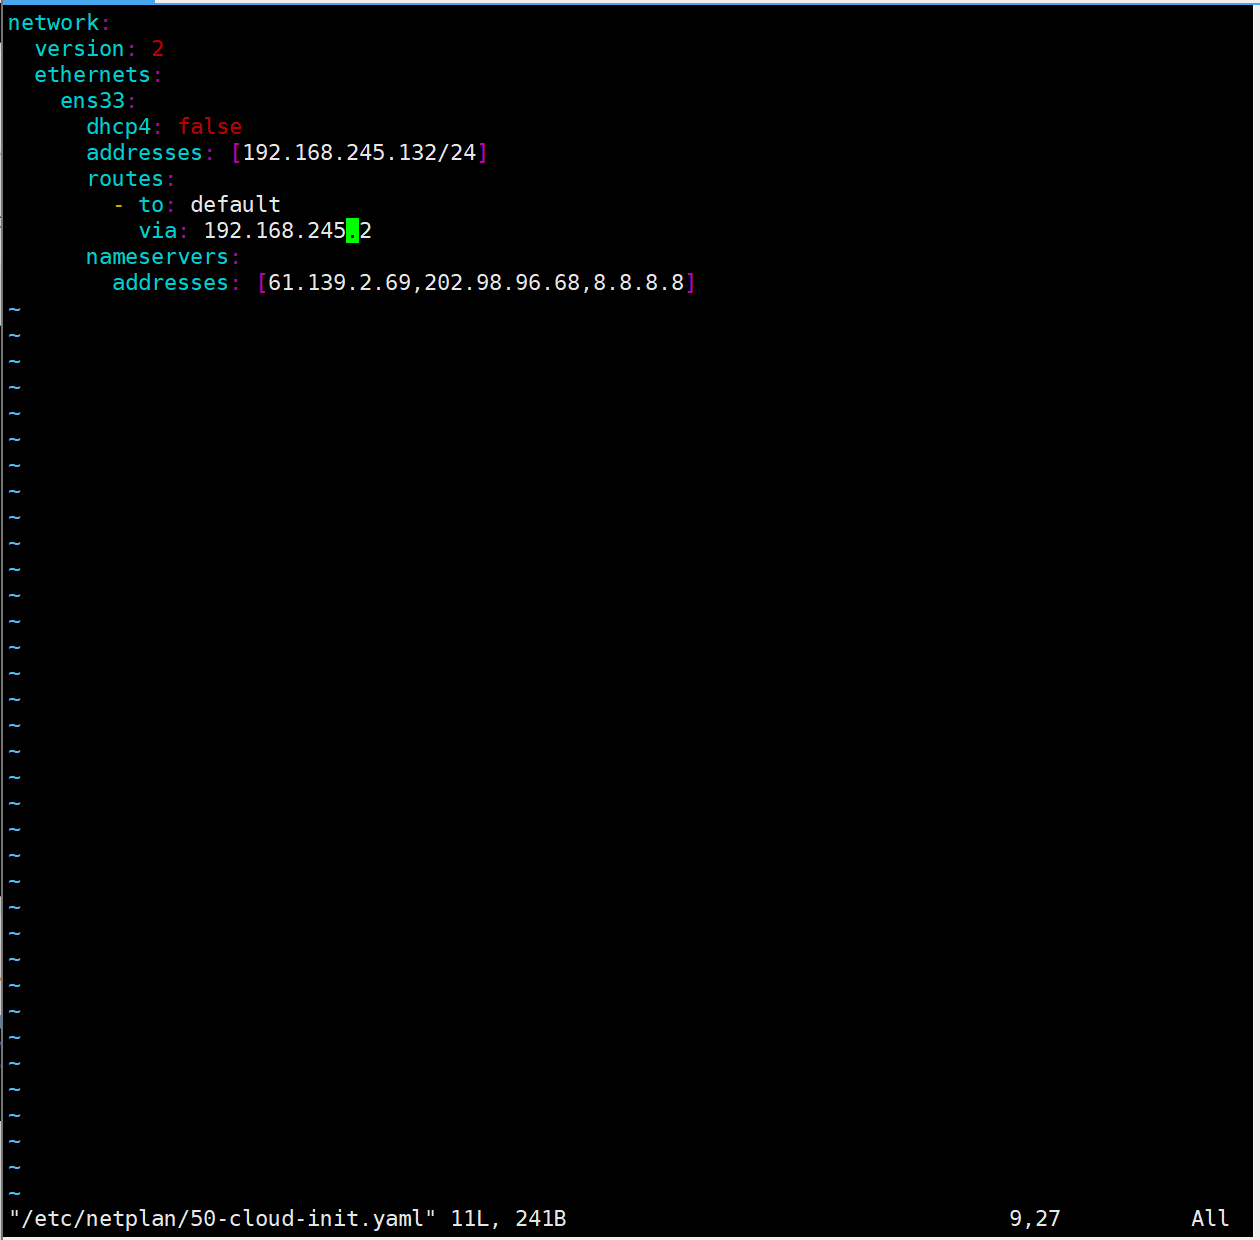
编辑好后 先按esc转到命令模式 输入 :wq 保存退出,然后输入
netplan apply
让网卡生效
三、换源(我换的是中科大源可以参考一下别的也行)


图上之后略有改动这是没输完版
中科大镜像:
Ubuntu - USTC Mirror HelpUSTC Mirror Help![]() https://mirrors.ustc.edu.cn/help/ubuntu.html#__tabbed_1_2清华镜像:
https://mirrors.ustc.edu.cn/help/ubuntu.html#__tabbed_1_2清华镜像:
ubuntu | 镜像站使用帮助 | 清华大学开源软件镜像站 | Tsinghua Open Source Mirror
四、 安装软件包
1.主流程(我自个儿进行的流程)
# 添加 PHP 的 PPA 软件源
sudo add-apt-repository ppa:ondrej/php# 更新软件包列表
sudo apt update# 安装所需的 PHP 版本及扩展、Nginx 和 MySQL 支持
sudo apt install -y php7.4-dev php7.4-mysql  php7.4-mbstring
php7.4-xml php7.4-gd php7.4-curl php7.4-zip php7.4-redis php7.4-sqlite3 php7.4-yaml
php7.4-decimal php7.4-http php7.4-imagick php7.4-bcmath php7.4-raphf php7.4-xmlrpc
php7.4-propro php-fpm php-mysql nginx
2.验证:
检查 PHP 版本
php -v
若输出类似 PHP 7.4.x 的信息,就表明 PHP 7.4 安装成功。
检查 Nginx 状态
sudo systemctl status nginx
若输出中包含 active (running),则说明 Nginx 服务正在运行。
检查 PHP-FPM 状态
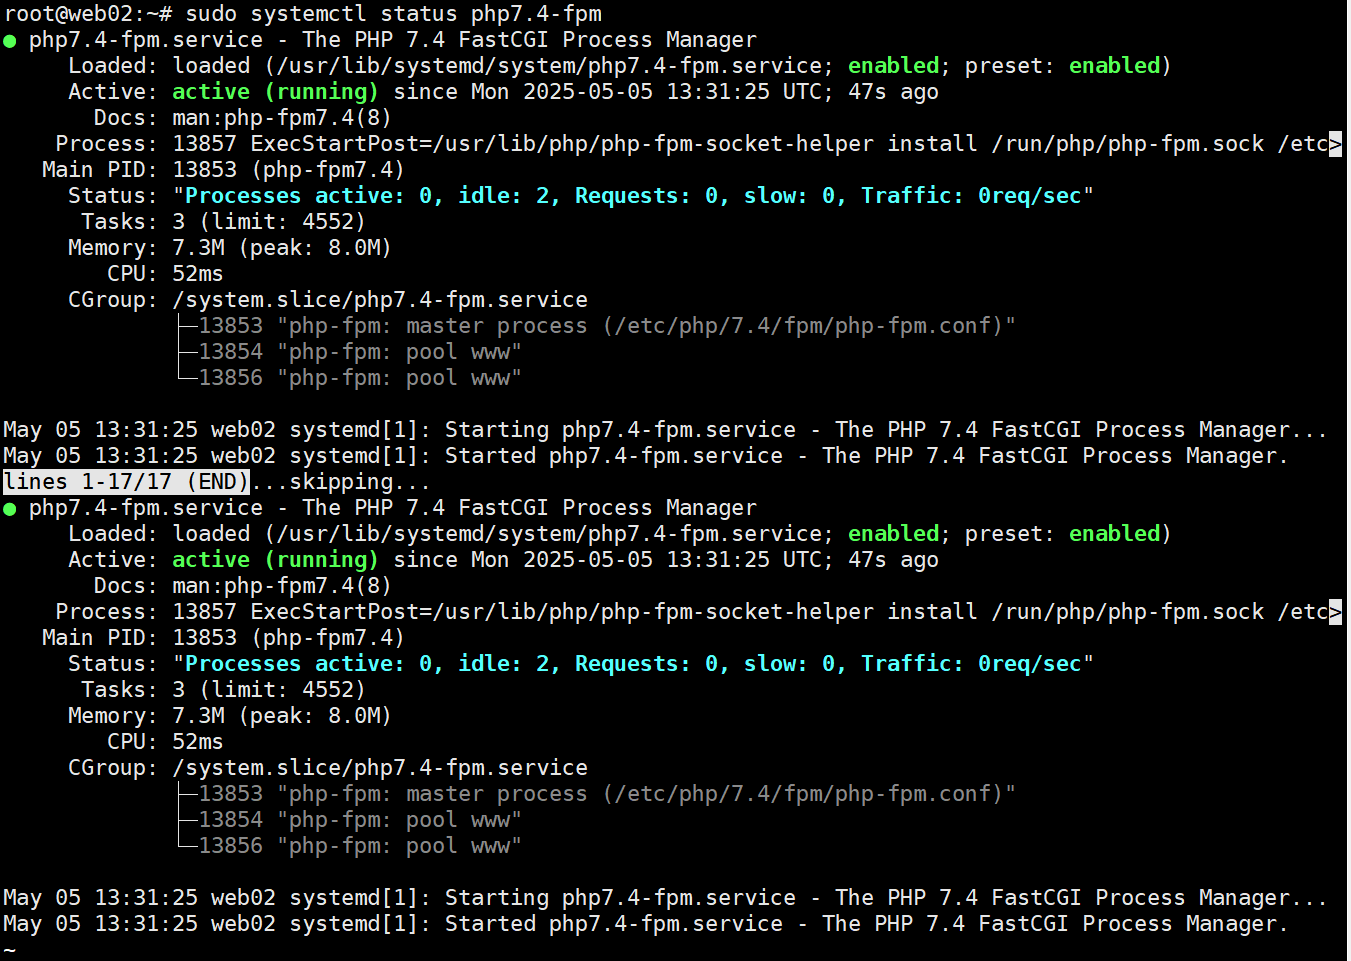
sudo systemctl status php7.4-fpm
若输出中包含 active (running),则说明 PHP-FPM 服务正在运行。
这里我发现我nginx没安
3.安装nginx
sudo apt update
sudo apt install nginx
验证安装:
sudo systemctl status nginx 正常情况下,输出结果会显示 nginx 服务的运行状态,例如 active (running) 就表示服务正在运行。
4.安装php7.4-fpm
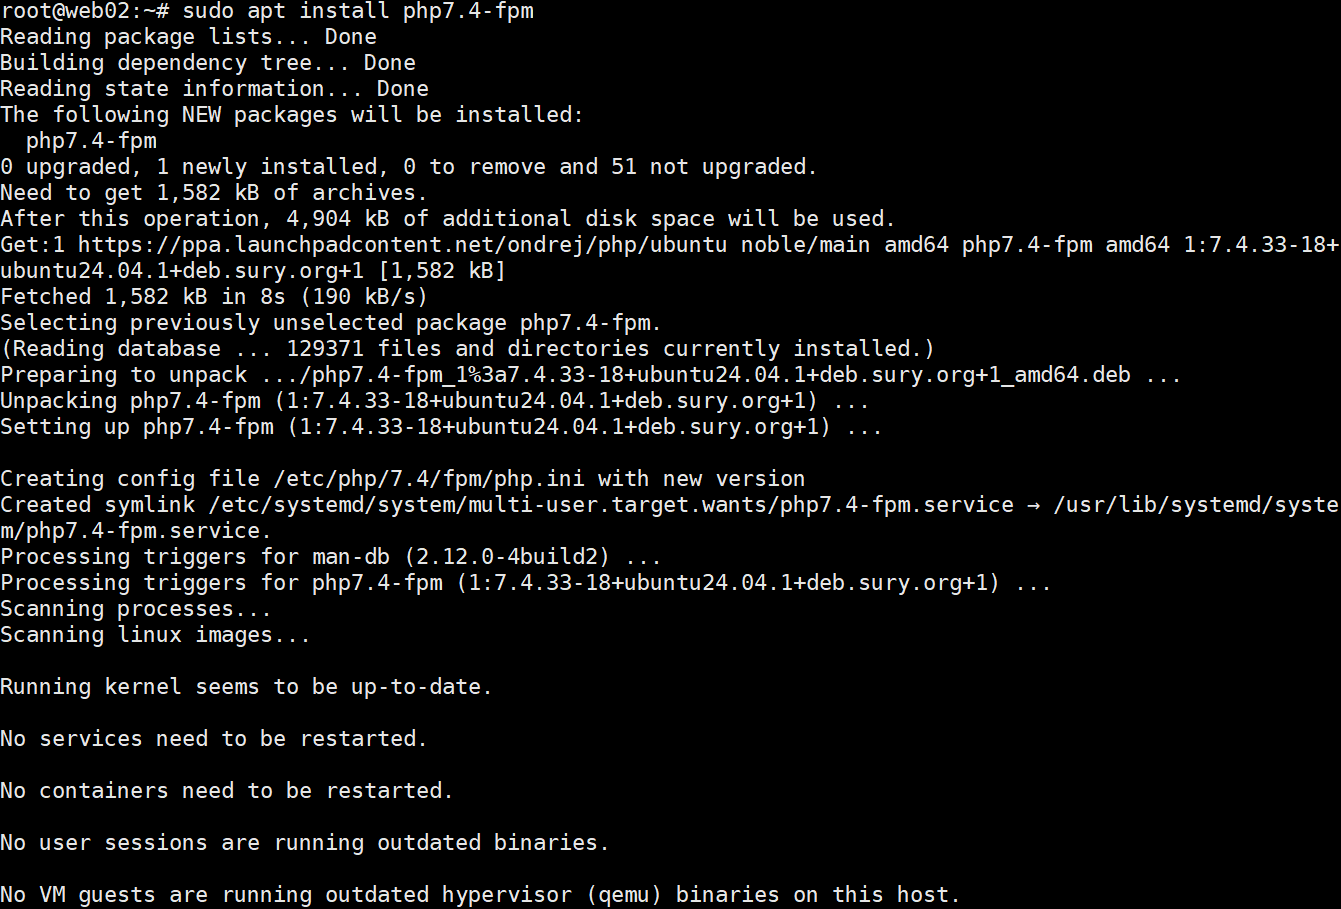
验证安装
五、配置简单修改
1.修改 PHP 配置文件(php.ini)
编辑 php.ini
sudo vim /etc/php/7.4/cli/php.ini 修改关键配置(搜索以下字段并调整)
设置时区(避免时间函数报错):
date.timezone = Asia/Shanghai # 取消注释并修改为中国时区
允许 PATH_INFO(可选,根据项目需求):
cgi.fix_pathinfo = 1 # 确保为 1(默认值,若被改为 0 需修正)
保存并退出(vim 操作:ESC → :wq → 回车)
2.创建php测试文件(info.php)
sudo vim /var/www/html/info.php写入php信息测试代码
<?php
phpinfo();  # 用于验证 PHP 和 Nginx 联动是否正常
?>
保存退出 (vim 操作:ESC → :wq → 回车)
2.修改nginx默认站点配置
编辑nginx配置文件
sudo vim /etc/nginx/sites-enabled/default在 server 块中添加 PHP 解析规则(找到 location / 部分,在下方新增)
 location ~ \.php$ {

      fastcgi_pass unix:/run/php/php7.4-fpm.sock;

      fastcgi_index index.php;

      fastcgi_param SCRIPT_FILENAME $document_root$fastcgi_script_name;

      include fastcgi-params;

}
检查语法正确性
sudo nginx -t # 若输出 "syntax is ok" 和 "test is successful",则配置无误重启nginx使配置生效
sudo systemctl restart nginx3. 启动并检查 PHP-FPM 服务(若之前未安装或未启动)
sudo systemctl start php7.4-fpm  # 启动服务
sudo systemctl enable php7.4-fpm  # 设置开机自启
sudo systemctl status php7.4-fpm  # 确认状态为 active (running)
4. 开放防火墙端口(若使用 ufw)
sudo ufw allow 'Nginx HTTP'  # 允许 HTTP 流量
sudo ufw status  # 检查防火墙状态
5.验证配置效果
在浏览器中访问服务器
输入服务器 IP 或域名:
Nginx 默认页面:
http://服务器IP应显示 "Welcome to nginx!"
效果如下:
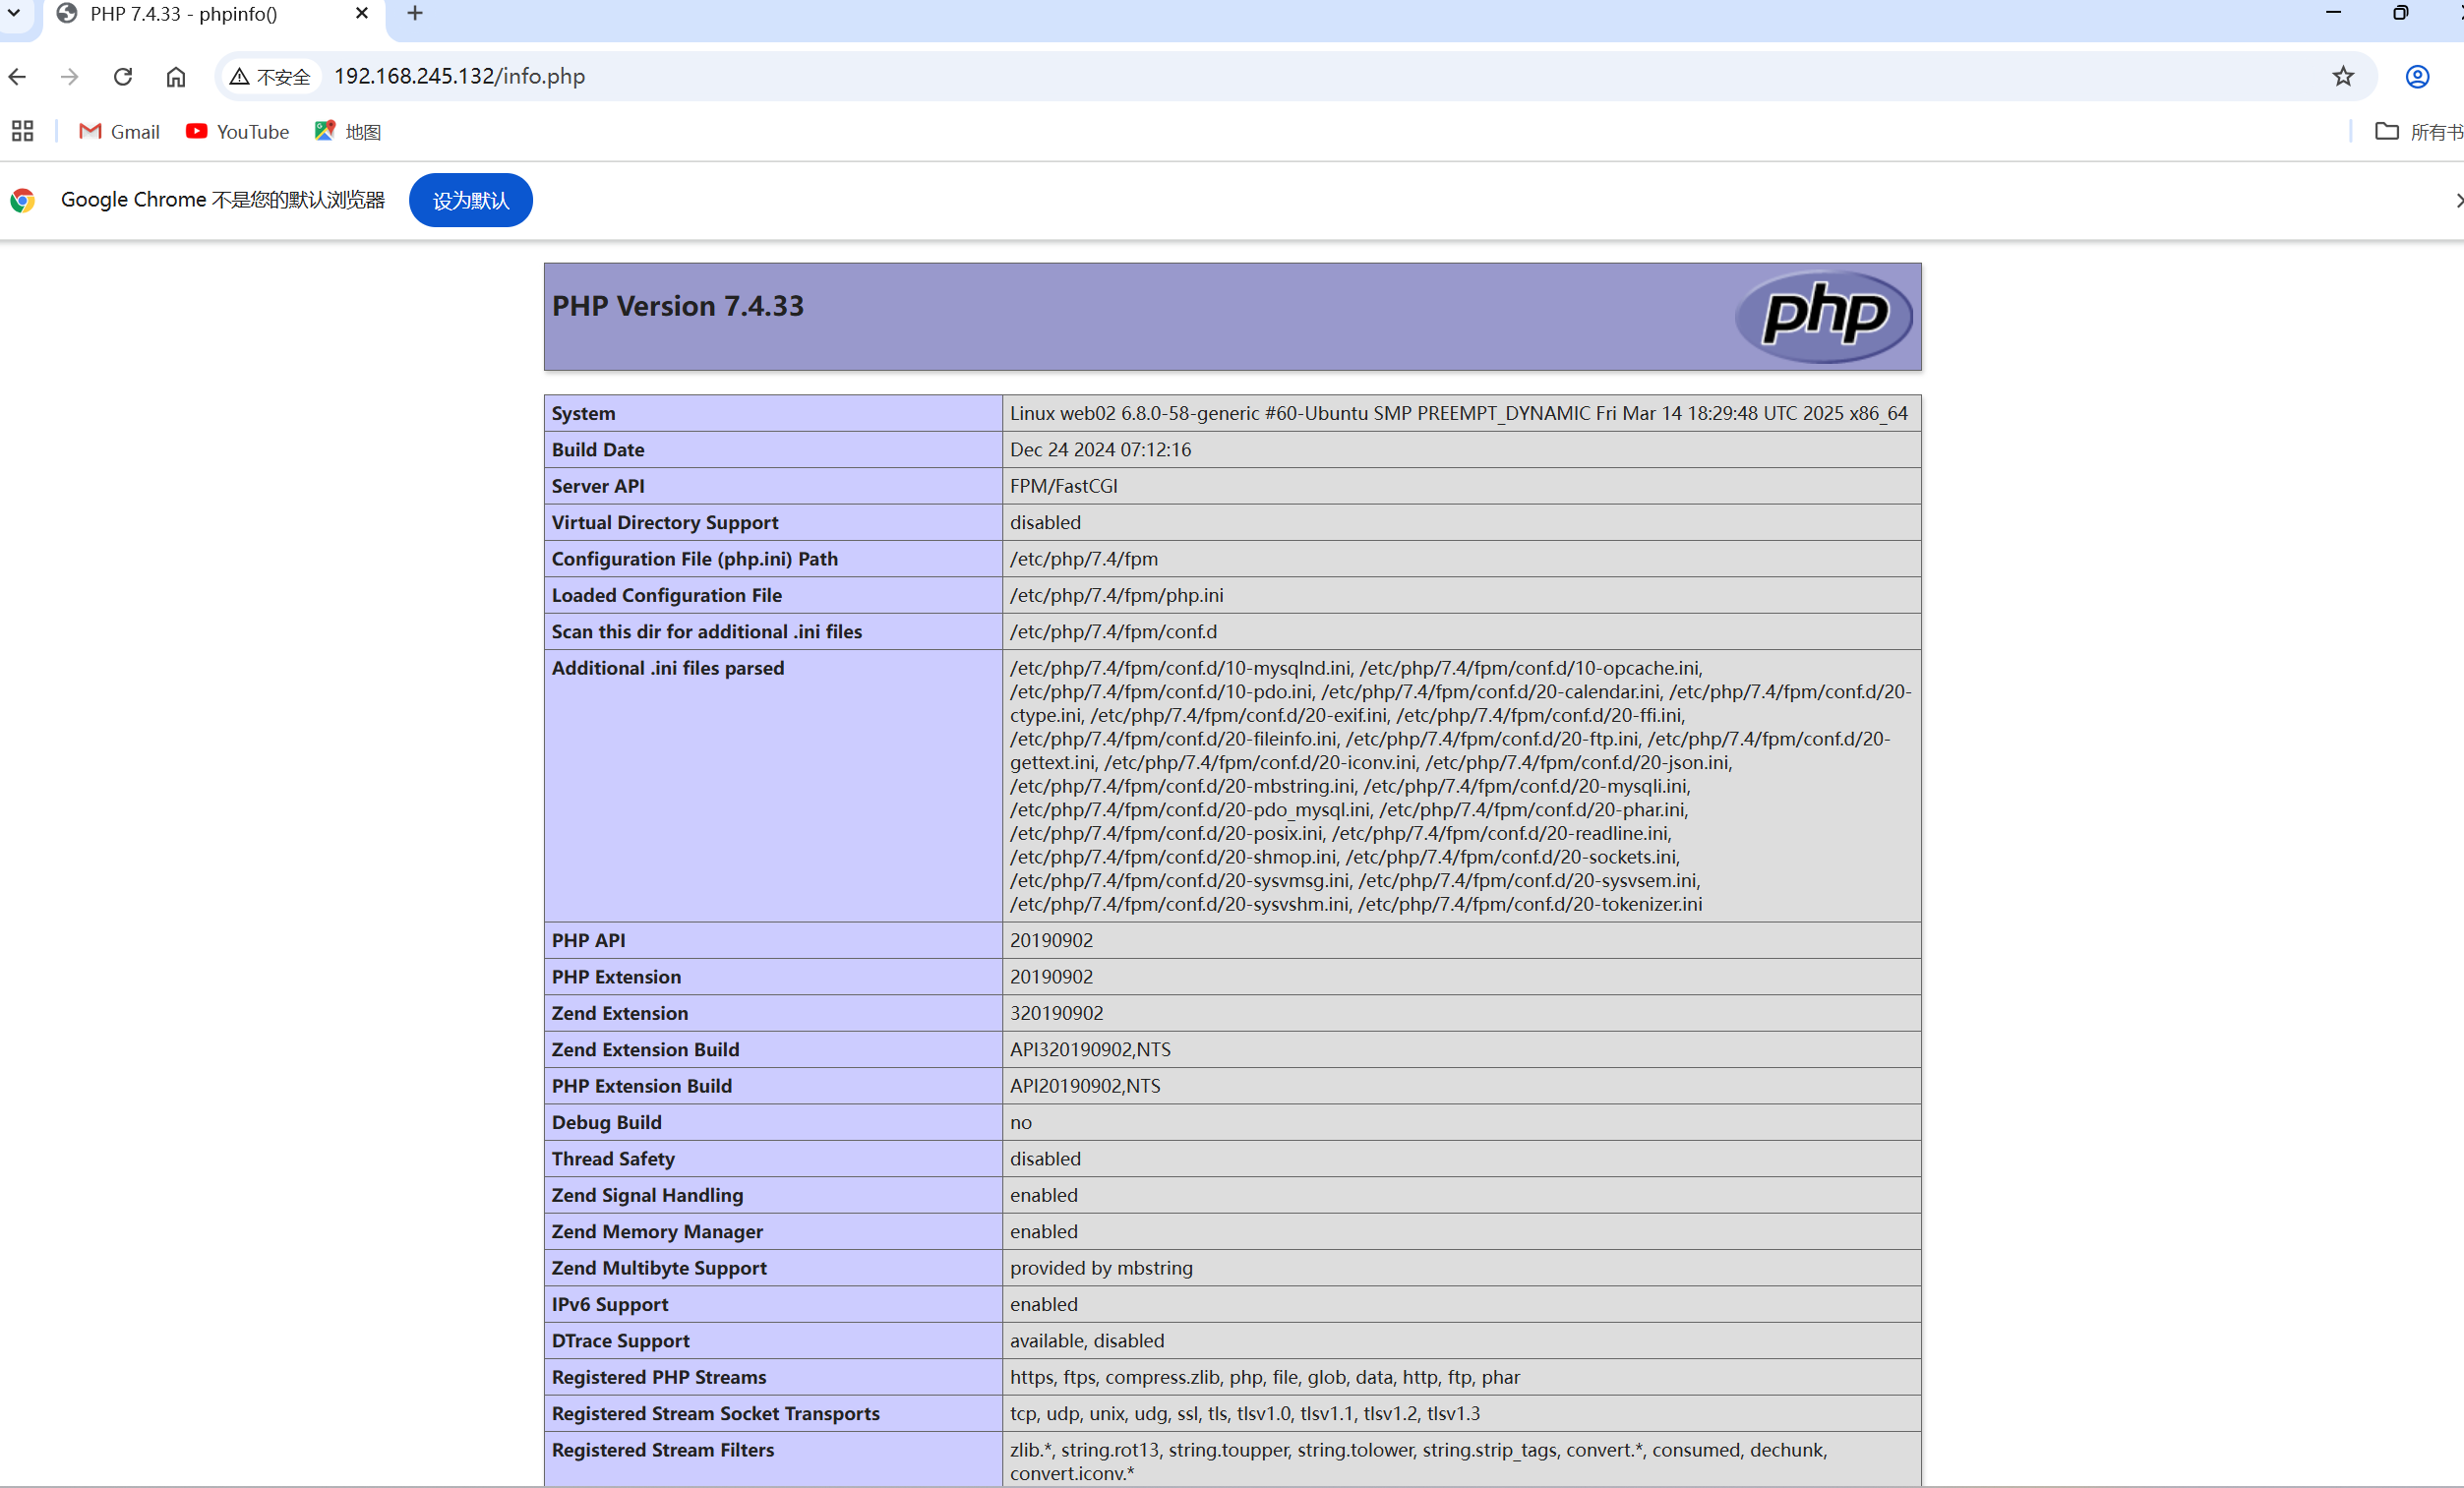
PHP 信息页面:
http://服务器IP/info.php应显示 PHP 详细配置信息(包含时区等设置)
效果如下:
六、服务管理
/etc/init d/php7.4-fpm restart
#命令用于重启 php7.4-fpm 服务 等效的 systemctl 命令如下:
sudo systemctl restart php7.4-fpmnginx -s reload
#重新加载 Nginx 配置,当你修改了 Nginx 的配置文件之后,无需重启 Nginx 服务,仅需使用此命令就能让新的配置生效。
systemctl restart nginx
#重启 PHP-FPM 服务,systemctl 是 Systemd 系统下用于管理服务的命令,restart 选项会先停止 Nginx 服务,然后再启动它
nginx -t
#检查 Nginx 配置文件语法,若配置文件语法无误,命令会输出类似如下的信息:
nginx: the configuration file /etc/nginx/nginx.conf syntax is ok
nginx: configuration file /etc/nginx/nginx.conf test is successful
如果你修改了 Nginx 或者 PHP-FPM 的配置文件,推荐按照以下流程操作:
1.检查 Nginx 配置文件语法:
nginx -t
2.若语法无误,重启 PHP-FPM 服务:
sudo systemctl restart php7.4-fpm
3.重新加载 Nginx 配置:
nginx -s reload
这样能确保新的配置正确生效,同时避免服务中断。


 2748
2748

 被折叠的 条评论
为什么被折叠?
被折叠的 条评论
为什么被折叠?
 到【灌水乐园】发言


