


因权限问题,本次构建、部署是在本机上完成的
1、安装Jenkins
📥 第一步:下载 Jenkins Windows 安装包
- 打开浏览器,访问官方下载页:
👉 https://www.jenkins.io/download/ - 在 “Long-term Support (LTS)” 区域,点击 Windows 图标(会下载
.msi文件)- 文件名类似:
jenkins-2.440.3-windows-x64.msi - ⚠️ 不要下载
.war或 Generic Java Package,我们要的是 Windows Installer (.msi)
- 文件名类似:
🔧 第二步:准备一个专用部署用户(关键!)
在你的 Jenkins 服务器 上操作:
- 以 管理员身份 打开 PowerShell 或 CMD
- 创建新用户(例如叫
jenkins-user): 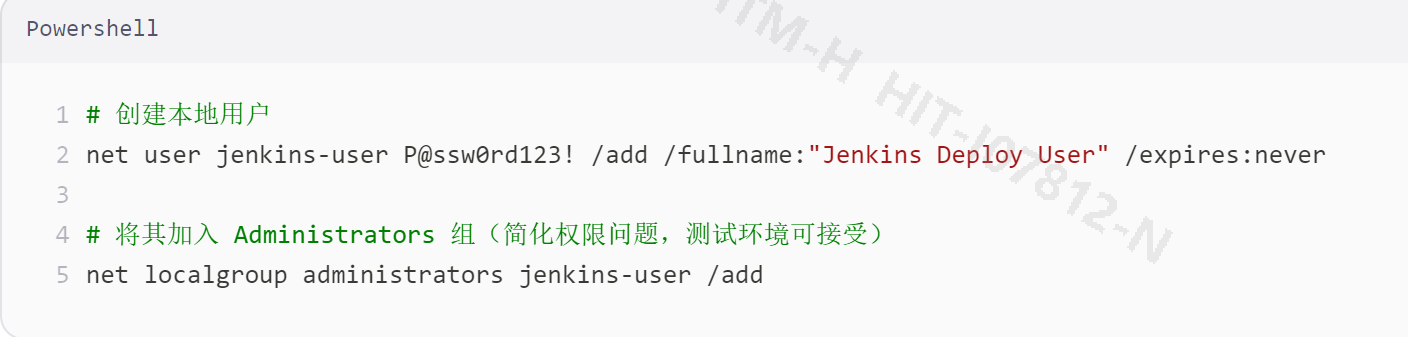
- 💡 后续你需要在 目标服务器(TEST/PROD) 上也创建同名同密码的用户!
🚀 第三步:运行 Jenkins 安装程序(.msi)
❌ 不要选 “Run service as LocalSystem” —— 它不能访问网络!
- 双击下载好的
jenkins-xxx-windows-x64.msi - 按提示点击 Next,直到出现 “Service Logon Identity” 页面
-
关键选择:
- ✅ 勾选 “Run service as local or domain user”
- 在下方输入:
- User name:
.\jenkins-user
(注意:.表示本地计算机,这是 Windows 本地用户的标准写法) - Password:
P@ssw0rd123!
- User name:
- 继续点击 Next,使用默认端口
8080,完成安装
🔍 第四步:验证 Jenkins 是否正常运行
打开浏览器,访问:
http://localhost:8080
- 如果看到 “Unlock Jenkins” 页面,说明安装成功!
- 获取初始密码(打开 PowerShell)
- 输入 type C:\ProgramData\Jenkins\.jenkins\secrets\initialAdminPassword
- 复制密码,粘贴到网页,继续初始化(安装推荐插件即可)
🛡️ 第五步:为目标服务器创建同名用户(部署前必须做!)
Jenkins 要部署到 任何一个服务器上,这些机器必须信任
jenkins-user。
- 以管理员身份登录目标服务器
- 打开 PowerShell,运行:
# 创建同名同密码的本地用户
2net user jenkins-user P@ssw0rd123! /add
3
4# 加入管理员组(或至少给 C:\Apps 写权限)
5net localgroup administrators jenkins-user /add
🧪 第六步:测试 Jenkins 能否访问目标服务器
1、在 Jenkins 服务器 上手动测试:
net use \\HIT-I07812-N\C$ /user:jenkins-user P@ssw0rd123!
如果返回:
The command completed successfully.
✅ 说明 Jenkins 未来可以通过此账号部署!
安装Jenkins的过程中,可能会提示java包不匹配的问题,下载安装即可
2、配置 Jenkins 实现 .NET 6 应用的自动构建与部署(Windows 环境)
✅ 目标
- 从 Git 仓库拉取代码(如 Gitblit)
- 使用
dotnet build+dotnet publish构建 .NET 6 应用 - 自动部署到 Windows 测试服务器(如
\\TEST-SERVER\C$\Apps\MyApp) - 通过 Windows 服务运行应用
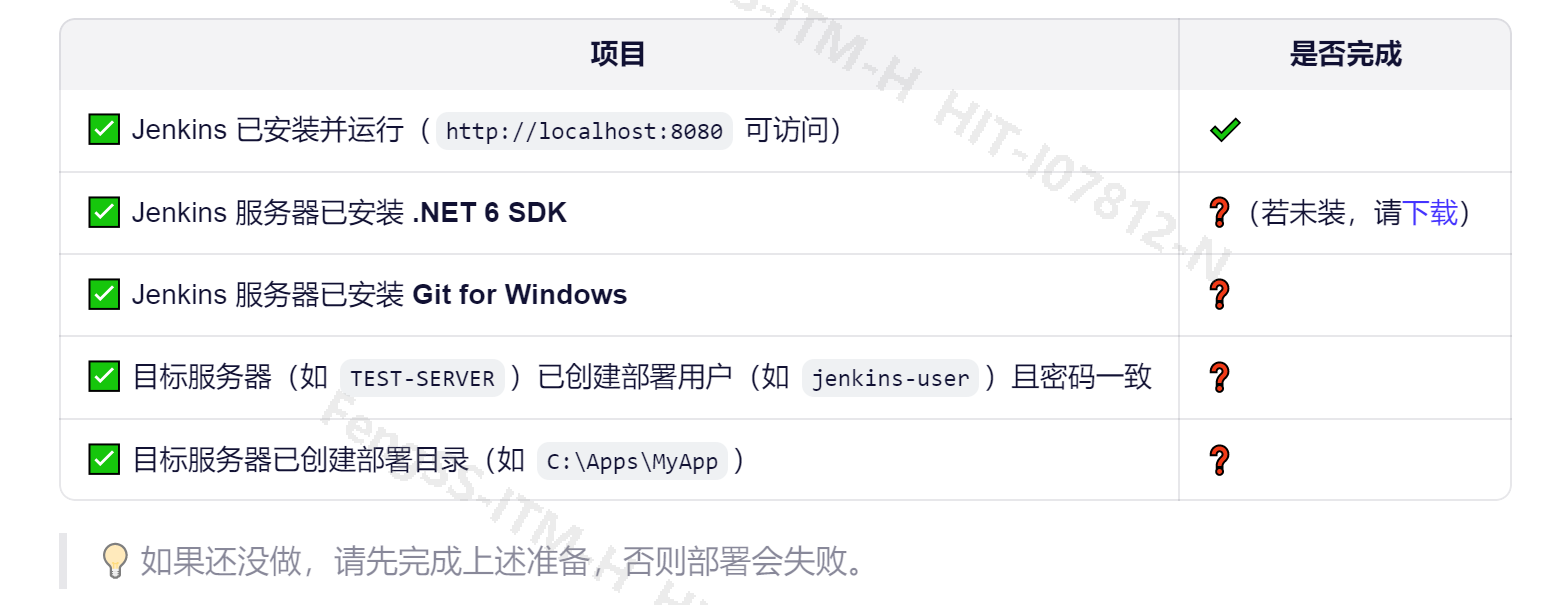
前提条件确认
🛠️ 第一步:在 Jenkins 中安装必要插件
- 进入 Manage Jenkins → Plugins → Available plugins,搜索并安装以下插件(勾选后点“Install without restart”):
- Git
- Pipeline
- Credentials Binding
- Workspace Cleanup(可选)
安装完成后重启 Jenkins(如果提示需要)。
🔐 第二步:配置凭据(Credentials)
1. Git 仓库凭据(用于拉代码)
- Kind:
Username with password - Scope: Global
- Username: 你的 Gitblit 用户名
- Password: 密码
- ID:
git-creds - Description:
Gitblit access
📂 第三步:准备 .NET 6 项目结构
确保你的项目根目录包含:


注意:.git文件最好和Jenkinsfile同一级
在 .csproj 中启用自包含发布(推荐):
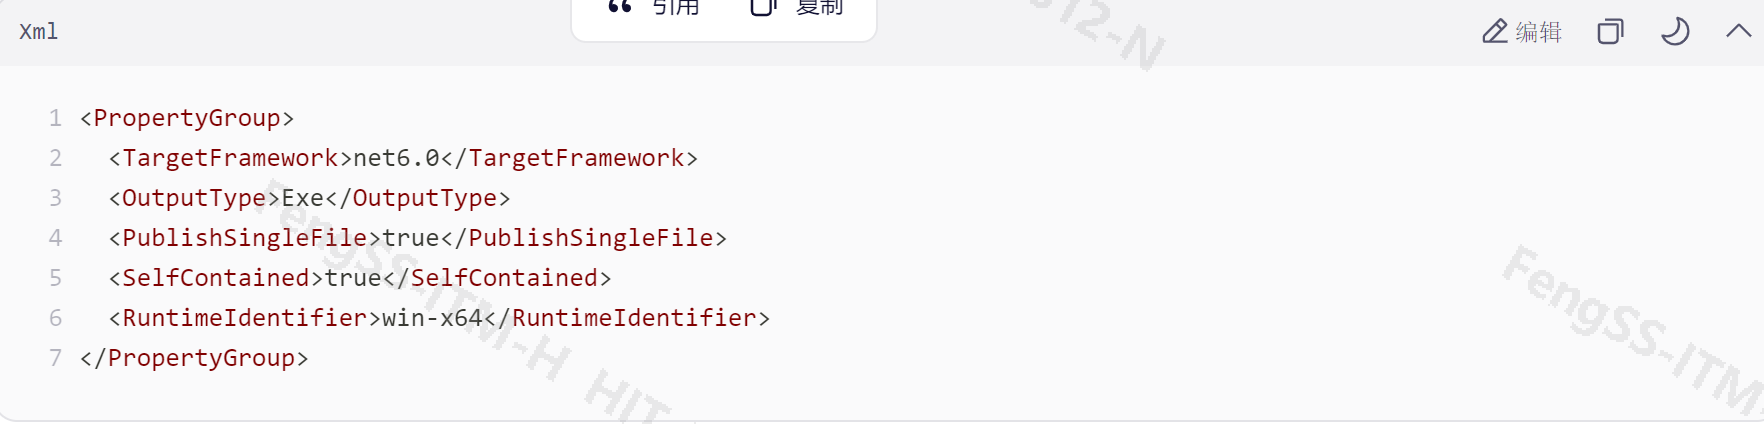
这样 dotnet publish 会生成 MyApp.exe,可直接作为 Windows 服务运行。
📜 第四步:创建 Jenkinsfile(核心)
在项目根目录新建文件 Jenkinsfile,内容如下:
pipeline {
agent any
environment {
APP_NAME = 'API' // 为IIS上的名称
DEPLOY_PATH = 'E:/code/2026/GPM/publish' //IIS上的物理路径
APP_POOL_NAME = 'API' // 必须和 IIS 应用池一致
}
stages {
stage('Checkout') {
steps {
checkout scm
}
}
stage('Publish VOL.WebApi') {
steps {
// ✅ 直接发布单个项目,无需先 restore/build
bat 'dotnet publish VOL.WebApi/VOL.WebApi.csproj -c Release -o publish --no-self-contained'
}
}
stage('Deploy to Local IIS') {
steps {
bat 'if exist "%DEPLOY_PATH%" rmdir /s /q "%DEPLOY_PATH%"'
bat 'mkdir "%DEPLOY_PATH%"'
bat 'robocopy "publish" "E:/code/2026/GPM/publish" /MIR /NFL /NDL || exit 0'
bat "powershell -Command \"Restart-WebAppPool -Name \\\"${APP_POOL_NAME}\\\"\""
}
}
}
post {
success {
echo "✅ 部署成功!访问 http://localhost:8081"
}
failure {
echo "❌ 部署失败,请检查日志"
}
}
}
注意:因为这是本地部署配置,若Jenkins和Git在不同服务器,配置要修改,可百度或AI查
🔄 第五步:在 Jenkins 中创建 Pipeline 任务
- 点击 New Item
- 输入名称:
MyApp-CI-CD - 选择 Pipeline → 点击 OK
- 在 Pipeline 区域:
- Definition: Pipeline script from SCM
- SCM: Git
- Repository URL:
http://gitblit.local/r/myapp.git - Credentials: 选择
git-creds - Branches to build:
*/main - Script Path:
Jenkinsfile
- Repository URL:
- 点击 Save
🚀 第六步:首次手动构建 & 验证
- 进入任务页面 → 点击 Build Now
- 查看 Console Output,观察是否:
- 成功拉取代码
dotnet build/publish成功- 成功停止/启动远程服务
- 文件复制无错误


 217
217

 被折叠的 条评论
为什么被折叠?
被折叠的 条评论
为什么被折叠?
 到【灌水乐园】发言


