


一、Ollama自定义导入模型
1、从GGUF导入
GGUF是一种用于保存经过微调的语言模型的文件格式,方便用户在不同平台和环境之间共享和导入模型。
示例:
1、下载模型GGUF文件
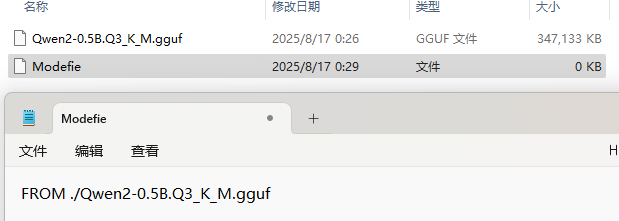
2、新建一个Modelfile文件,内容为:
Modefile是模型配置文件。
FROM ./Qwen2-0.5B.Q3_K_M.gguf
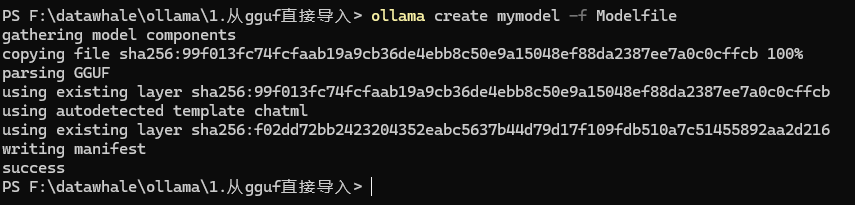
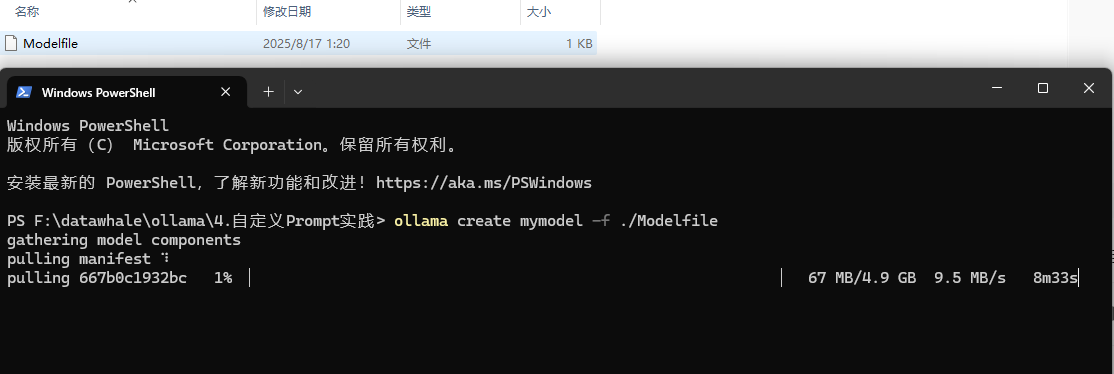
3、在Ollama中创建模型(在Modefile文件所在的目录下运行以下终端指令)
ollama create mymodel -f Modelfile
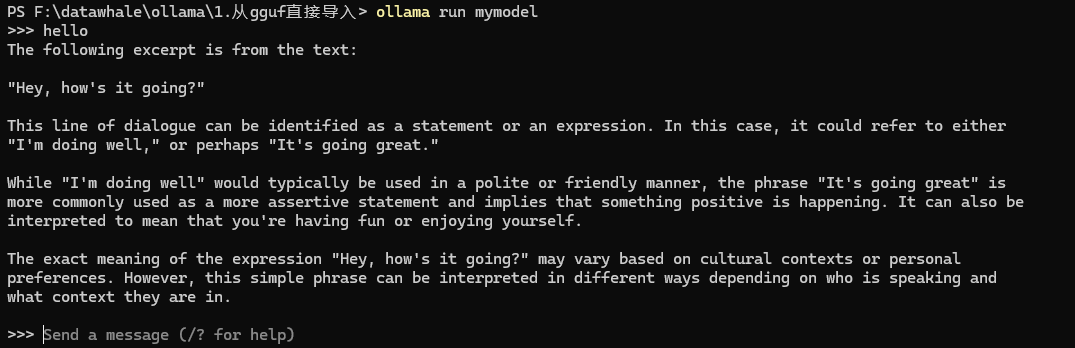
4、终端内运行模型
ollama run mymodel
2、从Pytorch或Safetensors导入
Safetensors 是一种用于存储深度学习模型权重的文件格式,同时它也可以转换为gguf文件。
1、下载llama-3模型
# 下载模型
from huggingface_hub import snapshot_download

model_id = "unsloth/llama-3-8b-bnb-4bit"
snapshot_download(
  repo_id=model_id,
  local_dir="llama-3-8b-bnb-4bit",
  local_dir_use_symlinks=False,
  revision="main",
  # 怎么获取<YOUR_ACCESS_TOKEN>,请参照部分3
  use_auth_token="<YOUR_ACCESS_TOKEN>")
2、创建Modelfile文件
FROM ./llama-3-8b-bnb-4bit
3、创建模型
ollama create mymodel2 -f Modelfile
4、运行模型
ollama run mymodel2
3、由模型直接导入
llama.cpp 是 GGUF 的开源项目,提供 CLI 和 Server 功能。
示例:
1、从HuggingFace下载Model
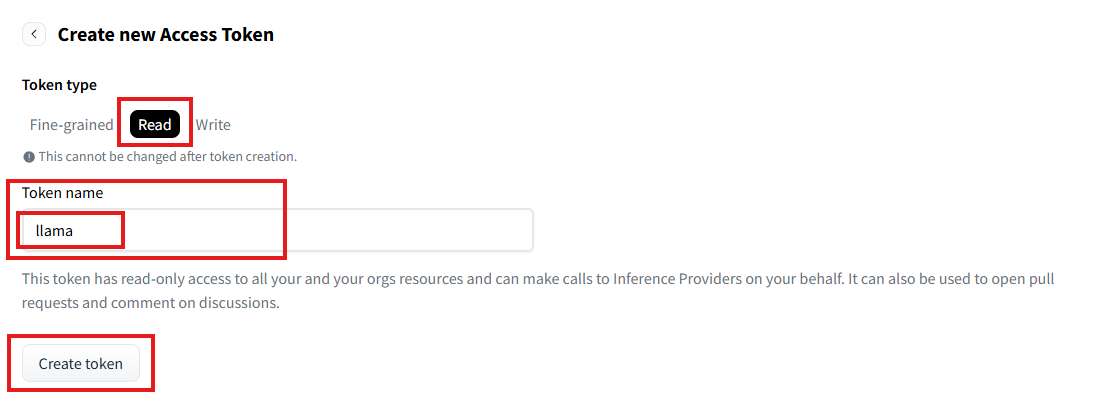
首先前往huggingface个人设置界面拿到用户个人的ACCESS_TOKEN.
Hugging Face – The AI community building the future.![]() https://huggingface.co/settings/tokens点击个人头像,在左侧找到 Access Token,点击右上侧Creat new token。
https://huggingface.co/settings/tokens点击个人头像,在左侧找到 Access Token,点击右上侧Creat new token。
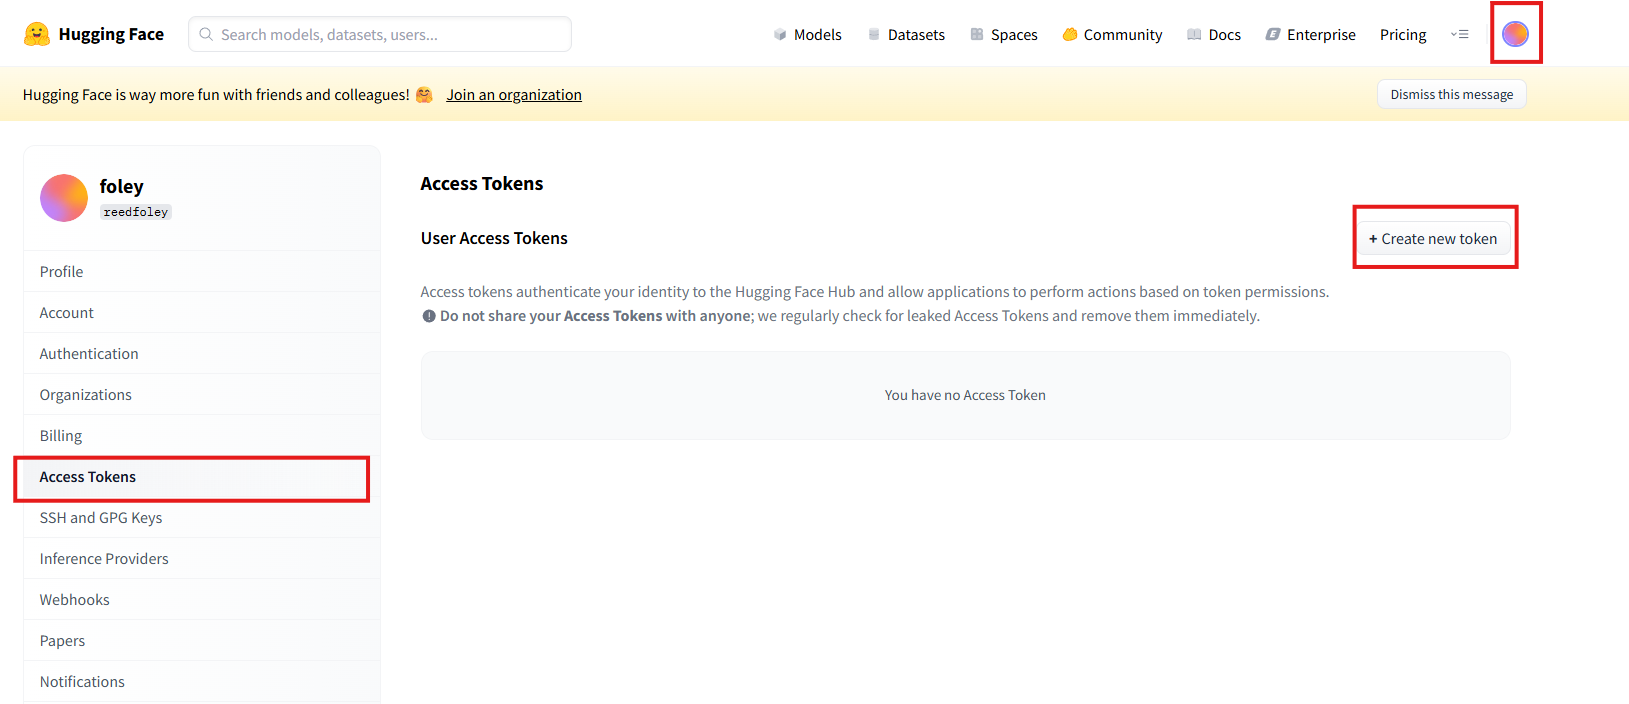
在Token type选择Read,填写Token name,最后点击Create token。
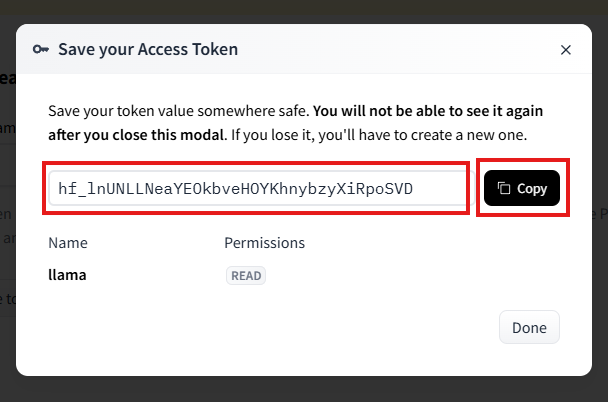
这样,我们就拿到了我们的第一个ACCESS_TOKEN,现在,你可以先返回第二小节,完成Safetensors的导入(我失败了)。
创建main.ipynb,输入代码,下载模型Qwen-0.5b。
from huggingface_hub import snapshot_download

model_id = "Qwen/Qwen1.5-0.5B" # hugginFace's model name
snapshot_download(
    repo_id=model_id,
    local_dir="Qwen-0.5b",
    local_dir_use_symlinks=False,
    revision="main",
    token="YOUR_ACCESS_TOKEN")
2、
4、自定义Prompt
Ollama 支持自定 义Prompt,可以让模型生成更符合用户需求的文本。
示例:
1、创建Modefile文件,内容:
FROM llama3.1
# sets the temperature to 1 [higher is more creative, lower is more coherent]
PARAMETER temperature 1
# sets the context window size to 4096, this controls how many tokens the LLM can use as context to generate the next token
PARAMETER num_ctx 4096

# sets a custom system message to specify the behavior of the chat assistant
SYSTEM You are Mario from super mario bros, acting as an assistant.
2、创建模型
ollama create mymodel -f ./Modelfile
下载完成后运行 ollama list 查看。

3、运行模型
ollama run mymodel

5、Ollama界面安装
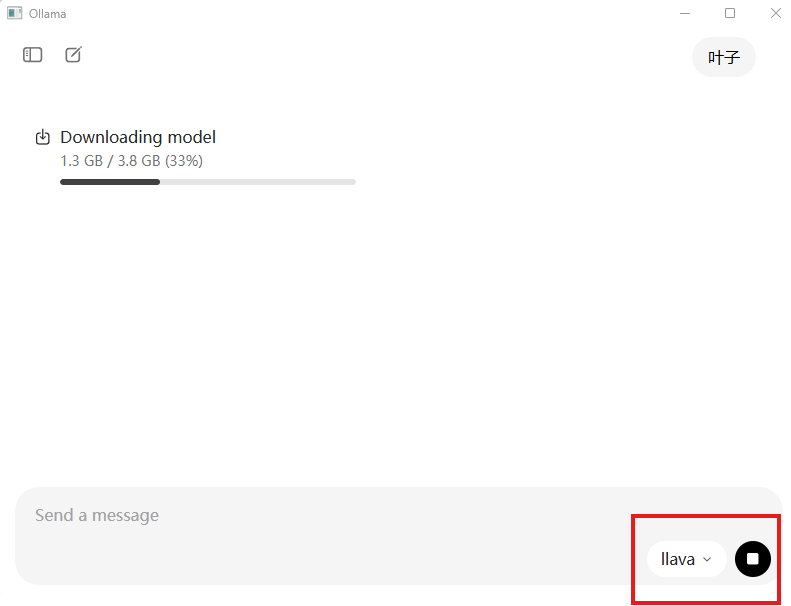
打开Ollama后,在右下侧选择模型,如果该模型没有被安装,则会自动安装该模型。
二、Ollama自定义在GPU中运行
1、设置环境变量
Windows搜索栏搜索“环境变量”,选择“编辑系统环境变量”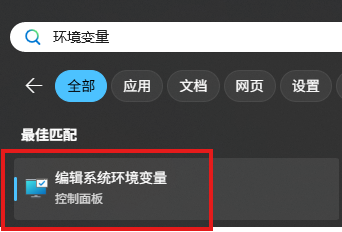
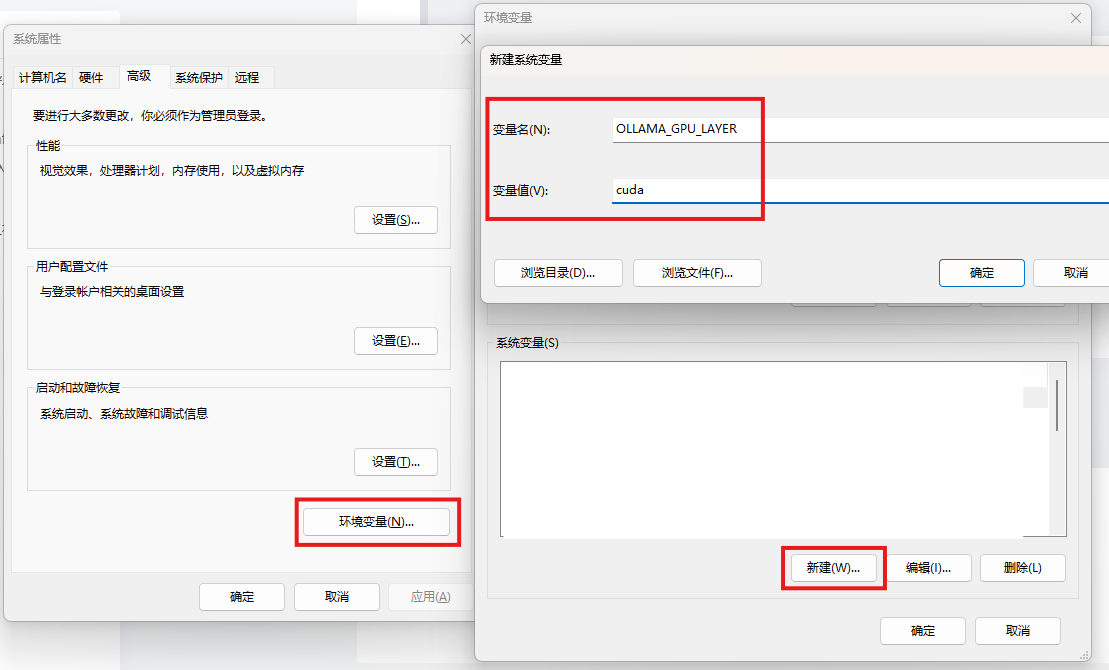
点击“环境变量”,点击“系统变量(s)”右下方的“新建”。
变量名:OLLAMA_GPU_LAYER
变量值:cuda
使用 ollama ps 验证GPU是否生效:


 411
411

 被折叠的 条评论
为什么被折叠?
被折叠的 条评论
为什么被折叠?
 到【灌水乐园】发言


