


SpringBoot + Vue 前后端加密登录实现(基于 Xboot 框架)
解决前后端登录时密码明文暴露的问题,增强登录安全性。
背景问题
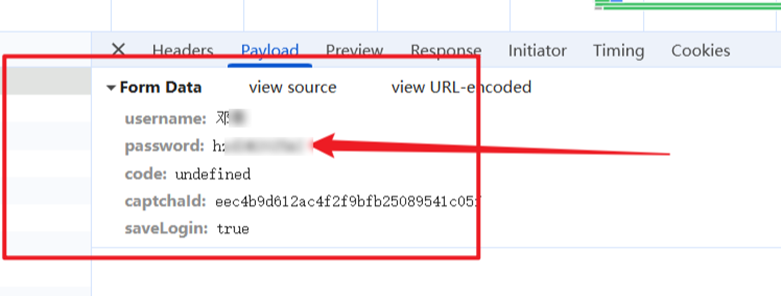
在使用 Vue + SpringBoot(Xboot 框架)开发的管理系统中,用户登录时密码通过 POST 请求明文传输,即使是 HTTPS,也会暴露在浏览器控制台的请求中:
目标效果
前端使用 RSA 公钥加密密码,后端使用 RSA 私钥解密密码,从而实现:
浏览器控制台不再显示明文密码;
不影响原有的登录认证逻辑;
实现方式
第一步:前端使用 RSA 公钥加密密码 (使用Java生成PEM 密钥,代码在末尾)
第二步:后端替换默认登录过滤器,在认证前使用私钥解密
详细实现步骤
一、前端加密(Vue 端)
1. 安装依赖
npm install jsencrypt --save
2. 修改登录方法
import { JSEncrypt } from 'jsencrypt';
export default {
  data() {
    return {
      form: {
        username: "",
        password: "",
      },
      publicKey: '"xxxxx",  // 直接写死。
    }
  },
//  async created() {
//    const res = await this.getRequest('/publicKey');
//    this.publicKey = res.publicKey;
//  },
  methods: {
    submitLogin() {
      const encryptor = new JSEncrypt();
      const pemKey = `-----BEGIN PUBLIC KEY-----\n${this.publicKey.match(/.{1,64}/g).join('\n')}\n-----END PUBLIC KEY-----`;
      encryptor.setPublicKey(pemKey);
      const encryptedPwd = encryptor.encrypt(this.form.password);
      if (!encryptedPwd) {
        this.$Message.error("密码加密失败,请重试");
        return;
      }
      login({
        username: this.form.username,
        password: encryptedPwd
      }).then(res => {
        // 登录成功处理逻辑
      });
    }
  }
}
二、后端解密(SpringBoot + Security)
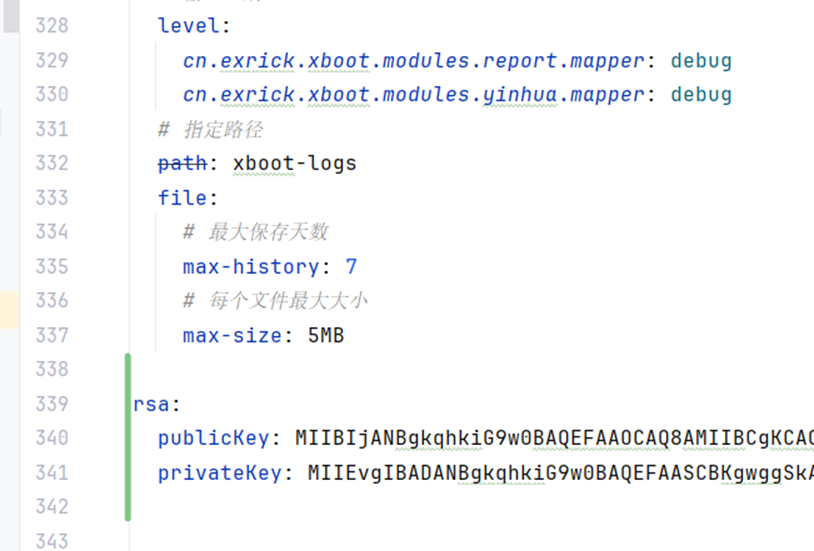
1.添加密钥配置
2. 创建 RSA 解密服务类
RsaDecryptService.java:
@Service
public class RsaDecryptService {

    @Value("${rsa.privateKey}")
    private String privateKeyBase64;

    public String decrypt(String cipherText) throws Exception {
        byte[] keyBytes = Base64.getDecoder().decode(privateKeyBase64);
        PKCS8EncodedKeySpec spec = new PKCS8EncodedKeySpec(keyBytes);
        PrivateKey privateKey = KeyFactory.getInstance("RSA").generatePrivate(spec);

        Cipher cipher = Cipher.getInstance("RSA/ECB/PKCS1Padding");
        cipher.init(Cipher.DECRYPT_MODE, privateKey);

        byte[] decoded = Base64.getDecoder().decode(cipherText);
        byte[] decrypted = cipher.doFinal(decoded);
        return new String(decrypted, StandardCharsets.UTF_8);
    }
}
3. 替换默认登录过滤器
RsaAuthenticationFilter.java:
public class RsaAuthenticationFilter extends UsernamePasswordAuthenticationFilter {

    private final RsaDecryptService rsaDecryptService;

    public RsaAuthenticationFilter(RsaDecryptService rsaDecryptService) {
        this.rsaDecryptService = rsaDecryptService;
        this.setFilterProcessesUrl("/xboot/login");
    }

    @Override
    public Authentication attemptAuthentication(HttpServletRequest request, HttpServletResponse response)
            throws AuthenticationException {

        String username = obtainUsername(request);
        String encryptedPassword = obtainPassword(request);

        try {
            String rawPassword = rsaDecryptService.decrypt(encryptedPassword);
            return this.getAuthenticationManager().authenticate(
                new UsernamePasswordAuthenticationToken(username, rawPassword)
            );
        } catch (Exception e) {
            throw new AuthenticationServiceException("RSA password decrypt failed", e);
        }
    }
}
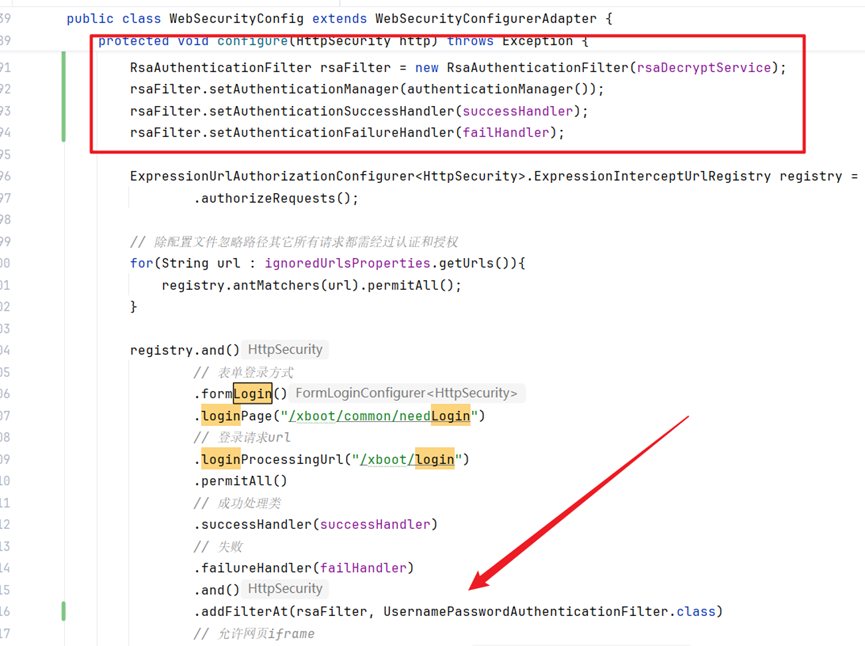
4. 修改 WebSecurityConfig 注册你的过滤器
修改webSecurityConfig类中的configure方法。
RsaAuthenticationFilter rsaFilter = new RsaAuthenticationFilter(rsaDecryptService);
rsaFilter.setAuthenticationManager(authenticationManager());
rsaFilter.setAuthenticationSuccessHandler(successHandler);
rsaFilter.setAuthenticationFailureHandler(failHandler);
加上以上代码,如下图所示,同时记得加上
.addFilterAt(rsaFilter, UsernamePasswordAuthenticationFilter.class)
替换默认的UsernamePasswordAuthenticationFilter 为你自己的
密钥生成工具(Java 生成 PEM 密钥)
import java.security.KeyPair;
import java.security.KeyPairGenerator;
import java.util.Base64;

/*登录加密*/
public class LoginSec {
    public static void main(String[] args) throws Exception {
        KeyPairGenerator kpg = KeyPairGenerator.getInstance("RSA");
        kpg.initialize(2048);
        KeyPair keyPair = kpg.generateKeyPair();

        String pub = Base64.getEncoder().encodeToString(keyPair.getPublic().getEncoded());
        String pri = Base64.getEncoder().encodeToString(keyPair.getPrivate().getEncoded());

        System.out.println("公钥: " + pub);
        System.out.println("私钥: " + pri);

    }
}
完


 被折叠的 条评论
为什么被折叠?
被折叠的 条评论
为什么被折叠?
 到【灌水乐园】发言


