


 本文介绍了使用Keepalived和Nginx构建双主切换的实验,确保高可用性。在实验中,配置了两台调度器作为负载均衡器,每个都配置了Nginx和Keepalived,并设置了虚拟IP。当一台调度器出现故障时,虚拟IP会自动切换到另一台,保持服务不间断。
一、实验架构图
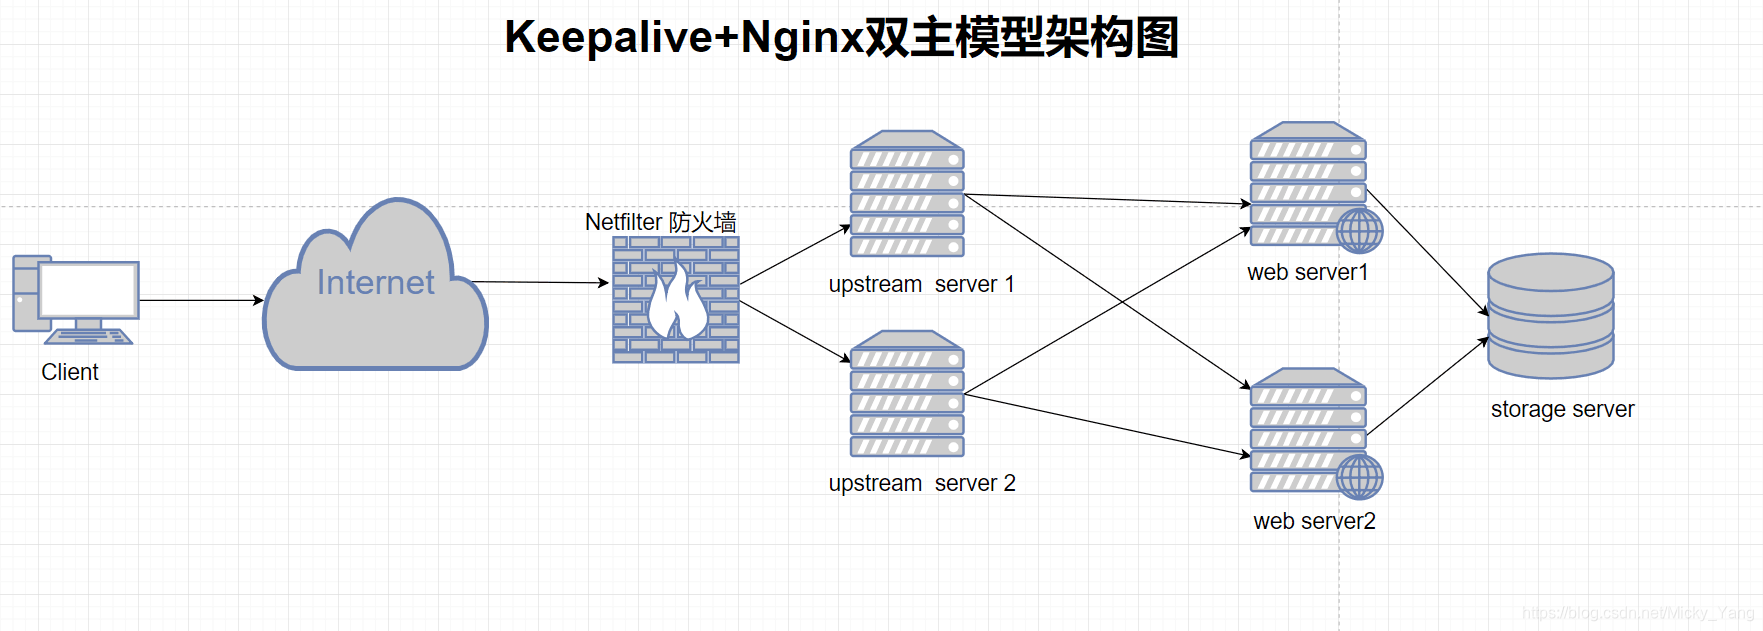
二、实验环境说明
| 角色说明 | ip地址 |
|---|---|
| 调度器1 | 192.168.126.141 |
| 调度器2 | 192.168.126.139 |
| Web server1 | 192.168.126.128 |
| Web server2 | 192.168.126.138 |
| 虚拟ip地址1 | 192.168.126.140 |
| 虚拟ip地址2 | 192.168.126.150 |
三、实验配置
注意事项:首先我们需要在两个调度器上可以互相解析主机名(需要与本地hosts文件相同),而且需要关闭iptables防火墙与selinux;而后要在调度器两端分别安装好keepalived和nginx程序包。
1)第一步,配置后端web服务器站点资源文件
web server1端:
[root@web1 ~]#vim /var/www/html/index.html
<h1>Page from web1</h1>
[root@master ~]# systemctl restart  httpd
[root@web1 ~]# ss -tunlp | grep 80   //web服务已经启动
tcp    LISTEN     0      128                   :::80                   :::*      users:(("httpd",6753,4),("httpd",6752,4),("httpd",6751,4),("httpd",6750,4),("httpd",6749,4),("httpd",6740,4))
[root@web1 ~]#
web server2端:
[root@db ~]# vim /var/www/html/index.html
<h1>Page from web2</h1>
[root@db ~]# service  httpd restart
停止 httpd:                                               [确定]
正在启动 httpd:httpd: apr_sockaddr_info_get() failed for db
httpd: Could not reliably determine the server's fully qualified domain name, using 127.0.0.1 for ServerName
                                                           [确定]
[root@db ~]# ss -tunlp | grep 80   //web服务已经正常启动
tcp    LISTEN     0      128                   :::80                   :::*      users:(("httpd",3213,4))
[root@db ~]#
2)配置nginx成为负载均衡调度器
我们需要在调度器端各自安装nginx程序包,先使nginx可以正常进行的web服务资源调度。
编译安装nginx程序请看:https://blog.youkuaiyun.com/Micky_Yang/article/details/88647953
[root@director1 ~]#vim /usr/local/nginx/conf/nginx.conf
http {
    include       mime.types;
    default_type  application/octet-stream;

    upstream webserv{   //在http配置段配置upstream服务器群,名称为webserv;
        server 192.168.126.128:80 weight=1;   //调度的后端服务器地址,权重为1;
        server 192.168.126.138:80 weight=1;   //调度的后端服务器地址,权重也为1,轮询方式;

    }


 location / {
            proxy_pass  http://webserv;     //在server端配置一个location匹配段,把所有请求本地的资源
            								调度到名称为webserv的负载均衡集群中;
        }


//
最低0.47元/天 解锁文章


 1263
1263

 被折叠的 条评论
为什么被折叠?
被折叠的 条评论
为什么被折叠?
 到【灌水乐园】发言


