


代码来源:GitHub - LittleNyima/code-snippets
DDIM training
见上一篇:ddpm training DDPM代码解读-优快云博客
DDIM sampling
import torch
import math
import time
from tqdm import tqdm
from diffusers import UNet2DModel
from diffusers.utils import make_image_grid, numpy_to_pil

# 加载本地预训练的UNet2D模型,并将其移动到GPU上
model = UNet2DModel.from_pretrained("./ddpm-animefaces-64").cuda()
导入库:
torch:PyTorch 深度学习框架。math:用于数学计算。time:用于计时。tqdm:用于显示进度条。diffusers:Hugging Face 提供的扩散模型库,包含 UNet2DModel 和图像处理工具。- 加载模型:
UNet2DModel.from_pretrained("./ddpm-animefaces-64"):从本地路径加载预训练的 UNet2D 模型。.cuda():将模型移动到 GPU 上,以加速计算。
class DDIM:
    def __init__(
        self,
        num_train_timesteps: int = 1000,  # 训练时的总时间步数
        beta_start: float = 0.0001,       # beta的起始值
        beta_end: float = 0.02,           # beta的结束值
        sample_steps: int = 20,           # 采样时的时间步数
    ):
        self.num_train_timesteps = num_train_timesteps
        # 生成从beta_start到beta_end的线性序列,表示每个时间步的beta值
        self.betas = torch.linspace(beta_start, beta_end, num_train_timesteps, dtype=torch.float32)
        # alpha = 1 - beta,表示每个时间步的alpha值
        self.alphas = 1.0 - self.betas
        # alpha的累积乘积,表示从开始到当前时间步的alpha累积乘积
        self.alphas_cumprod = torch.cumprod(self.alphas, dim=0)
        # 生成从num_train_timesteps-1到0的时间步序列,用于采样
        self.timesteps = torch.linspace(num_train_timesteps - 1, 0, sample_steps).long()
DDIM类的初始化
- 参数:
num_train_timesteps:训练时的时间步总数,通常为 1000。beta_start和beta_end:控制噪声调度的起始和结束值。sample_steps:采样时的时间步数,通常比训练时的时间步数少。- 计算 beta 和 alpha:
betas:从beta_start到beta_end的线性序列,表示每个时间步的噪声强度。alphas:每个时间步的alpha = 1 - beta,表示保留信号的比例。alphas_cumprod:alpha 的累积乘积,表示从开始到当前时间步的信号保留比例。- 时间步序列:
timesteps:生成从num_train_timesteps-1到0的时间步序列,用于采样。
    @torch.no_grad()  # 禁用梯度计算,因为采样过程不需要反向传播
    def sample(
        self,
        unet: UNet2DModel,  # 使用的UNet模型
        batch_size: int,     # 生成的图像批次大小
        in_channels: int,    # 输入图像的通道数
        sample_size: int,    # 生成图像的尺寸
        eta: float = 0.0,    # DDIM中的eta参数,控制采样过程中的随机性
    ):
        start_time = time.time()  # 记录起始时间

        # 将alpha、alpha的累积乘积和时间步序列移动到与UNet相同的设备上(通常是GPU)
        alphas = self.alphas.to(unet.device)
        alphas_cumprod = self.alphas_cumprod.to(unet.device)
        timesteps = self.timesteps.to(unet.device)

        # 初始化随机噪声图像,作为采样的起点
        images = torch.randn((batch_size, in_channels, sample_size, sample_size), device=unet.device)
DDIM的采样方法
- 禁用梯度计算:
@torch.no_grad():采样过程不需要计算梯度,因此禁用梯度以节省内存和计算资源。- 参数:
unet:用于预测噪声的 UNet 模型。batch_size:生成的图像数量。in_channels:输入图像的通道数(例如,RGB 图像为 3)。sample_size:生成图像的尺寸(例如,64x64)。eta:控制采样过程中随机性的参数,eta=0表示确定性采样。- 初始化噪声图像:
torch.randn:生成随机噪声图像,作为采样的起点。
        # 使用tqdm显示采样进度条
        for t, tau in tqdm(list(zip(timesteps[:-1], timesteps[1:])), desc='Sampling'):
            # 使用UNet模型预测当前时间步的噪声
            pred_noise: torch.Tensor = unet(images, t).sample

            # 计算sigma_t,用于控制采样过程中的随机性
            if not math.isclose(eta, 0.0):
                one_minus_alpha_prod_tau = 1.0 - alphas_cumprod[tau]
                one_minus_alpha_prod_t = 1.0 - alphas_cumprod[t]
                one_minus_alpha_t = 1.0 - alphas[t]
                sigma_t = eta * (one_minus_alpha_prod_tau * one_minus_alpha_t / one_minus_alpha_prod_t) ** 0.5
            else:
                sigma_t = torch.zeros_like(alphas[0])

            # 计算x_tau的第一项,表示从当前时间步t到下一个时间步tau的确定性部分
            alphas_cumprod_tau = alphas_cumprod[tau]
            sqrt_alphas_cumprod_tau = alphas_cumprod_tau ** 0.5
            alphas_cumprod_t = alphas_cumprod[t]
            sqrt_alphas_cumprod_t = alphas_cumprod_t ** 0.5
            sqrt_one_minus_alphas_cumprod_t = (1.0 - alphas_cumprod_t) ** 0.5
            first_term = sqrt_alphas_cumprod_tau * (images - sqrt_one_minus_alphas_cumprod_t * pred_noise) / sqrt_alphas_cumprod_t

            # 计算x_tau的第二项,表示从当前时间步t到下一个时间步tau的随机性部分
            coeff = (1.0 - alphas_cumprod_tau - sigma_t ** 2) ** 0.5
            second_term = coeff * pred_noise

            # 生成随机噪声,用于添加随机性
            epsilon = torch.randn_like(images)
            # 更新图像,结合确定性部分和随机性部分
            images = first_term + second_term + sigma_t * epsilon
时间步迭代采样
- 时间步迭代:
- 使用
tqdm显示进度条,逐步从噪声生成图像。 - 预测噪声:
unet(images, t).sample:使用 UNet 模型预测当前时间步的噪声。- 计算
sigma_t: - 根据
eta参数计算随机性强度sigma_t。 - 更新图像:
- 根据 DDIM 的公式,结合确定性部分和随机性部分更新图像。
图像后处理和保存
        # 将生成的图像从[-1, 1]的范围转换到[0, 1]的范围,并将其移动到CPU并转换为numpy数组
        images = (images / 2.0 + 0.5).clamp(0, 1).cpu().permute(0, 2, 3, 1).numpy()

        end_time = time.time()  # 记录结束时间
        print(f"Sampling completed in {end_time - start_time:.2f} seconds")

        return images

# 创建DDIM采样器实例
ddim = DDIM()
# 运行采样过程,生成32张64x64大小的图像
images = ddim.sample(model, batch_size=32, in_channels=3, sample_size=64)

# 将生成的图像保存为网格图像
image_grid = make_image_grid(numpy_to_pil(images), rows=4, cols=8)
image_grid.save("ddim-sample-results.png")- 图像后处理:
- 将图像从
[-1, 1]的范围转换到[0, 1]的范围。 - 将图像移动到 CPU 并转换为 NumPy 数组。
- 保存图像:
- 使用
make_image_grid将生成的图像拼接成网格,并保存为 PNG 文件。
DDPM与DDIM对比
使用cifar-10数据集,训练轮数皆为50轮。采样过程均生成32张图。
ddpm:
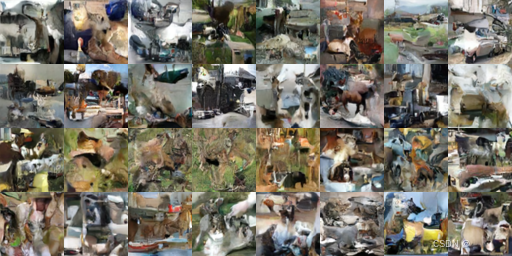
Sampling took 58.68 seconds.
ddim:
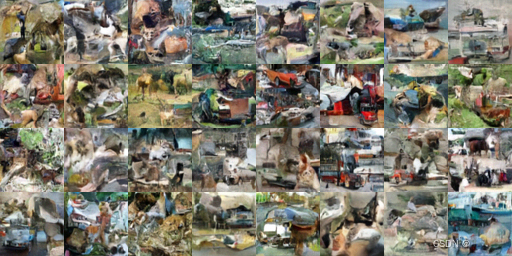
Sampling completed in 1.44 seconds
对比可以看出,ddim的速度明显比ddpm快多了。不过效果嘛。。。可能是训练的次数不够吧,确实也看不出什么东西。不过ddpm训练出来的东西确实比ddim要少掉san些(?)
然后又用原作者提供的权重模型跑了一下两个的sampling:
DDPM:
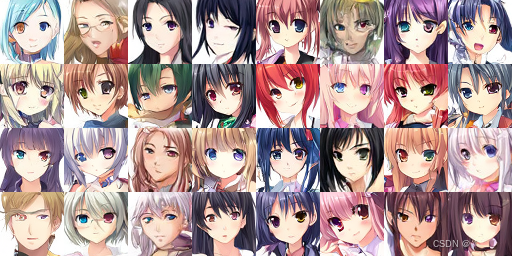
Sampling took 60.04 seconds.
DDIM:

Sampling completed in 1.44 seconds
又用CelebA数据集跑了一次,选取了前10000张照片,100epoch
ddpm:
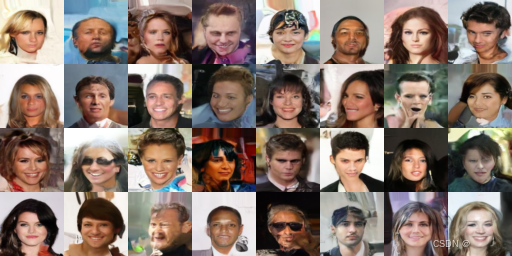
图片 ddpm_20250304-154744.png 用时 59.24 秒
ddim:
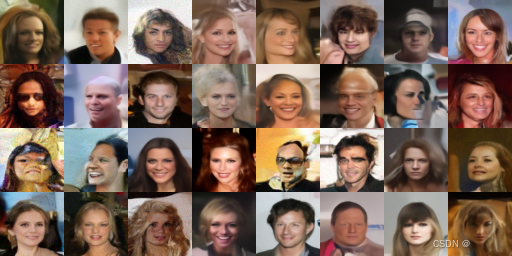
ddim_20250304_154848用时1.44 秒


 1338
1338

 被折叠的 条评论
为什么被折叠?
被折叠的 条评论
为什么被折叠?
 到【灌水乐园】发言


