


 本文介绍如何实现原生的登录注册功能及个人中心模块。登录注册包括手机号和密码的必填参数,成功后自动跳转到个人中心。个人中心接口需要用户ID。依赖、权限设置、接口拼接和Freson初始化也是关键步骤。
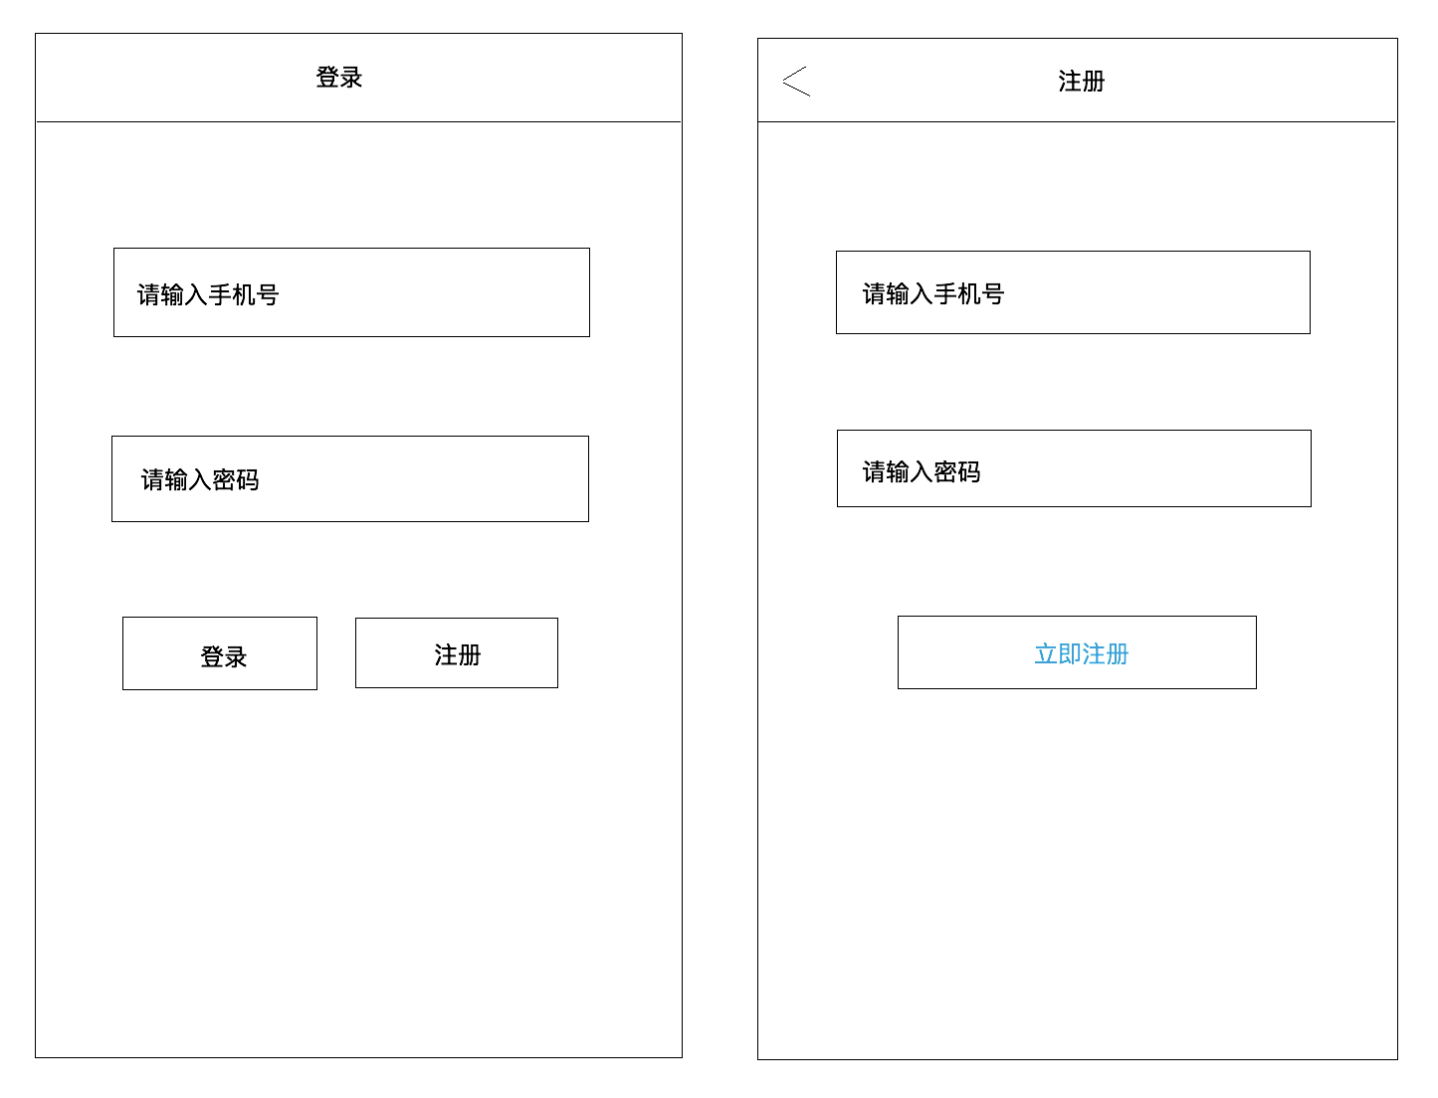
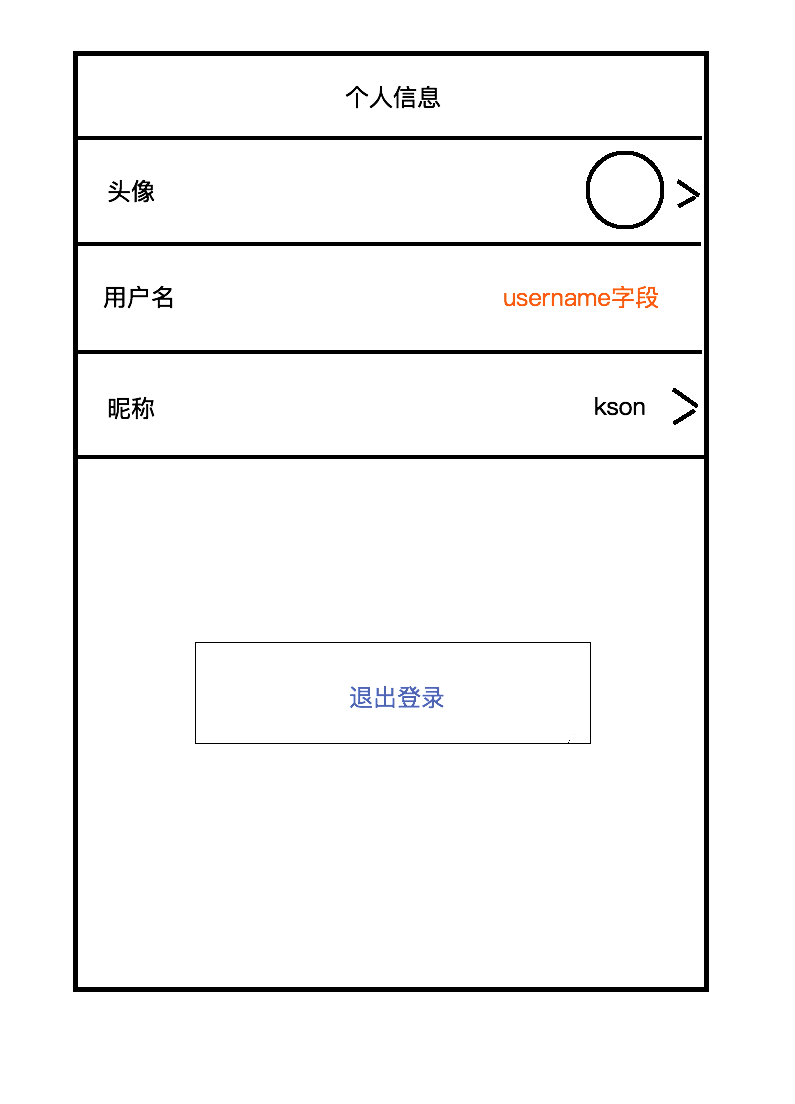
1. 现如图登录注册模块和个人中心模块,登录成功后跳转到个人中心页面;
2. 第二次进入自动登录
接口地址:
登录接口:
http://120.27.23.105/user/login
请求参数:
mobile 手机号 必填
password 密码 必填
注册接口:
请求参数:
mobile 手机号 必填
password 密码 必填
个人中心接口:
http://120.27.23.105/user/getUserInfo
请求参数:
uid 用户id 必填
1.依赖
// OkHttp
compile 'com.squareup.okhttp3:okhttp:3.9.0'
// 拦截器依赖
compile 'com.squareup.okhttp3:logging-interceptor:3.9.0'
// Gson解析
compile 'com.google.code.gson:gson:2.2.4'
//《Butterknife依赖(黄油刀)》
compile 'com.jakewharton:butterknife:8.8.1'
annotationProcessor 'com.jakewharton:butterknife-compiler:8.8.1'
//《Retrofit网络请求依赖》
implementation 'com.squareup.retrofit2:retrofit:2.4.0'
compile 'com.squareup.retrofit2:converter-gson:2.4.0'
//
compile 'com.squareup.retrofit2:retrofit:2.3.0'
//《Fresco图片框架依赖》
compile 'com.facebook.fresco:fresco:0.14.1'
//《RXjava2的适配器》
compile 'com.squareup.retrofit2:adapter-rxjava2:2.4.0'
//《Rxjava2》
compile 'io.reactivex.rxjava2:rxjava:2.1.7'
compile 'io.reactivex.rxjava2:rxandroid:2.0.1'
//《glide依赖》
compile 'com.github.bumptech.glide:glide:3.7.0'
2.权限
<uses-permission android:name="android.permission.INTERNET"/>
<uses-permission android:name="android.permission.MOUNT_UNMOUNT_FILESYSTEMS"/>
<uses-permission android:name="android.permission.WRITE_EXTERNAL_STORAGE"/>
<uses-permission android:name="android.permission.READ_EXTERNAL_STORAGE"/>
3.接口拼接
package com.example.dell.a1511r0424.api;

import com.example.dell.a1511r0424.bean.UserBean;
import io.reactivex.Observable;
import retrofit2.http.GET;
import retrofit2.http.Query;

public interface ApiService {
    //注册
    @GET("user/reg")
    Observable<UserBean> getzc(@Query("mobile")String mobile, @Query("password")String password);
    //登录
    @GET("user/login")
    Observable<UserBean> getlogin(@Query("mobile")String mobile, @Query("password")String password);
    //个人信息
    @GET("user/getUserInfo")
    Observable<UserBean> getUser(@Query("uid")String uid);
 }
4.初始化freson
package com.example.dell.a1511r0424.app;

import android.app.Application;
import com.facebook.drawee.backends.pipeline.Fresco;

public class App extends Application{
    @Override
    public void onCreate() {
        super.onCreate();
        //初始化Fresco
        Fresco.initialize(this);
    }
}
5. RetrofitUtils封装
package com.example.dell.a1511r0424.utils;

import com.example.dell.a1511r0424.api.ApiService;
import retrofit2.Retrofit;
import retrofit2.adapter.rxjava2.RxJava2CallAdapterFactory;
import retrofit2.converter.gson.GsonConverterFactory;

public class RetrofitUtils {
    //1创建一个单列模式
    private static volatile RetrofitUtils instance;
    private final Retrofit retrofit;

    //2创建一个私有的无参构造
    private RetrofitUtils(){

        //创建Retrofit
        retrofit = new Retrofit.Builder()
                .addConverterFactory(GsonConverterFactory.create())//默认Gson进行解析
                .addCallAdapterFactory(RxJava2CallAdapterFactory.create())//使用RxJava2的适配器
                .baseUrl(StringUrl.BASE_URL)//接口
                .build();

    }
    //4.创建一个静态方法,得到instance 判断是否为空
    public static RetrofitUtils getInstance(){
        if(null==instance){
            synchronized (RetrofitUtils.class){
                if(instance==null){
                    instance = new RetrofitUtils();
                }
            }
        }
        //5返回创建的instance
        return instance;
    }
    //6创建方法 方便调用
    public ApiService getApiService(){
        return  retrofit.create(ApiService.class);
    }
}
6.接口拼接
package com.example.dell.a1511r0424.utils;

public class StringUrl {
    //接口路径
    public static final String BASE_URL="http://120.27.23.105/";
}
7.网络请求个人信息Bean uid=71
package com.example.dell.a1511r0424.bean;

public class UserBean{

    private String msg;
    private String code;
    private DataBean data;

    public String getMsg() {
        return msg;
    }

    public void setMsg(String msg) {
        this.msg = msg;
    }

    public String getCode() {
        return code;
    }

    public void setCode(String code) {
        this.code = code;
    }

    public DataBean getData() {
        return data;
    }

    public void setData(DataBean data) {
        this.data = data;
    }

    public static class DataBean {

        private Object age;
        private Object appkey;
        private String appsecret;
        private String createtime;
        private Object email;
        private int fans;
        private int follow;
        private int gender;
        private String icon;
        private Object latitude;
        private Object longitude;
        private String mobile;
        private int money;
        private String nickname;
        private String password;
        private Object praiseNum;
 最低0.47元/天 解锁文章


 4303
4303

 被折叠的 条评论
为什么被折叠?
被折叠的 条评论
为什么被折叠?
 到【灌水乐园】发言


