


Spring简介
百度百科:https://baike.baidu.com/item/spring/85061
Spring核心作用
解耦
jar包
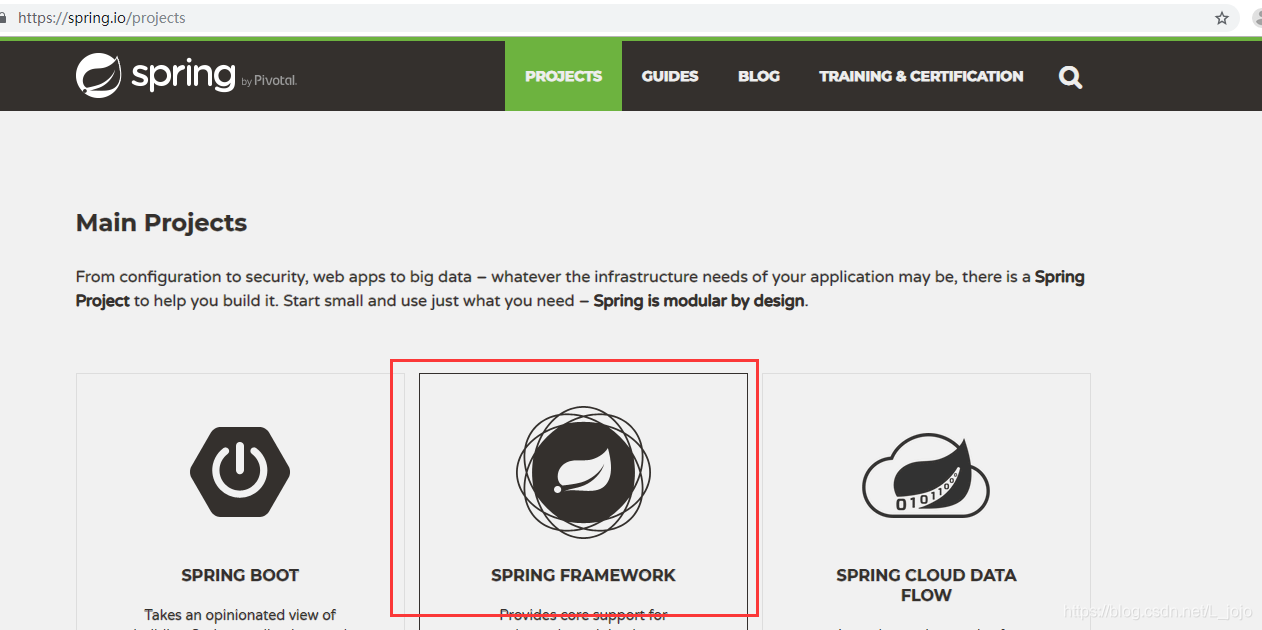
英文官网:https://spring.io/projects/spring-framework
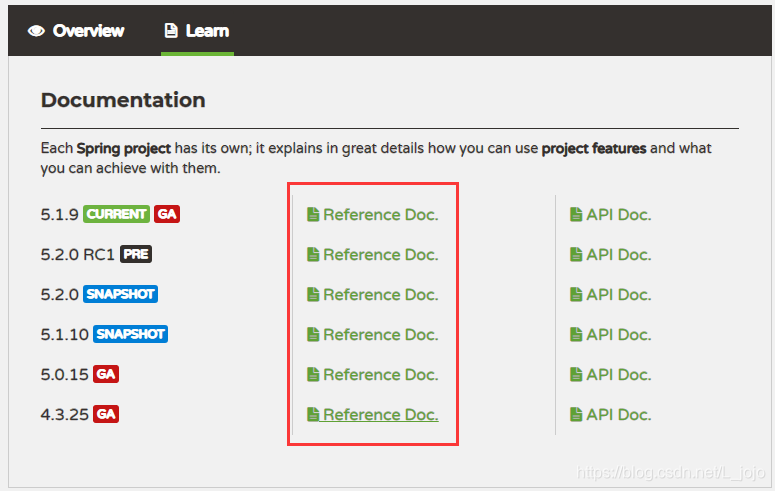
GA:为官方推荐版本
搭建简单的spring框架jar包
核心包
- spring-beans-4.2.1.RELEASE.jar
- spring-core-4.2.1.RELEASE.jar
- spring-context-4.2.1.RELEASE.jar
- spring-expression-4.2.1.RELEASE.jar
- spring-aop-4.2.1.RELEASE.jar
- spring-jdbc-4.2.1.RELEASE.jar
- spring-tx-4.2.1.RELEASE.jar
依赖包
- com.springsource.org.jboss.logging-2.0.5.GA.jar
- mysql-connector-java-5.1.13-bin.jar(jdbc驱动)
- com.springsource.org.apache.log4j-1.2.15.jar(不必须)
IOC配置文件
官方推荐名字为:application.xml
约束
约束查找页面:https://pan.baidu.com/s/1eQkjnMMQXdHX5bshVXlUiQ
<?xml version="1.0" encoding="UTF-8"?>
<beans xmlns="http://www.springframework.org/schema/beans"
	xmlns:xsi="http://www.w3.org/2001/XMLSchema-instance"

	xmlns:context="http://www.springframework.org/schema/context"

	xmlns:aop="http://www.springframework.org/schema/aop"

	xmlns:tx="http://www.springframework.org/schema/tx"
	xsi:schemaLocation="
        http://www.springframework.org/schema/beans
        http://www.springframework.org/schema/beans/spring-beans.xsd

        http://www.springframework.org/schema/context
        http://www.springframework.org/schema/context/spring-context.xsd

        http://www.springframework.org/schema/aop
        http://www.springframework.org/schema/aop/spring-aop.xsd

        http://www.springframework.org/schema/tx
        http://www.springframework.org/schema/tx/spring-tx.xsd">
</beans>
配置文件创建一个对象并赋值
- 自定义类属性
<!-- 创建一个名字为stockService的对象 -->
<bean id="stockService" class="com.woniu.service.impl.StockServiceImpl">
    <!-- 该对象下有属性,名字分别为stockDao -->
    <!-- ref:这个属性值为一个对象,引用于stockDao这个名字的对象 -->
    <property name="stockDao" ref="stockDao" />
</bean>
<!-- 创建一个名字为stockDao的对象 -->
<bean id="stockDao" class="com.woniu.dao.impl.StockDaoImpl" />- Map
<property name="map">
	<map>
		<entry key="str1" value-ref="sutdent1" />
		<entry key="str2" value-ref="sutdent2" />
	</map>
</property>- Array
<property name="strs">
	<array>
		<value>aaa</value>
		<value>bbb</value>
	</array>
</property>- List
<property name="list">
	<list>
		<ref bean="sutdent1"/>
		<ref bean="sutdent2"/>
	</list>
</property>- properties
<property name="pros">
	<props>
		<prop key="key1">001</prop>
		<prop key="key2">002</prop>
	</props>
</property>-
自动注入
- 根据名称
<bean id="student" class="com.woniu.Student" autowire="byName">
	<property name="id" value="1" />
	<property name="name" value="张三" />
</bean>
<bean id="school" class="com.woniuxy.di02.School">
	<property name="name" value="学校" />
</bean>- 根据类型
当使用按类型自动注入时,不能有同类的bean,以及子父类关系的bean
<bean id="student" class="com.woniuxy.di03.Student" autowire="byType">
	<property name="id" value="1" />
	<property name="name" value="张三" />
</bean>
<bean id="school" class="com.woniuxy.di03.School">
	<property name="name" value="父学校" />
</bean>
<bean id="superSchool" class="com.woniuxy.di03.SuperSchool">
	<property name="name" value="子学校" />
</bean>
注解形式创建一个对象并赋值
使用注解需要使用aop的jar包,以及约束
@Component("school")
public class School {
@Value("学校")
private String name;
public School(String name) {
super();
this.name = name;
}
public School() {
super();
}
}
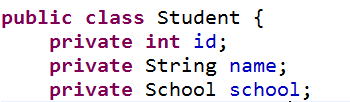
@Component("student")
public class Student {
@Value("1")
private int id;
@Value("张三")
private String name;
@Resource
private School school;
}
//配置文件,配置扫描
// com.woniuxy.di01 扫描当前包及其字表
// com.woniuxy.di01.* 扫描当前包的子表
<context:component-scan base-package="com.woniuxy.di04" />还有三个注解的作用和@Componet是一样的,他们用在分层项目中,带表每层的bean
@Repository 在DAO层使用
@Service 在Service层使用
@Controller 在Controller层使用
使用内置jdbc连接数据库
- 配置文件
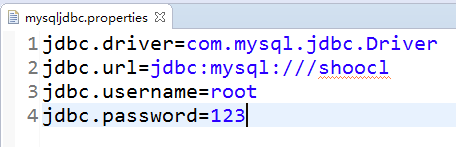
<!-- 连接jdbc四大参数文件 -->
<context:property-placeholder location="classpath:mysqljdbc.properties"/>
<!-- 创建对象 -->
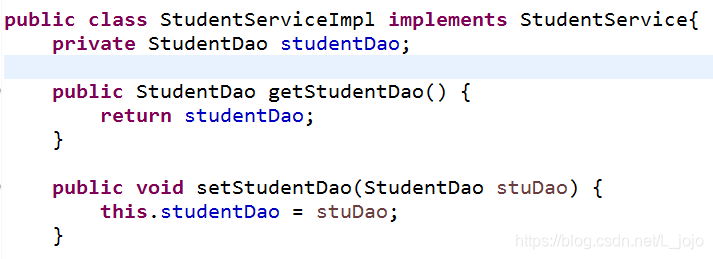
<bean id="studentService" class="com.woniu.service.impl.StudentServiceImpl">
<property name="studentDao" ref="studentDao" />
</bean>
<bean id="studentDao" class="com.woniu.dao.impl.StudentDaoImpl">
<property name="dataSource" ref="dataSource" />
</bean>
<!--设置连接池-->
<bean id="dataSource" class="org.springframework.jdbc.datasource.DriverManagerDataSource">
<property name="driverClassName" value="${jdbc.driver}"/>
<property name="url" value="${jdbc.url}" />
<property name="username" value="${jdbc.username}" />
<property name="password" value="${jdbc.password}" />
</bean>
AOP
AOP是一种编程思想,Spring框架实现了这种思想,其他框架也可以实现。Spring的实现不好,
AspectJ框架对AOP的实现更好。Spring框架提供对AspectJ的整合支持。
直接使用Spring内置的AOP实现
缺点:使用复杂:要实现切面织入,必须实现特定的接口,配置复杂
7个基础包+aop联盟包(规范,接口)+spring-aop.jar
使用AspectJ实现
7个基础包+aop联盟包(规范,接口)+spring-aop.jar+aspectjs.jar+spring-aspectj.jar(spring对aspectj的整合包)
-
注解实现
execution设置切入点表达式指定切面的织入给哪些方法
- 前置通知 Before
@Component("myAspect")
@Aspect
public class MyAspect {
	@Before("execution(* *..SomeService.do*(..))")
	public void befor(){
		System.out.println("前置增强");
	}
}- 后置通知 AfterReturning
@Component("myAspect")
@Aspect
public class MyAspect {
	@AfterReturning("execution(* *..SomeService.do*(..))")
	public void AfterReturning(){
		System.out.println("后置增强");
	}
//returning的值与方法参数引用名一致
	@AfterReturning(value="execution(* *..SomeService.doAther(..))",returning="result")
	public void AfterReturning(Object result){
		System.out.println("后置增强中操作方法返回值,但不修改方法返回值");
		System.out.println("后置增强中操作的返回值:"+result.toString().toUpperCase());
	}
}- 环绕通知 Around
@Component("myAspect")
@Aspect
public class MyAspect {
	@Around("execution(* *..SomeService.do*(..))")
	public Object befor(ProceedingJoinPoint pjp) throws Throwable{
		System.out.println("环绕前置通知");
		Object obj = pjp.proceed();
		System.out.println("环绕后置通知");
		if(obj!=null && obj.getClass().getName().equals("java.lang.String")){
//环绕通知可以修改方法的返回值
			return obj.toString().toUpperCase();
		}
		return obj;
	}
}- 异常通知 AfterThrowing

根据方法中异常类型,触发该异常类型,以及异常类型父类的方法
@Component("myAspect")
@Aspect
public class MyAspect {
	@AfterThrowing(value="execution(* *..SomeService.test*(..))",throwing="ex")
	public void AfterThrowing(Exception ex) {
		System.out.println("Exception异常通知,捕获异常:"+ex);
	}
	@AfterThrowing(value="execution(* *..SomeService.test*(..))",throwing="ex")
	public void AfterThrowing(NullPointerException ex) {
		System.out.println("NullPointerException异常通知,捕获异常:"+ex);
	}
	@AfterThrowing(value="execution(* *..SomeService.test*(..))",throwing="ex")
	public void AfterThrowing(ArithmeticException ex) {
		System.out.println("ArithmeticException异常通知,捕获异常:"+ex);
	}
}
测试结果:

- 最终通知 After
类似于try_catch_finally中finally的用法
@Component("myAspect")
@Aspect
public class MyAspect {
	@AfterThrowing(value="execution(* *..SomeService.test*(..))",throwing="ex")
	public void AfterThrowing(ArithmeticException ex) {
		System.out.println("ArithmeticException异常通知,捕获异常:"+ex);
	}
	@After("execution(* *..SomeService.*(..))")
	public void after(){
		System.out.println("最终通知");
	}
}
测试结果:

配置文件实现
-
前置通知
<!-- 配置切入 -->
<aop:config>
	<!-- 切入点 -->
	<aop:pointcut expression="execution(* *..SomeService.do*(..))"
		id="pointcutdo"/>
	<!-- 切面 -->
	<aop:aspect ref="myAspect">
        <-- 设置通知类型 before前置通知 -->
		<aop:before method="befor" pointcut-ref="pointcutdo"/>
	</aop:aspect>
</aop:config>-
后置通知
<aop:config>
	<aop:pointcut expression="execution(* *..SomeService.doSome(..))" id="ponintcutdosome"/>
	<aop:pointcut expression="execution(* *..SomeService.doAther(..))" id="ponintcutdoather"/>
	<aop:aspect ref="myAspect">
		<aop:after-returning method="AfterReturning" pointcut-ref="ponintcutdosome" />
		<aop:after-returning method="AfterReturning(java.lang.Object)"
			    pointcut-ref="ponintcutdoather" returning="result"/>
	</aop:aspect>
</aop:config>-
环绕通知
<aop:config>
	<aop:pointcut expression="execution(* *..SomeService.doSome(..))"
             id="ponintcutdosome"/>
	<aop:pointcut expression="execution(* *..SomeService.doAther(..))"
             id="ponintcutdoather"/>
	<aop:aspect ref="myAspect">
		<aop:around method="around(org.aspectj.lang.ProceedingJoinPoint)"
                      pointcut-ref="ponintcutdosome" />
		<aop:around method="around(org.aspectj.lang.ProceedingJoinPoint)"
                      pointcut-ref="ponintcutdoather" />
	</aop:aspect>
</aop:config>
事务管理
aop联盟包, spring-aop.jar
出现异常类型:
配置文件实现
<!-- 配置事务管理器 -->
<bean id="transactionManager"
	  class="org.springframework.jdbc.datasource.DataSourceTransactionManager">
	<proper ty name="dataSource" ref="dataSource"/>
</bean>
<!-- 注册事务代理类,完成事务织入-->
<bean id="proxy"
	  class="org.springframework.transaction.interceptor.TransactionProxyFactoryBean">
	<property name="transactionManager" ref="transactionManager" />
	<property name="target" ref="stockService"/>
	<property name="transactionAttributes" >
		<props>
		<!-- spring对运行时异常和编译异常两个异常类型处理机制不同
			运行时异常默认回滚,编译异常默认提交。
			-Exception:设置编译异常回滚
			+RuntimeException:设置运行时异常提交
		 -->
			<prop key="open*">ISOLATION_DEFAULT,PROPAGATION_REQUIRED</prop>
			<prop key="buy*">ISOLATION_DEFAULT,PROPAGATION_REQUIRED</prop>
		</props>
	</property>
</bean>
缺点:必须使用代理类对象
public class MyTest {
	StockService stockService;
	@Before
	public void before(){
		ApplicationContext ac = new ClassPathXmlApplicationContext("applicationContext.xml");
		stockService = (StockService) ac.getBean("proxy");
	}
注解实现
jar包:spring-tx
配置文件
<!-- 设置自动查找 -->
<tx:annotation-driven/>
织入
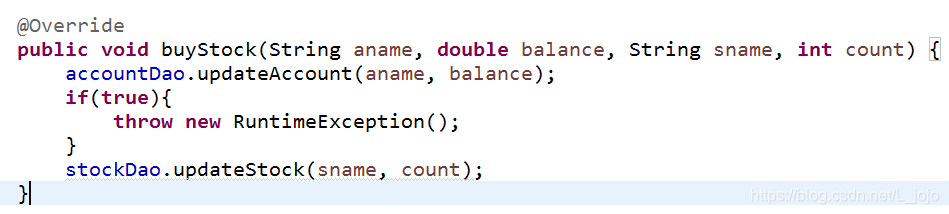
	@Override
	@Transactional(isolation=Isolation.DEFAULT,propagation=Propagation.REQUIRED)
	public void buyStock(String aname, double balance, String sname, int count) {
		accountDao.updateAccount(aname, balance);
		if(true){
			throw new RuntimeException();
		}
		stockDao.updateStock(sname, count);
	}
可以直接使用目标类对象
public class MyTest {
	StockService stockService;
	@Before
	public void before(){
		ApplicationContext ac = new ClassPathXmlApplicationContext("applicationContext.xml");
		stockService = (StockService) ac.getBean("stockService");
	}
}


 6295
6295

 被折叠的 条评论
为什么被折叠?
被折叠的 条评论
为什么被折叠?
 到【灌水乐园】发言


