


 本文介绍如何在Spring Boot项目中配置并使用Swagger3.x和Knife4j,包括pom文件依赖、Swagger配置类编写及UI界面访问方式等关键步骤。
一、Swagger3.x配置
1、pom文件
<parent>
   <groupId>org.springframework.boot</groupId>
   <artifactId>spring-boot-starter-parent</artifactId>
   <version>2.3.4.RELEASE</version>
   <relativePath/>
</parent>
<dependency>
   <groupId>io.springfox</groupId>
   <artifactId>springfox-boot-starter</artifactId>
   <version>3.0.0</version>
</dependency>
2、Swagger配置文件
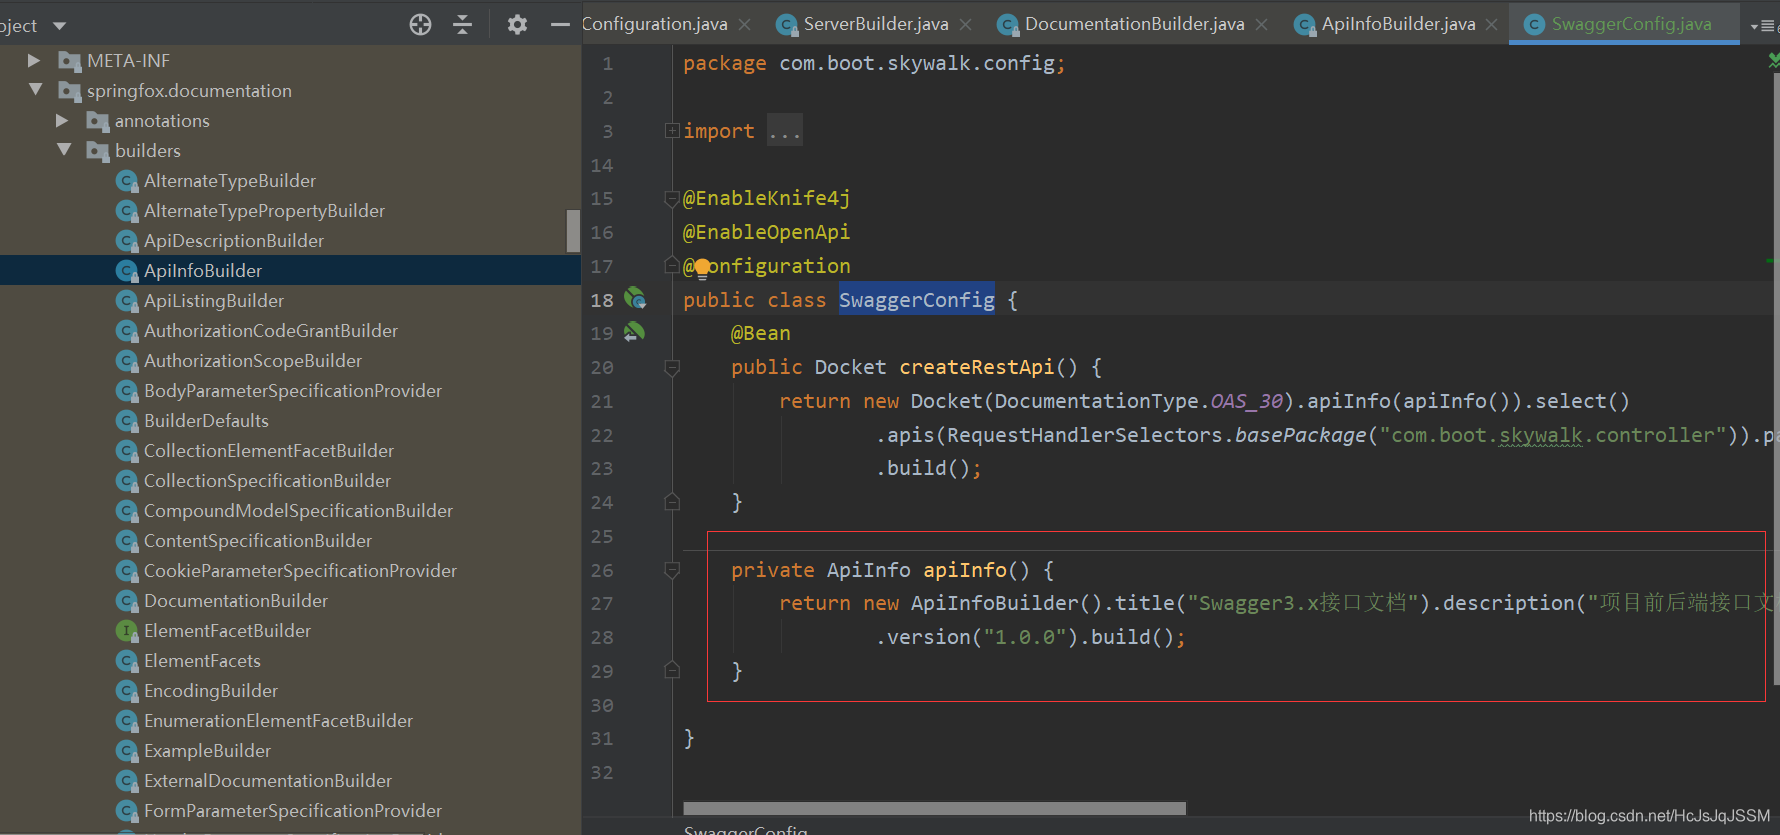
package com.boot.skywalk.config;
import org.springframework.context.annotation.Bean;
import org.springframework.context.annotation.Configuration;
import springfox.documentation.builders.ApiInfoBuilder;
import springfox.documentation.builders.PathSelectors;
import springfox.documentation.builders.RequestHandlerSelectors;
import springfox.documentation.oas.annotations.EnableOpenApi;
import springfox.documentation.service.ApiInfo;
import springfox.documentation.service.Contact;
import springfox.documentation.spi.DocumentationType;
import springfox.documentation.spring.web.plugins.Docket;
@EnableOpenApi
@Configuration
public class SwaggerConfig {
@Bean
public Docket createRestApi() {
return new Docket(DocumentationType.OAS_30).apiInfo(apiInfo()).select()
.apis(RequestHandlerSelectors.basePackage("com.boot.skywalk.controller")).paths(PathSelectors.any())
.build();
}
private ApiInfo apiInfo() {
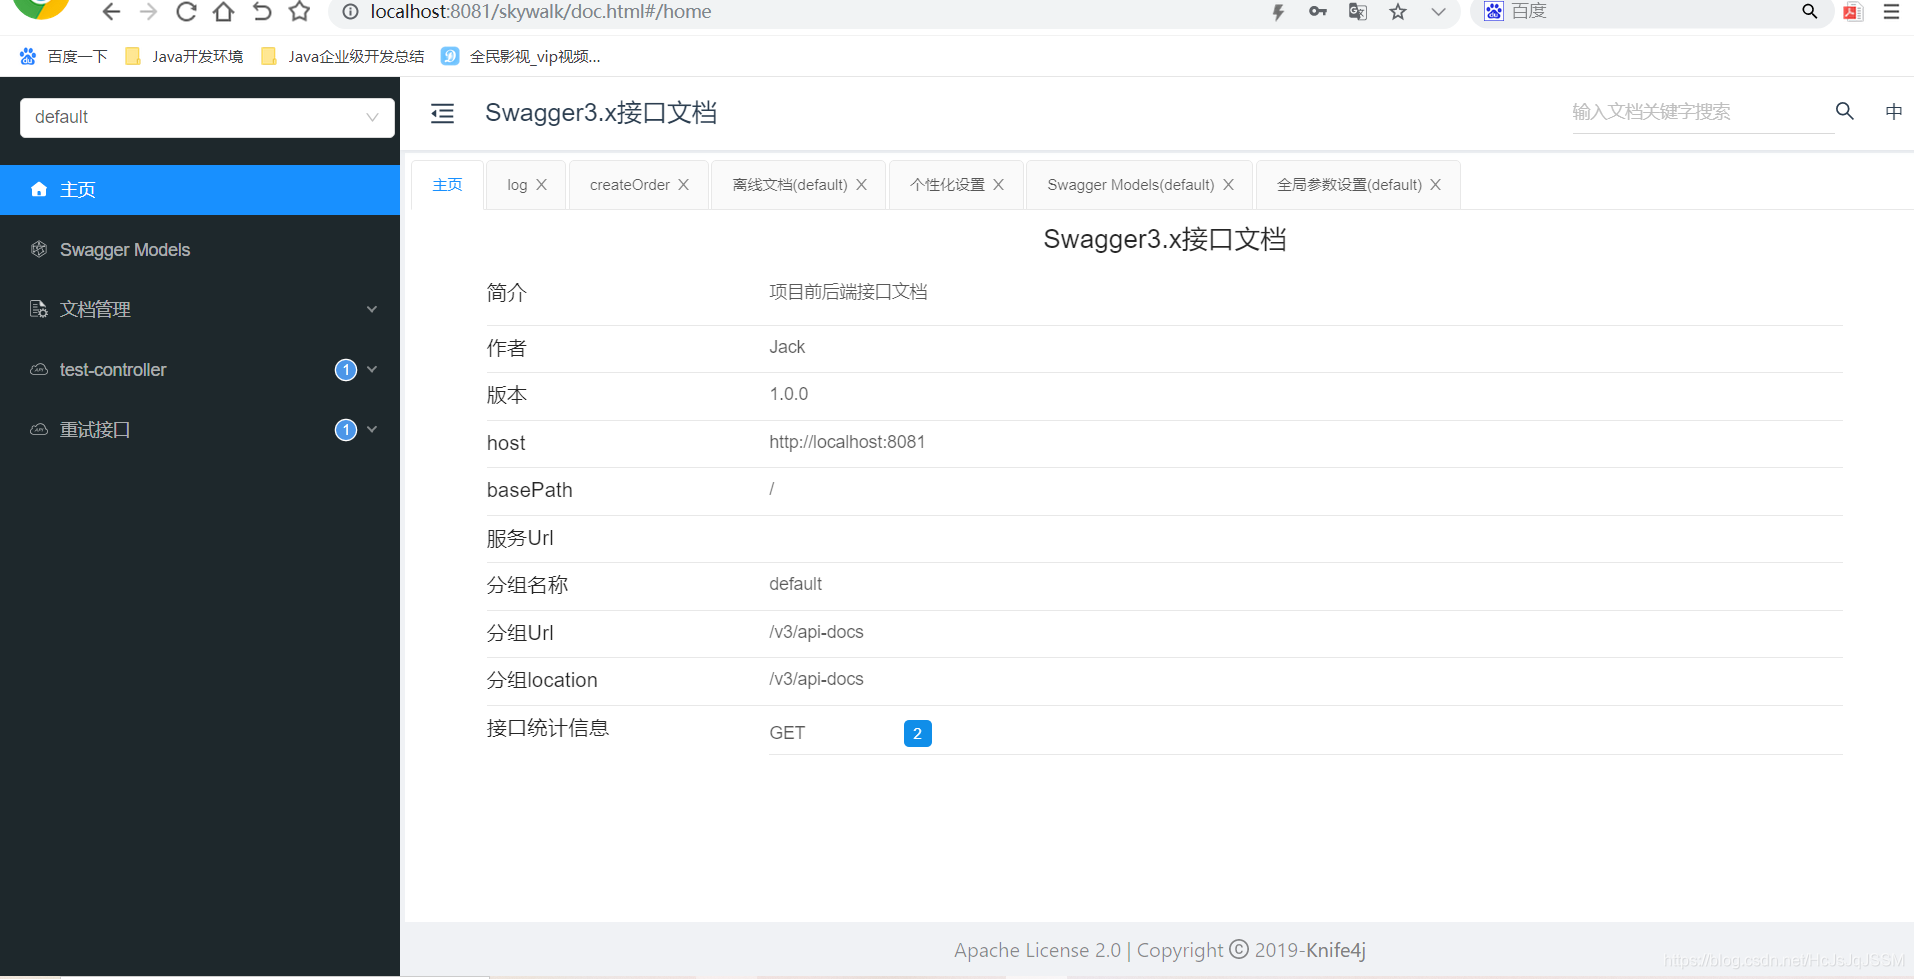
return new ApiInfoBuilder().title("Swagger3.x接口文档").description("项目前后端接口文档").contact(new Contact("Jack", "https://blog.youkuaiyun.com/hcjsjqjssm", "xxx@qq.com"))
.version("1.0.0").build();
}
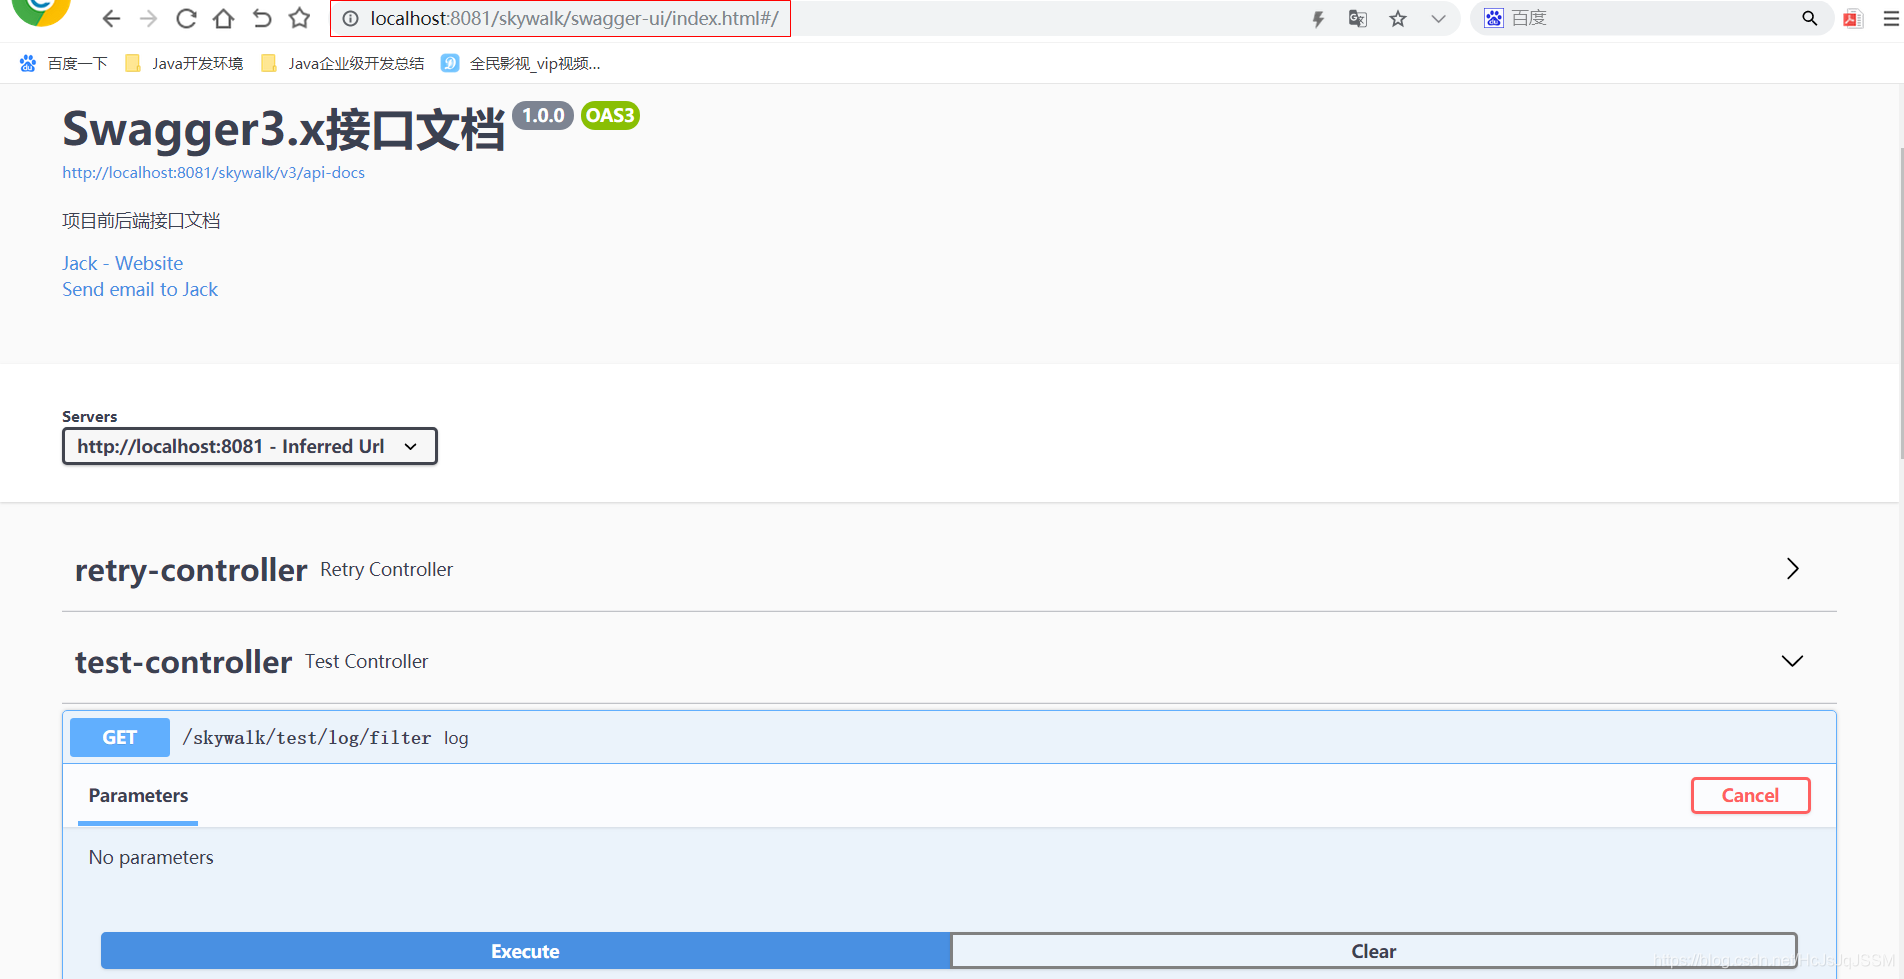
}3、会自动扫描项目配置下的包的接口的,编写一个,访问项目接口文档界面:http://localhost:8081/skywalk/swagger-ui/index.html
二、knife4jUI界面配置
1、引入pom依赖
<dependency>
   <groupId>com.github.xiaoymin</groupId>
   <artifactId>knife4j-spring-boot-starter</artifactId>
   <version>3.0.2</version>
 </dependency>
2、yml文件配置
#配置swagger配置
knife4j:
basic:
username: admin
password: 666666
enable: true #开启认证
production: false #默认是false ,屏蔽所有Swagger的相关资源
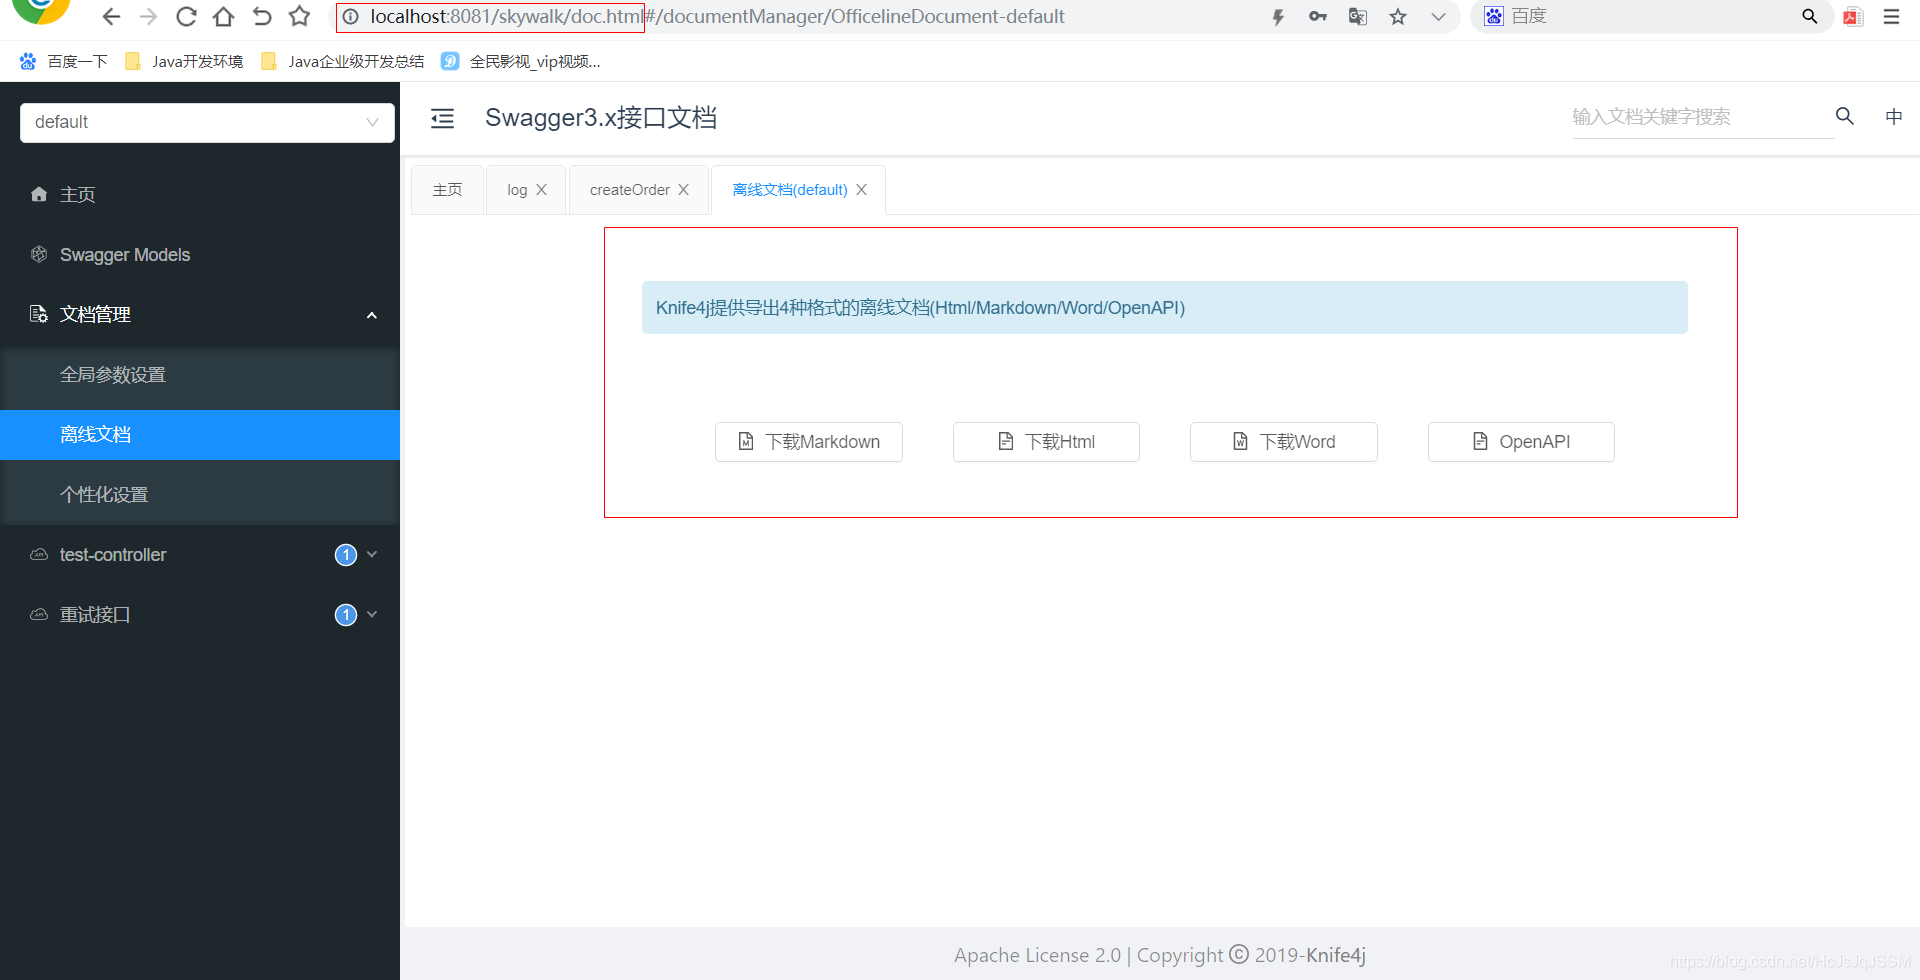
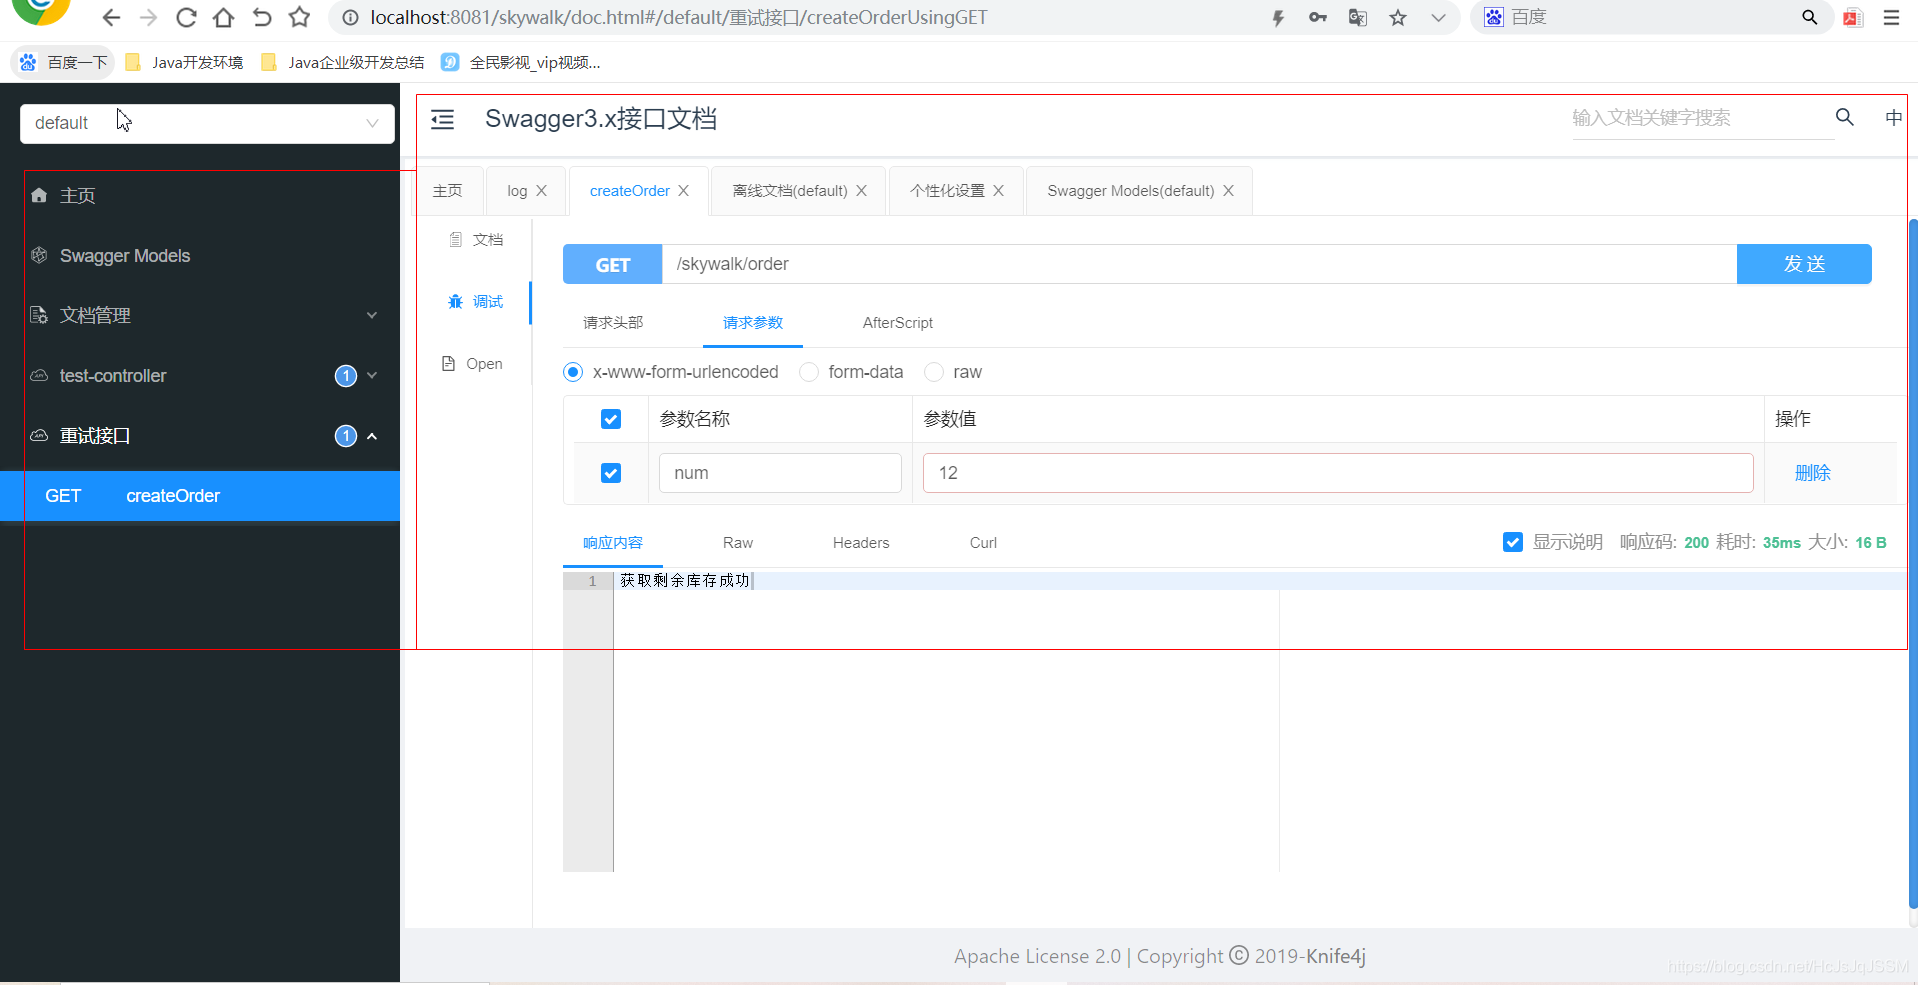
enable: true #是否开启swagger3、访问UI:http://localhost:8081/skywalk/doc.html
同时Swagger界面也可以访问,看喜欢UI界面吧。常用注解就不介绍了,基本上是看到就知道啥意思了。
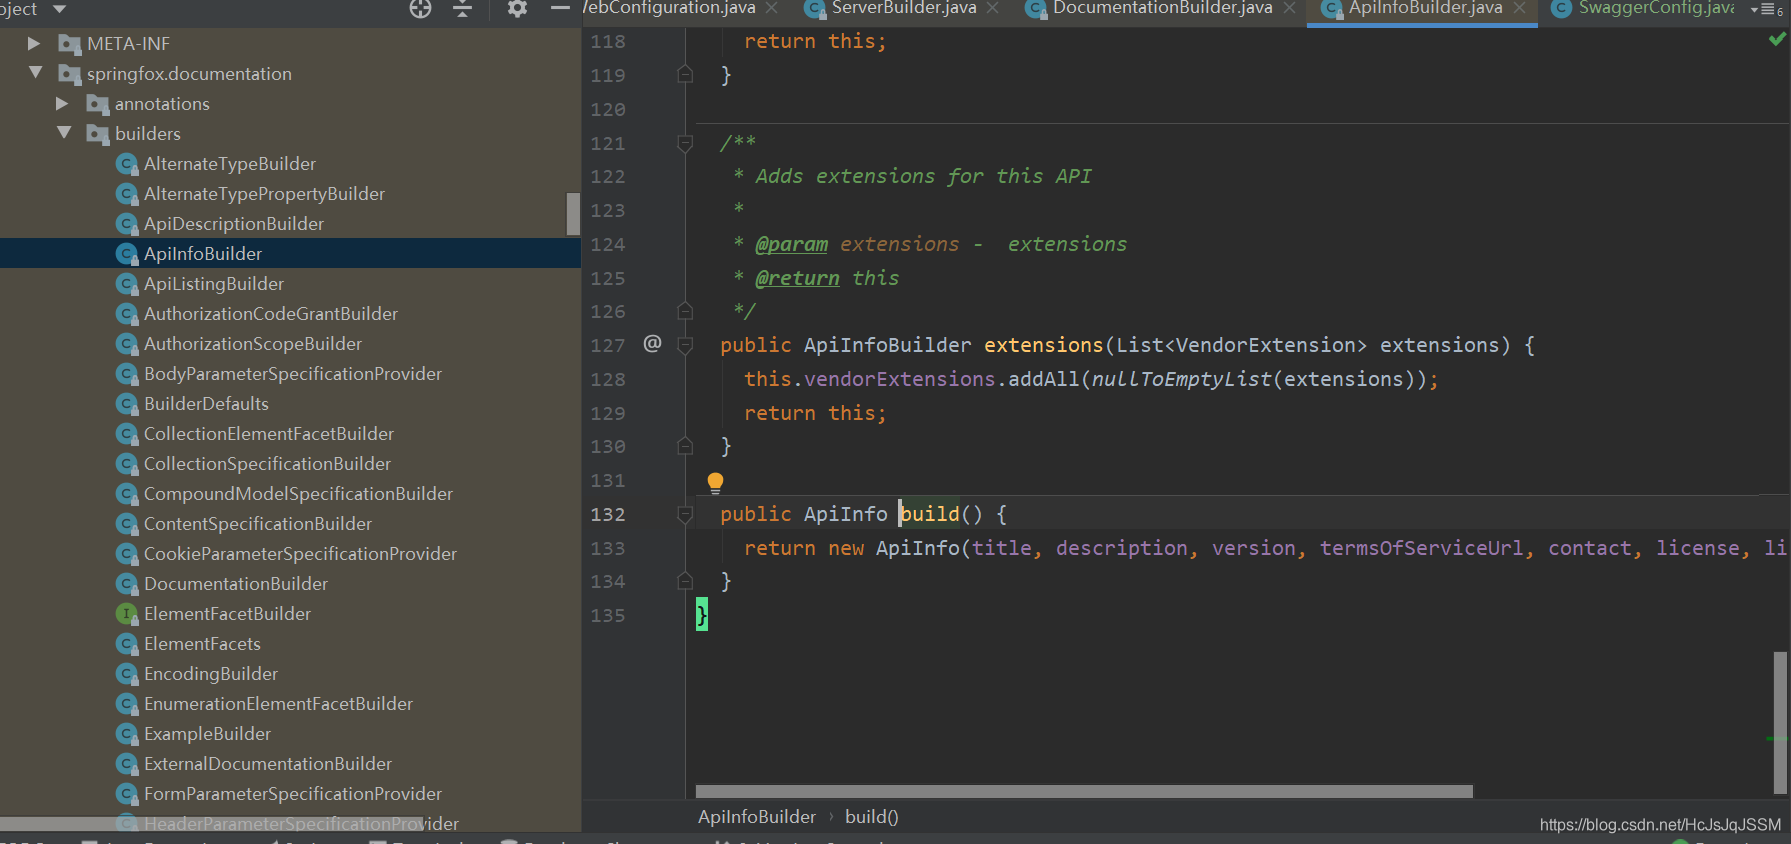
四、Swagger里面有大量的建造者模式的使用,可以看看,在业务开发中复杂对象的建立上面学习使用。
1、ServerBuilder.有一个build()方法。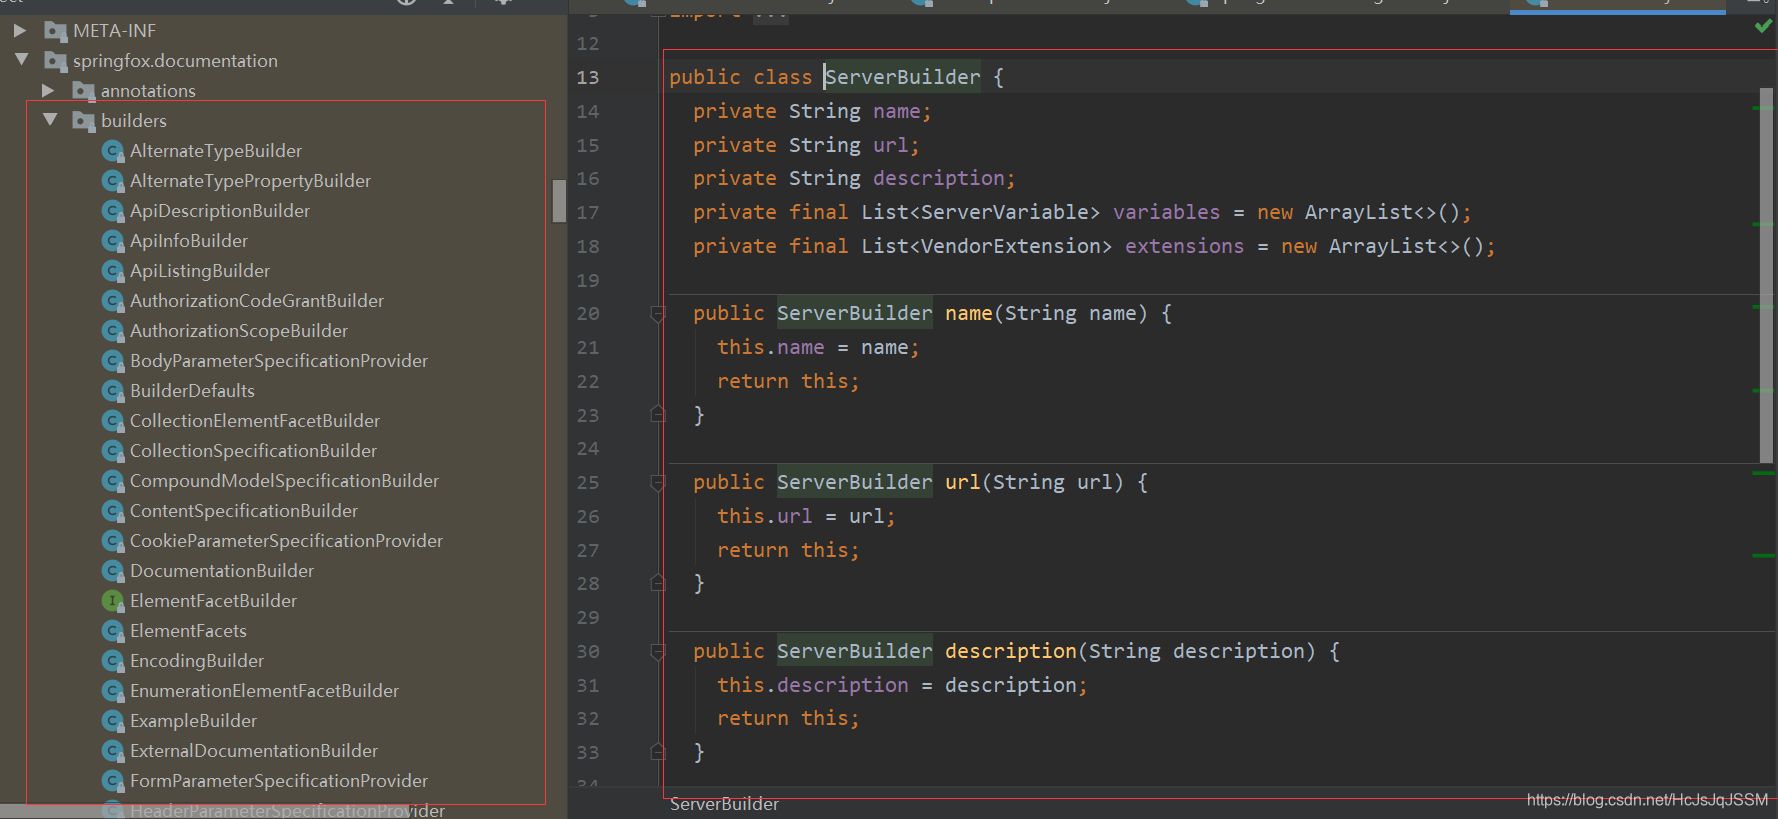
2、ApiInfoBuilder


 243
243


 到【灌水乐园】发言


