


 本文介绍如何在SpringBoot项目中整合MyBatis和JSP,包括配置数据源、实体类映射路径、扫描包xml文件路径,以及添加Tomcat支持和JSTL标准标签库。
Spring Boot入门 Spring Boot整合MyBatis Spring Boot集成JSP
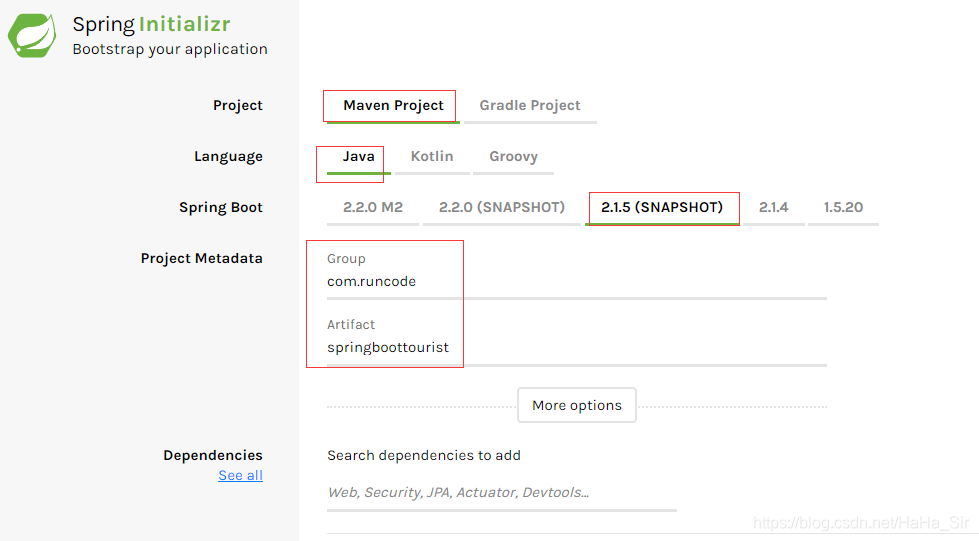
一、初始化项目
2、相关配置选项如下,然后创建项目
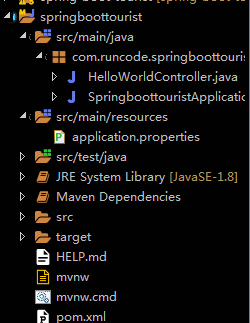
3、导入Eclipse (步骤:Import --- Import --- Maven --- Existing Maven Projects )
二、Spring Boot Hello World!
1、引入web支持
<!-- 引入 web 支持 -->
	<dependency>
		<groupId>org.springframework.boot</groupId>
		<artifactId>spring-boot-starter-web</artifactId>
		<scope>compile</scope>
	</dependency>
2、创建 HelloWorldController
@RestController
public class HelloWorldController {
	@RequestMapping(value = {})
	public String hello(String productName) {
		return "hello world! --->" +productName;
	}
}
3、启动项目: SpringboottouristApplication --- Run As --- Java Application
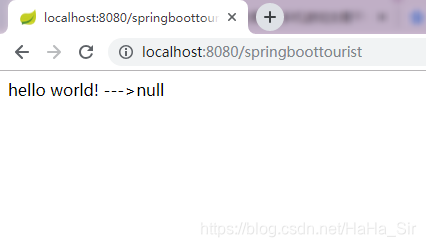
4、浏览器输入: http://localhost:8080/springboottourist
5、结果如下:
三、整合 MyBatis
1、添加MyBatis 依赖 ,MySQL驱动
<!-- 引入 spring boot MyBatis 依赖 -->
	<dependency>
		<groupId>org.mybatis.spring.boot</groupId>
		<artifactId>mybatis-spring-boot-starter</artifactId>
		<version>2.0.0</version>
	</dependency>

	<!-- 引入 MySQL connector 驱动 -->
	<dependency>
		<groupId>mysql</groupId>
		<artifactId>mysql-connector-java</artifactId>
	</dependency>
2、在 application.properties 配置文件中添加 MySQL、MyBatis相关配置信息
## 数据源配置
spring.datasource.url=jdbc:mysql://localhost/chapter?useSSL=false&useUnicode=true&characterEncoding=utf-8
spring.datasource.username=root
spring.datasource.password=root
spring.datasource.driver-class-name=com.mysql.jdbc.Driver

## Mybatis 配置
# 配置 实体类包路径。 typeAliasesPackage
mybatis.typeAliasesPackage=com.runcode.mybatis.entity
# 配置扫描 MyBatis XML 文件路径 mapperLocations
mybatis.mapperLocations=classpath:mapping/**/*.xml

# 配置 server path 路径
server.servlet.context-path = /mybatis
3、 创建 User表
SET FOREIGN_KEY_CHECKS=0;
-- ----------------------------
-- Table structure for user
-- ----------------------------
DROP TABLE IF EXISTS `user`;
CREATE TABLE `user` (
  `id` int(11) NOT NULL AUTO_INCREMENT,
  `name` varchar(255) DEFAULT NULL,
  `age` varchar(255) DEFAULT NULL,
  PRIMARY KEY (`id`)
) ENGINE=InnoDB AUTO_INCREMENT=48 DEFAULT CHARSET=utf8;
4.1、User 实体类
public class User {

    /** 编号 */
    private Integer id;

    /** 姓名 */
    private String name;

    /** 年龄 */
    private int age;

    // ====== 省略 getter , setter ====== //
}
4.2、UserDao
public interface UserDao {
	int insert(User user);
	int delete(User user);
	int update(User user);
	User get(User user);
	User get(int id);
	List<User> getList(User user);
}
4.3、UserService
同 4.2 UserDao 略!
4.4 UserController
@RestController
@RequestMapping(value = "/user")
public class UserController {
	private Logger logger = LoggerFactory.getLogger(UserController.class);

	@Autowired
	private UserService userService ;

	@RequestMapping(value = "/insert")
	public Boolean insert(User user) {
		logger.debug(" 插入数据: insert {} insert");
		return userService.insert(user) ;
	}

	@RequestMapping(value = "/delete")
	public Boolean delete(User user) {
		logger.debug(" 删除数据: delete {} delete");
		return userService.delete(user) ;
	}

	@RequestMapping(value = "/update")
	public Boolean update(User user) {
		logger.debug(" 修改数据: update {} update");
		return userService.update(user) ;
	}

	@RequestMapping(value = "/get")
	public User get(User user) {
		logger.debug(" 获取一条数据: get {} get ");
		return userService.get(user) ;
	}

	@RequestMapping(value = {"/getList","" , "list"})
	public List<User> getList(User user) {
		logger.debug(" 获取list数据: getList {} getList");
		return userService.getList(user) ;
	}
}
5、MyBatisApplication 启动程序入口类
@SpringBootApplication
@MapperScan(value = {"com.runcode.mybatis.dao"})
public class MyBatisApplication {
	public static void main(String[] args) {
		SpringApplication.run(MyBatisApplication.class, args);
		System.out.println("main application running ... ");
	}
}
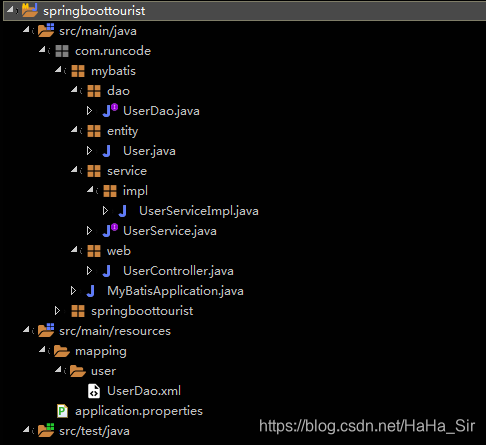
6、目录结构如下:
7、启动程序: MyBatisApplication --- 右键 --- Run As --- Java Application
8、测试: http://localhost:8080/mybatis/user , 可以看到用户表全部 JSON数据输出
四、整合 JSP
1、添加 Tomcat 支持, jstl 标签库
<!-- tomcat支持 -->
       <dependency>
           <groupId>org.springframework.boot</groupId>
           <artifactId>spring-boot-starter-tomcat</artifactId>
           <scope>provided</scope>
       </dependency>
       <dependency>
           <groupId>org.apache.tomcat.embed</groupId>
           <artifactId>tomcat-embed-jasper</artifactId>
           <scope>provided</scope>
       </dependency>
        <!-- jsp标签库 -->
        <dependency>
           <groupId>javax.servlet</groupId>
           <artifactId>jstl</artifactId>
       </dependency>
2、application.properties 添加 JSP 相关配置
# SpringMVC 相关配置
spring.mvc.view.prefix=/WEB-INF/views/
spring.mvc.view.suffix=.jsp
3、创建一个 JspController
import org.springframework.stereotype.Controller;
import org.springframework.ui.Model;
import org.springframework.web.bind.annotation.RequestMapping;
@RequestMapping(value="/jsp")
@Controller
public class JspController {
	@RequestMapping(value = "/index")
	public String index(Model model) {
		model.addAttribute("name", "Spring Boot 返回JSP页面@!");
		return "index";
	}
}
4、在 src/main下创建目录: /webapp/WEB-INF/views/index.jsp 如下:
(补充:jsp文件不能放在 resouces目录下,jsp文件不会编译。请自行补充知识点: maven 约定, jsp执行原理!)
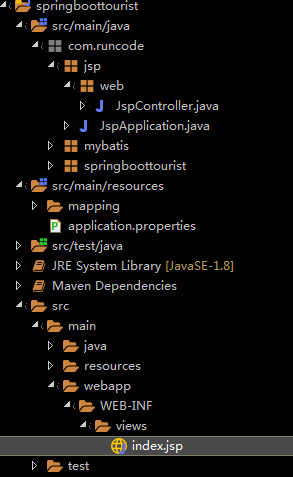
5、index.jsp 文件详情
<%@ page language="java" contentType="text/html; charset=UTF-8"
pageEncoding="UTF-8"%>
<!DOCTYPE html>
<html>
<head>
<meta charset="UTF-8">
<title>Insert title here</title>
</head>
<body>
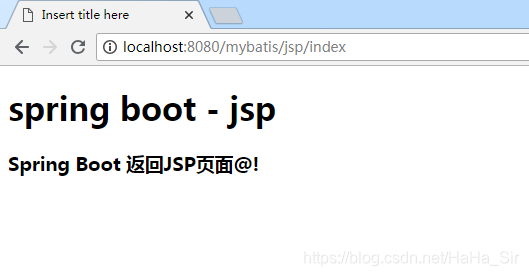
<h1> spring boot - jsp </h1>
<h3>${name }</h3>
</body>
</html>
6、启动程序: JspApplication --- 右键 --- Run As --- Java Application
7、测试:http://localhost:8080/mybatis/jsp/index 如下
五、总结
1、初始化Spring Boot 项目,Eclipse 、 Idea 都有对应的插件,无需到 https://start.spring.io/ 去下载项目。
2、整合MyBatis:配置数据源,实体类映射路径,扫描包xml文件路径即可。 也可以直接使用MyBatis 注解开发,不用写xml文件。
3、整合JSP:需要添加Tomcat支持,JSTL标准标签库。(其实,官方不推荐使用JSP,毕竟效率低,占内存。)
4、Spring Boot + MyBatis + JSP 整合起来,成为了曾经流行的 SSM 项目。
5、本示例提供代码下载: https://gitee.com/RunCoder/spring-boot-tourist/tree/feature-mybatis-jsp/ (请注意切换分支,不会下载,可私信联系,谢谢。)
6、遗留问题: Spring Boot 整合JSP,打包后无法JSP页面了。


 510
510

 被折叠的 条评论
为什么被折叠?
被折叠的 条评论
为什么被折叠?
 到【灌水乐园】发言


