


 本文深入讲解Spring框架中Bean的自动装配机制,包括byName、byType两种方式的使用及注意事项,以及如何使用@Autowired、@Qualifier和@Resource注解实现更灵活的自动装配。
文章目录
Spring中Bean的自动装配
测试环境搭建
创建Cat.class类
package com.zhbit.pojo;

public class Cat {
    public void shout(){
        System.out.println("苗苗~");
    }
}
创建Dog.class类
package com.zhbit.pojo;

public class Dog {
    public void shout(){
        System.out.println("wang wang");
    }
}
创建People.class类
package com.zhbit.pojo;

public class People {
    private Cat cat;
    private Dog dog;
    private String name;

    public Cat getCat() {
        return cat;
    }

    public void setCat(Cat cat) {
        this.cat = cat;
    }

    public Dog getDog() {
        return dog;
    }

    public void setDog(Dog dog) {
        this.dog = dog;
    }

    public String getName() {
        return name;
    }

    public void setName(String name) {
        this.name = name;
    }

    @Override
    public String toString() {
        return "People{" +
                "cat=" + cat +
                ", dog=" + dog +
                ", name='" + name + '\'' +
                '}';
    }
}
创建beans.xml
<?xml version="1.0" encoding="UTF-8"?>
<beans xmlns="http://www.springframework.org/schema/beans"
       xmlns:xsi="http://www.w3.org/2001/XMLSchema-instance"
       xsi:schemaLocation="http://www.springframework.org/schema/beans http://www.springframework.org/schema/beans/spring-beans.xsd">
    <bean id="cat" class="com.zhbit.pojo.Cat"></bean>
    <bean id="dog" class="com.zhbit.pojo.Dog"/>
    <bean id="people" class="com.zhbit.pojo.People">
        <property name="name" value="doli"/>
        <property name="cat" ref="cat"/>
        <property name="dog" ref="dog"/>
    </bean>

</beans>
### 编写测试类

```java
import com.zhbit.pojo.People;
import org.junit.Test;
import org.springframework.context.ApplicationContext;
import org.springframework.context.support.ClassPathXmlApplicationContext;

public class MyTest {
    @Test
        public void test1(){
            ApplicationContext context = new ClassPathXmlApplicationContext("beans.xml");
            People people = context.getBean("people", People.class);
            people.getDog().shout();
            people.getCat().shout();

        }

}
测试结果
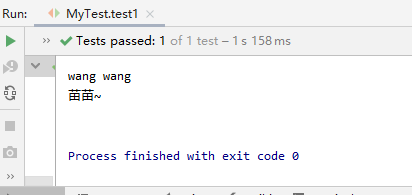
测试环境搭建完成
Bean的自动装配
ByName自动装配
修改beans.xml
<?xml version="1.0" encoding="UTF-8"?>
<beans xmlns="http://www.springframework.org/schema/beans"
       xmlns:xsi="http://www.w3.org/2001/XMLSchema-instance"
       xsi:schemaLocation="http://www.springframework.org/schema/beans http://www.springframework.org/schema/beans/spring-beans.xsd">
    <bean id="cat" class="com.zhbit.pojo.Cat"></bean>
    <bean id="dog" class="com.zhbit.pojo.Dog"/>
    <!--<bean id="people" class="com.zhbit.pojo.People">
        <property name="name" value="doli"/>
        <property name="cat" ref="cat"/>
        <property name="dog" ref="dog"/>
    </bean>-->
    <!--byName:会自动在容器上下文中查找,和自己对象set方法后面的值对应的beanid-->
    <bean id="people" class="com.zhbit.pojo.People" autowire="byName">
        <property name="name" value="doli"/>

    </bean>

</beans>
测试结果:
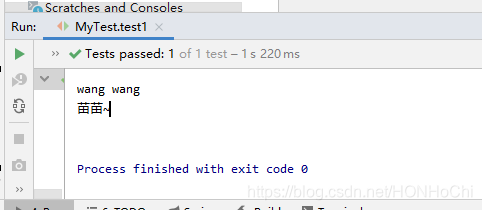
注意点:byName:会自动在容器上下文中查找,和自己对象set方法后面的值对应的beanid,如果id写错了,则会报空指针异常
ByType自动装配
修改beans.xml
<?xml version="1.0" encoding="UTF-8"?>
<beans xmlns="http://www.springframework.org/schema/beans"
xmlns:xsi="http://www.w3.org/2001/XMLSchema-instance"
xsi:schemaLocation="http://www.springframework.org/schema/beans http://www.springframework.org/schema/beans/spring-beans.xsd">
<bean id="cat" class="com.zhbit.pojo.Cat"></bean>
<bean id="dog" class="com.zhbit.pojo.Dog"/>
<!--<bean id="people" class="com.zhbit.pojo.People">
<property name="name" value="doli"/>
<property name="cat" ref="cat"/>
<property name="dog" ref="dog"/>
</bean>-->
<!--<!–byName:会自动在容器上下文中查找,和自己对象set方法后面的值对应的beanid–>
<bean id="people" class="com.zhbit.pojo.People" autowire="byName">
<property name="name" value="doli"/>
</bean>-->
<!--byType:会自动在容器上下文中查找,和自己对象属性类型相同的bean 注意点:必须保证上下文的对象类型唯一-->
<bean id="people" class="com.zhbit.pojo.People" autowire="byType">
<property name="name" value="doli"/>
</bean>
</beans>
注意点:必须保证上下文的对象类型唯一
ByName和ByType的总结
- byName的时候,需要保证所有bean的id唯一,并且这个bean需要和自动注入的属性的set方法的值一致
- bytype的时候,需要保证所有bean的class唯一,并且这个bean需要和自动注入的属性的类型一致
使用注解实现自动装配
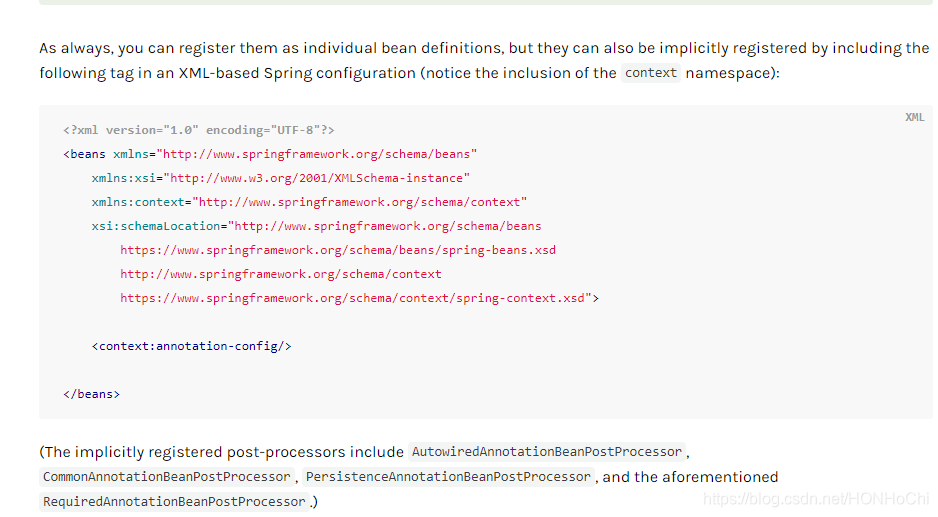
这边的重点是beans.xml的搭建,从spring官网查到如下
使用注解须知:1.导入约束:context约束 2.配置注解的支持 <context:annotation-config/>
@Autowired
修改People.class
package com.zhbit.pojo;

import org.springframework.beans.factory.annotation.Autowired;

public class People {
    @Autowired
    private Cat cat;
    @Autowired
    private Dog dog;
    private String name;

    public Cat getCat() {
        return cat;
    }

    public void setCat(Cat cat) {
        this.cat = cat;
    }

    public Dog getDog() {
        return dog;
    }

    public void setDog(Dog dog) {
        this.dog = dog;
    }

    public String getName() {
        return name;
    }

    public void setName(String name) {
        this.name = name;
    }

    @Override
    public String toString() {
        return "People{" +
                "cat=" + cat +
                ", dog=" + dog +
                ", name='" + name + '\'' +
                '}';
    }
}
新增autoBeans.xml
<?xml version="1.0" encoding="UTF-8"?>
<beans xmlns="http://www.springframework.org/schema/beans"
       xmlns:xsi="http://www.w3.org/2001/XMLSchema-instance"
       xmlns:context="http://www.springframework.org/schema/context"
       xsi:schemaLocation="http://www.springframework.org/schema/beans
        https://www.springframework.org/schema/beans/spring-beans.xsd
        http://www.springframework.org/schema/context
        https://www.springframework.org/schema/context/spring-context.xsd">

    <context:annotation-config/>
    <bean id="cat" class="com.zhbit.pojo.Cat"/>
    <bean id="dog" class="com.zhbit.pojo.Dog"/>
    <bean id="people" class="com.zhbit.pojo.People"/>
</beans>
测试结果:

而且@Autowired注解是通过反射实现的,可以不需要编写set方法
@Autowired注解默认要求依赖对象必须存在,如果定义了@Autowired(required = false),说明这个对象可以为null,否则不允许为空,等价于@Nullable
@Qualifier(value=“xxx”)
因为@Autowired注解优先使用根据类型进行标注装配,如果@Autowired自动装配的环境比较复杂,例如存在多个类型相同但是id不一样的bean,此时可以搭配@Qualifier可完成按照名称进行装配
@Resource
@Resource注解默认按照名字进行装配,找不到名字匹配的bean时才会按照类型进行装配,但如果名字通过name属性进行指定,则只会按照名字进行装配。
小结
@Resource和@Autowired的区别:
- @Autowired 默认通过bytype的方式实现
- @Resource默认通过byname的方式实现,如果找不到名字,则通过
类型进行装配


 被折叠的 条评论
为什么被折叠?
被折叠的 条评论
为什么被折叠?
 到【灌水乐园】发言


