The simplest method of rolling out your TreeView control is utilizing the interface within Visual Studio 2005 Beta 2 without having to write one single line of code. Pretty cool huh! The first thing you will need is a well-formed XML file. For the purpose of this article, I am utilizing an XML file which contains Name and URL values.
Listing 1: authors.xml
<?xml version="1.0" standalone="yes"?>
<ASPAlliance_Authors>
    <Author NAME="Steven Smith">
        <blog URL="http://blogs.aspadvice.com/ssmith/"></blog>
    </Author>
    <Author NAME="Robert Chartier">
        <blog URL="http://weblogs.asp.net/rchartier/"></blog>
    </Author>
    <Author NAME="Steven Swafford">
        <blog URL="http://blogs.aspadvice.com/sswafford/"></blog>
    </Author>
    <Author NAME="J. Ambrose Little">
        <blog URL="http://dotnettemplar.net/"></blog>
    </Author>
</ASPAlliance_Authors>
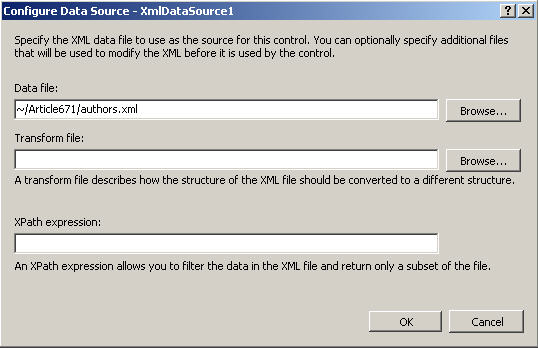
The first thing you need to do is to create a new Web Form. Once you have the Web Form in place, there are two controls that you must add to this Web Form. First is the XmlDataSource, which will be what we will use as the DataSource.
Figure 1: Configure Data Source
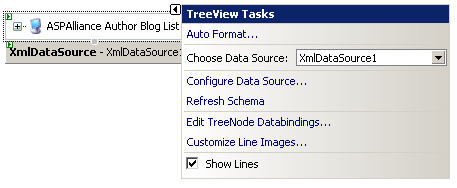
Next, drag and drop a TreeView control onto your Web Form. Bring up the TreeView Tasks and select the XmlDataSource that you previously configured. In this case, the name of the DataSource is XmlDataSource1.
Figure 2: TreeView Tasks, XmlDataSource Configuration
The final step in this process is to open the TreeView DataBindings Editor and configure the TreeView control.
Figure 3: TreeView DataBindings Editor
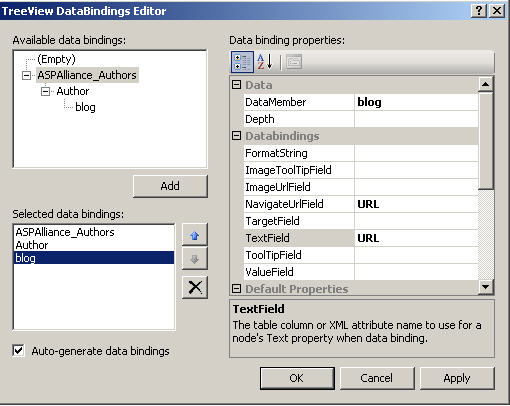
There are three items that we will databind to this TreeView control.
- ASPAlliance_Authors – parent node
- In the available data bindings area, highlight ASPAlliance_Authors and click Add. Next, within the data binding properties, add the text “ASPAlliance Authors Blog List” to the Text property.
- Author – child node
- In the available data bindings area, highlight Author and click Add. In the data bindings TextField attribute, select NAME from the dropdown list.
- URL – Used as an HREF that will be attached to the Author child node
- In the available databindings area, highlight Blog and click Add. In the data bindings TextField attribute, select URL from the dropdown list, and select URL as well for the NavigateUrlField attribute.
Finally, make sure that the "Auto-generate data bindings" checkbox is checked.
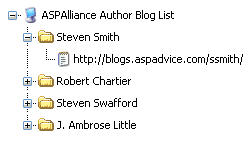
That is all it takes to generate your TreeView control, without writing one single line of code. Execute this Web Form and you will see the following.
Figure 4: TreeView Control Execution


 669
669

 被折叠的 条评论
为什么被折叠?
被折叠的 条评论
为什么被折叠?
 到【灌水乐园】发言


