


idea创建springboot项目
数据库结构


导入以下依赖
 <dependencies>
        <dependency>
            <groupId>org.projectlombok</groupId>
            <artifactId>lombok</artifactId>
            <optional>true</optional>
        </dependency>
        <dependency>
            <groupId>org.springframework.boot</groupId>
            <artifactId>spring-boot-starter-data-jpa</artifactId>
        </dependency>
        <dependency>
            <groupId>mysql</groupId>
            <artifactId>mysql-connector-java</artifactId>
        </dependency>
        <dependency>
            <groupId>org.springframework.boot</groupId>
            <artifactId>spring-boot-starter-web</artifactId>
        </dependency>

        <dependency>
            <groupId>org.springframework.boot</groupId>
            <artifactId>spring-boot-starter-test</artifactId>
            <scope>test</scope>
            <exclusions>
                <exclusion>
                    <groupId>org.junit.vintage</groupId>
                    <artifactId>junit-vintage-engine</artifactId>
                </exclusion>
            </exclusions>
        </dependency>
        <dependency>
            <groupId>org.springframework.boot</groupId>
            <artifactId>spring-boot-starter-thymeleaf</artifactId>
        </dependency>
        <dependency>
            <groupId>org.projectlombok</groupId>
            <artifactId>lombok</artifactId>
            <version>1.18.10</version>
        </dependency>
    </dependencies>
配置yml文件
spring:
  thymeleaf:
    prefix: classpath:/templates/
    suffix: .html
    mode: HTML5
    encoding: UTF-8
    cache: false

  resources:
    chain:
      strategy:
        content:
          enabled: true
          paths: /**
  datasource:
    driver-class-name: com.mysql.cj.jdbc.Driver
    url: jdbc:mysql://localhost:3306/echarts?useUnicode=true&characterEncoding=UTF-8&serverTimezone=UTC
    password: root
    username: root
server:
  port: 8787
下载echarts插件
地址:https://www.echartsjs.com/zh/download.html
 将echarts.min.js文件加入到static下
 entity层
树状图的表
@Data
@Entity
@Table(name = "table1")
public class Table1  implements Serializable {

	@Id
	@GeneratedValue(strategy=GenerationType.IDENTITY)
	@Column(name = "id")
	private Integer id;

	@Column(name = "name")
	private String name;

	@Column(name = "num")
	private Integer num;

}
饼状图表
@Data
@Entity
@Table(name = "table2")
public class Table2  implements Serializable {

	@Id
	@GeneratedValue(strategy=GenerationType.IDENTITY)
	@Column(name = "id")
	private Integer id;

	@Column(name = "name")
	private String name;

	@Column(name = "value")
	private Integer value;

}
dao层
树状图dao层
package com.fz.webspark.dao;

import com.fz.webspark.entity.Table1;
import org.springframework.data.jpa.repository.JpaRepository;

public interface Table1Dao extends JpaRepository<Table1,Integer> {
}
饼状图dao层
package com.fz.webspark.dao;

import com.fz.webspark.entity.Table2;
import org.springframework.data.jpa.repository.JpaRepository;

public interface Table2Dao extends JpaRepository<Table2,Integer> {
}
service层
树状图Service
package com.fz.webspark.service;

import com.fz.webspark.dao.Table1Dao;
import com.fz.webspark.entity.Table1;
import org.springframework.beans.factory.annotation.Autowired;
import org.springframework.stereotype.Service;
import org.springframework.transaction.annotation.Transactional;

import java.util.List;

@Service
@Transactional
public class Table1Service {
    @Autowired
    Table1Dao table1Dao;
    public List<Table1> findAll(){
        return table1Dao.findAll();
    }
}
饼状图service
package com.fz.webspark.service;


import com.fz.webspark.dao.Table2Dao;
import com.fz.webspark.entity.Table2;
import org.springframework.beans.factory.annotation.Autowired;
import org.springframework.stereotype.Service;
import org.springframework.transaction.annotation.Transactional;

import java.util.List;

@Service
@Transactional
public class Table2Service {
    @Autowired
    Table2Dao table2Dao;
    public List<Table2> findAll(){
        return table2Dao.findAll();
    }
}
controller层
HelloSpringBoot.java
package com.fz.webspark.controller;
import org.springframework.web.bind.annotation.RequestMapping;
import org.springframework.web.bind.annotation.RequestMethod;
import org.springframework.web.bind.annotation.RestController;
import org.springframework.web.servlet.ModelAndView;
@RestController
public class HelloSpringBoot {
@RequestMapping(value="/hello",method = RequestMethod.GET)
public String sayHello(){
return "Hello Spring Boot!";
}
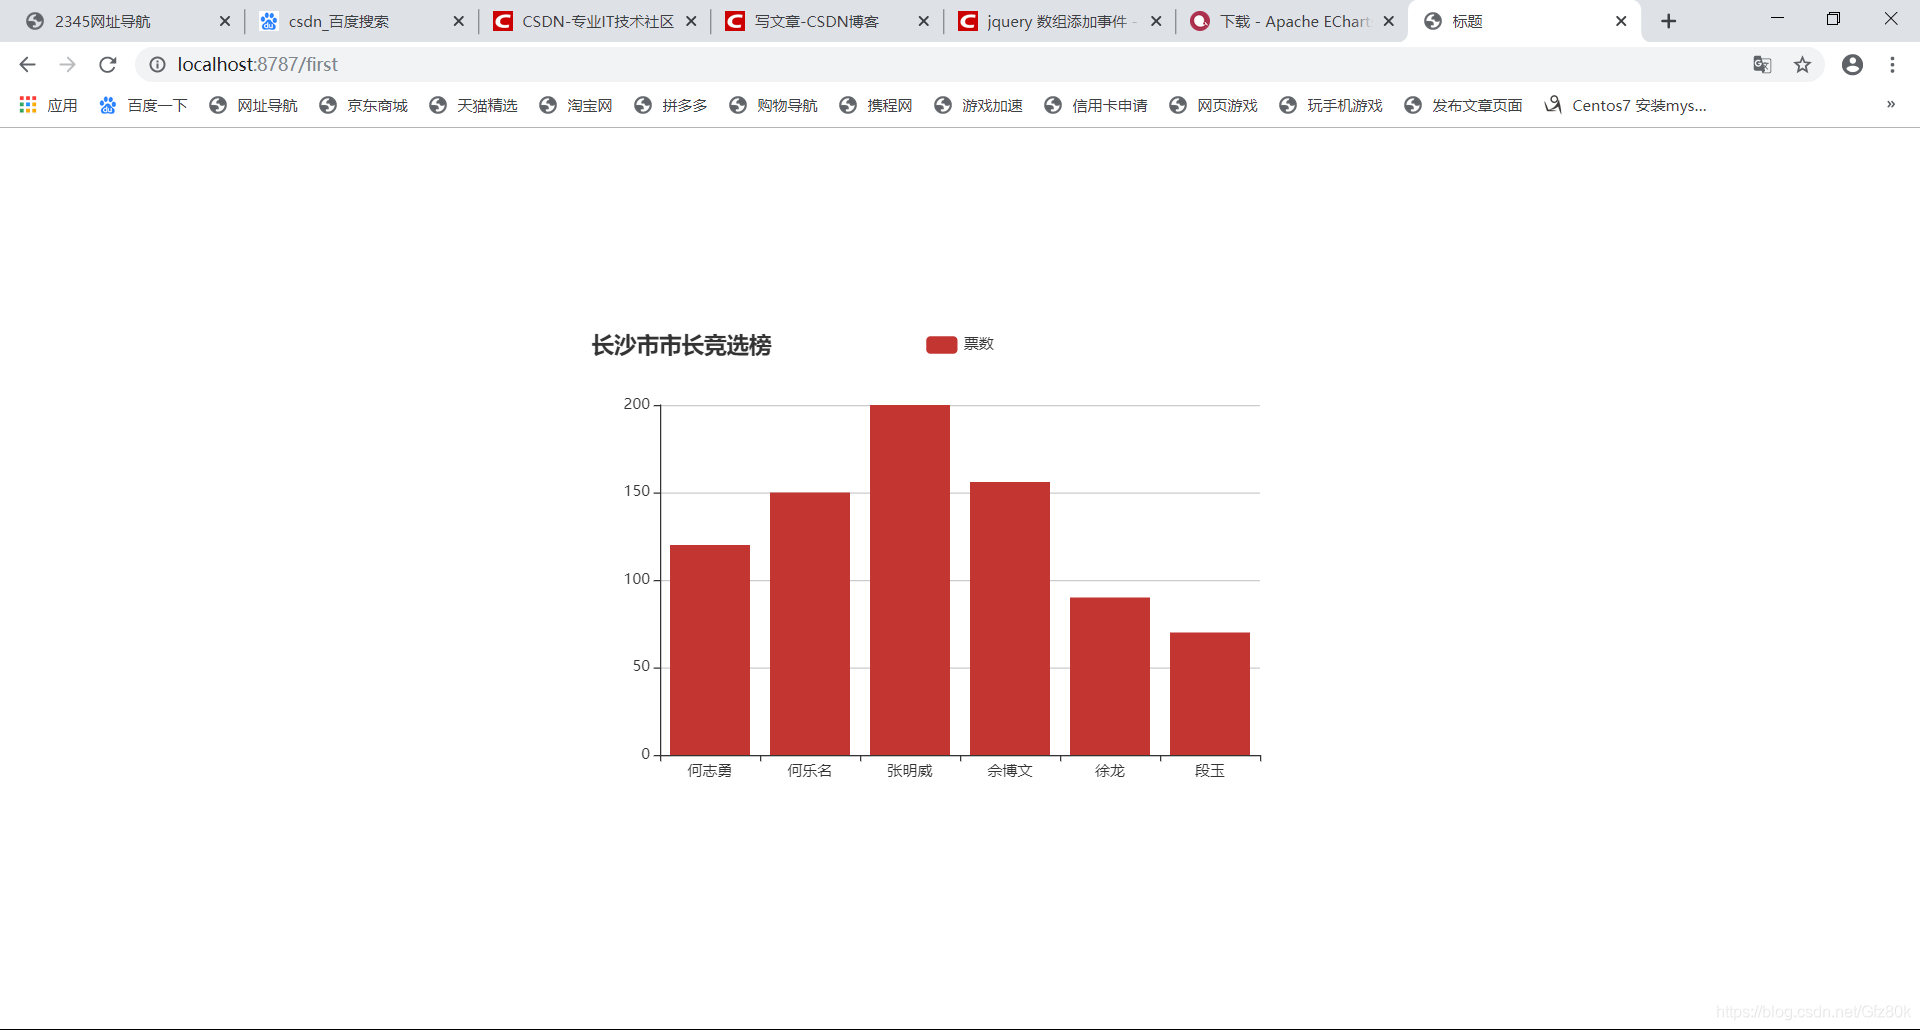
@RequestMapping(value="/first",method = RequestMethod.GET)
public ModelAndView firstDemo(){
return new ModelAndView("test");//跟templates文件夹下的test.html名字一样,返回这个界面
}
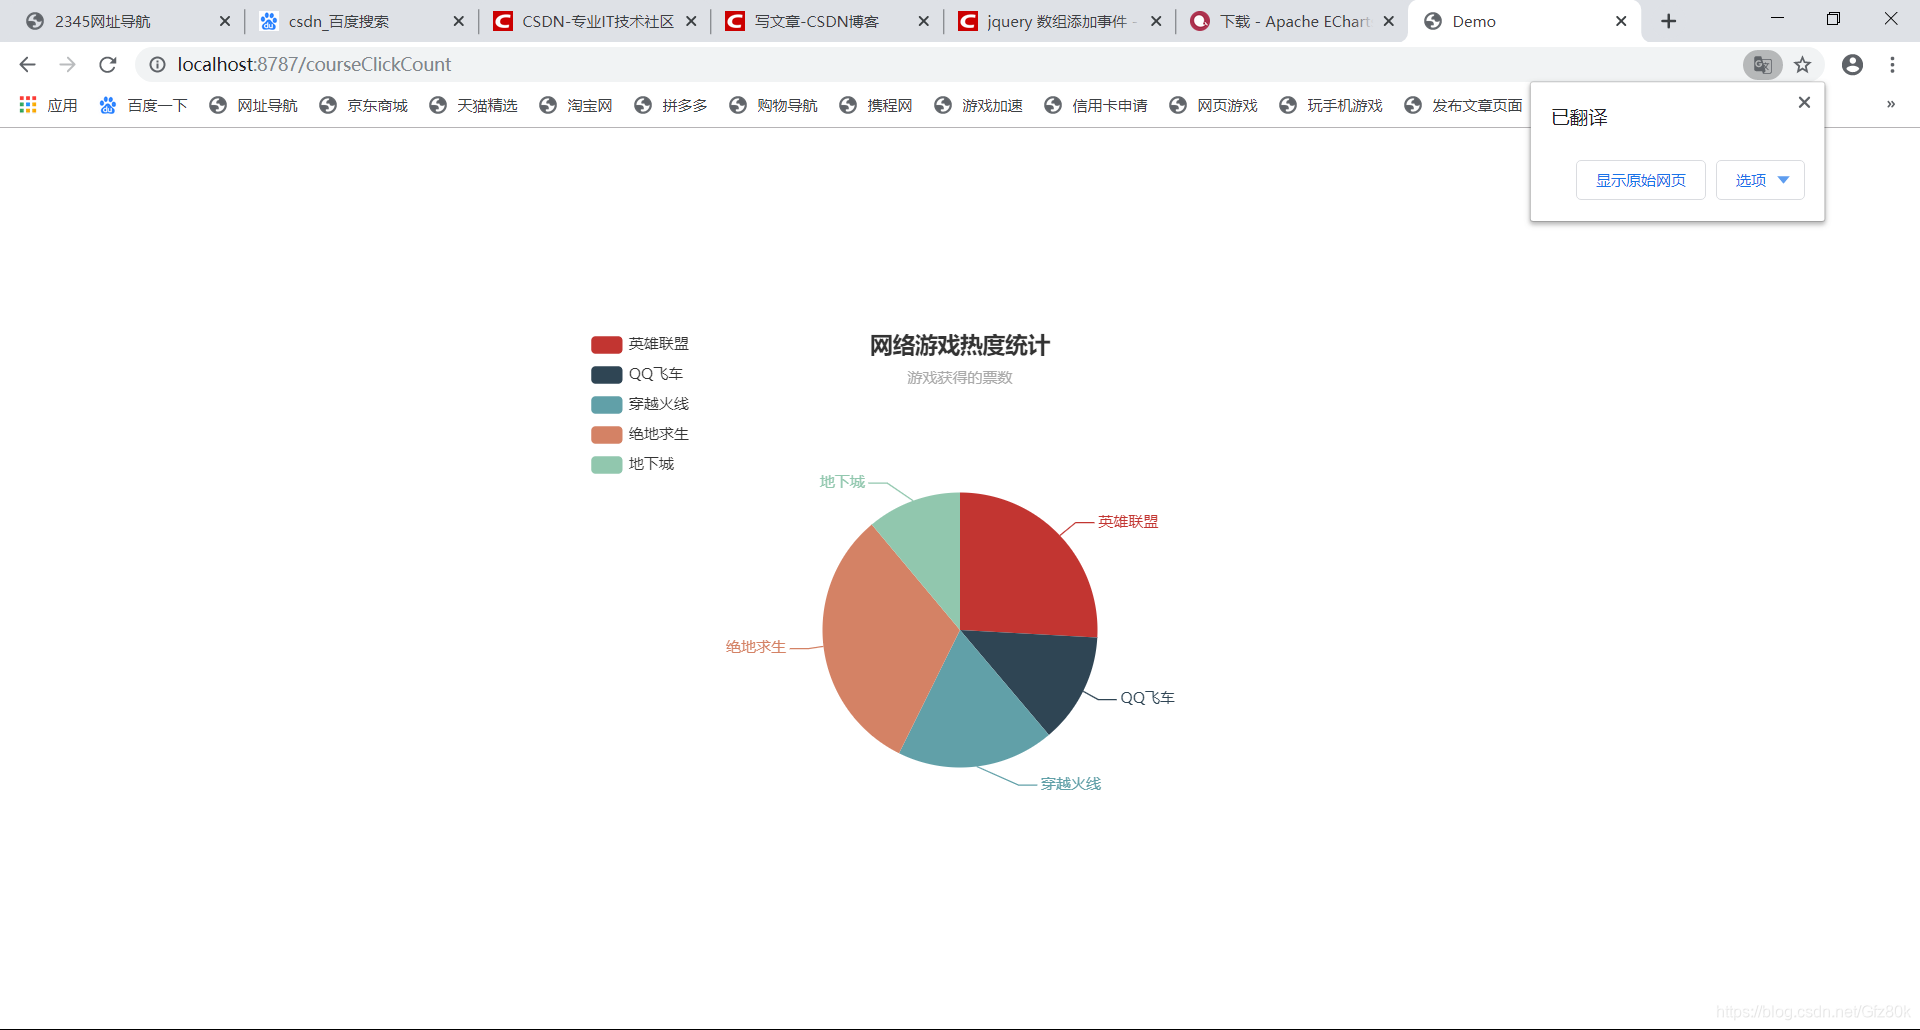
@RequestMapping(value="/courseClickCount",method = RequestMethod.GET)
public ModelAndView courseClickCountStat(){
return new ModelAndView("demo");//跟templates文件夹下的demo.html名字一样,返回这个界面
}
}
Table1Controller
package com.fz.webspark.controller;
import org.springframework.web.bind.annotation.RequestMapping;
import org.springframework.web.bind.annotation.RequestMethod;
import org.springframework.web.bind.annotation.RestController;
import org.springframework.web.servlet.ModelAndView;

@RestController
public class HelloSpringBoot {

    @RequestMapping(value="/hello",method = RequestMethod.GET)
    public String sayHello(){

        return "Hello Spring Boot!";

    }

    @RequestMapping(value="/first",method = RequestMethod.GET)
    public ModelAndView firstDemo(){

        return new ModelAndView("test");//跟templates文件夹下的test.html名字一样,返回这个界面

    }

    @RequestMapping(value="/courseClickCount",method = RequestMethod.GET)
    public ModelAndView courseClickCountStat(){

        return new ModelAndView("demo");//跟templates文件夹下的demo.html名字一样,返回这个界面

    }
}
Table2Contoller
package com.fz.webspark.controller;


import com.fz.webspark.entity.Table2;
import com.fz.webspark.service.Table2Service;
import org.springframework.beans.factory.annotation.Autowired;
import org.springframework.web.bind.annotation.RequestMapping;
import org.springframework.web.bind.annotation.RestController;

import java.util.List;

@RestController
public class Table2Controller {
    @Autowired
    Table2Service table2Service;
    @RequestMapping("/lastApi")
    public List<Table2> findAll(){
        return table2Service.findAll();
    }
}
html
test.html
<!DOCTYPE html>
<html lang="en">
<head>
    <meta charset="UTF-8">
    <title>Title</title>
    <!-- 引入 ECharts 文件 -->
    <script src="js/echarts.min.js"></script>
</head>
<body>
<!-- 为 ECharts 准备一个具备大小(宽高)的 DOM -->
<div id="main" style="width: 600px;height:400px;position:absolute;top:50%;left: 50%;margin-top: -200px;margin-left: -300px;"></div>

<script src="https://code.jquery.com/jquery-3.2.1.min.js"></script>
<script type="text/javascript">
    var option;
        var arr1=[]
        var arr2=[]
    // 基于准备好的dom,初始化echarts实例
    var myChart = echarts.init(document.getElementById('main'));//main是<div id="main" style="width: 600px;height:400px;"></div>的id
    // 指定图表的配置项和数据
    $.get("firstApi",function (result) {
        $.each(result,function (index,item) {
            arr1.push(item.name);
            arr2.push(item.num);
        })
        option = {
            title: {
                text: '长沙市市长竞选榜'
            },
            tooltip: {},
            legend: {
                data:['票数']
            },
            xAxis: {
                data: arr1
            },
            yAxis: {},
            series: [{
                name: '票数',
                type: 'bar',
                data: arr2
            }]
        };
        // 使用刚指定的配置项和数据显示图表。
        myChart.setOption(option);
    })
</script>
</body>
</html>
demo.html
<!DOCTYPE html>
<html lang="en">
<head>
    <meta charset="UTF-8">
    <title>Demo</title>
    <!-- 引入 ECharts 文件 -->
    <script src="js/echarts.min.js"></script>
</head>
<body>
<!-- 为 ECharts 准备一个具备大小(宽高)的 DOM -->
<div id="main" style="width: 600px;height:400px;position:absolute;top:50%;left: 50%;margin-top: -200px;margin-left: -300px;"></div>
<script src="https://code.jquery.com/jquery-3.2.1.min.js"></script>
<script type="text/javascript">
    var option;
    var arr1=[]
    var arr2=[]
    // 基于准备好的dom,初始化echarts实例
    var myChart = echarts.init(document.getElementById('main'));//main是<div id="main" style="width: 600px;height:400px;"></div>的id

    // 指定图表的配置项和数据
    $.get("lastApi",function(result){
        arr1=result;
        $.each(result,function (index,item) {
            arr2.push(item.name);
        })
        option={
            title : {
                text: '网络游戏热度统计',
                subtext: '游戏获得的票数',
                x:'center'
            },
            tooltip : {
                trigger: 'item',
                formatter: "{a} <br/>{b} : {c} ({d}%)"
            },
            legend: {
                orient: 'vertical',
                left: 'left',
                data: arr2
            },
            series : [
                {
                    name: '票数数',
                    type: 'pie',
                    radius : '55%',
                    center: ['50%', '60%'],
                    data:arr1,
                    itemStyle: {
                        emphasis: {
                            shadowBlur: 10,
                            shadowOffsetX: 0,
                            shadowColor: 'rgba(0, 0, 0, 0.5)'
                        }
                    }
                }
            ]
        };
        myChart.setOption(option);
    })
    // 使用刚指定的配置项和数据显示图表。

</script>
</body>
</html>
执行结果
 到此springboot整合echarts完成!


 4995
4995

 被折叠的 条评论
为什么被折叠?
被折叠的 条评论
为什么被折叠?
 到【灌水乐园】发言


