


一、开始前须知:
开发环境:
1、HBuilder4.15:HBuilderX-高效极客技巧 --- 最新版本有无法识别当地小程序的问题,选择前面的版本
2、微信开发者工具:微信开发者工具下载地址与更新日志 | 微信开放文档
uniapp与原生的区别(个人感觉):
1、原生用的是WXML、WXSS、JS,使用wx:for等指令
2、uniapp相当于是 vue + 原生,使用vue对应指令(v-for等),没有window、document对象,调用API使用uni对象(uni.navigateToD等)
二、创建项目流程:
2.1 配置环境:
HBuilder + 微信开发者工具下载安装
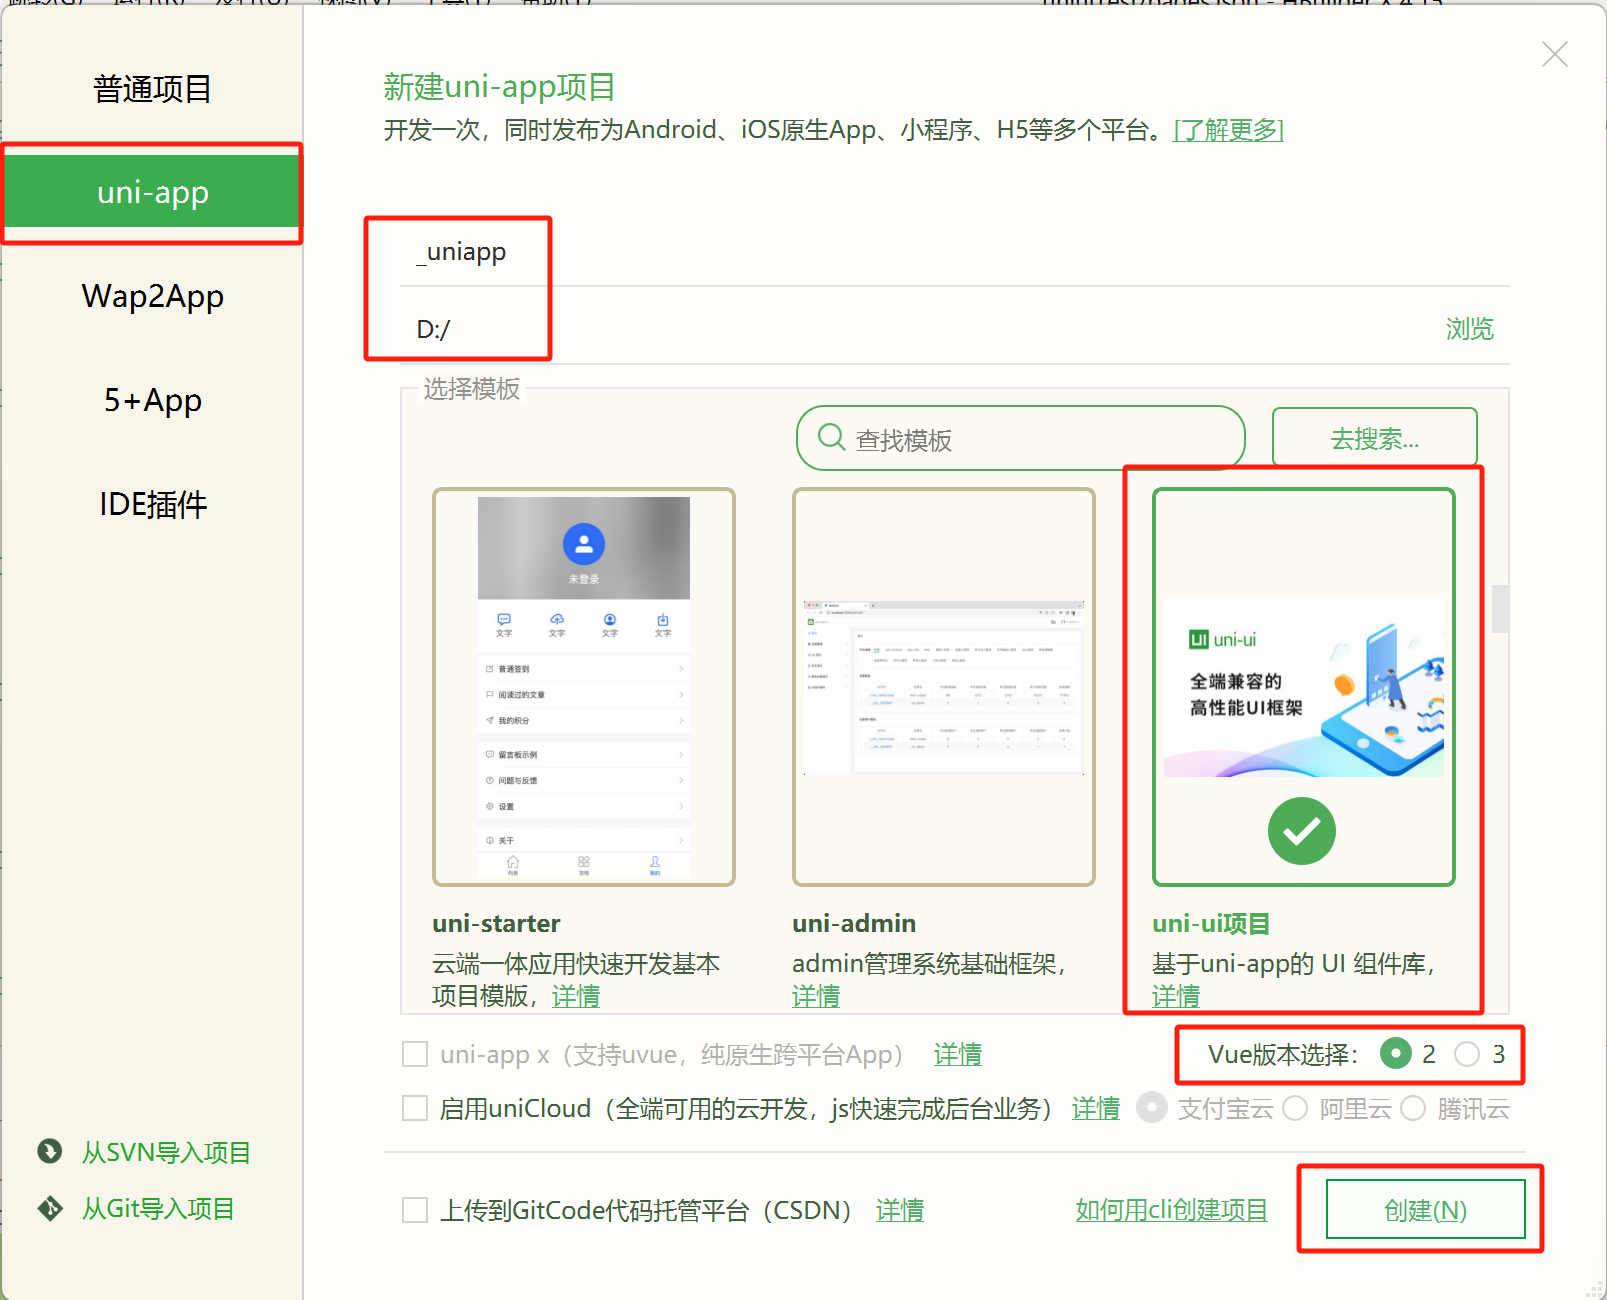
2.2 创建项目
这里以Vue2为例,选择uni-ui为模版,uni-ui是uniapp的组件库,在官网查看具体用法
2.3 运行到微信开发者工具
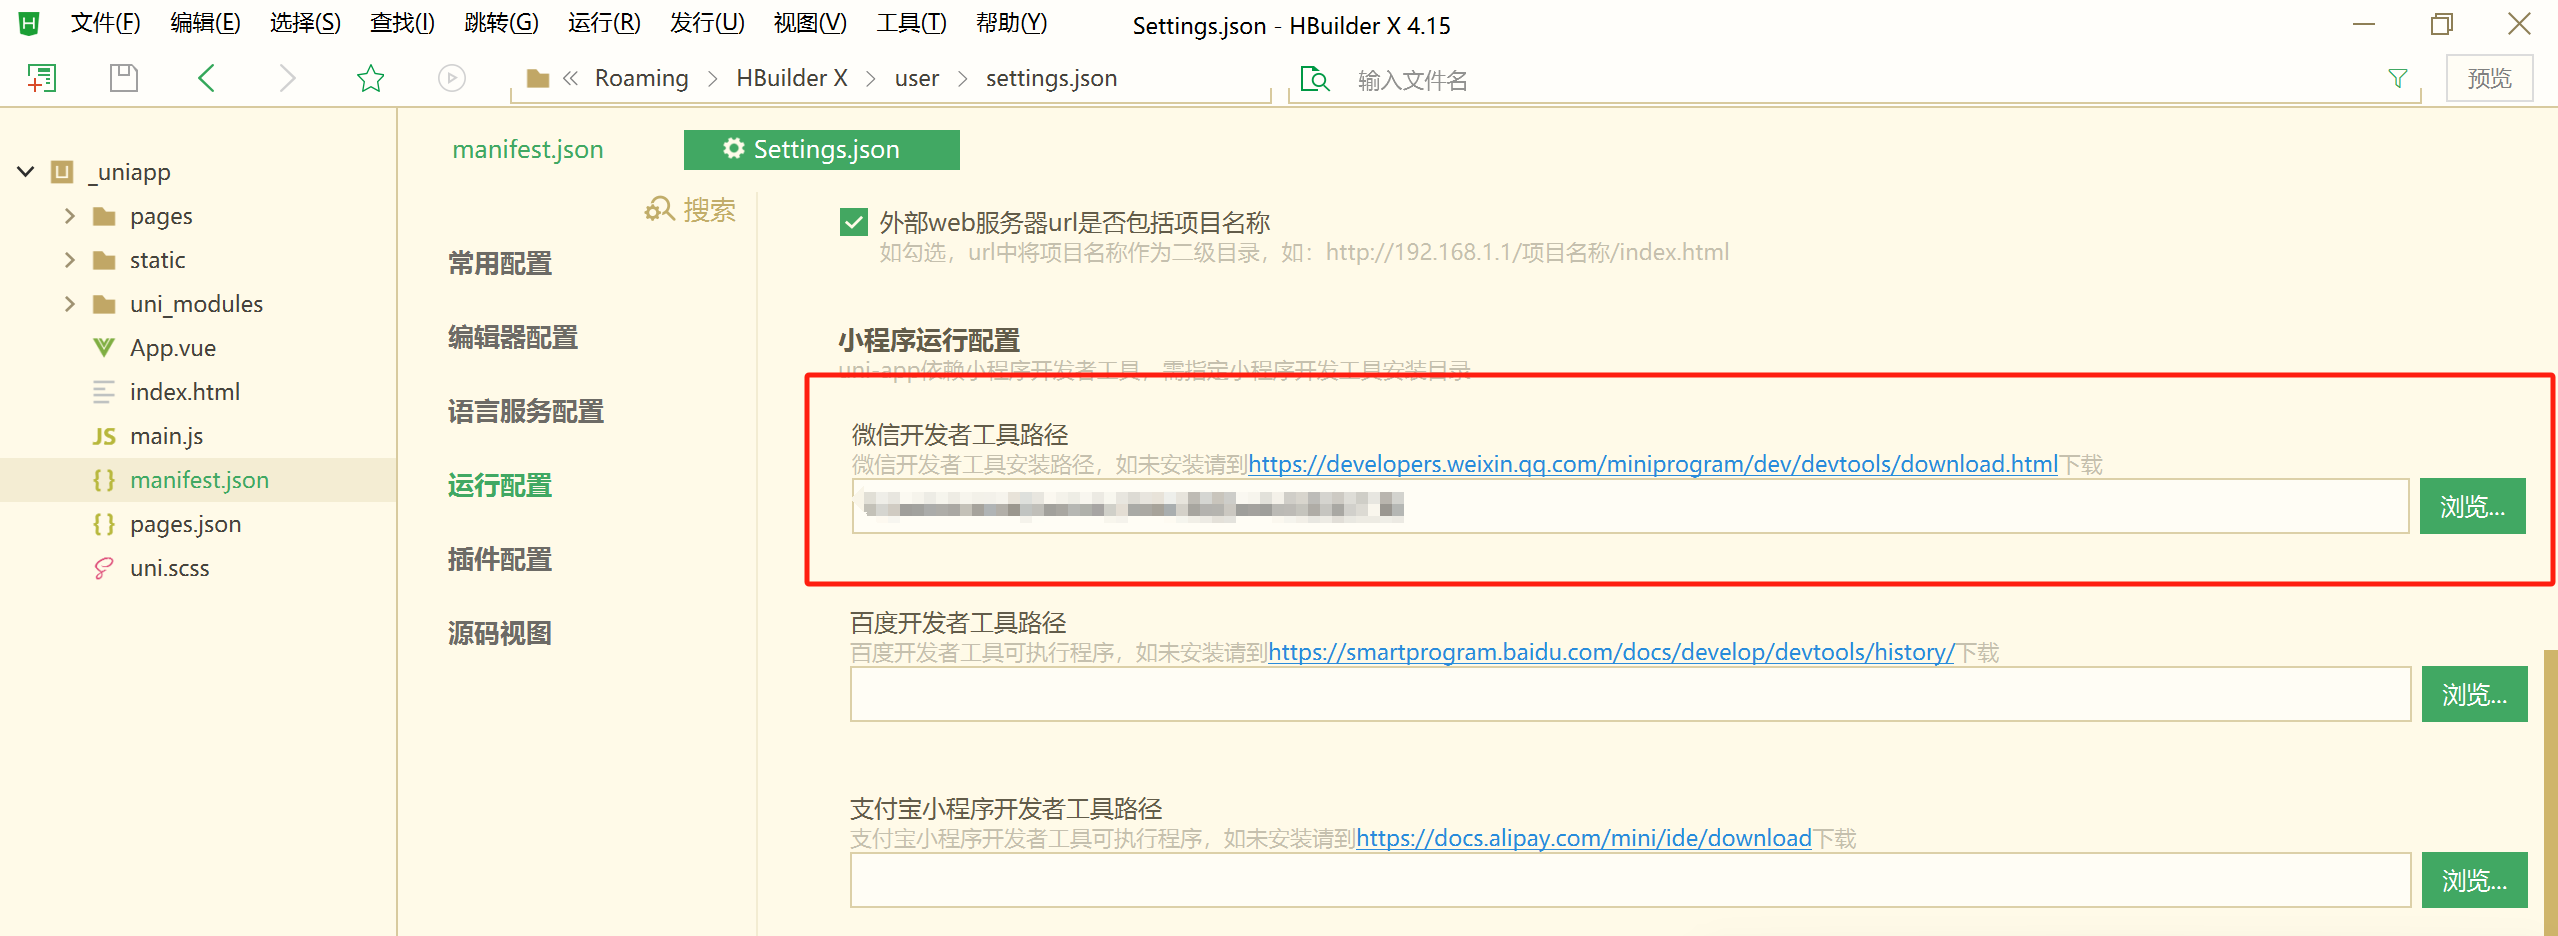
- uniapp中:工具—>设置—>运行配置 中设置微信开发者工具路径
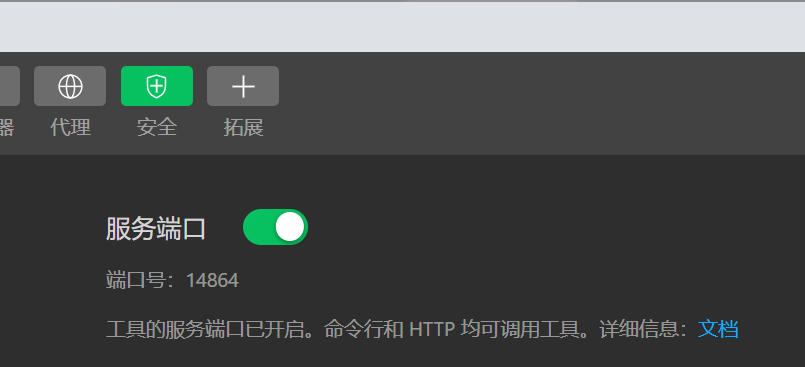
- 微信开发者工具中:设置—>安全设置,打开服务端口
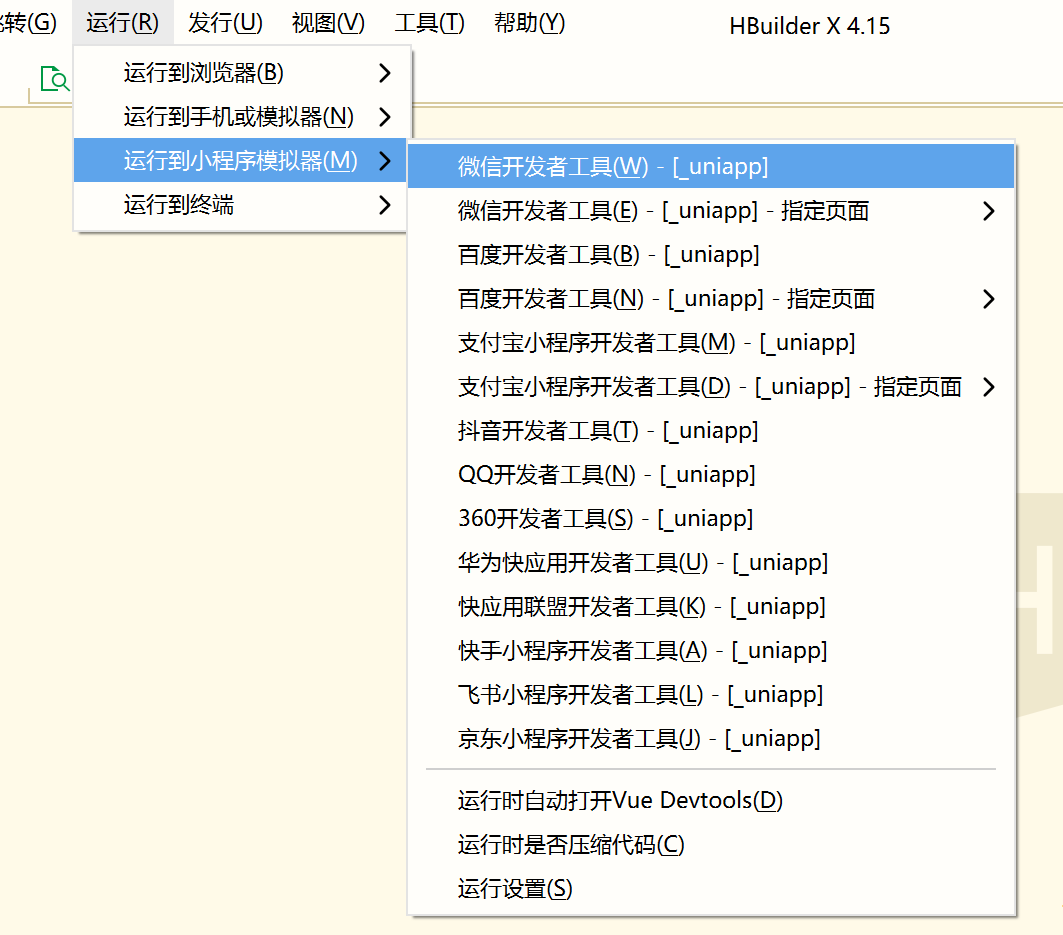
2.4 在uniapp中运行
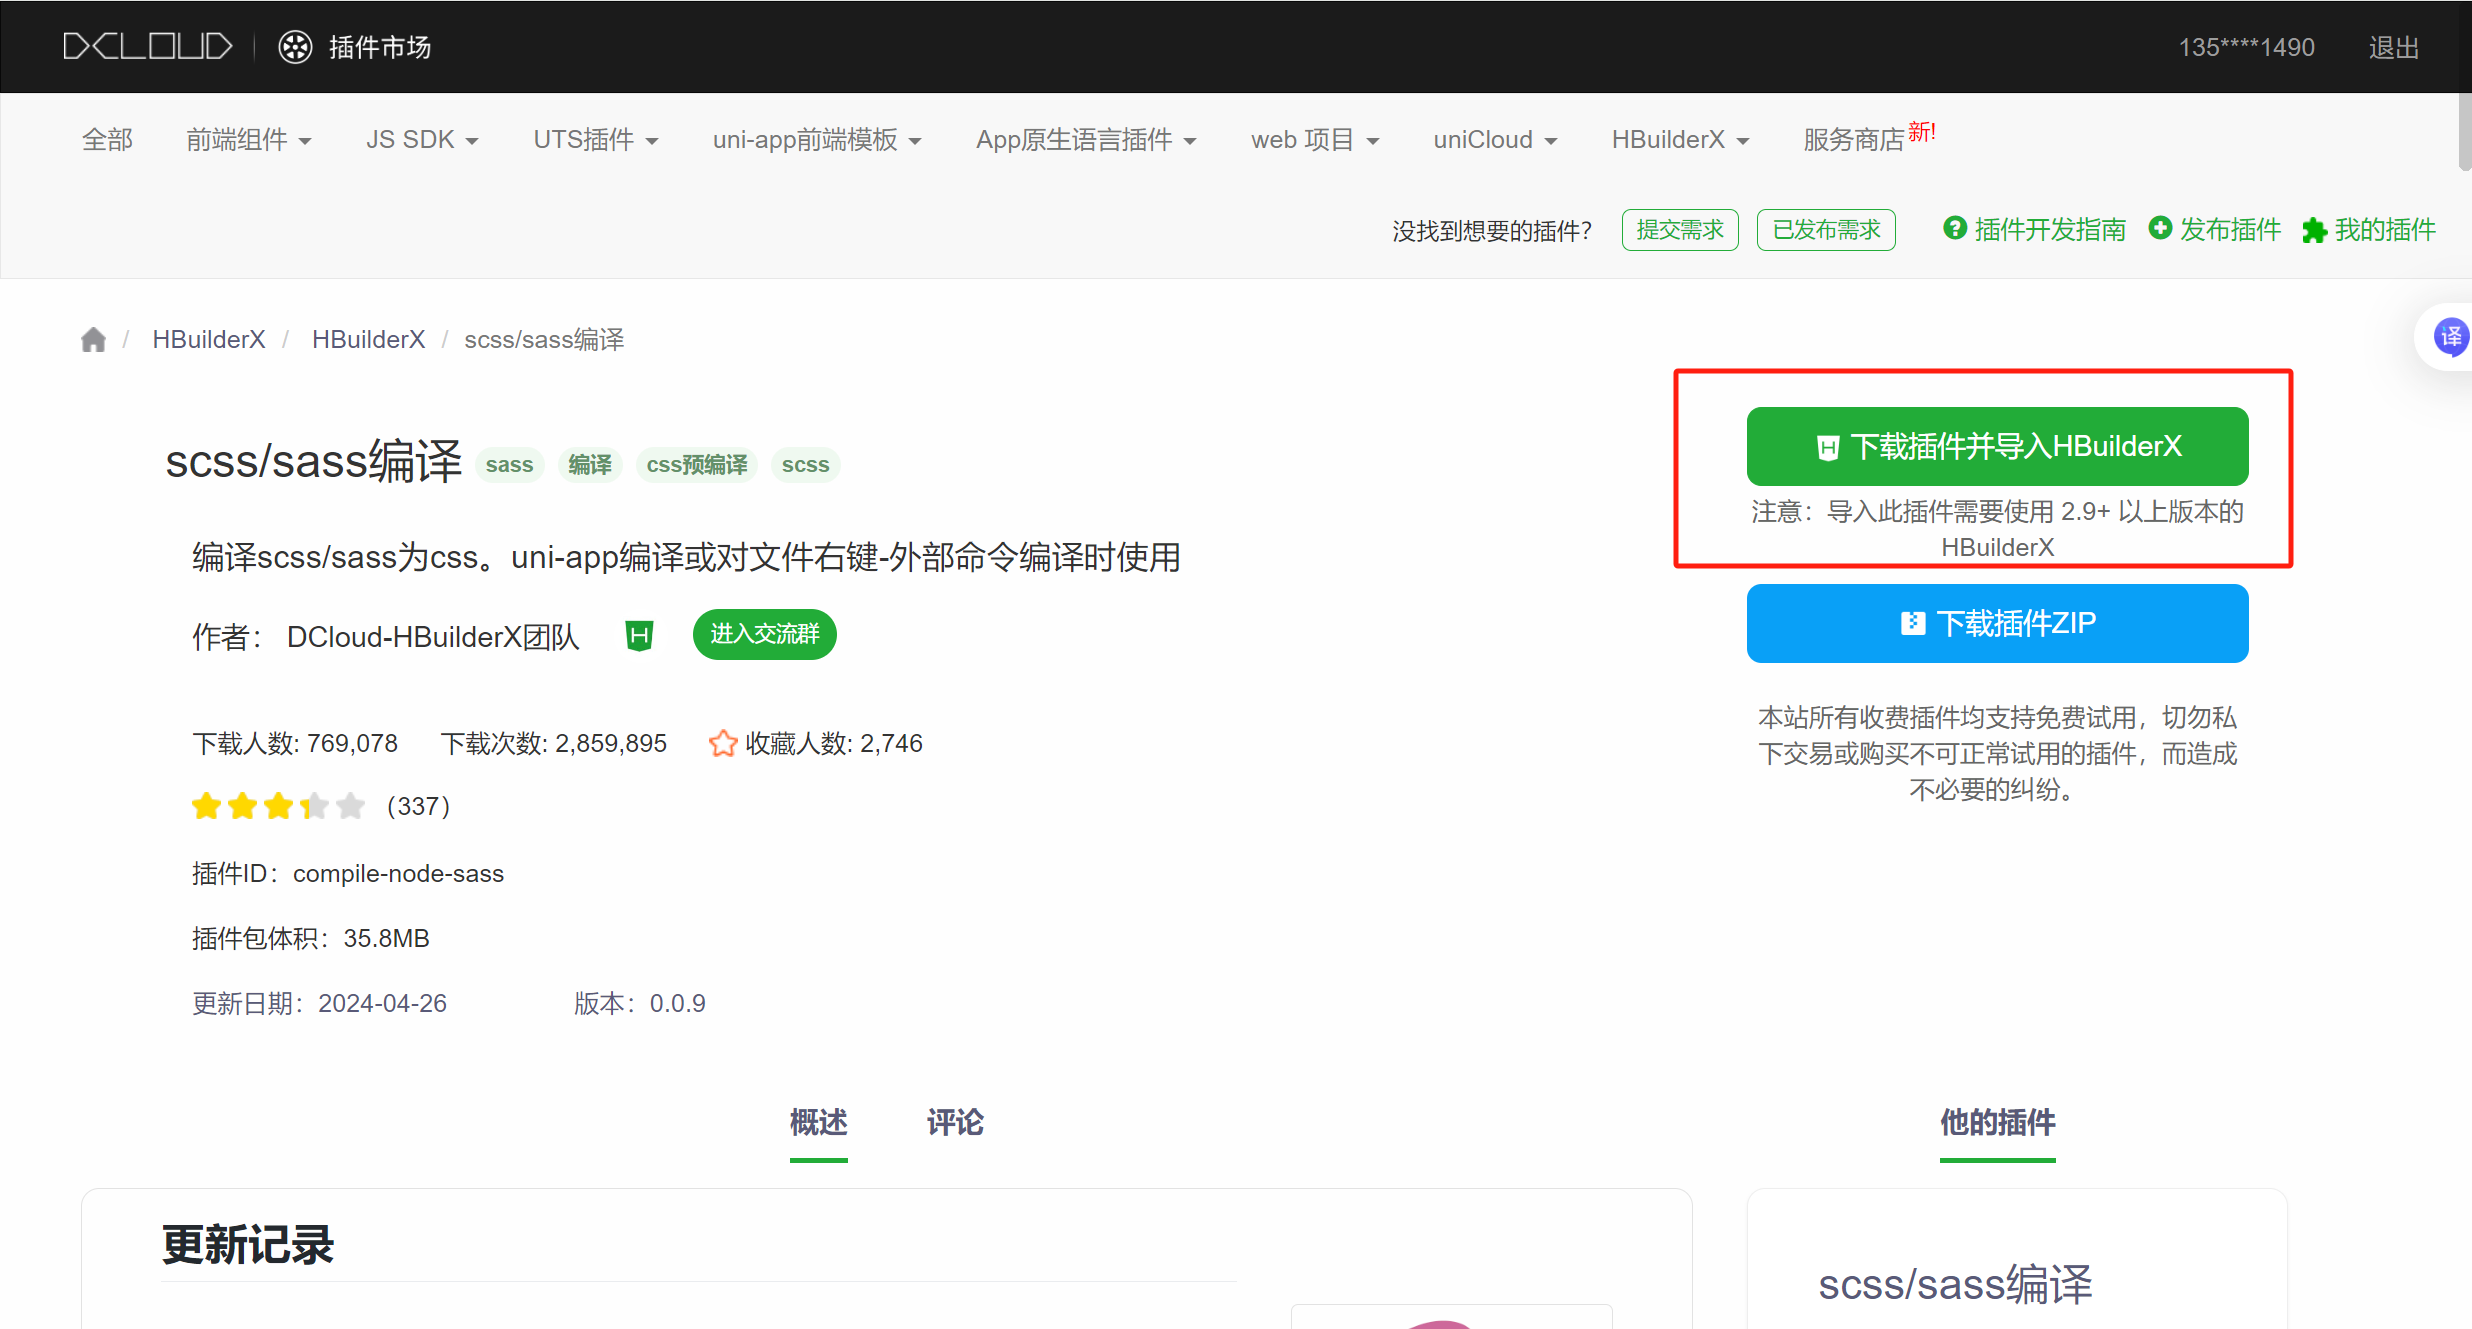
2.5 配置Sass编译器
三、开发中记录:
3.1 v-if 和 v-for同时作用时,v-if失效
踩坑代码:
<view class="right-img-box">
  <view class="right-img-item" v-for="(item2, i2) in item.product_list" :key="i2" v-if="i2 !== 0">
    <image :src="item2.image_src" mode="widthFix" :style="{width: item2.image_width + 'rpx'}"></image>
  </view>
</view>
原因:
在 UniApp 中,
v-if和v-for同时作用于同一个元素时,可能会因为编译到小程序后的优先级问题导致条件判断失效。
解决方法:
1、使用<block>包裹,分离渲染逻辑
2、使用计算属性直接得到要渲染的部分
3、直接使用数组的方法,在v-for中修改遍历范围
// block包裹
<view class="right-img-box">
  <block v-for="(item2, i2) in item.product_list" :key="i2">
    <view class="right-img-item" v-if="i2 !== 0">
      <image :src="item2.image_src" mode="widthFix" :style="{width: item2.image_width + 'rpx'}"></image>
    </view>
  </block>
</view>

// 计算属性computed
computed: {
  filteredList() {
    return this.item.product_list.filter((_, index) => index !== 0);
  }
}
<view class="right-img-item" v-for="(item2, i2) in filteredList" :key="i2">
  <image :src="item2.image_src" mode="widthFix" :style="{width: item2.image_width + 'rpx'}"></image>
</view>

// 修改v-for遍历范围
<view class="right-img-item" v-for="(item2, i2) in item.product_list.slice(1)" :key="i2">
  <text>{{ i2 + 1 }}</text> <!-- 注意索引偏移 -->
  <image :src="item2.image_src" mode="widthFix" :style="{width: item2.image_width + 'rpx'}"></image>
</view>
3.2 scroll-view滚动条重置
踩坑代码:
场景:商城左侧一级分类列表,右侧二级分类列表,两边都是scroll-view,点击左侧列表项,右侧列表更新,希望更新时滚动条重置---在最顶上
// template
<scroll-view class="right-scroll-view" scroll-y :style="{height: wh + 'px'}" :scroll-top="scrollTop">
  <view class="cate-lv2" v-for="(item2, i2) in cateLevel2" :key="i2" @click="activeChanged(i)">xxx</view>
</scroll-view>

// js
data() {
  return: {
    scrollTop: 0
  }
},
methods:{
  activeChanged(i){
    this.scrollTop = 0
  }
}
原因:
scroll-view动态绑定scroll-top的值后如果赋值前后的值一样,滚动条不会进行重置
解决方法:
在对scroll-top进行赋值时采用不一样的值,比如0和1,用户视觉上差别不大但是可以实现滚动条重置效果
// template
<scroll-view class="right-scroll-view" scroll-y :style="{height: wh + 'px'}" :scroll-top="scrollTop">
  <view class="cate-lv2" v-for="(item2, i2) in cateLevel2" :key="i2" @click="activeChanged(i)">xxx</view>
</scroll-view>

// js
data() {
  return: {
    scrollTop: 0
  }
},
methods:{
  activeChanged(i){
    this.scrollTop = this.scrollTop ? 0 : 1
  }
}
3.3 rich-text标签的使用
实现效果:
官网说明链接:rich-text | uni-app官网
富文本效果 —— 可以实现html和css效果
具体使用:
1、通过 nodes属性 传入内容
2、nodes属性支持形式:数组形式的节点列表、HTML字符串
3、在数组形式的节点列表中,有两种节点 —— 元素节点(node)和文本节点(text)
4、元素节点:一个对象,定义HTML元素
包含属性:
type:字符串,固定为'node',表示这是一个元素节点。
name:字符串,表示 HTML 元素的标签名,例如'div'、'p'、'a'等。
attrs(可选):对象,表示元素的属性,例如class、style、href等。
children(可选):数组,表示元素的子节点,可以包含其他元素节点或文本节点。5、文本节点:纯文本内容
包含属性:
type:字符串,固定为'text',表示这是一个文本节点。
text:字符串,表示文本内容。
// 数组形式的节点列表
<template>
  <rich-text :nodes="richTextNodes"></rich-text>
</template>

<script>
export default {
  data() {
    return {
      richTextNodes: [
        // 根元素节点(div)
        {
          type: 'node',
          name: 'div',
          attrs: {
            class: 'rich-text-content',
            style: 'color: #333; padding: 10px; border: 1px solid #ddd;'
          },
          children: [
            // 文本节点
            {
              type: 'text',
              text: '欢迎使用富文本组件!'
            },
            // 换行
            {
              type: 'node',
              name: 'br'
            },
            // 加粗文本(span)
            {
              type: 'node',
              name: 'span',
              attrs: {
                style: 'font-weight: bold; color: #ff5722;'
              },
              children: [
                {
                  type: 'text',
                  text: '这是一个加粗的文本'
                }
              ]
            },
            // 换行
            {
              type: 'node',
              name: 'br'
            },
            // 链接(a)
            {
              type: 'node',
              name: 'a',
              attrs: {
                href: 'https://uniapp.dcloud.io',
                target: '_blank',
                style: 'color: #007aff; text-decoration: none;'
              },
              children: [
                {
                  type: 'text',
                  text: '访问 UniApp 官方文档'
                }
              ]
            },
            // 换行
            {
              type: 'node',
              name: 'br'
            },
            // 图片(img)
            {
              type: 'node',
              name: 'img',
              attrs: {
                src: 'https://example.com/image.png',
                style: 'width: 200px; height: 200px; display: block; margin: 10px auto;'
              }
            }
          ]
        }
      ]
    };
  }
};
</script>

// HTML字符串形式
<template>
  <rich-text :nodes="richTextHtml"></rich-text>
</template>

<script>
export default {
  data() {
    return {
      richTextHtml: `
        <div class="rich-text-content" style="color: #333;">
          这是一段富文本内容,<span style="font-weight: bold;">带有加粗效果的文字</span>,
          以及 <a href="https://uniapp.dcloud.io/component/rich-text" target="_blank" style="color: blue;">链接</a>。
          <img src="https://example.com/image.png" style="width: 200px; height: 200px;" />
        </div>
      `,
    };
  },
};
</script>


 2376
2376

 被折叠的 条评论
为什么被折叠?
被折叠的 条评论
为什么被折叠?
 到【灌水乐园】发言


