


 本文详细介绍了在React应用中如何通过状态提升实现父子组件间的通信。通过一个实例展示了当用户在摄氏度输入框中输入温度时,如何更新父组件状态,并同步到华氏度输入框,以及子组件如何通过props向父组件传递值进行状态变更。文章涵盖了React组件状态管理、props传递、事件处理和温度转换函数等核心概念。
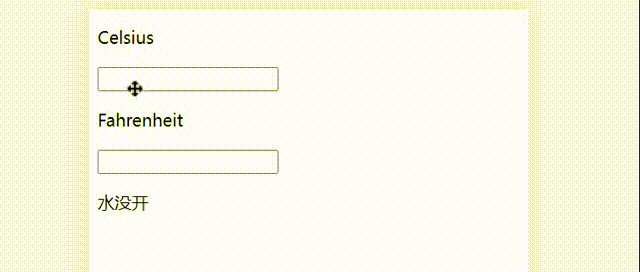
来自react 官网状态提升
father
假设在摄氏度输入框中输入温度:
1.父组件中的状态: scale:c , temperature:''
this.state = {temperature: '',scale:'c'}
2.摄氏度输入框从父组件中得到 scale:c , temperature:' '。
<Son2 scale="c" temperature={celsius} onTemperatureChange={this.handleCelsiusChange}></Son2>2-1.父组件传递给子组件一个 onTemperatureChange 方法,方法为:handleCelsiusChange 此方法用来修改父组件中的状态。
handleCelsiusChange(temperature) {
        this.setState({scale: 'c', temperature})
2-2.父组件传递给子组件一个属性 temperature,为: celsius :
celsius = scale === 'f' ? tryConvert(temperature, toCelsius) : temperature;判断 scale 的值是否为 f 如果是则执行 toCelsius 函数,
function toCelsius(fahrenheit) {
    return (fahrenheit - 32) * 5 / 9;
  }
如果不是,则直接将 temperature 传递给子组件。
因为父组件中最初的状态 scale:c 所以这里父组件传递给摄氏度输入框的 temperature 为 父组件的 temperature:' '
3.子组件
<input value={temperature} onChange={this.handleChange}/>3.1 子组件摄氏度输入框的值 value={temperature} 为 value = ' ',
3.2 当向摄氏度输入框输入值假设输入 100 ,触发 onChange={this.handleChange} 事件。
handleChange(e) {
        this.props.onTemperatureChange(e.target.value)
3.3 handleChange 方法为: this.props.onTemperatureChange(e.target.value) 获取到输入框的值 e.target.value = 100,并将值传递给 onTemperatureChange
4. 父组件中触发 handleCelsiusChange 将 temperature 改为 摄氏度输入框中的值 this.setState({scale: 'c', temperature=100})
5. 此时华氏度输入框从父组件状态中得到的数据将是 :scale: 'c', temperature=100
6. 判断 scale 等于 c 将执行 toFahrenheit 函数。将温度修改为华氏度 212
7.如果在华氏度输入框中输入一个值时,那么将会把这个值通过父组件传递过来的方法 onTemperatureChange 传回这个值给父组件,
8.父组件接收到新的值,修改状态,同时将状态同步到摄氏度输入框。
全部代码:
import React from "react";
import Son1 from './Son1'
import Son2 from './Son2'
// 定义一个函数将 华氏度 转为 摄氏度
function toCelsius(fahrenheit) {
    return (fahrenheit - 32) * 5 / 9;
  }
// 定义一个函数将 摄氏度 转为 华氏度
function toFahrenheit(celsius) {
    return (celsius * 9 / 5) + 32;
  }
function tryConvert(temperature, convert) {
    const input = parseFloat(temperature);
    if (Number.isNaN(input)) {
      return '';
    }
    const output = convert(input);
    const rounded = Math.round(output * 1000) / 1000;
    return rounded.toString();
}
export default class Father extends React.Component {
    constructor(props) {
        super(props)
        this.handleCelsiusChange = this.handleCelsiusChange.bind(this)
        this.handleFahrenheitChange = this.handleFahrenheitChange.bind(this)
        this.state = {temperature: '',scale:'c'}
    }
    // handleChange(e) {
    //     this.setState({temperature: e.target.value})
    // }
    // 创建一个方法,将摄氏度子组件输入框传递过来的 temperature 的值保存在 state 中
    handleCelsiusChange(temperature) {
        this.setState({scale: 'c', temperature});
        console.log(temperature)
    }
    // 创建一个方法,将华氏度子组件输入框传递过来的 temperature 的值保存在 state 中
    handleFahrenheitChange(temperature) {
        this.setState({scale: 'f', temperature});
    }

    render() {
        // const temperature = this.state.temperature
        const scale = this.state.scale;
        const temperature = this.state.temperature;
        // 判断 如果为 华氏度 则执行 函数 toCelsius,如果不为华氏度,则直接 摄氏度 等于 temperature
        const celsius = scale === 'f' ? tryConvert(temperature, toCelsius) : temperature;
        const fahrenheit = scale === 'c' ? tryConvert(temperature, toFahrenheit) : temperature;
        return (
            // <>
            // <input value={temperature} onChange={this.handleChange} />
            // <Son1 num={parseFloat(temperature)}></Son1>
            // </>
            <div>
                <Son2 scale="c" temperature={celsius} onTemperatureChange={this.handleCelsiusChange}></Son2>
                <Son2 scale="f" temperature={fahrenheit} onTemperatureChange={this.handleFahrenheitChange}></Son2>
                <Son1 num={parseFloat(celsius)}></Son1>
            </div>
        )
    }
}
son1
import React from "react";
export default function Son01 (props) {
    if (props.num >= 100) {
        return <p> 水开了 </p>
    }
    return <p> 水没开 </p>
}
son2
import React from "react";
const scaleNames = {
    c: 'Celsius',
    f: 'Fahrenheit'
  }
export default class Son2 extends React.Component {
    constructor(props) {
        super(props)
        this.handleChange = this.handleChange.bind(this)
        console.log(this)
        // this.state = {temperature: ''}
    }
    handleChange(e) {
        // this.setState({temperature:e.target.value})
        this.props.onTemperatureChange(e.target.value)
    }
    render() {
        const temperature = this.props.temperature
        const scale = this.props.scale
        return (
            <>
            <p>{scaleNames[scale]}</p>
            <input value={temperature} onChange={this.handleChange}/>
            </>
        )
    }
}


 1705
1705

 被折叠的 条评论
为什么被折叠?
被折叠的 条评论
为什么被折叠?
 到【灌水乐园】发言


