


 本文详细介绍了Spring中JDBC模板的使用,包括入门案例、数据库连接池配置(DBCP和C3P0)、CRUD操作以及事务管理API的应用。通过具体的代码示例展示了如何配置Spring的JDBC模板进行数据操作,并讲解了PlatformTransactionManager、TransactionDefinition和TransactionStatus等事务管理接口的作用。
一、JDBC模板
Spring对持久层也有解决方案,提供了很多模板
1.1 入门案例
jar包引入:
- 基本jar包
- 数据库驱动哦
- Spring的JDBC模板jar包
- 单元测试jar包

1.2 数据库建表
建表语句如下:
CREATE DATABASE spring4_demo01;

USE spring4_demo01;

CREATE TABLE account(
	id INT PRIMARY KEY AUTO_INCREMENT,
	NAME VARCHAR(20),
	money DOUBLE
);
1.3 TestDemo:使用JDBC模板
使用JDBC模板
package com.spring4_jdbc.demo01;

import org.junit.Test;
import org.springframework.jdbc.core.JdbcTemplate;
import org.springframework.jdbc.datasource.DriverManagerDataSource;

/**
 * JDBC模板
 * @author cf
 *
 */

//@RunWith(SpringJUnit4ClassRunner.class)
//@ContextConfiguration("classpath:applicationContext.xml")
public class jdbcDemo01 {

	@Test
	public void testDemo01() {
		//创建连接池
		DriverManagerDataSource dataSource = new DriverManagerDataSource();
		dataSource.setDriverClassName("com.mysql.jdbc.Driver");
		dataSource.setUrl("jdbc:mysql://localhost:3305/spring4_demo01");
		dataSource.setUsername("root");
		dataSource.setPassword("root");
		//创建JDBC模板
		JdbcTemplate jdbcTemplate = new JdbcTemplate(dataSource);
		jdbcTemplate.update("insert into account values (null, ?, ?)", "陈星星",100000d);
	}
}
执行后结果如下:

1.4 连接池和模板由Spring管理
spring配置文件applicationContext.xml
<?xml version="1.0" encoding="UTF-8"?>
<beans xmlns="http://www.springframework.org/schema/beans"
    xmlns:xsi="http://www.w3.org/2001/XMLSchema-instance"
    xmlns:aop="http://www.springframework.org/schema/aop" xsi:schemaLocation="
        http://www.springframework.org/schema/beans http://www.springframework.org/schema/beans/spring-beans.xsd
        http://www.springframework.org/schema/aop http://www.springframework.org/schema/aop/spring-aop.xsd"> <!-- bean definitions here -->

	<!-- 配置Spring的内部连接池  -->
	<bean id="dataSource" class="org.springframework.jdbc.datasource.DriverManagerDataSource">
		<!-- 属性注入 -->
		<property name="driverClassName" value="com.mysql.jdbc.Driver"></property>
		<property name="url" value="jdbc:mysql://localhost:3305/spring4_demo01"></property>
		<property name="username" value="root"></property>
		<property name="password" value="root"></property>
	</bean>

	<!-- 配置Spring的JDBC模板 -->
	<bean id="jdbcTemplate" class="org.springframework.jdbc.core.JdbcTemplate">
		<property name="dataSource" ref="dataSource"></property>
	</bean>


</beans>
TestDemo02.java
package com.spring4_jdbc.demo01;
import javax.annotation.Resource;
import org.junit.Test;
import org.junit.runner.RunWith;
import org.springframework.jdbc.core.JdbcTemplate;
import org.springframework.test.context.ContextConfiguration;
import org.springframework.test.context.junit4.SpringJUnit4ClassRunner;
@RunWith(SpringJUnit4ClassRunner.class)
@ContextConfiguration("classpath:applicationContext.xml")
public class jdbcDemo02 {
@Resource(name="jdbcTemplate")
private JdbcTemplate jdbcTemplate;
@Test
public void demo02() {
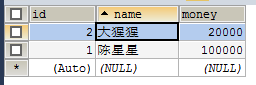
jdbcTemplate.update("insert into account values (null,?,?)", "大猩猩",20000d);
}
}
结果如下:
刚开始报错了,缺少spring aop的jar包,需引入aop的jar再执行
二、开源数据连接池的配置
2.1 DBCP的使用
配置applicationContext.xml,我的数据库端口为3305
<bean id="dataSource" class="org.apache.commons.dbcp.BasicDataSource">
	<property name="driverClassName" value="com.mysql.jdbc.Driver"></property>
	<property name="url" value="jdbc:mysql://localhost:3305/spring4_demo01"></property>
	<property name="username" value="root"></property>
	<property name="password" value="root"></property>
</bean>
2.2 C3P0的使用
<bean id="dataSource" class="com.mchange.v2.c3p0.ComboPooledDataSource">
	<property name="driverClass" value="com.mysql.jdbc.Driver"></property>
	<property name="jdbcUrl" value="jdbc:mysql://localhost:3305/spring4_demo01"></property>
	<property name="user" value="root"></property>
	<property name="password" value="root"></property>
</bean>
2.3 使用外部配置文件
- 使用bean标签引入:
src下新建jdbc.properties文件
jdbc.driverClass=com.mysql.jdbc.Driver
jdbc.url=jdbc:mysql://localhost:3305/spring4_demo01
jdbc.username=root
jdbc.password=root
applicationContext.xml引入配置文件:
	<!-- 引入属性文件 -->
	<!-- 使用bean标签引入(使用较少) -->
  <bean class="org.springframework.beans.factory.config.PropertyPlaceholderConfigurger">
    		<property name="location" value="classpath:jdbc.properties"></property>
    	</bean>
-
使用context标签引入
applicationContext.xml配置
<context:property-placeholder location="classpath:jdbc.properties"/>
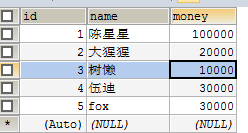
三、CRUD的模板操作
操作前数据库:
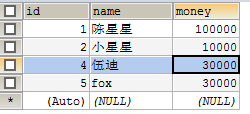
修改和删除操作:
测试代码如下:
@Test
//修改操作
public void demo03() {
	jdbcTemplate.update("update account set name=?, money=? where id=?", "小星星",10000d,2);
}

@Test
//删除操作
public void demo04() {
	jdbcTemplate.update("delete from account where id = ?", 3);
}
数据库结果:
查询操作:
@Test
//查询操作
public void demo05() {
	String name = jdbcTemplate.queryForObject("select name from account where id=?", String.class, 5);
	System.out.println(name);
}
结果如下:

统计查询:
@Test
//统计查询操作
public void demo06() {
	Long count = jdbcTemplate.queryForObject("select count(*) from account", Long.class);
	System.out.println(count);
}
结果如下:

查询对象:
测试代码
@Test
//查询一个对象
public void demo07() {
	Account account = jdbcTemplate.queryForObject("select * from account where id = ?", new MyRowMapper(), 5);
	System.out.println(account);
}

@Test
//封装到一个对象中
public void demo08() {
	List<Account> list = jdbcTemplate.query("select * from account", new MyRowMapper());
	for (Account account : list) {
		System.out.println(account);
	}
}

class MyRowMapper implements RowMapper<Account>{

	@Override
	public Account mapRow(ResultSet rs, int rowNum) throws SQLException {
		Account account = new Account();
		account.setId(rs.getInt("id"));
		account.setName(rs.getString("name"));
		account.setMoney(rs.getDouble("money"));
		return account;
	}

}
四、Spring事务管理的API
4.1 PlatformTransactionManager:平台事务管理器
是spring用于事务管理的接口
-
DataSourceTransactionManager:底层使用JDBC管理事务
-
HibernateTransactionManager:底层使用Hibernate管理事务
4.2 TransactionDefinition:事务定义信息
定义事务相关信息的接口,如隔离级别、超时信息、传播行为、是否只读等
4.3 TransactionStatus:事务的状态
用于纪录事务管理过程中事务状态的接口
4.4 事务管理API的关系
PlatformTransactionManager根据TransactionDefinition进行事务的管理,在管理过程中,将产生的各种状态纪录到TransactionDefinition中去。
4.5 Spring的事务管理:声明式事务管理
-
XML方式的声明式事务管理
-
注解方式的声明式事务管理


 1048
1048

 被折叠的 条评论
为什么被折叠?
被折叠的 条评论
为什么被折叠?
 到【灌水乐园】发言


