


 本文详细介绍了如何编译全志D1的Linux内核,包括应用补丁、修改配置以及处理设备树以支持T113芯片。尽管内核成功启动,但由于缺少文件系统,系统无法启动成功。
接下来编译kernel,编译过程可能会出现缺少命令的报错,大概是下面这几个
sudo apt update
sudo apt install flex bison bc libncurses-dev
目前linux主线的最新版本并没有适配t113的相关外设驱动,虽然能启动并串口打印,但其他的一些外设并没有驱动,还不是可用的状态,所以这里选择全志D1的kernel进行修改。
GitHub - smaeul/linux at d1/allPatches include sunxi platform support and various driver fixes - GitHub - smaeul/linux at d1/all https://github.com/smaeul/linux/tree/d1/all
unzip linux-d1-all.zip
cd linux-d1-all
应用awboot提供的linux补丁
- linux/allow_select_d1_ccu_on_t113.patch
- linux/ccu-sun20i-make_cpux_clk_critical_for_t113.patch
- linux/second_core_support_in_platsmp.patch
- linux/d1s_t113_can_bus.patch
在arch\arm\configs\sunxi_defconfig中添加D1时钟
CONFIG_SUN20I_D1_CCU=y
CONFIG_SUN20I_D1_R_CCU=y
添加sun8i-t113.dtsi和sun8i-t113-mangopi-dual.dts设备树配置文件到arch\arm\boot\dts\
在arch\arm\boot\dts\Makefile的line:1389 处,CONFIG_MACH_SUN8I配置中添加sun8i-t113-mangopi-dual.dtb
awboot提供的sun8i-t113-mangopi-dual.dts设备树文件调试终端串口是5,需要改成uart0。
make ARCH=arm CROSS_COMPILE=arm-none-linux-gnueabihf- sunxi_defconfig
make ARCH=arm CROSS_COMPILE=arm-none-linux-gnueabihf- zImage -j4
make ARCH=arm CROSS_COMPILE=arm-none-linux-gnueabihf- dtbs

xfel spinand write 0x40000 arch/arm/boot/dts/sun8i-t113-mangopi-dual.dtb
xfel spinand write 0x80000 arch/arm/boot/zImage 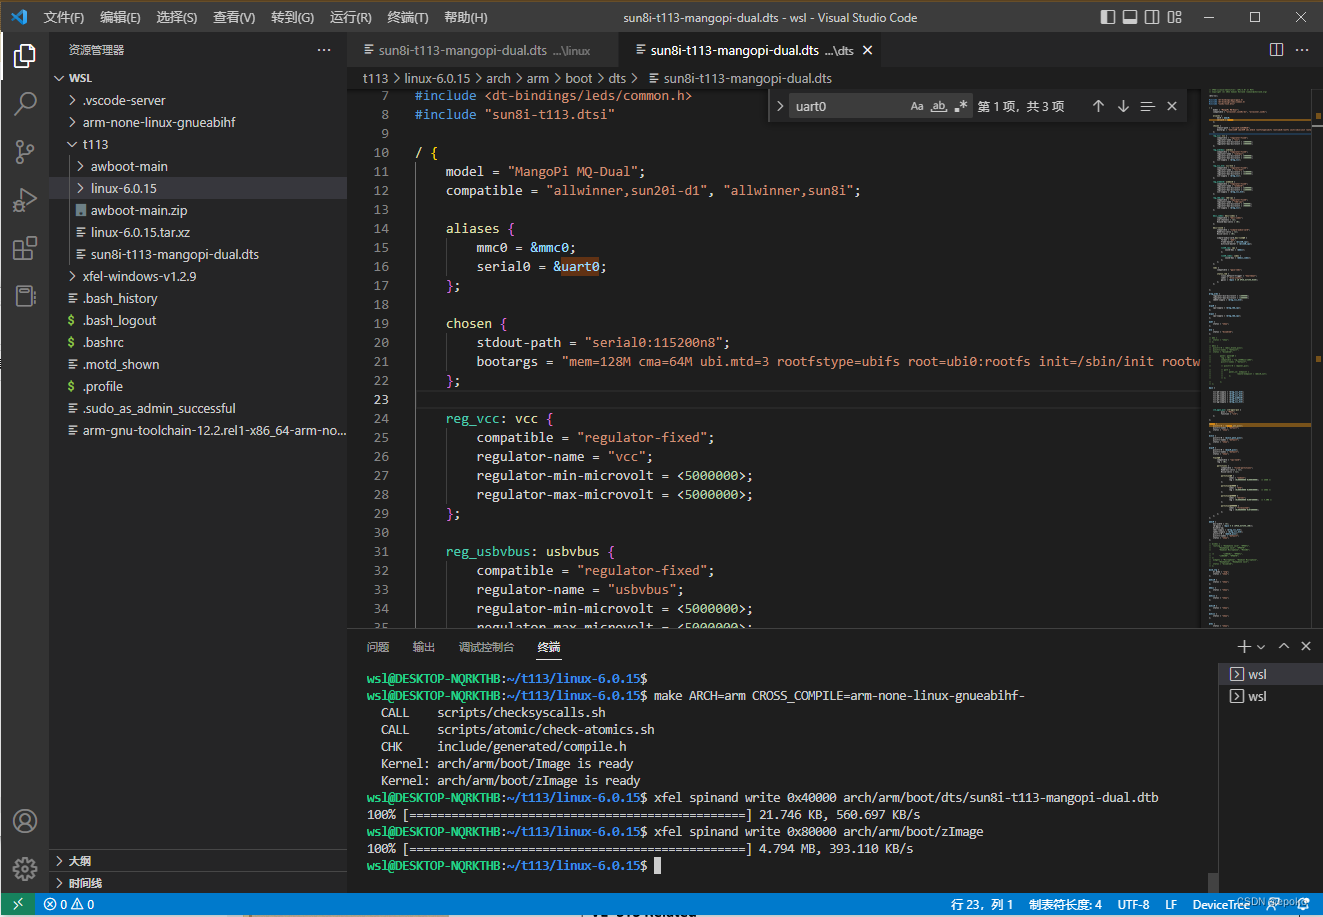
复位,串口成功打印内核信息,目前spinand中还没有文件系统,所以系统无法启动成功。
[I] AWBoot r6143 starting...
[I] SPI-NAND: W25N01GV detected
[I] SPI-NAND: read dt blob of size 22242 at 43.00MB/S
[I] SPI-NAND: read Image of size 5424416 at 49.00MB/S
[I] booting linux...
[    0.000000] Booting Linux on physical CPU 0x0
[    0.000000] Linux version 6.1.0-rc3 (wsl@DESKTOP-NQRKTHB) (arm-none-linux-gnueabihf-gcc (Arm GNU Toolchain 12.2.Rel1 (Build arm-12.24)) 12.2.1 20221205, GNU ld (Arm GNU Toolchain 12.2.Rel1 (Build arm-12.24)) 2.39.0.20221210) #7 SMP Fri Dec 30 18:52:12 CST 2022
[    0.000000] CPU: ARMv7 Processor [410fc075] revision 5 (ARMv7), cr=10c5387d
[    0.000000] CPU: div instructions available: patching division code
[    0.000000] CPU: PIPT / VIPT nonaliasing data cache, VIPT aliasing instruction cache
[    0.000000] OF: fdt: Machine model: MangoPi MQ-Dual
[    0.000000] Memory policy: Data cache writealloc
[    0.000000] cma: Reserved 16 MiB at 0x47000000
[    0.000000] Zone ranges:
[    0.000000]   Normal   [mem 0x0000000040000000-0x0000000047ffffff]
[    0.000000]   HighMem  empty
[    0.000000] Movable zone start for each node
[    0.000000] Early memory node ranges
[    0.000000]   node   0: [mem 0x0000000040000000-0x0000000047ffffff]
[    0.000000] Initmem setup node 0 [mem 0x0000000040000000-0x0000000047ffffff]
[    0.000000] percpu: Embedded 11 pages/cpu s15764 r8192 d21100 u45056
[    0.000000] Built 1 zonelists, mobility grouping on.  Total pages: 32512
[    0.000000] Kernel command line: mem=128M ubi.mtd=3 rootfstype=ubifs root=ubi0:rootfs rw rootwait console=ttyS0,115200
[    0.000000] Dentry cache hash table entries: 16384 (order: 4, 65536 bytes, linear)
[    0.000000] Inode-cache hash table entries: 8192 (order: 3, 32768 bytes, linear)
[    0.000000] mem auto-init: s
最低0.47元/天 解锁文章


 2385
2385

 被折叠的 条评论
为什么被折叠?
被折叠的 条评论
为什么被折叠?
 到【灌水乐园】发言


