


 本文详细介绍了如何使用Docker快速安装部署Elasticsearch、Ik分词器及Kibana,包括配置文件调整、权限设置、容器运行及开机自启等关键步骤。
Docker,安装部署 Elasticsearch +Ik+kibana
比较简单,话不多说直接上操作,踩的坑都踩玩了,跟着我的步骤来,错了你来打我
安装 Elasticsearch
#安装  elasticsearch
[root@localhost home]# mkdir  /home/grkj/es/data
[root@localhost home]# mkdir  /home/grkj/es/config
[root@localhost config]#   vim es.yml
# 集群名称
cluster.name: elasticsearch-cluster
# # 节点名称
node.name: es-node1
# # 绑定host,0.0.0.0代表当前节点的ip
network.host: 0.0.0.0
# # 设置其它节点和该节点交互的ip地址,如果不设置它会自动判断,值必须是个真实的ip地址(本机ip)
# network.publish_host: 192.168.22.130
# # 设置对外服务的http端口,默认为9200
http.port: 9200
# # 设置节点间交互的tcp端口,默认是9300
# transport.tcp.port: 9300
#是否支持跨域,默认为false
http.cors.enabled: true
# # 当设置允许跨域,默认为*,表示支持所有域名,如果我们只是允许某些网站能访问,那么可以使用正则表达式。比如只允许本地地址。 /https?:\/\/localhost(:[0-9]+)?/
http.cors.allow-origin: "*"
# # 表示这个节点是否可以充当主节点
node.master: true
# # 是否充当数据节点
# node.data: true
# # 所有主从节点ip:port
# discovery.seed_hosts: ["192.168.22.130:9300"]
# # 这个参数决定了在选主过程中需要 有多少个节点通信  预防脑裂
discovery.zen.minimum_master_nodes: 1
#标识主节点
cluster.initial_master_nodes: ["es-node1"]


[root@localhost home]# mkdir  /home/grkj/es/plugins
#赋值权限
[root@localhost home]# chmod 777 /home/grkj/es/data
[root@localhost home]# chmod 777 /home/grkj/es/config
[root@localhost home]# chmod 777 /home/grkj/es/plugins

#设置参数
[root@localhost home]vi /etc/sysctl.conf
#最后一行添加保存
vm.max_map_count=262144

[root@localhost home]docker run -d  -p 9200:9200 -v /home/grkj/es/data:/usr/share/elasticsearch/data -v /home/grkj/es/plugins:/usr/share/elasticsearch/plugins -v /home/grkj/es/config/es.yml:/usr/share/elasticsearch/config/elasticsearch.yml -e ES_JAVA_OPTS="-Xms512m -Xmx512m" -e “discovery.type=single-node” --name es fulcrum/elasticsearch7.4

#设置开机启动
[root@localhost home]docker update es --restart=always

[root@localhost home]
安装 Ik 分词器
#方式一,下载对应版本分词器 上传服务器
https://github.com/medcl/elasticsearch-analysis-ik/releases/tag/v7.4.2


#方式二,在线下载
1,进入容器,然后输入命令,下载对应版本的 分词器
./bin/elasticsearch-plugin install https://github.com/medcl/elasticsearch-analysis-ik/releases/download/v5.6.10/elasticsearch-analysis-ik-5.6.10.zip

[root@localhost config]# cd ..
#创建文件夹, 上传压缩包
[root@localhost plugins]# mkdir ik
[root@localhost plugins]# ls
elasticsearch-analysis-ik-7.4.2.zip  ik

[root@localhost plugins]# cd ik
#解压压缩包
[root@localhost ik]# unzip elasticsearch-analysis-ik-7.4.2.zip
Archive:  elasticsearch-analysis-ik-7.4.2.zip
  inflating: elasticsearch-analysis-ik-7.4.2.jar
  inflating: httpclient-4.5.2.jar
  inflating: httpcore-4.4.4.jar
  inflating: commons-logging-1.2.jar
  inflating: commons-codec-1.9.jar
  inflating: plugin-descriptor.properties
  inflating: plugin-security.policy
   creating: config/
  inflating: config/surname.dic
  inflating: config/quantifier.dic
  inflating: config/extra_stopword.dic
  inflating: config/suffix.dic
  inflating: config/extra_single_word_full.dic
  inflating: config/extra_single_word.dic
  inflating: config/preposition.dic
  inflating: config/IKAnalyzer.cfg.xml
  inflating: config/main.dic
  inflating: config/stopword.dic
  inflating: config/extra_main.dic
  inflating: config/extra_single_word_low_freq.dic

#赋值权限
[root@localhost ik]# chmod -R 777 /home/grkj/es/plugins/ik
#进入容器查看是否操作成功
[root@localhost ik]# docker exec -it es /bin/bash
[root@edb5bde2b6a4 elasticsearch]# cd plugins/
[root@edb5bde2b6a4 plugins]# ls
ik
#重启容器
[root@edb5bde2b6a4 elasticsearch]# docker restart es
安装 ElasticSearch-Head
[root@localhost minio]# docker pull mobz/elasticsearch-head:5
5: Pulling from mobz/elasticsearch-head
75a822cd7888: Pull complete
57de64c72267: Pull complete
4306be1e8943: Pull complete
871436ab7225: Pull complete
0110c26a367a: Pull complete
1f04fe713f1b: Pull complete
723bac39028e: Pull complete
7d8cb47f1c60: Pull complete
7328dcf65c42: Pull complete
b451f2ccfb9a: Pull complete
304d5c28a4cf: Pull complete
4cf804850db1: Pull complete
Digest: sha256:55a3c82dd4ba776e304b09308411edd85de0dc9719f9d97a2f33baa320223f34
Status: Downloaded newer image for mobz/elasticsearch-head:5
docker.io/mobz/elasticsearch-head:5
[root@localhost minio]# docker run -d --name es_admin -p 9100:9100 mobz/elasticsearch-head:5
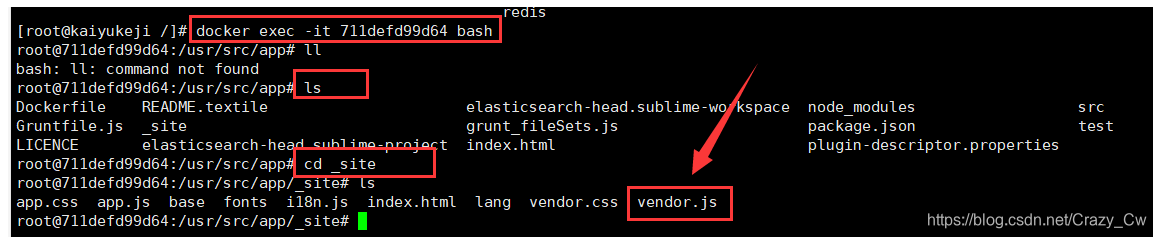
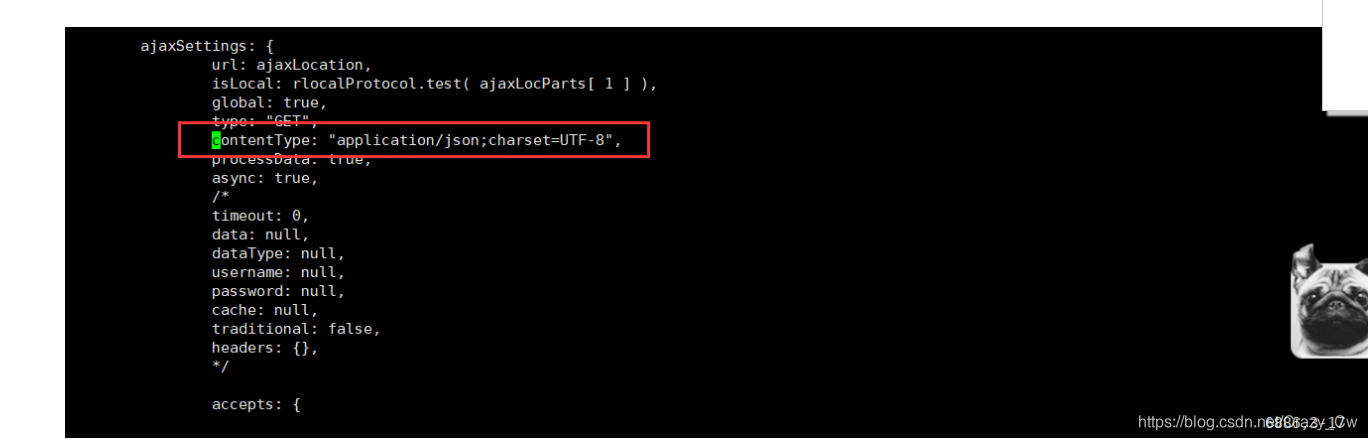
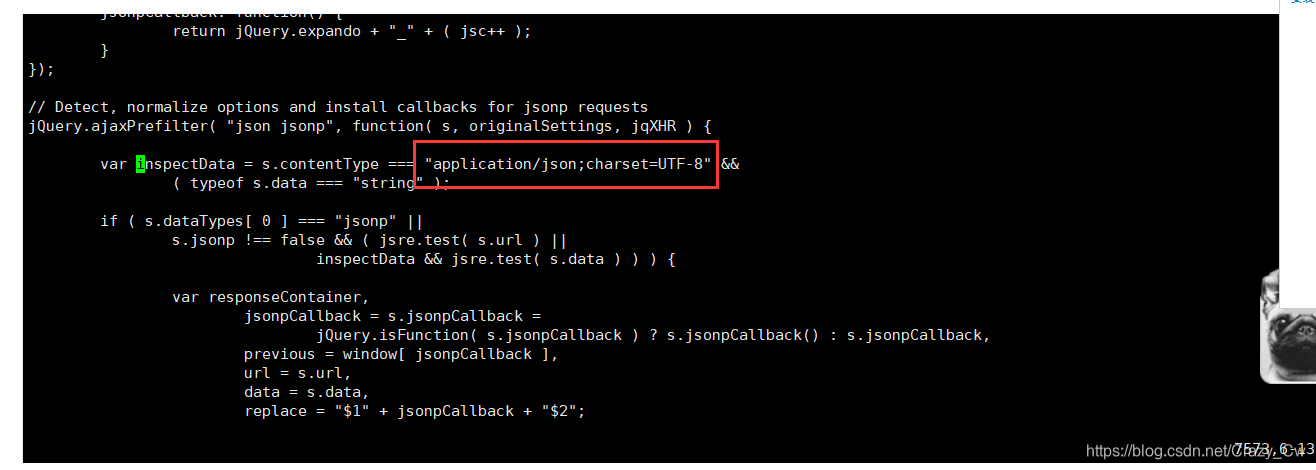
#进入容器 修改 vendor.js 文件 可以 复制到主机 文本编辑之后 复制到容器里面
安装 Kibana
[root@localhost ik]# docker pull kibana:7.4.2
7.4.2: Pulling from library/kibana
d8d02d457314: Already exists
bc64069ca967: Pull complete
c7aae8f7d300: Pull complete
8da0971e3b41: Pull complete
58ea4bb2901c: Pull complete
b1e21d4c2a7e: Pull complete
3953eac632cb: Pull complete
5f4406500758: Pull complete
340d85e0d1c7: Pull complete
1768564d16fb: Pull complete
Digest: sha256:355f9c979dc9cdac3ff9a75a817b8b7660575e492bf7dbe796e705168f167efc
Status: Downloaded newer image for kibana:7.4.2
docker.io/library/kibana:7.4.2
[root@localhost ik]# docker run -it -d -e ELASTICSEARCH_URL=http://172.16.104.234:9200 --name kibana --restart=always -p 5601:5601 kibana:7.4.2

#将 config/kibana.yml 复制出容器
[root@localhost ik]docker cp 4fef23eef291:/usr/share/kibana/config/kibana.yml /home/grkj

#编辑容器内 config/kibana.yml 修改为一下内容
#
# ** THIS IS AN AUTO-GENERATED FILE **
#

# Default Kibana configuration for docker target
server.name: kibana
server.host: "0"
#修改ip地址
elasticsearch.hosts: [ "http://172.16.104.234:9200" ]
xpack.monitoring.ui.container.elasticsearch.enabled: true
#修改语言为中文
i18n.locale: "zh-CN"

#复制进容器
[root@localhost ik] docker cp /home/grkj/kibana.yml 4fef23eef291:/usr/share/kibana/config/kibana.yml


 826
826

 被折叠的 条评论
为什么被折叠?
被折叠的 条评论
为什么被折叠?
 到【灌水乐园】发言


