


 本文深入探讨了延时任务调度机制,详细介绍了TaskScheduler类的功能,包括任务调度、取消和重启,以及背景处理和事件触发。同时,解析了Timeval、DelayInterval和_EventTime类在时间表示和操作中的作用,重点分析了DelayQueue及其内部结构DelayQueueEntry的工作原理,展示了如何通过AlarmHandler实现延时任务的插入和执行。
本来想一篇写完,结果发现这个关联了好多东西,还是分开写吧,这一篇算预热,下一篇更精彩。
4.1 基本关系
继承图:
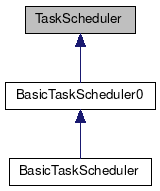
这个继承图,也包含了三个类,跟上一节的继承关系差不多。
协作图:
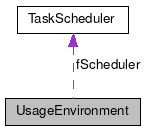
这个图是上一节的,不过这节也使用到。
4.2 TaskScheduler
4.2.1 TaskScheduler类
typedef void TaskFunc(void* clientData);
typedef void* TaskToken;
typedef u_int32_t EventTriggerId;

class TaskScheduler {
public:
  virtual ~TaskScheduler();

  virtual TaskToken scheduleDelayedTask(int64_t microseconds, TaskFunc* proc,
					void* clientData) = 0;
	// 安排任务在下一次到达安排点时发生(在延迟之后)。
	// (如果“微秒” <= 0,则不延迟)
	// 返回一个token ,该token 可在对unscheduleDelayedTask()或rescheduleDelayedTask()的后续调用中使用
    // (但仅当任务尚未发生时)。

  virtual void unscheduleDelayedTask(TaskToken& prevTask) = 0;
	// (如果“ prevTask” == NULL,则无效)
    // 之后将“ prevTask”设置为NULL。
    // 注意:如果计划任务已经发生,则不得调用此函数。

  virtual void rescheduleDelayedTask(TaskToken& task,
				     int64_t microseconds, TaskFunc* proc,
				     void* clientData);
        // 将“ unscheduleDelayedTask()”与“ scheduleDelayedTask()”组合
        // (将“任务”设置为新任务token)。
        // 注意:如果计划任务已经发生,则不得调用此函数。

  // 用于在后台处理套接字操作(从事件循环):
  typedef void BackgroundHandlerProc(void* clientData, int mask);
    // 在“掩码”中设置可能的位。  (故意将这些定义与Tcl中的定义相同,以简化基于Tcl的子类。)
    #define SOCKET_READABLE    (1<<1)
    #define SOCKET_WRITABLE    (1<<2)
    #define SOCKET_EXCEPTION   (1<<3)   //例外
  virtual void setBackgroundHandling(int socketNum, int conditionSet, BackgroundHandlerProc* handlerProc, void* clientData) = 0;
  void disableBackgroundHandling(int socketNum) { setBackgroundHandling(socketNum, 0, NULL, NULL); }
  virtual void moveSocketHandling(int oldSocketNum, int newSocketNum) = 0;
        // 更改“ oldSocketNum”的所有套接字处理,以使之与“ newSocketNum”一起发生。

  virtual void doEventLoop(char volatile* watchVariable = NULL) = 0;
      // 使事件循环内进一步执行。
      //延迟的任务,后台I / O处理和其他事件将按顺序处理(作为单个控制线程)。
      // (如果“ watchVariable”不为NULL,则当* watchVariable!= 0时,我们从此例程返回)

  virtual EventTriggerId createEventTrigger(TaskFunc* eventHandlerProc) = 0;
      // 为事件创建一个“触发器”,如果发生,将使用“ eventHandlerProc”来处理(从事件循环中)。
      // (如果无法创建此类触发器,则返回0(例如,由于触发器数量的实现限制)。)
  virtual void deleteEventTrigger(EventTriggerId eventTriggerId) = 0;

  virtual void triggerEvent(EventTriggerId eventTriggerId, void* clientData = NULL) = 0;
      // 导致(从事件循环)处理指定事件的(先前注册的)处理函数。
      // 以“ clientData”为参数调用处理程序函数。
      // 注意:可以从外部线程调用此函数(与其他库函数不同),以发出外部事件信号。
      // (但是,不应从不同线程使用相同的“事件触发器ID”调用“ triggerEvent()”。)

  // 不推荐使用以下两个功能,并且仅提供了向后兼容性:
  void turnOnBackgroundReadHandling(int socketNum, BackgroundHandlerProc* handlerProc, void* clientData) {
    setBackgroundHandling(socketNum, SOCKET_READABLE, handlerProc, clientData);
  }
  void turnOffBackgroundReadHandling(int socketNum) { disableBackgroundHandling(socketNum); }

  virtual void internalError(); // 用于在库中“处理”“不应发生”类型的错误情况。

protected:
  TaskScheduler(); // abstract base class
};
4.2.2 TaskScheduler简单实现
TaskScheduler::TaskScheduler() {
}

TaskScheduler::~TaskScheduler() {
}

void TaskScheduler::rescheduleDelayedTask(TaskToken& task,
					  int64_t microseconds, TaskFunc* proc,
					  void* clientData) {
  unscheduleDelayedTask(task);
  task = scheduleDelayedTask(microseconds, proc, clientData);
}

// By default, we handle 'should not occur'-type library errors by calling abort().  Subclasses can redefine this, if desired.
void TaskScheduler::internalError() {
  abort();
}
这个实现没有啥,这个类是一个基类,所以实现的比较简单,就是这个函数rescheduleDelayedTask复杂了一点,这个函数是重启延时任务,函数内容是先停止任务,然后再重启,但是这两个函数也都是虚函数,需要子类去实现。
4.3 时间有关的类
4.3.1 Timeval类
稍微浏览了一下类的实现,发现还有几个类是需要提前了解的。
“ Timeval”可以是绝对时间,也可以是时间间隔。
#ifdef TIME_BASE
typedef TIME_BASE time_base_seconds;
#else
typedef long time_base_seconds;
#endif

class Timeval {
public:
  time_base_seconds seconds() const {
    return fTv.tv_sec;
  }
  time_base_seconds seconds() {
    return fTv.tv_sec;
  }
  time_base_seconds useconds() const {
    return fTv.tv_usec;
  }
  time_base_seconds useconds() {
    return fTv.tv_usec;
  }

  int operator>=(Timeval const& arg2) const;
  int operator<=(Timeval const& arg2) const {
    return arg2 >= *this;
  }
  int operator<(Timeval const& arg2) const {
    return !(*this >= arg2);
  }
  int operator>(Timeval const& arg2) const {
    return arg2 < *this;
  }
  int operator==(Timeval const& arg2) const {
    return *this >= arg2 && arg2 >= *this;
  }
  int operator!=(Timeval const& arg2) const {
    return !(*this == arg2);
  }

  void operator+=(class DelayInterval const& arg2);
  void operator-=(class DelayInterval const& arg2);
  // returns ZERO iff arg2 >= arg1

protected:
  Timeval(time_base_seconds seconds, time_base_seconds useconds) {
    fTv.tv_sec = seconds; fTv.tv_usec = useconds;
  }

private:
  time_base_seconds& secs() {
    return (time_base_seconds&)fTv.tv_sec;
  }
  time_base_seconds& usecs() {
    return (time_base_seconds&)fTv.tv_usec;
  }

  struct timeval fTv;      //把这个timeval再次做一个封装,封装了一个时间类
};

#ifndef max
inline Timeval max(Timeval const& arg1, Timeval const& arg2) {
  return arg1 >= arg2 ? arg1 : arg2;
}
#endif
#ifndef min
inline Timeval min(Timeval const& arg1, Timeval const& arg2) {
  return arg1 <= arg2 ? arg1 : arg2;
}
#endif

class DelayInterval operator-(Timeval const& arg1, Timeval const& arg2);
// returns ZERO iff arg2 >= arg1
4.3.2 Timeval部分实现
为什么是部分实现,因为感觉这一部分应该用到,比较重要,剩下的可以看源码,源码也很简单的,就是一些操作符重载。
static const int MILLION = 1000000;

/ Timeval /

int Timeval::operator>=(const Timeval& arg2) const {
  return seconds() > arg2.seconds()
    || (seconds() == arg2.seconds()
	&& useconds() >= arg2.useconds());
}

void Timeval::operator+=(const DelayInterval& arg2) {
  secs() += arg2.seconds(); usecs() += arg2.useconds();
  if (useconds() >= MILLION) {
    usecs() -= MILLION;
    ++secs();
  }
}

void Timeval::operator-=(const DelayInterval& arg2) {
  secs() -= arg2.seconds(); usecs() -= arg2.useconds();
  if ((int)useconds() < 0) {
    usecs() += MILLION;
    --secs();
  }
  if ((int)seconds() < 0)
    secs() = usecs() = 0;

}

DelayInterval operator-(const Timeval& arg1, const Timeval& arg2) {
  time_base_seconds secs = arg1.seconds() - arg2.seconds();
  time_base_seconds usecs = arg1.useconds() - arg2.useconds();

  if ((int)usecs < 0) {
    usecs += MILLION;
    --secs;
  }
  if ((int)secs < 0)
    return DELAY_ZERO;
  else
    return DelayInterval(secs, usecs);
}
这些都是操作符重载的,难度不大。
4.3.3 DelayInterval类
这个类是继承于Timeval类,实现了一层时间的封装,也定义了一些比较常用的延时时间。
class DelayInterval: public Timeval {
public:
  DelayInterval(time_base_seconds seconds, time_base_seconds useconds)
    : Timeval(seconds, useconds) {}
};

DelayInterval operator*(short arg1, DelayInterval const& arg2);

extern DelayInterval const DELAY_ZERO;
extern DelayInterval const DELAY_SECOND;
extern DelayInterval const DELAY_MINUTE;
extern DelayInterval const DELAY_HOUR;
extern DelayInterval const DELAY_DAY;
延时间隔类,这个类的作用定义延时间隔的,因为Timeval的构造方法保护化,外部不能访问,只有子类可以访问,这时候,子类就可以调用父类的初始化函数,进行初始化时间间隔。
这就定义了几个常见的延时和实现:
DelayInterval operator*(short arg1, const DelayInterval& arg2) {
  time_base_seconds result_seconds = arg1*arg2.seconds();
  time_base_seconds result_useconds = arg1*arg2.useconds();

  time_base_seconds carry = result_useconds/MILLION;
  result_useconds -= carry*MILLION;
  result_seconds += carry;

  return DelayInterval(result_seconds, result_useconds);
}

#ifndef INT_MAX
#define INT_MAX	0x7FFFFFFF
#endif
const DelayInterval DELAY_ZERO(0, 0);
const DelayInterval DELAY_SECOND(1, 0);
const DelayInterval DELAY_MINUTE = 60*DELAY_SECOND;
const DelayInterval DELAY_HOUR = 60*DELAY_MINUTE;
const DelayInterval DELAY_DAY = 24*DELAY_HOUR;
const DelayInterval ETERNITY(INT_MAX, MILLION-1);
难度也不大。
4.3.4 _EventTime类
应该是时间时间,这个还不细看,细看的时候再写写
class _EventTime: public Timeval {
public:
  _EventTime(unsigned secondsSinceEpoch = 0,
	    unsigned usecondsSinceEpoch = 0)
    // We use the Unix standard epoch: January 1, 1970
    : Timeval(secondsSinceEpoch, usecondsSinceEpoch) {}
};

_EventTime TimeNow();

extern _EventTime const THE_END_OF_TIME;
也是跟延时时间用的方式一样,不过这个参数是有默认值的,下面看看函数的实现和那个变量:
//获取当前时间的封装
_EventTime TimeNow() {
  struct timeval tvNow;

  gettimeofday(&tvNow, NULL);

  return _EventTime(tvNow.tv_sec, tvNow.tv_usec);
}

//结束时间
const _EventTime THE_END_OF_TIME(INT_MAX);
4.4 DelayQueue
延时队列也起到很关键的作用。
4.4.1 DelayQueueEntry类
这是延时队列中存储了一个条目的信息,延时队列就是需要一个一个这样结点组成。
/ DelayQueueEntry /

class DelayQueueEntry {
public:
  virtual ~DelayQueueEntry();

  intptr_t token() {
    return fToken;
  }

protected: // abstract base class
  DelayQueueEntry(DelayInterval delay);

  virtual void handleTimeout();

private:
  friend class DelayQueue;
  DelayQueueEntry* fNext;
  DelayQueueEntry* fPrev;
  // 用于表示延迟任务需要被执行的时间距当前时间的间隔,还需要多久能执行这个任务
  DelayInterval fDeltaTimeRemaining;

  intptr_t fToken;					//这个是标识哪一个结点的id,开始时由全局变量tokenCounter维护。
  static intptr_t tokenCounter;     //这是一个静态变量,这个变量表示多少个条目
};
fDeltaTimeRemaining:是当前结点和上一个结点要执行的时间差
tokenCounter:这是一个静态变量,这个变量表示多少个条目
fToken:这个是标识哪一个结点的id,开始时由全局变量tokenCounter维护。
virtual void handleTimeout():子类需要实现这个函数,这个函数就是时间到的时候,需要执行的任务。
这个是延时队列的一个条目,具体等在用的时候分析就知道了。
简单看一下实现:
/ DelayQueueEntry /

intptr_t DelayQueueEntry::tokenCounter = 0;

DelayQueueEntry::DelayQueueEntry(DelayInterval delay)
  : fDeltaTimeRemaining(delay) {
  fNext = fPrev = this;         //这个是初始化指针
  fToken = ++tokenCounter;
}

DelayQueueEntry::~DelayQueueEntry() {
}

void DelayQueueEntry::handleTimeout() {   //原来是在这里删除的
  delete this;
}
4.4.2 DelayQueue类
下面这个才是队列的定义,队列定义继承了上面的队列条目。
/ DelayQueue /

class DelayQueue: public DelayQueueEntry {
public:
  DelayQueue();
  virtual ~DelayQueue();

  void addEntry(DelayQueueEntry* newEntry); // returns a token for the entry
  void updateEntry(DelayQueueEntry* entry, DelayInterval newDelay);
  void updateEntry(intptr_t tokenToFind, DelayInterval newDelay);
  void removeEntry(DelayQueueEntry* entry); // but doesn't delete it
  DelayQueueEntry* removeEntry(intptr_t tokenToFind); // but doesn't delete it

  DelayInterval const& timeToNextAlarm();
  void handleAlarm();

private:
  DelayQueueEntry* head() { return fNext; }
  DelayQueueEntry* findEntryByToken(intptr_t token);
  void synchronize(); // bring the 'time remaining' fields up-to-date

  _EventTime fLastSyncTime;    //最后一次同步的时间
};
fLastSyncTime:最后一次同步的时间
可以看看下具体是怎么实现的。
4.4.3 DelayQueue()
DelayQueue::DelayQueue()
  : DelayQueueEntry(ETERNITY) {
  fLastSyncTime = TimeNow();
}
调用了父类的构造函数,ETERNITY是一个很大的值,上面有定义。
父类的构造函数,填充了两个参数
fDeltaTimeRemaining:ETERNITY 一个很大的值 (时间差)
fNext = fPrev = this :类中的Next和Prev指针
子类构造函数设的值:
fLastSyncTime:最后一次同步的时间。
4.4.4 addEntry()
先看添加的时候:
void DelayQueue::addEntry(DelayQueueEntry* newEntry) {
  synchronize();

  DelayQueueEntry* cur = head();
  while (newEntry->fDeltaTimeRemaining >= cur->fDeltaTimeRemaining) {    // 以这个时间差排序
  	// 每过一个条目,这个时间差就是和上一个条目的时间差,所以需要相减
    newEntry->fDeltaTimeRemaining -= cur->fDeltaTimeRemaining;
    cur = cur->fNext;													 // 查找下一个
  }
  // 找到符合当前的位置了,插入到cur的前面,所以cur要往后退,所以cur的时间差要改
  cur->fDeltaTimeRemaining -= newEntry->fDeltaTimeRemaining;

  // Add "newEntry" to the queue, just before "cur":
  // 下面就是把newEnrty插入到cur的前面
  newEntry->fNext = cur;
  newEntry->fPrev = cur->fPrev;
  cur->fPrev = newEntry->fPrev->fNext = newEntry;
}
synchronize()下节再看,现在要先了解添加过程:
head():
DelayQueueEntry* head() { return fNext; }
直接返回Next指针,这个next指针现在是this,也就是新建的条目的地址。
新添加的条目的时间差,肯定比第一个条目小,所以就直接插入,插入到第一条的前面,变成新的第一条。
如果是大于当前条目,就需要循环遍历,这个队列是按照时间差排序的,找到适合的时间差,然后插入。
重点:
1,延时队列是按照fDeltaTimeRemaining这个时间间隔的值排序的。
2,fDeltaTimeRemaining这个时间间隔是和上一个结点的fDeltaTimeRemaining这个值算出来的时间间隔。
4.4.5 synchronize()
接下来看看同步了,上面的两行红色的字,要记清楚,这个关系到这个队列的理解。
void DelayQueue::synchronize() {
  // First, figure out how much time has elapsed since the last sync:
  _EventTime timeNow = TimeNow();
  if (timeNow < fLastSyncTime) {
    // 系统时钟显然已经回到过去。 重置我们的同步时间并返回:
    fLastSyncTime  = timeNow;
    return;
  }
  DelayInterval timeSinceLastSync = timeNow - fLastSyncTime;    //算出两次同步的间隔时间
  fLastSyncTime = timeNow;    //保存现在的时间为最后同步时间

  // 然后,为时间到的所有条目调整延迟队列:
  DelayQueueEntry* curEntry = head();
  while (timeSinceLastSync >= curEntry->fDeltaTimeRemaining) {     //判断一下间隔任务中都比这个时间间隔低的结点
    timeSinceLastSync -= curEntry->fDeltaTimeRemaining;			   // 因为这是存储和上一个结点的时间差,所以需要减
    curEntry->fDeltaTimeRemaining = DELAY_ZERO;						// 时间差已经过了的,把时间间隔请0
    curEntry = curEntry->fNext;										// 找下一个
  }
  curEntry->fDeltaTimeRemaining -= timeSinceLastSync;				//  当找到一个时间个比过去的时间间隔都要长的时候,更新时间间隔
  //为什么后面的时间间隔不需要改变,是因为我们当初保存的是和上一个结点的时间差,时间差是不会改变的,所以只要调整一个即可,这里比较巧妙。
}
这个注释在程序中,已经写清楚了,这里就不在描述了。
4.4.6 removeEntry()
有添加就有删除,删除就比较简单。
void DelayQueue::removeEntry(DelayQueueEntry* entry) {
  if (entry == NULL || entry->fNext == NULL) return;    //这个是因为是双向链表。所以需要这样判断

  entry->fNext->fDeltaTimeRemaining += entry->fDeltaTimeRemaining;   //要删除一个结点了,需要把后一个结点的时间差更新一下
  //后面是调整链表的指针
  entry->fPrev->fNext = entry->fNext;
  entry->fNext->fPrev = entry->fPrev;
  entry->fNext = entry->fPrev = NULL;
  // in case we should try to remove it again
}

//这个才是真正的删除,通过token删除结点
DelayQueueEntry* DelayQueue::removeEntry(intptr_t tokenToFind) {
  DelayQueueEntry* entry = findEntryByToken(tokenToFind);     //通过token找到对应的结点的指针
  removeEntry(entry);			//删除结点
  return entry;
}
删除结点的时候需要注意:就是函数中没有提供释放结点的操作,只是返回了该结点的指针,应该是需要我们自己释放结点的内存。
相应的在添加的时候,也并没有申请内存,只是把结点的指针挂载在链表上。
4.4.7 updateEntry()
增删改查到了改,数据的地方都需要更新数据。
//entry:要更新的结点的指针
//newDelay:新的延时时间
void DelayQueue::updateEntry(DelayQueueEntry* entry, DelayInterval newDelay) {
  if (entry == NULL) return;

  removeEntry(entry);    //删除结点,其实删除内部只是修改了值,并没有释放内存,这点要注意
  entry->fDeltaTimeRemaining = newDelay;
  addEntry(entry);	     //还是原来的指针,修改了时间差,就添加进入(这个是排序的队列,所以不能直接修改时间差)
}

//这个就不解释了
void DelayQueue::updateEntry(intptr_t tokenToFind, DelayInterval newDelay) {
  DelayQueueEntry* entry = findEntryByToken(tokenToFind);
  updateEntry(entry, newDelay);
}
4.4.8 findEntryByToken()
查,其实上面的函数都已经用到了,只不过我们在这里才看,这样也符合函数的单一原则,黑盒子原则,因为只要知道函数内部是干啥的,不需要看源码,上面的代码也可以看的懂。
DelayQueueEntry* DelayQueue::findEntryByToken(intptr_t tokenToFind) {
  DelayQueueEntry* cur = head();
  while (cur != this) {
    if (cur->token() == tokenToFind) return cur;
    cur = cur->fNext;
  }

  return NULL;
}
就猜到这个会用到遍历的方式,然后去匹配,链表只能是从头到尾遍历,这样效率不高,所以应该可以改进成用红黑树的方式保存,这样查找的效率会提高很多,比较这是一个高频率使用的组件。
4.4.9 timeToNextAlarm()
这个应该也是属于查询的函数,查找下一个要执行的任务的时间差还有多少。
DelayInterval const& DelayQueue::timeToNextAlarm() {
  if (head()->fDeltaTimeRemaining == DELAY_ZERO) return DELAY_ZERO; // a common case

  synchronize();
  return head()->fDeltaTimeRemaining;
}
4.4.10 handleAlarm()
处理时间到的事件,也是使用回调的方式处理的。
这个函数感觉是需要一个线程专门更新的把,以后看一下具体用法,就知道了。
void DelayQueue::handleAlarm() {
  if (head()->fDeltaTimeRemaining != DELAY_ZERO) synchronize();   //不想等的话,同步时间

  if (head()->fDeltaTimeRemaining == DELAY_ZERO) {    //如果已经到时间了,执行回调函数
    // This event is due to be handled:
    DelayQueueEntry* toRemove = head();
    removeEntry(toRemove); // do this first, in case handler accesses queue

    toRemove->handleTimeout();
  }
}
看完了这个延时队里之后,好像明白了一些为什么用时间差来实现的方式了,因为时间差是这个结点和上一结点的时间差,只要上一个结点不改变,这个结点就不要用改变,这样减少了遍历的次数,并且这还是一个以时间差排序的队列,这样只有在队头的元素,才是即将要执行的数据,不需要关注后面的元素。(这个操作想到了最小堆)
4.4.11 ~DelayQueue()
析构函数
DelayQueue::~DelayQueue() {
  while (fNext != this) {      //循环链表的判断方式
    DelayQueueEntry* entryToRemove = fNext;
    removeEntry(entryToRemove);
    delete entryToRemove;
  }
}
析构函数中有释放内存,但是还是不知道在哪里申请内存,看来还是继续往下看了。
4.5 AlarmHandler
这个类比较简单,就是定义了一个DelayQueueEntry的子类,保存到延时队列中的一个结点元素,以后只要申请这个类的对象,插入到队列中即可。
class AlarmHandler: public DelayQueueEntry {
public:
  AlarmHandler(TaskFunc* proc, void* clientData, DelayInterval timeToDelay)
    : DelayQueueEntry(timeToDelay), fProc(proc), fClientData(clientData) {
  }

private: // redefined virtual functions
  virtual void handleTimeout() {
    (*fProc)(fClientData);
    DelayQueueEntry::handleTimeout();
  }

private:
  TaskFunc* fProc;
  void* fClientData;
};
构造函数,申请了一个结点的内存,是在这里申请的,c语言的思维还是太重了。还是把改填充的参数也都填充了。
fProc:回调函数,还是用了函数指针的方式
fClientData:客户端的数据
virtual void handleTimeout():执行回调的函数,首先执行的是我们绑定进去的函数指针,其次就是执行父类的回调函数。刚刚看了,父类的对调函数就是释放掉这个结点的内存,是需要执行的。


 500
500

 被折叠的 条评论
为什么被折叠?
被折叠的 条评论
为什么被折叠?
 到【灌水乐园】发言


