


 本文介绍了如何在Jupyter Notebook中播放视频,由于cv2.imshow()在Notebook中不适用,因此推荐使用ipython.display模块。同时,针对可能出现的iopub_data_rate_limit问题,提供了通过修改配置文件或运行时参数来提高数据传输上限的解决方案。
在解决图像处理问题的时候,可以利用opencv打开视频,并一帧一帧地show出来,但是要用到imshow(),需要本地的界面支持。代码如下
# -*- coding:utf-8*-
import cv2

capture = cv2.VideoCapture("D:\\dataset\\chip_gesture.ts")

# 图像处理函数
def processImg(img):
    # 画出一个框
    cv2.rectangle(img, (500, 300), (800, 400), (0, 0, 255), 5, 1, 0)
    # 上下翻转
    # img= cv2.flip(img, 0)
    return img

# 一帧帧地show
while (capture.isOpened()):
    ret, frame = capture.read()
    if not ret:
        break

    result = processImg(frame)

    cv2.imshow('result', result)

    # esc键退出
    if 0xFF & cv2.waitKey(30) == 27:
        break

cv2.destroyAllWindows()
capture.release()
但是当我们使用jupyter notebook来编写python程序的时候,cv2.imshow()就不行了。
最终的解决办法是使用ipython.display模块来解决。
from IPython.display import clear_output, Image, display, HTML
import time
import cv2
import base64
current_time = 0
# 图像处理函数
def processImg(img):
# 画出一个框
cv2.rectangle(img, (500, 300), (800, 400), (0, 0, 255), 5, 1, 0)
# 上下翻转
# img= cv2.flip(img, 0)
# 显示FPS
global current_time
if current_time == 0:
current_time = time.time()
else:
last_time = current_time
current_time = time.time()
fps = 1. / (current_time - last_time)
text = "FPS: %d" % int(fps)
cv2.putText(img, text , (0,100), cv2.FONT_HERSHEY_TRIPLEX, 3.65, (255, 0, 0), 2)
return img
def arrayShow(imageArray):
ret, png = cv2.imencode('.png', imageArray)
encoded = base64.b64encode(png)
return Image(data=encoded.decode('ascii'))
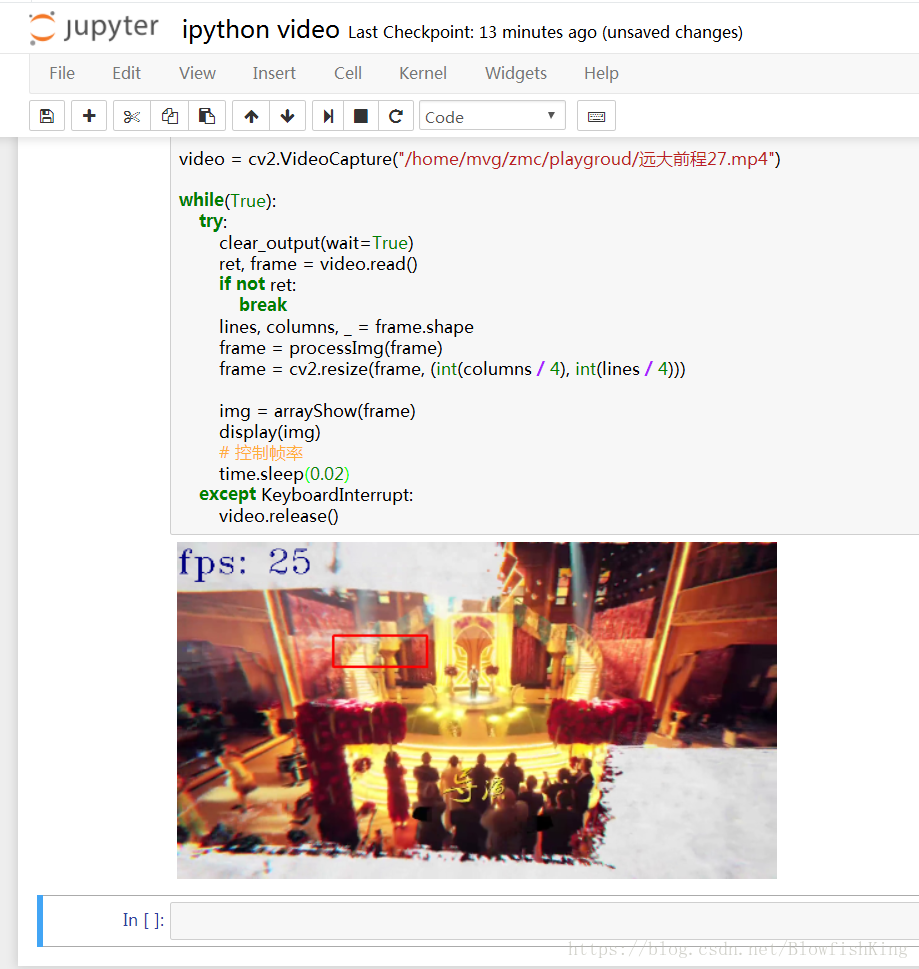
video = cv2.VideoCapture("/home/mvg/zmc/playgroud/远大前程27.mp4")
while(True):
try:
clear_output(wait=True)
ret, frame = video.read()
if not ret:
break
lines, columns, _ = frame.shape
frame = processImg(frame)
frame = cv2.resize(frame, (int(columns / 4), int(lines / 4)))
img = arrayShow(frame)
display(img)
# 控制帧率
time.sleep(0.02)
except KeyboardInterrupt:
video.release()
最终的运行效果如下:
不过运行这段代码的时候,可能会提示iopub_data_rate_limit问题。如果使用配置文件(推荐)来运行jupyter notebook的话,修改配置文件
vim ~/.jupyter/jupyter_notebook_config.py
将c.NotebookApp.iopub_data_rate_limit = 10000000一行取消注释,改变后面的数据传输上限值,10M差不多能播放视频(有提示再修改上限)。
不使用配置文件的话,在运行时加上参数
jupyter notebook --NotebookApp.iopub_data_rate_limit=10000000。


 2566
2566

 被折叠的 条评论
为什么被折叠?
被折叠的 条评论
为什么被折叠?
 到【灌水乐园】发言


