


网上学习资料一大堆,但如果学到的知识不成体系,遇到问题时只是浅尝辄止,不再深入研究,那么很难做到真正的技术提升。
一个人可以走的很快,但一群人才能走的更远!不论你是正从事IT行业的老鸟或是对IT行业感兴趣的新人,都欢迎加入我们的的圈子(技术交流、学习资源、职场吐槽、大厂内推、面试辅导),让我们一起学习成长!
}

`MyTest`类计算出来的快照如图所示,主要`classId,classAbiHash,classHeaderStrings`等内容
可以看出`private`函数的声明也是`abi`的一部分,当`public`或者`private`的函数声明发生变化时,`classAbiHash`都会发生变化,而只修改函数体时,`snapshot`不会发生任何变化。
### 第五步:KotlinCompile Task执行编译
在配置完成之后,接下来我们就来看下`KotlinCompile`是怎么执行编译的
abstract class KotlinCompile @Inject constructor(
override val kotlinOptions: KotlinJvmOptions,
workerExecutor: WorkerExecutor,
private val objectFactory: ObjectFactory
) : AbstractKotlinCompile(objectFactory {
// classpathSnapshot入参
@get:Nested
abstract val classpathSnapshotProperties: ClasspathSnapshotProperties

abstract class ClasspathSnapshotProperties {
    @get:Classpath
    @get:Incremental
    @get:Optional // Set if useClasspathSnapshot == true
    abstract val classpathSnapshot: ConfigurableFileCollection
}

// 增量编译参数
override val incrementalProps: List<FileCollection>
    get() = listOf(
        sources,
        javaSources,
        classpathSnapshotProperties.classpathSnapshot
    )

override fun callCompilerAsync(inputChanges: InputChanges) {
	// 获取增量编译环境变量
    val icEnv = if (isIncrementalCompilationEnabled()) {
        IncrementalCompilationEnvironment(
            changedFiles = getChangedFiles(inputChanges, incrementalProps),
            classpathChanges = getClasspathChanges(inputChanges),
        )
    } else null
    val environment = GradleCompilerEnvironment(incrementalCompilationEnvironment = icEnv)
    compilerRunner.runJvmCompilerAsync(
        (kotlinSources + scriptSources).toList(),
        commonSourceSet.toList(),
        javaSources.files,
        environment,
    )
}

// 查找改动了的input
protected fun getChangedFiles(
    inputChanges: InputChanges,
    incrementalProps: List<FileCollection>
) = if (!inputChanges.isIncremental) {
    ChangedFiles.Unknown()
} else {
    incrementalProps
        .fold(mutableListOf<File>() to mutableListOf<File>()) { (modified, removed), prop ->
            inputChanges.getFileChanges(prop).forEach {
                when (it.changeType) {
                    ChangeType.ADDED, ChangeType.MODIFIED -> modified.add(it.file)
                    ChangeType.REMOVED -> removed.add(it.file)
                    else -> Unit
                }
            }
            modified to removed
        }
        .run {
            ChangedFiles.Known(first, second)
        }
}

// 查找改变了的classpath
private fun getClasspathChanges(inputChanges: InputChanges): ClasspathChanges = when {
    !classpathSnapshotProperties.useClasspathSnapshot.get() -> ClasspathSnapshotDisabled
    else -> {
        when {
            !inputChanges.isIncremental -> NotAvailableForNonIncrementalRun(classpathSnapshotFiles)
            inputChanges.getFileChanges(classpathSnapshotProperties.classpathSnapshot).none() -> NoChanges(classpathSnapshotFiles)
            !classpathSnapshotFiles.shrunkPreviousClasspathSnapshotFile.exists() -> {
                NotAvailableDueToMissingClasspathSnapshot(classpathSnapshotFiles)
            }
            else -> ToBeComputedByIncrementalCompiler(classpathSnapshotFiles)
        }
    }
}
}
对于`KotlinCompile`,我们也可以从入参,出参,`TaskAction`的角度来分析
1. `classpathSnapshotProperties`是个包装类型的输入,内部包括`@Classpath`类型的输入,使用@Classpath输入时,如果输入文件名发生变化而内容没有发生变化时,不会触发Task重新运行,这对classpath来说非常重要
2. `incrementalProps`是组件后的增量编译输入参数,包括`kotlin`输入,`java`输入,`classpath`输入等
3. `CompileKotlin`的`TaskAction`,它最后会执行到`callCompilerAsync`方法,在其中通过`getChangedFiles`与`getClasspathChanges`获取改变了的输入与`classpath`
4. `getClasspathChanges`方法通过`inputChanges`获取一个已经改变与删除的文件的Pair
5. `getClasspathChanges`则根据增量编译是否开启,是否有文件发生更改,历史snapshotFile是否存在,返回不同的`ClassPathChanges`密封类
在增量编译参数拼装完成后,接下来就是跟着逻辑走,最后会走到`GradleKotlinCompilerWork` 的 `compileWithDaemmonOrFailbackImpl`

private fun compileWithDaemonOrFallbackImpl(messageCollector: MessageCollector): ExitCode {
val executionStrategy = kotlinCompilerExecutionStrategy()
if (executionStrategy == DAEMON_EXECUTION_STRATEGY) {
val daemonExitCode = compileWithDaemon(messageCollector)
if (daemonExitCode != null) {
return daemonExitCode
}
}
val isGradleDaemonUsed = System.getProperty(“org.gradle.daemon”)?.let(String::toBoolean)
return if (executionStrategy == IN_PROCESS_EXECUTION_STRATEGY || isGradleDaemonUsed == false) {
compileInProcess(messageCollector)
} else {
compileOutOfProcess()
}
}
可以看出,`kotlin`编译有三种策略,分别是


1. 守护进程编译:Kotlin编译的默认模式,只有这种模式才支持增量编译,可以在多个`Gradle daemon`进程间共享
2. 进程内编译:Gradle daemon进程内编译
3. 进程外编译:每次编译都是在不同的进程


`compileWithDaemon` 会调用到 `Kotlin Compile` 里执行真正的编译逻辑:
val exitCode = try {
val res = if (isIncremental) {
incrementalCompilationWithDaemon(daemon, sessionId, targetPlatform, bufferingMessageCollector)
} else {
nonIncrementalCompilationWithDaemon(daemon, sessionId, targetPlatform, bufferingMessageCollector)
}
} catch (e: Throwable) {
null
}
到这里会执行 `org.jetbrains.kotlin.daemon.CompileServiceImpl` 的 `compile` 方法,这样就终于调到了Kotlin编译器内部


### 第六步:Kotlin 编译器计算出需重编译的文件


经过这么多步骤,终于走到Kotlin编译器内部了,下面我们来看下Kotlin编译器的增量编译逻辑
protected inline fun <ServicesFacadeT, JpsServicesFacadeT, CompilationResultsT> compileImpl(){
//…
CompilerMode.INCREMENTAL_COMPILER -> {
when (targetPlatform) {
CompileService.TargetPlatform.JVM -> withIC(k2PlatformArgs) {
doCompile(sessionId, daemonReporter, tracer = null) { _, _ ->
execIncrementalCompiler(
k2PlatformArgs as K2JVMCompilerArguments,
gradleIncrementalArgs,
//…
)
}
}
}
如上代码,会判断输入的编译参数,如果是增量编译并且是JVM平台的话,就会执行`execIncrementalCompiler`方法,最后会调用到`sourcesToCompile`方法
private fun sourcesToCompile(
caches: CacheManager,
changedFiles: ChangedFiles,
args: Args,
messageCollector: MessageCollector,
dependenciesAbiSnapshots: Map<String, AbiSnapshot>
): CompilationMode =
when (changedFiles) {
is ChangedFiles.Known -> calculateSourcesToCompile(caches, changedFiles, args, messageCollector, dependenciesAbiSnapshots)
is ChangedFiles.Unknown -> CompilationMode.Rebuild(BuildAttribute.UNKNOWN_CHANGES_IN_GRADLE_INPUTS)
is ChangedFiles.Dependencies -> error(“Unexpected ChangedFiles type (ChangedFiles.Dependencies)”)
}
private fun calculateSourcesToCompileImpl(
caches: IncrementalJvmCachesManager,
changedFiles: ChangedFiles.Known,
args: K2JVMCompilerArguments,
abiSnapshots: Map<String, AbiSnapshot> = HashMap(),
withAbiSnapshot: Boolean
): CompilationMode {
val dirtyFiles = DirtyFilesContainer(caches, reporter, kotlinSourceFilesExtensions)
// 初始化dirtyFiles
initDirtyFiles(dirtyFiles, changedFiles)
	// 计算变化的classpath
    val classpathChanges = when (classpathChanges) {
        is NoChanges -> ChangesEither.Known(emptySet(), emptySet())
        //  classpathSnapshot可用时
        is ToBeComputedByIncrementalCompiler -> reporter.measure(BuildTime.COMPUTE_CLASSPATH_CHANGES) {
            computeClasspathChanges(
                classpathChanges.classpathSnapshotFiles,
                caches.lookupCache,
                storeCurrentClasspathSnapshotForReuse,
                ClasspathSnapshotBuildReporter(reporter)
            ).toChangesEither()
        }
        is NotAvailableDueToMissingClasspathSnapshot -> ChangesEither.Unknown(BuildAttribute.CLASSPATH_SNAPSHOT_NOT_FOUND)
        is NotAvailableForNonIncrementalRun -> ChangesEither.Unknown(BuildAttribute.UNKNOWN_CHANGES_IN_GRADLE_INPUTS)
        // classpathSnapshot不可用时
        is ClasspathSnapshotDisabled -> reporter.measure(BuildTime.IC_ANALYZE_CHANGES_IN_DEPENDENCIES) {
            val lastBuildInfo = BuildInfo.read(lastBuildInfoFile)
            getClasspathChanges(
                args.classpathAsList, changedFiles, lastBuildInfo, modulesApiHistory, reporter, abiSnapshots, withAbiSnapshot,
                caches.platformCache, scopes
            )
        }
        is NotAvailableForJSCompiler -> error("Unexpected type for this code path: ${classpathChanges.javaClass.name}.")
    }
    // 将结果添加到dirtyFiles
    val unused = when (classpathChanges) {
        is ChangesEither.Unknown -> {
            return CompilationMode.Rebuild(classpathChanges.reason)
        }
        is ChangesEither.Known -> {
            dirtyFiles.addByDirtySymbols(classpathChanges.lookupSymbols)
            dirtyClasspathChanges = classpathChanges.fqNames
            dirtyFiles.addByDirtyClasses(classpathChanges.fqNames)
        }
    }

    // ...
    return CompilationMode.Incremental(dirtyFiles)
}
`calculateSourcesToCompileImpl`的目的就是计算Kotlin编译器应该重新编译哪些代码,主要分为以下几个步骤


1. 初始化`dirtyFiles`,并将`changedFiles`加入`dirtyFiles`,因为changedFiles需要重新编译
2. `classpathSnapshot`可用时,通过传入的`snapshot.bin`文件,与Project目录下的`shrunk-classpath-snapshot.bin`进行比较得出变化的classpath,以及受影响的类。在比较结束时,也会更新当前目录的shrunk-classpath-snapshot.bin,供下次比较使用
3. 当classpathSnapshot不可用时,通过`getClasspathChanges`方法来判断classpath变化,这里面实际上是通过`last-build.bin`与`build-history.bin`来判断的,同时每次编译完成也会更新build-history.bin
4. 将受`classpath`变化影响的类也加入dirtyFiles
5. 返回dirtyFiles供Kotlin编译器真正开始编译


在这一步,Kotlin编译器利用输入的各种参数进行分析,将需要重新编译的文件加入dirtyFiles,供下一步使用


### 第七步:Kotlin编译器真正开始编译
private fun compileImpl(): ExitCode {
// …
var compilationMode = sourcesToCompile(caches, changedFiles, args, messageCollector, classpathAbiSnapshot)
when (compilationMode) {
is CompilationMode.Incremental -> {
// …
compileIncrementally(args, caches, allSourceFiles, compilationMode, messageCollector, withAbiSnapshot)
}
is CompilationMode.Rebuild -> rebuildReason = compilationMode.reason
}
// …
}
protected open fun compileIncrementally(): ExitCode {
while (dirtySources.any() || runWithNoDirtyKotlinSources(caches)) {
// …
val (sourcesToCompile, removedKotlinSources) = dirtySources.partition(File::exists)
// 真正进行编译
val compiledSources = runCompiler(
sourcesToCompile, args, caches, services, messageCollectorAdapter,
allKotlinSources, compilationMode is CompilationMode.Incremental
)
// …
}
if (exitCode == ExitCode.OK) {
    // 写入`last-build.bin`
    BuildInfo.write(currentBuildInfo, lastBuildInfoFile)
}

val dirtyData = DirtyData(buildDirtyLookupSymbols, buildDirtyFqNames)
// 写入`build-history.bin`
processChangesAfterBuild(compilationMode, currentBuildInfo, dirtyData)

return exitCode
}
这段代码主要做了这么几件事:
1. 通过`sourcesToCompile`计算出发生改变的文件后,如果可以增量编译,则进入到`compileIncrementally`
2. 从`dirtySouces`中找出需要重新编译的文件,交给`runCompiler`方法进行真正的编译
3. 在编译结束之后,写入`last-build.bin`与`build-history.bin`文件,供下次编译时对比使用
到这里,增量编译的流程也就基本完成了。
## 总结
本文较为详细地介绍了Kotin是怎么一步步从编译入口到真正开始增量编译的,了解Kotlin增量编译原理可以帮助你定位为什么Kotlin增量编译有时会失效,也可以了解如何写出更容易命中增量编译的代码,希望对你有所帮助。
关于Kotlin增量编译还有更多的细节,本文也只是介绍了主要的流程,感兴趣的同学可直接查看KGP和Kotlin编译器的源码
参考资料
深入研究Android编译流程-Kotlin是如何编译的
>
> 作者:程序员江同学
> 链接:https://juejin.cn/post/7137089121989689351
>
>
>
## 最后
如果想要成为架构师或想突破20~30K薪资范畴,那就不要局限在编码,业务,要会选型、扩展,提升编程思维。此外,良好的职业规划也很重要,学习的习惯很重要,但是最重要的还是要能持之以恒,任何不能坚持落实的计划都是空谈。
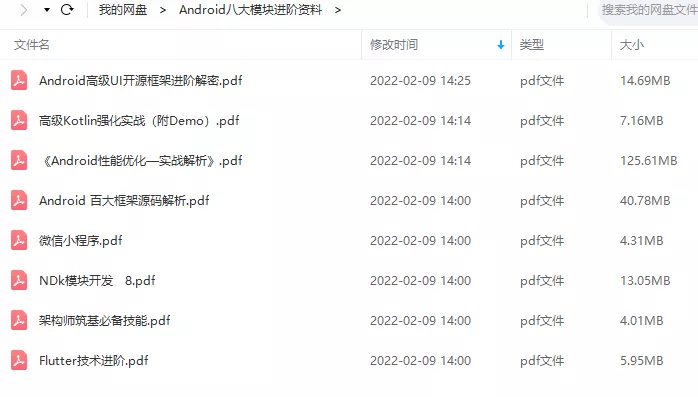
如果你没有方向,这里给大家分享一套由阿里高级架构师编写的《Android八大模块进阶笔记》,帮大家将杂乱、零散、碎片化的知识进行体系化的整理,让大家系统而高效地掌握Android开发的各个知识点。
相对于我们平时看的碎片化内容,这份笔记的知识点更系统化,更容易理解和记忆,是严格按照知识体系编排的。
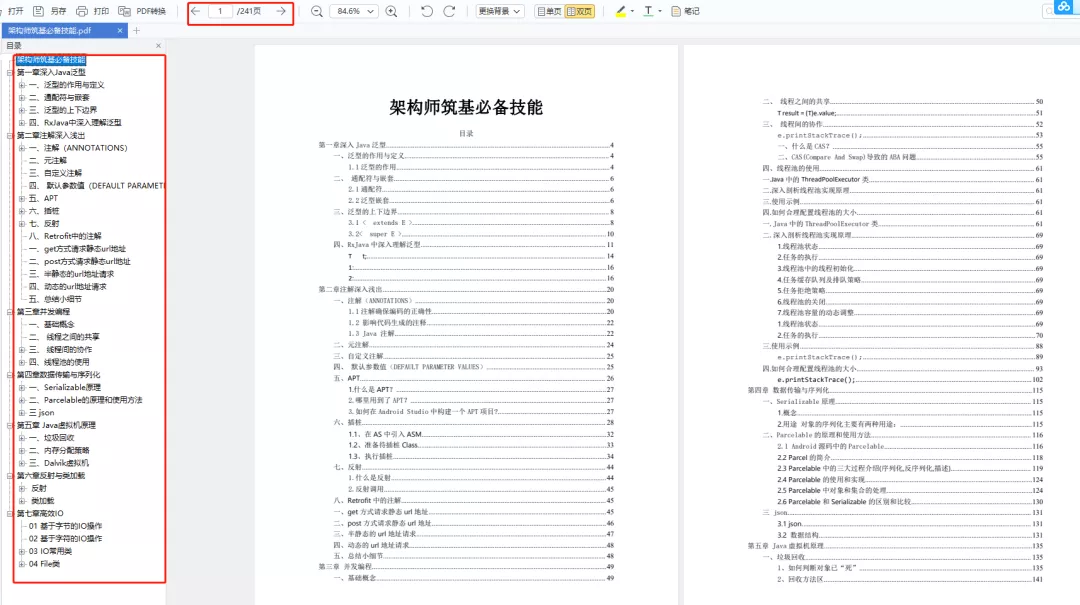
#### 一、架构师筑基必备技能
1、深入理解Java泛型
2、注解深入浅出
3、并发编程
4、数据传输与序列化
5、Java虚拟机原理
6、高效IO
……
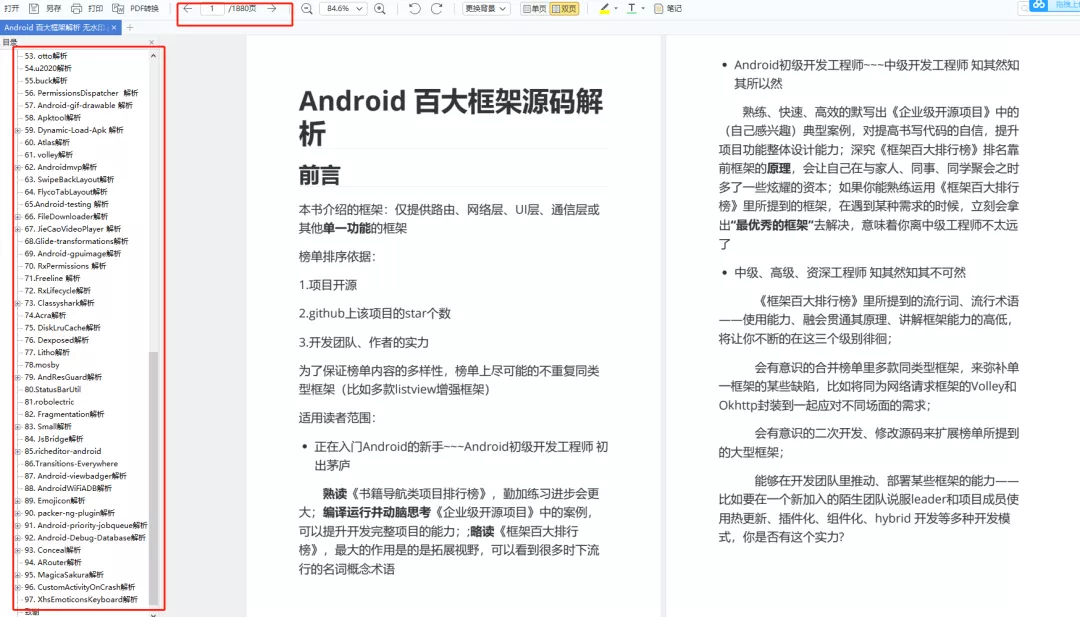
#### 二、Android百大框架源码解析
1.Retrofit 2.0源码解析
2.Okhttp3源码解析
3.ButterKnife源码解析
4.MPAndroidChart 源码解析
5.Glide源码解析
6.Leakcanary 源码解析
7.Universal-lmage-Loader源码解析
8.EventBus 3.0源码解析
9.zxing源码分析
10.Picasso源码解析
11.LottieAndroid使用详解及源码解析
12.Fresco 源码分析——图片加载流程
#### 三、Android性能优化实战解析
* 腾讯Bugly:对字符串匹配算法的一点理解
* 爱奇艺:安卓APP崩溃捕获方案——xCrash
* 字节跳动:深入理解Gradle框架之一:Plugin, Extension, buildSrc
* 百度APP技术:Android H5首屏优化实践
* 支付宝客户端架构解析:Android 客户端启动速度优化之「垃圾回收」
* 携程:从智行 Android 项目看组件化架构实践
* 网易新闻构建优化:如何让你的构建速度“势如闪电”?
* …

#### 四、高级kotlin强化实战
1、Kotlin入门教程
2、Kotlin 实战避坑指南
3、项目实战《Kotlin Jetpack 实战》
* 从一个膜拜大神的 Demo 开始
* Kotlin 写 Gradle 脚本是一种什么体验?
* Kotlin 编程的三重境界
* Kotlin 高阶函数
* Kotlin 泛型
* Kotlin 扩展
* Kotlin 委托
* 协程“不为人知”的调试技巧
* 图解协程:suspend

**网上学习资料一大堆,但如果学到的知识不成体系,遇到问题时只是浅尝辄止,不再深入研究,那么很难做到真正的技术提升。**
**[需要这份系统化的资料的朋友,可以戳这里获取](https://bbs.youkuaiyun.com/topics/618636735)**
**一个人可以走的很快,但一群人才能走的更远!不论你是正从事IT行业的老鸟或是对IT行业感兴趣的新人,都欢迎加入我们的的圈子(技术交流、学习资源、职场吐槽、大厂内推、面试辅导),让我们一起学习成长!**
e 脚本是一种什么体验?
* Kotlin 编程的三重境界
* Kotlin 高阶函数
* Kotlin 泛型
* Kotlin 扩展
* Kotlin 委托
* 协程“不为人知”的调试技巧
* 图解协程:suspend
[外链图片转存中...(img-5cvWi13k-1715707940943)]
[外链图片转存中...(img-ss7FtXYO-1715707940943)]
**网上学习资料一大堆,但如果学到的知识不成体系,遇到问题时只是浅尝辄止,不再深入研究,那么很难做到真正的技术提升。**
**[需要这份系统化的资料的朋友,可以戳这里获取](https://bbs.youkuaiyun.com/topics/618636735)**
**一个人可以走的很快,但一群人才能走的更远!不论你是正从事IT行业的老鸟或是对IT行业感兴趣的新人,都欢迎加入我们的的圈子(技术交流、学习资源、职场吐槽、大厂内推、面试辅导),让我们一起学习成长!**


 被折叠的 条评论
为什么被折叠?
被折叠的 条评论
为什么被折叠?
 到【灌水乐园】发言


