


该功能将使用vue3 + TS来实现语音播放组件,使用什么技术不重要,重要的是看懂了核心逻辑后,通过原生js、react、vue2等都可以轻松实现
所涉及到重要点有以下几个:
(1)进度条的实现:拖拽进度条、点击进度条
(2)操作audio语音播放:通过js操作audio媒体
(3)播放进度与进度条紧密关联:播放的进度改变时,进度条也随之改变;进度条改变时,播放的进度也随之改变
效果图:
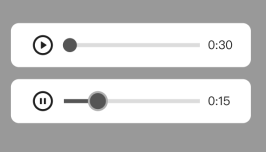
开始我们的设计吧!
第一步:点击拖拽进度条
进度条的css样式如下:
父元素设置灰色背景色,圆圈进行position定位,使用left百分比,同时黑色进度条的width也是百分比,这样圆圈的left值是多少,黑色进度条的width就是多少。
.slider-wrap {
      position: relative;
      display: flex;
      align-items: center;
      height: 4px;
      max-width: 194px;
      min-width: 36px;
      width: 194px;
      background-color: rgba(23, 23, 23, 0.15);
      cursor: pointer;
      .circle {
        position: absolute;
        width: 14px;
        height: 14px;
        background-color: #555555;
        border-radius: 100%;
        cursor: pointer;
        user-select: none;
        transform: translate(-50%);
      }
      .slider-bar {
        height: 4px;
        max-width: 200px;
        background-color: #555555;
      }
    }
先说拖拽圆圈,圆圈上绑定mousedown事件,根据事件e.target确定圆圈、黑色进度条、灰色父元素,三者的element。同时知道了圆圈当前的left值,比如30%,还知道了当前鼠标mousedown时,事件e.pageX,即鼠标mousedown时,距离页面左边的水平值,因为对比后续鼠标移动时,触发的mousemove事件的e.pageX可以判断移动了多少。同时还要知道灰色背景的父元素的width。因为鼠标移动的距离 / width 要赋值给圆圈的left。知道移动了%多少。
    const circleMousedown = (e) => {
      circleTarget.el = e.target; // 圆圈自身
      wrapEle.el = e.target.parentElement; // 圆圈父元素
      sliderBar.el = e.target.nextElementSibling; // 圆圈的兄弟节点

      circleTarget.circleLeft = e.target.style.left;
      circleTarget.pageX = e.pageX;
      circleTarget.circleMouseMouve = true;
      wrapEle.width = window.getComputedStyle(wrapEle.el, null).getPropertyValue('width');
    };
然后,监听document文档的mousemove,注意鼠标是可以在整个文档上移动的,不过圆圈可不能在灰色父元素之外。移动的e.pageX - 鼠标mousedown时的e.pageX 就是鼠标水平移动的距离。超出最大值时,圆圈left设置为100%,小于最小值时,left设置为0%,总之left要在0%~100%之间,才能保证圆圈不超出到外面去。这样圆圈就可以随着鼠标移动了,同时黑色进度条的width值与圆圈的left值一样,所以黑色进度条的width也随着鼠标移动。
document.addEventListener('mousemove', (e) => {
      if (circleTarget.circleMouseMouve) {
        const nowLeft =
          parseFloat(circleTarget.circleLeft) +
          getPercentage(e.pageX - circleTarget.pageX, wrapEle.width);
        if (nowLeft >= 100) {
          circleDragLeft = '100%';
        } else if (nowLeft <= 0) {
          circleDragLeft = '0%';
        } else {
          circleDragLeft = `${nowLeft}%`;
 最低0.47元/天 解锁文章


 8902
8902

 被折叠的 条评论
为什么被折叠?
被折叠的 条评论
为什么被折叠?
 到【灌水乐园】发言


