


 本文详细介绍如何使用SpringBoot创建一个简单的Web应用,包括pom文件中引入SpringBoot依赖、创建RESTful风格的控制器以及启动类的编写。通过示例代码,读者可以快速掌握SpringBoot的基本用法。
1.pom引入springboot
<!-- Inherit defaults from Spring Boot -->
	<parent>
		<groupId>org.springframework.boot</groupId>
		<artifactId>spring-boot-starter-parent</artifactId>
		<version>2.1.1.RELEASE</version>
		<relativePath /> <!-- lookup parent from repository -->
	</parent>

	<dependencies>
		<!--核心模块,包括自动配置支持、日志和YAML -->
		<dependency>
			<groupId>org.springframework.boot</groupId>
			<artifactId>spring-boot-starter</artifactId>
		</dependency>
		<!-- 测试模块,包括JUnit、Hamcrest、Mockito -->
		<dependency>
			<groupId>org.springframework.boot</groupId>
			<artifactId>spring-boot-starter-test</artifactId>
			<scope>test</scope>
		</dependency>

		<!-- 引入Web模块,需添加spring-boot-starter-web模块: -->
		<dependency>
			<groupId>org.springframework.boot</groupId>
			<artifactId>spring-boot-starter-web</artifactId>
		</dependency>
2.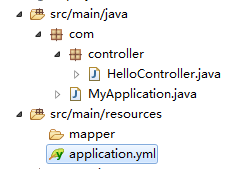
3.新建一个控制层
@RestController
public class HelloController {
	@RequestMapping("/hello")
	public String hello() {
		return "Hello Spring Boot!";
	}
	/**
	 *获取车牌列表
	 * @return
	 *//*
	@RequestMapping("/GetCarMessages")
	public String GetCarMessages() {
		return "Hello Spring Boot!";
	}

	*//**
	 *登录
	 * @return
	 *//*
	@RequestMapping("/Login")
	public String Login() {
		return "Hello Spring Boot!";
	}*/


}
4.启动类
@SpringBootApplication
public class MyApplication {
	public static void main(String[] args) {
		SpringApplication.run(MyApplication.class, args);
	}

}


 被折叠的 条评论
为什么被折叠?
被折叠的 条评论
为什么被折叠?
 到【灌水乐园】发言


