


1. 概述
本文档旨在指导如何将前端资源包部署到Nginx上,确保前端应用能够正常在Nginx运行。以下是部署前端资源包到Nginx的详细步骤。
2. 环境准备
在部署前端资源包之前,请确保以下环境和工具准备就绪:
- 服务器端:
-
- 操作系统:Windows
- Nginx(1.10.3)
- 前端资源包(dist文件夹)
3. 部署步骤
3.1 构建资源包
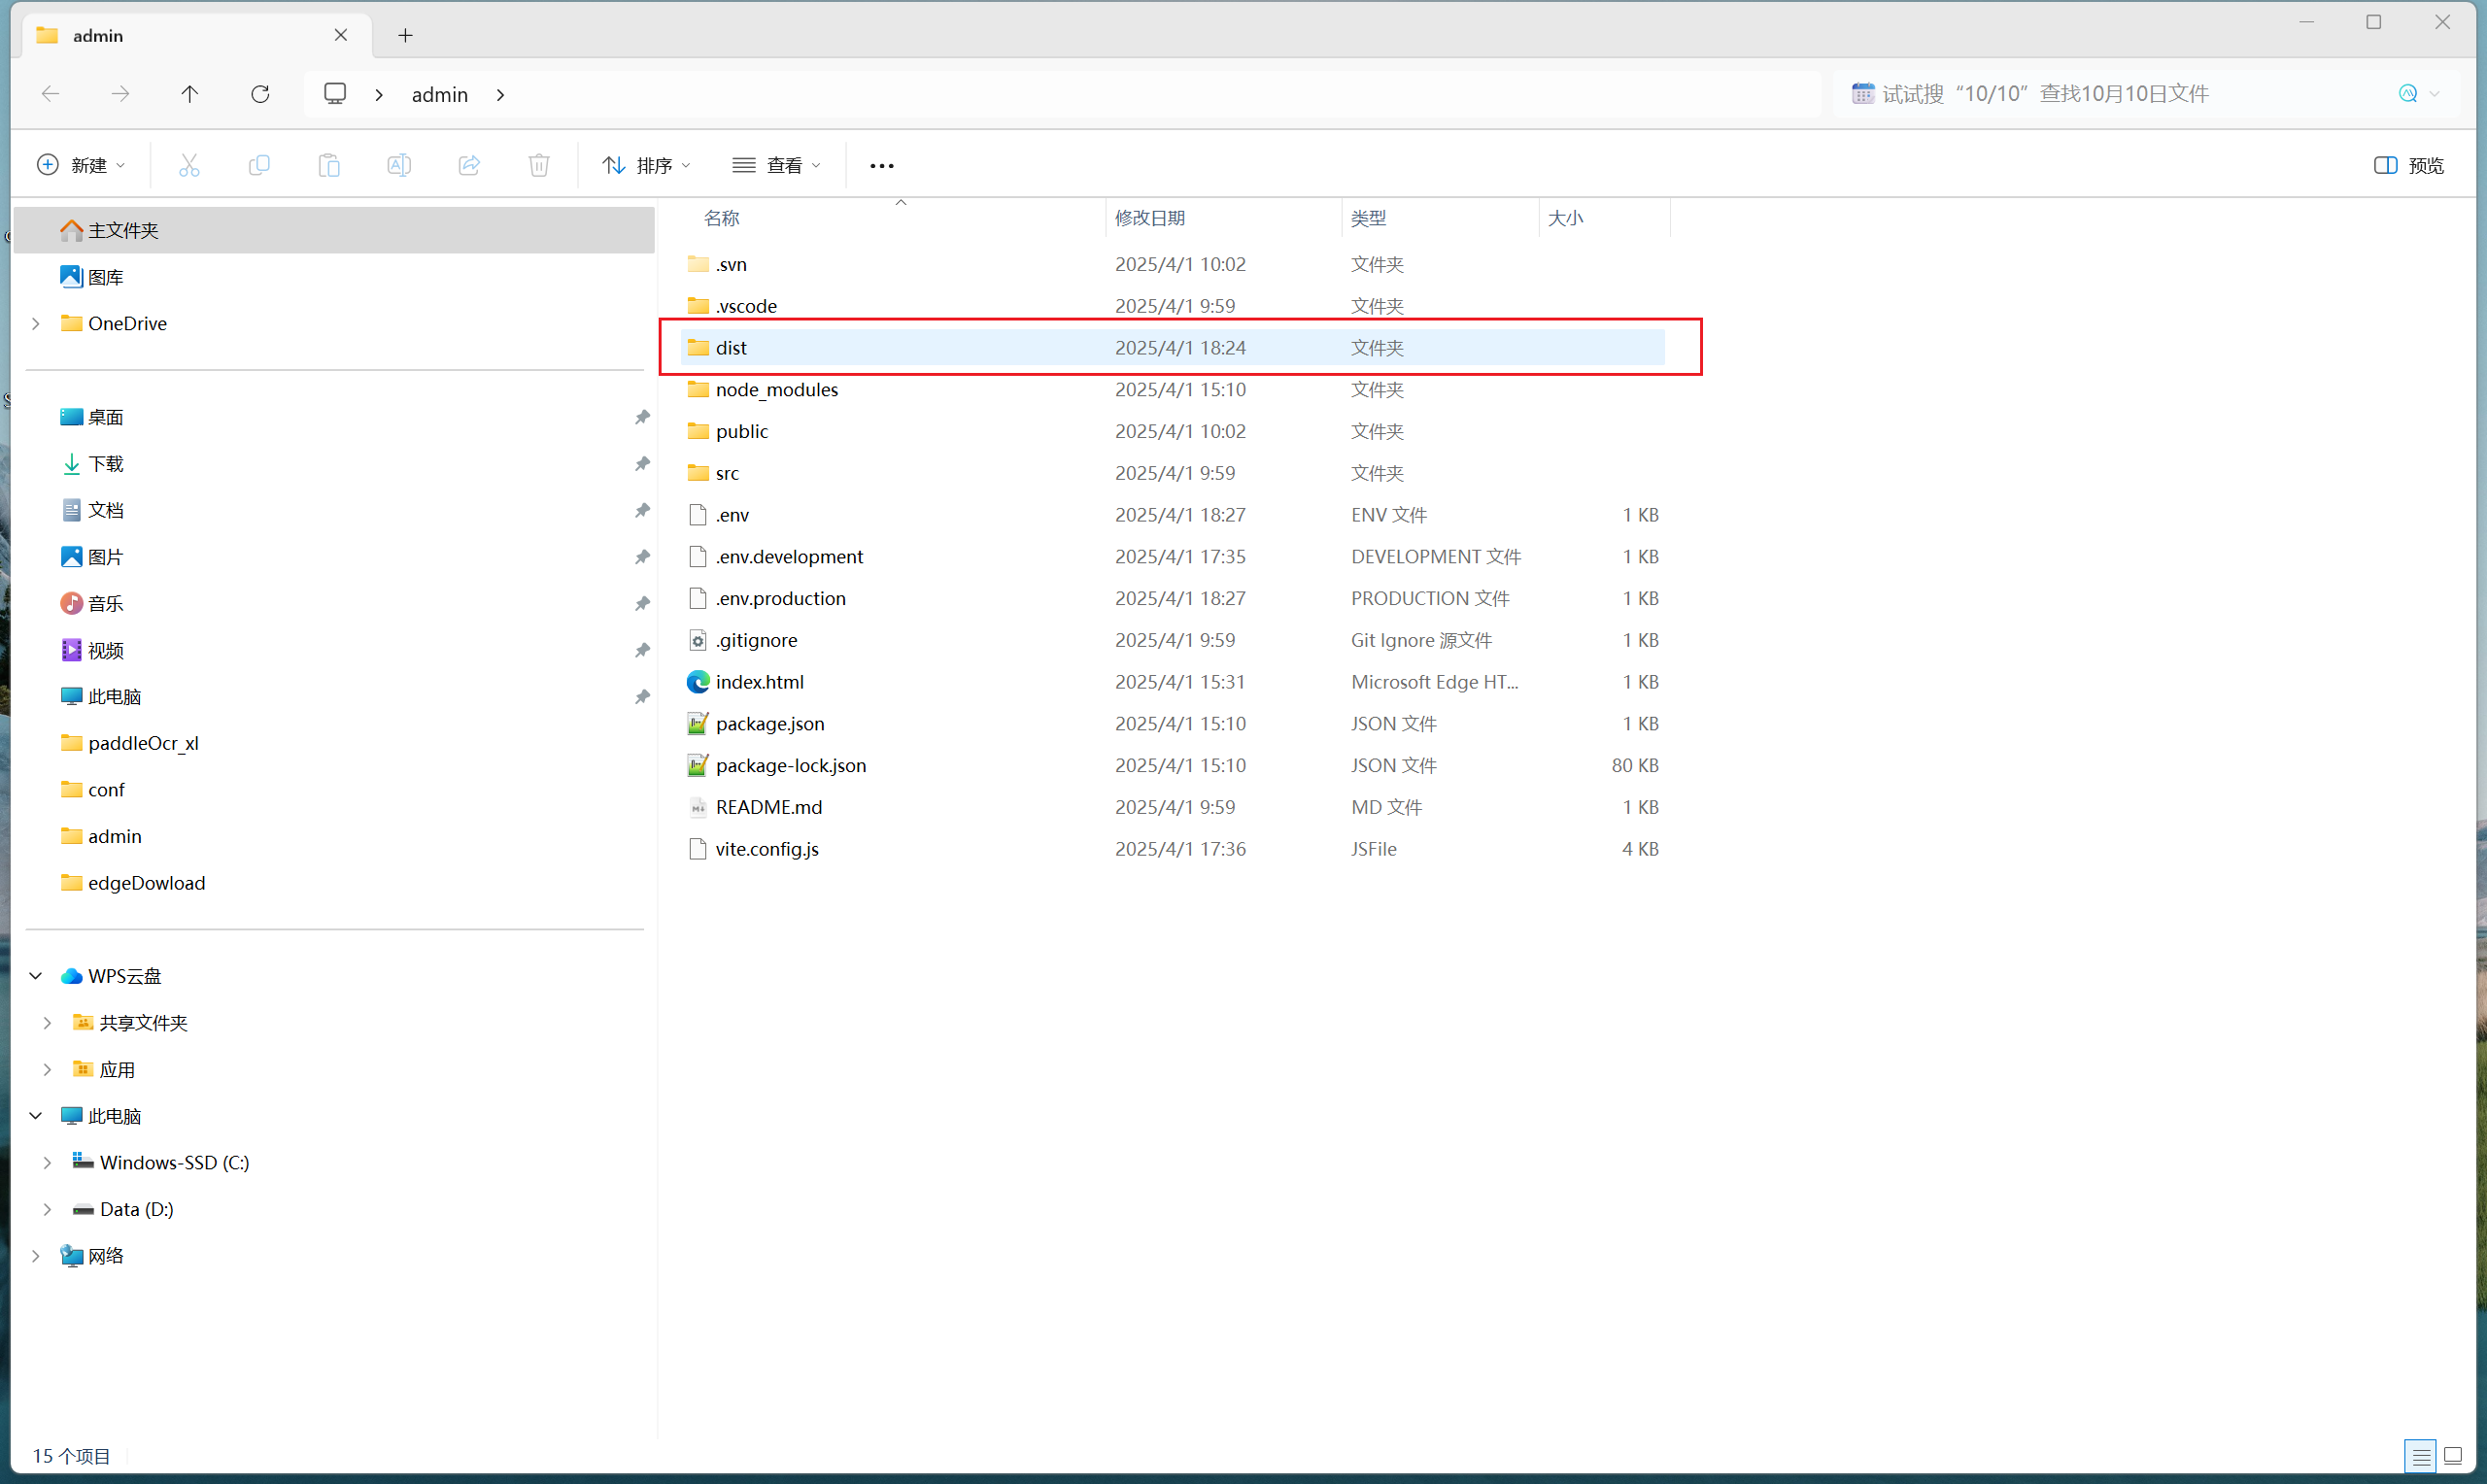
使用构建工具(如 webpack、Vite、parcel 等)将前端代码打包成资源包。
npm run build构建完成后,会在项目目录下生成一个 dist 文件夹,其中包含所有打包后的静态资源。
如图1
3.2 配置 Nginx
在服务器上配置 Nginx,使其能够托管前端资源。
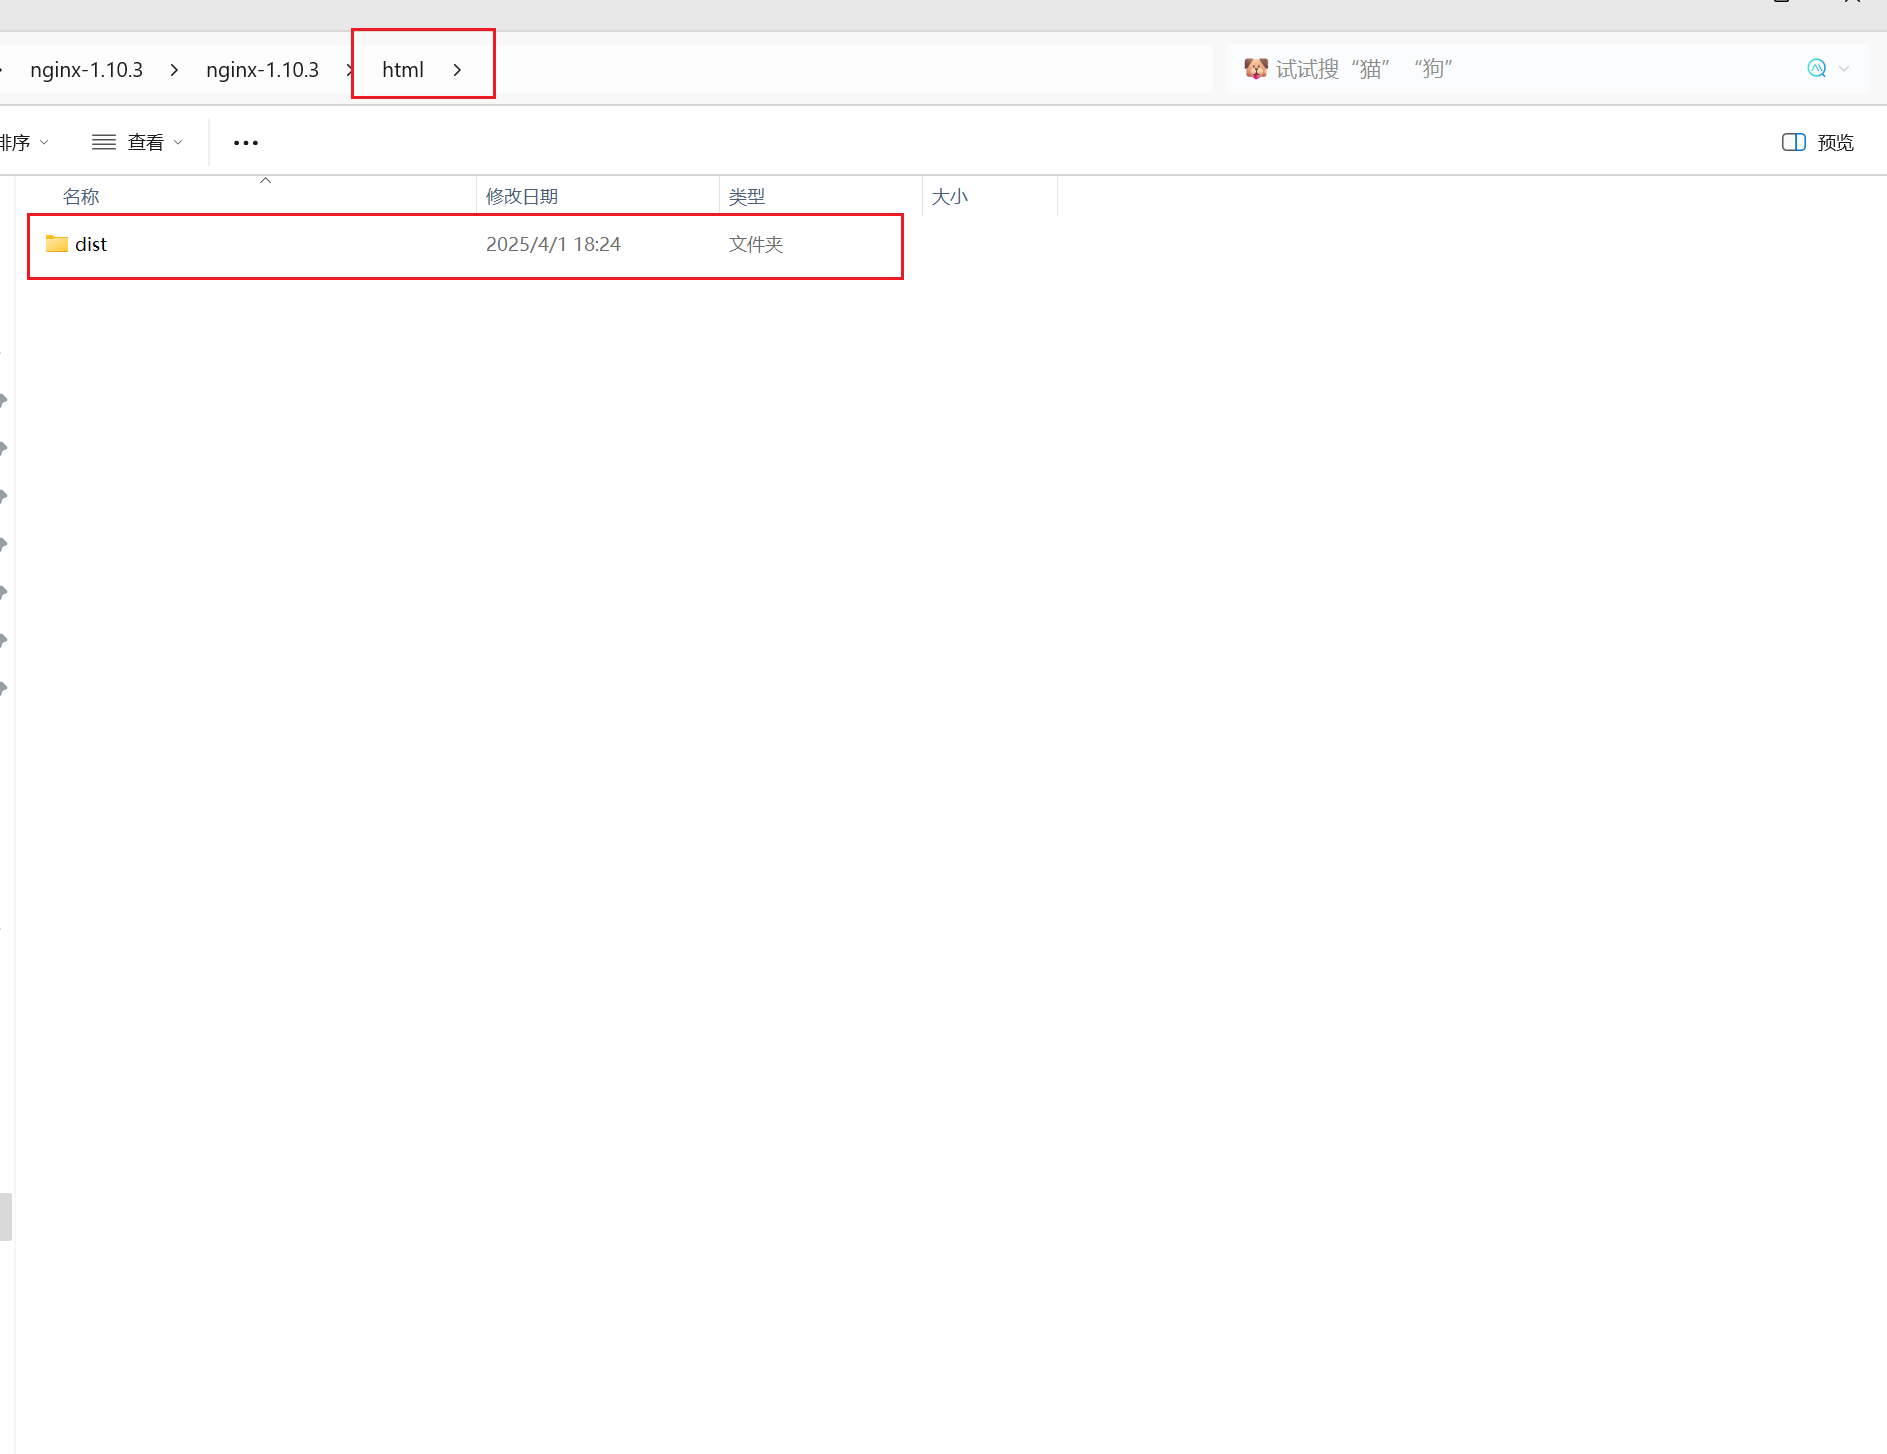
- 首先解压Nginx目录

- 把前端资源包(dist文件夹)放进html目录中
- 进入config目录下找到nginx.conf文件
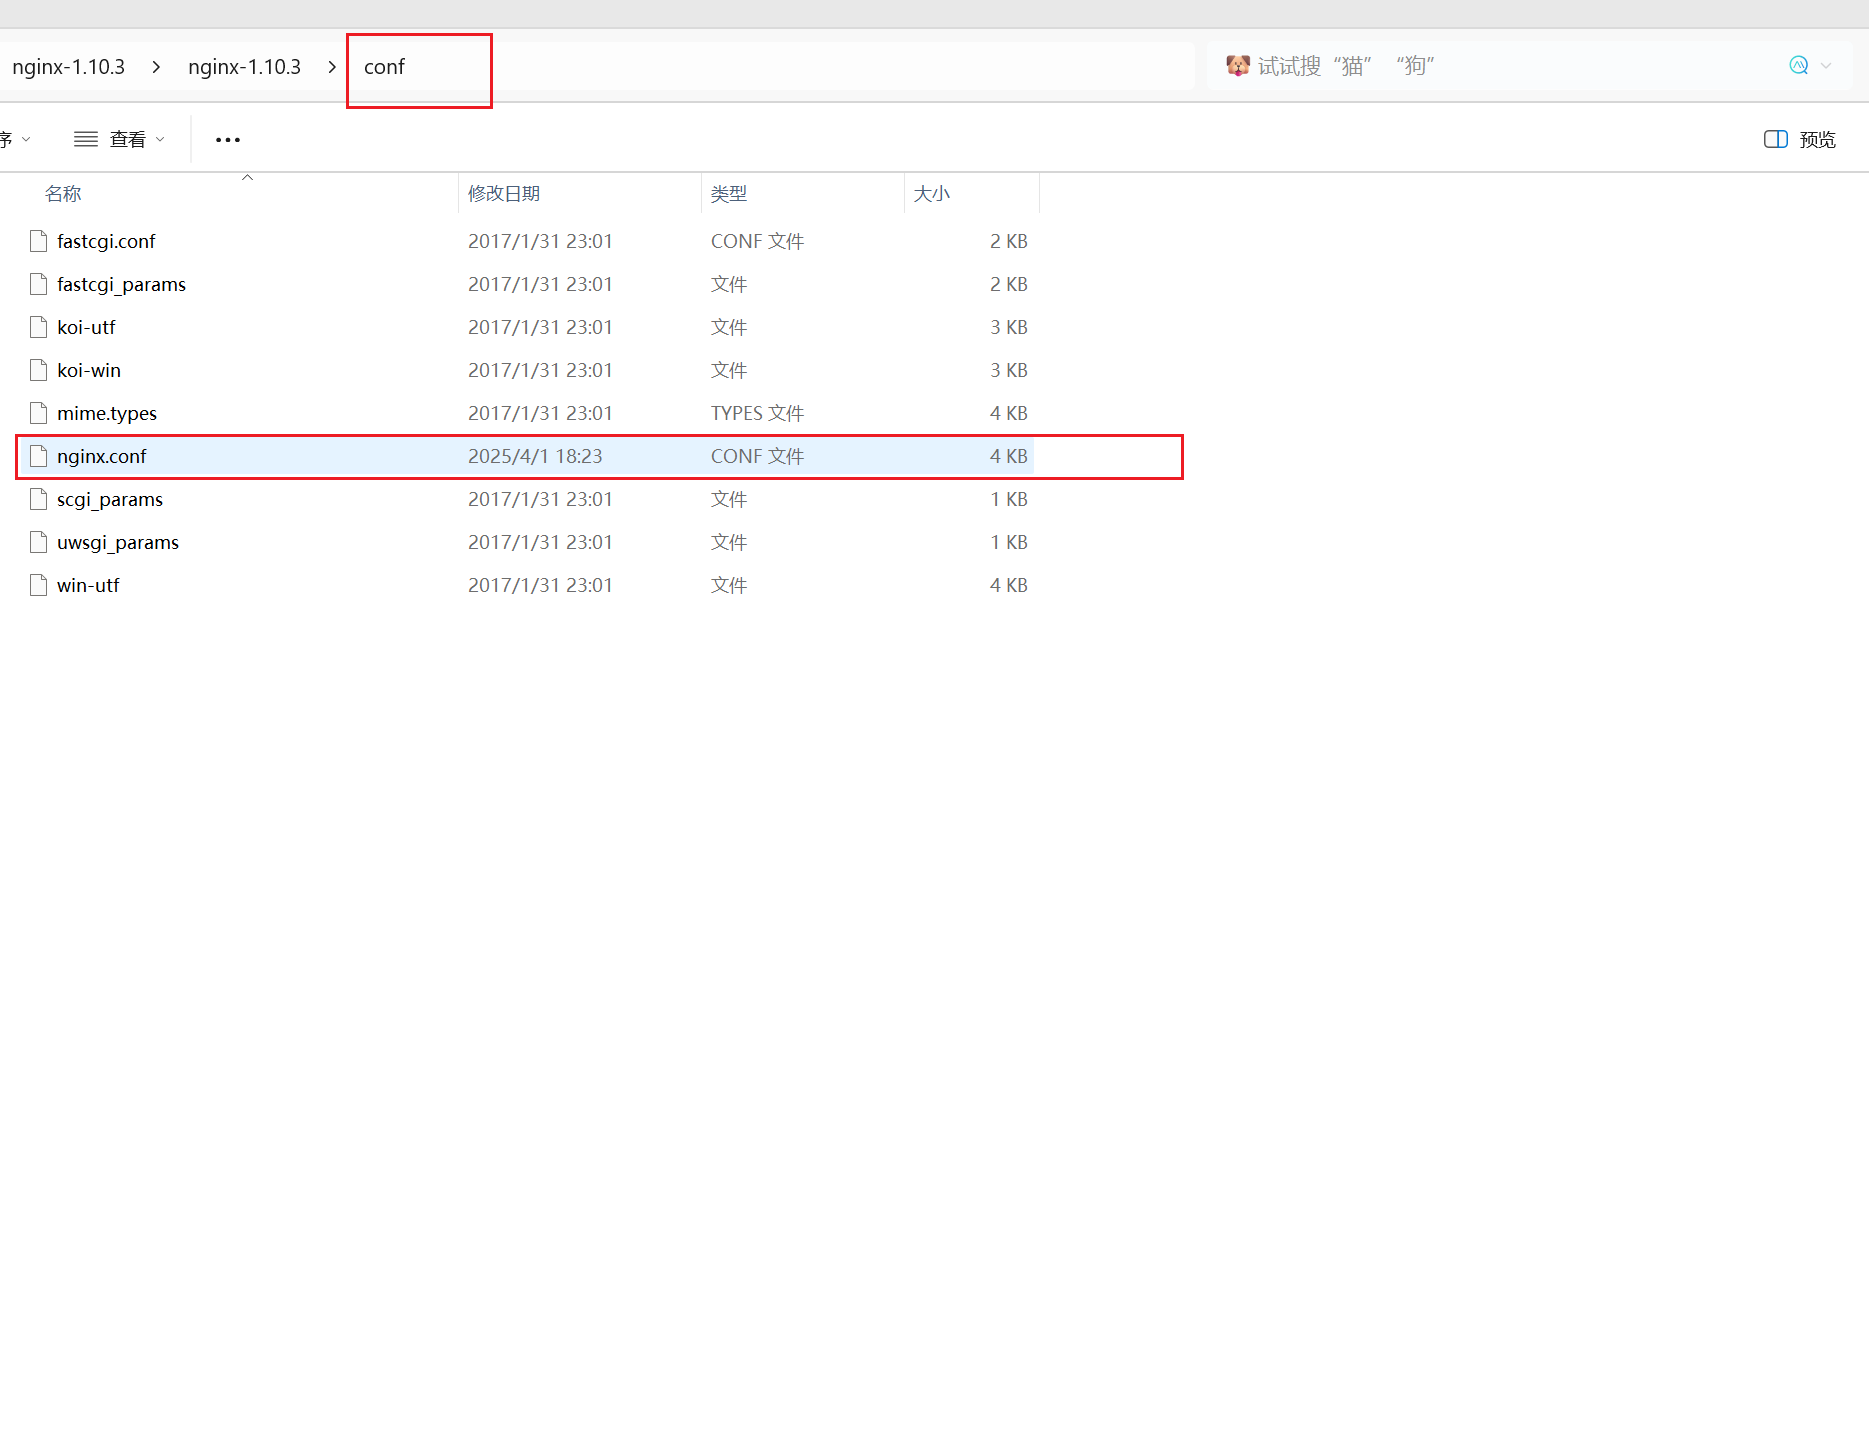
- 打开nginx.conf并进行配置
# 定义运行 Nginx 的用户(默认是 nobody)
#user  nobody;

# worker_processes 定义 Nginx 使用的工作进程数
# 通常设置为 CPU 核心数,默认值为 1
worker_processes  1;


# pid 文件用于记录 Nginx 主进程的 PID
#pid        logs/nginx.pid;


events {
    # 每个 worker 进程允许的最大连接数
    # 默认值为 512,可以根据服务器性能调整
    worker_connections  1024;
}


http {
    # 引入 MIME 类型文件,用于定义文件扩展名与 MIME 类型的映射
    include       mime.types;

    # 设置默认的 MIME 类型
    default_type  application/octet-stream;

    # 自定义日志格式(这里被注释掉了)
    #log_format  main  '$remote_addr - $remote_user [$time_local] "$request" '
    #                  '$status $body_bytes_sent "$http_referer" '
    #                  '"$http_user_agent" "$http_x_forwarded_for"';

    # 访问日志的路径和格式
    #access_log  logs/access.log  main;

    # 开启 sendfile 选项,用于高效传输文件
    sendfile        on;

    # tcp_nopush 选项可以优化网络传输(需要配合 sendfile 使用)
    #tcp_nopush     on;

    # keepalive_timeout 定义客户端连接保持活动的时间
    # 默认值为 65 秒
    #keepalive_timeout  0;
    keepalive_timeout  65;

    # 开启 Gzip 压缩功能(这里被注释掉了)
    #gzip  on;

    # 配置一个虚拟主机
    server {
        # 监听的端口号
        listen     80;

        # 服务器名称(域名或 IP 地址)
        server_name  localhost;

        # 字符集设置(这里被注释掉了)
        #charset koi8-r;

        # 访问日志(这里被注释掉了)
        #access_log  logs/host.access.log  main;

        # 默认根目录配置
        location / {
            # 根目录路径(静态资源所在的目录)
            root   html/dist;

            # 默认首页文件
            index  index.html index.htm;
            # try_files 指令会依次尝试匹配 $uri、$uri/,最后返回 /index.html
            try_files $uri $uri/ /index.html;
        }

        # 处理 /hospital-admin 路径
        location /hospital-admin/ {
            # alias 指令用于替换匹配的路径部分
            # 注意:alias 后面的路径末尾是否有斜杠会影响解析结果
            alias   html/dist/;

            # 默认首页文件
            index  index.html index.htm;

            # 确保静态资源优先匹配,避免循环重定向
            try_files $uri $uri/ /hospital-admin/index.html;
        }

        # 反向代理配置(这里被注释掉了)
        # location /api/ {
        #     # 将请求转发到后端服务
        #     proxy_pass http://后端服务地址:端口;

        #     # 跨域资源共享(CORS)相关配置
        #     add_header Access-Control-Allow-Origin *;
        #     add_header Access-Control-Allow-Methods 'GET, POST, OPTIONS';
        #     add_header Access-Control-Allow-Headers 'DNT,X-CustomHeader,Keep-Alive,User-Agent,X-Requested-With,If-Modified-Since,Cache-Control,Content-Type,Authorization';
        # }

        # 自定义错误页面
        error_page   500 502 503 504  /50x.html;

        # 定义 50x 错误页面的具体位置
        location = /50x.html {
            root   html;
        }

        # PHP 脚本代理到 Apache(这里被注释掉了)
        #location ~ \.php$ {
        #    proxy_pass   http://127.0.0.1;
        #}

        # PHP 脚本通过 FastCGI 传递给 PHP-FPM(这里被注释掉了)
        #location ~ \.php$ {
        #    root           html;
        #    fastcgi_pass   127.0.0.1:9000;
        #    fastcgi_index  index.php;
        #    fastcgi_param  SCRIPT_FILENAME  /scripts$fastcgi_script_name;
        #    include        fastcgi_params;
        #}

        # 禁止访问 .htaccess 文件(这里被注释掉了)
        #location ~ /\.ht {
        #    deny  all;
        #}
    }

    # 另一个虚拟主机的示例(这里被注释掉了)
    #server {
    #    listen       8000;
    #    listen       somename:8080;
    #    server_name  somename  alias  another.alias;

    #    location / {
    #        root   html;
    #        index  index.html index.htm;
    #    }
    #}


    #server {
    #    listen       443 ssl;
    #    server_name  localhost;

    #    # SSL 证书和密钥文件
    #    ssl_certificate      cert.pem;
    #    ssl_certificate_key  cert.key;

    #    # SSL 会话缓存和超时时间
    #    ssl_session_cache    shared:SSL:1m;
    #    ssl_session_timeout  5m;

    #    # SSL 加密算法
    #    ssl_ciphers  HIGH:!aNULL:!MD5;
    #    ssl_prefer_server_ciphers  on;

    #    location / {
    #        root   html;
    #        index  index.html index.htm;
    #    }
    #}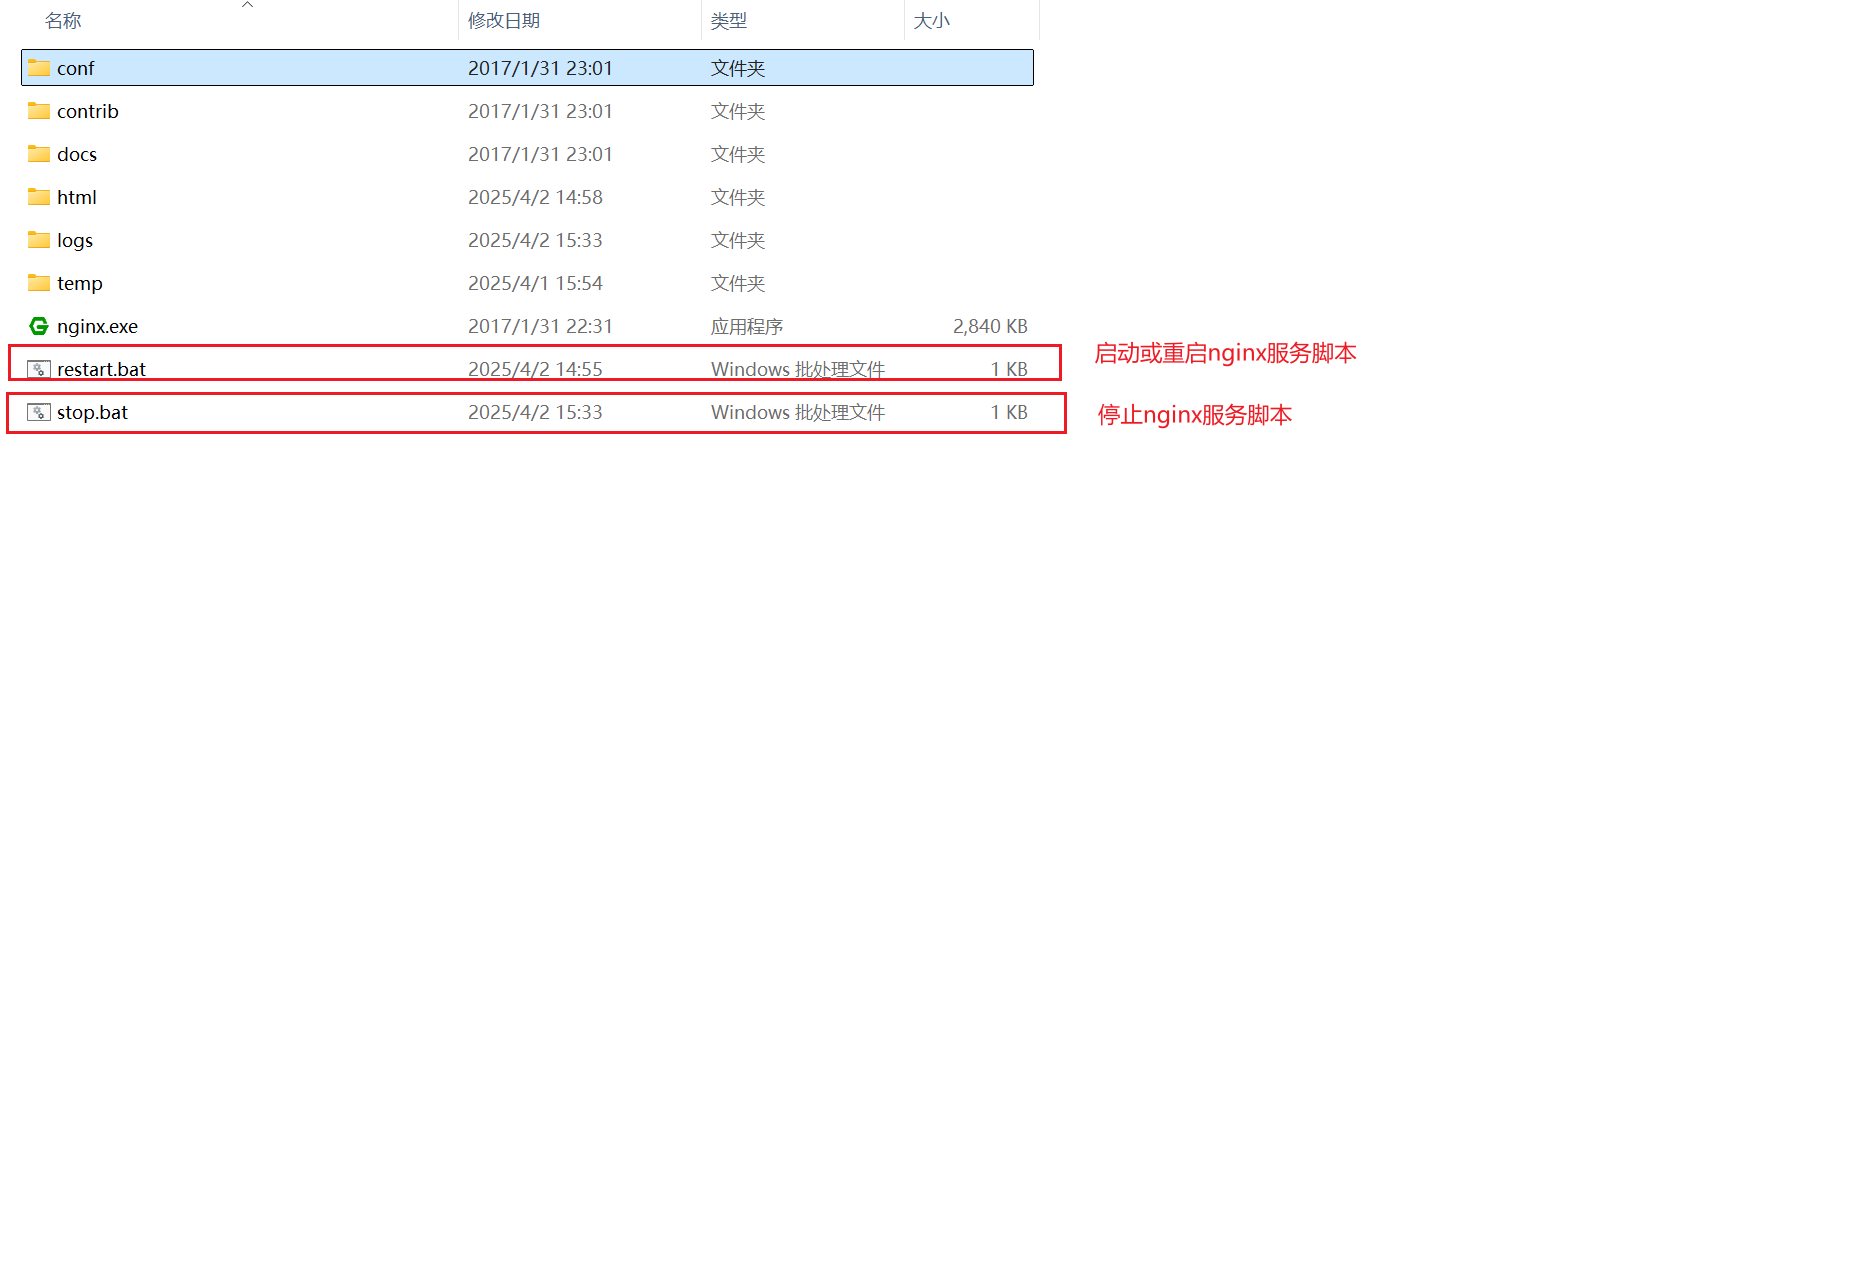
}- 保存nginx.conf配置文件并重启Nginx
4. 验证
在浏览器上输入nginx访问地址
http://localhost:端口


 被折叠的 条评论
为什么被折叠?
被折叠的 条评论
为什么被折叠?
 到【灌水乐园】发言


