


最近在集成agents-flex时发现公司当前项目中的springboot版本相对落后,很多方法集成都找不到类,因此将springboot的版本升级到了3.4.0,将jdk8升级到了jdk17而重新搭建了一个简单的springboot项目,用于调用ai大模型的接入。
<maven.compiler.source>17</maven.compiler.source>
<maven.compiler.target>17</maven.compiler.target>
<spring-boot.version>3.4.0</spring-boot.version>
<spring.cloud.version>2022.0.0</spring.cloud.version>
下面就简单讲一下关于版本升级后原项目springfox2.2.9.2版本不再适配,需要做出调整(前提条件时上述的版本限制哈,版本不一致的时候会出现各种问题,作者不做任何保证):
一,集成springdoc相关的pom引入
<dependency>
            <groupId>org.springdoc</groupId>
            <artifactId>springdoc-openapi-starter-webmvc-ui</artifactId>
            <version>2.2.0</version>
        </dependency>

        <dependency>
            <groupId>org.springdoc</groupId>
            <artifactId>springdoc-openapi-starter-webmvc-api</artifactId>
            <version>2.2.0</version>
        </dependency>

        <dependency>
            <groupId>io.swagger.core.v3</groupId>
            <artifactId>swagger-annotations</artifactId>
            <version>2.2.32</version>
        </dependency>
        <dependency>
            <groupId>io.swagger.core.v3</groupId>
            <artifactId>swagger-annotations</artifactId>
            <version>2.2.32</version>
        </dependency>
二,启动类的配置代码
import io.swagger.v3.oas.annotations.OpenAPIDefinition;
import io.swagger.v3.oas.annotations.info.Info;
import org.slf4j.Logger;
import org.slf4j.LoggerFactory;
import org.springframework.boot.SpringApplication;
import org.springframework.boot.autoconfigure.SpringBootApplication;
import org.springframework.context.ConfigurableApplicationContext;
import org.springframework.scheduling.annotation.EnableAsync;

@SpringBootApplication(scanBasePackages = {"com.ai.*"})
@OpenAPIDefinition(info = @Info(title = "AI API", version = "1.0", description = "AI系统接口文档"))
@EnableAsync
public class AiApplication {

    public static void main(String[] args) {
        ConfigurableApplicationContext run = SpringApplication.run(ZhidaiAiApplication.class, args);
        Logger log = LoggerFactory.getLogger(ZhidaiAiApplication.class);
        log.info("ai.zhidai.com启动成功...");
        String springProfiles = run.getEnvironment().getProperty("spring.profiles.active");
        if ("qa".equals(springProfiles) || "dev".equals(springProfiles)) {
            String port = run.getEnvironment().getProperty("server.port");
            log.info("\n----------------------------------------------------------\n" +
                    "swagger访问网址: \t\thttp://localhost:" + port + "/swagger-ui.html" + "\n" +
                    "knife4j访问网址: \t\thttp://localhost:" + port + "/doc.html" + "\n" +
                    "----------------------------------------------------------");
        }
    }
}
三,项目拦截器配置中增加spring doc的排除拦截路径
import com.ai.ai.config.interceptor.TokenAuthInterceptor;
import org.springframework.beans.factory.annotation.Autowired;
import org.springframework.context.annotation.ComponentScan;
import org.springframework.context.annotation.Configuration;
import org.springframework.web.servlet.config.annotation.InterceptorRegistry;
import org.springframework.web.servlet.config.annotation.WebMvcConfigurer;

@Configuration
@ComponentScan("com.ai.ai.config.interceptor")
public class WebAppConfiguration implements WebMvcConfigurer {
    @Autowired
    private TokenAuthInterceptor tokenAuthInterceptor;

    @Override
    public void addInterceptors(InterceptorRegistry registry) {
        registry.addInterceptor(tokenAuthInterceptor).addPathPatterns("/**")
                .excludePathPatterns("/v3/api-docs","/api-docs",
                        "/swagger-resources/configuration/ui",
                        "/swagger-resources",
                        "/swagger-resources/configuration/security",
                        "/swagger-ui.html",
                        "/error");
    }

}
四,配置文件参数配置整理
springdoc.swagger-ui.path=/swagger-ui.html
springdoc.api-docs.path=/v3/api-docs
springdoc.api-docs.enabled=true
springdoc.packages-to-scan=**************
五,如果原有项目集成了knife4j,也需要同步调整相关jar包版本与配置
(1),knife4j的pom文件
<dependency>
            <groupId>com.github.xiaoymin</groupId>
            <artifactId>knife4j-openapi3-spring-boot-starter</artifactId>
            <version>4.1.0</version>
        </dependency>
(2),配置文件调整
knife4j.enable=true
knife4j.setting.language=zh-CN
六,项目集成效果
(1),项目启动完成时的效果

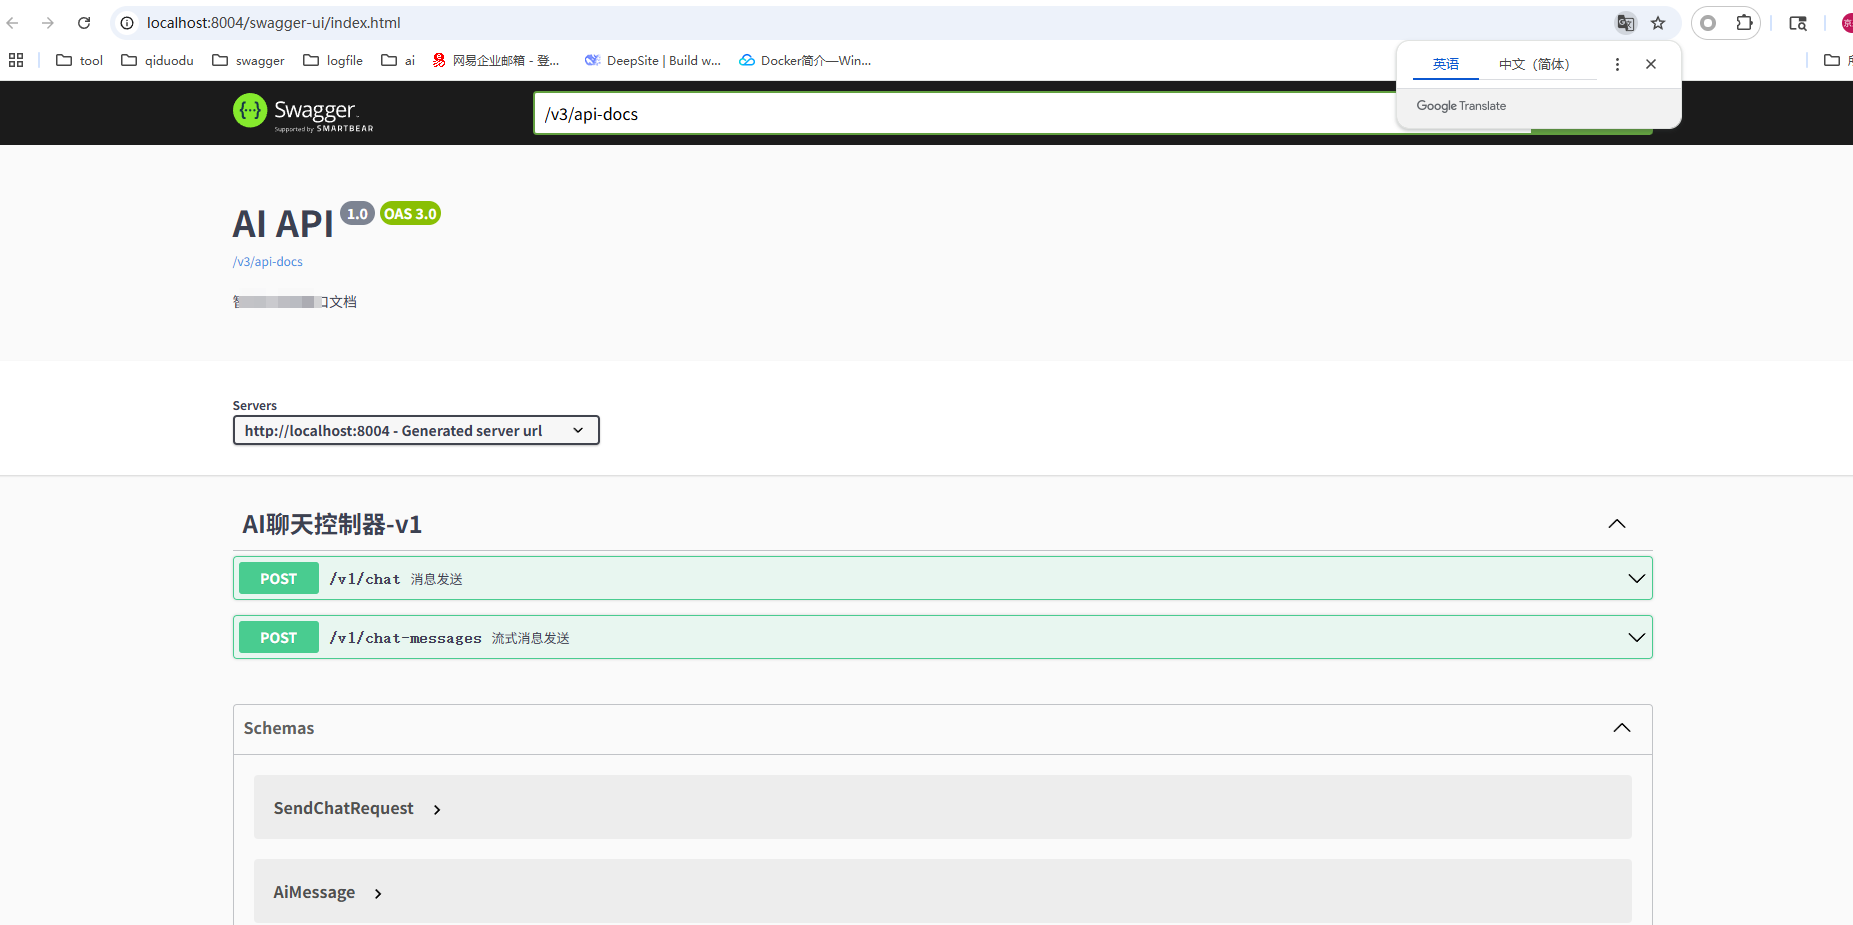
(2),swagger-ui的效果
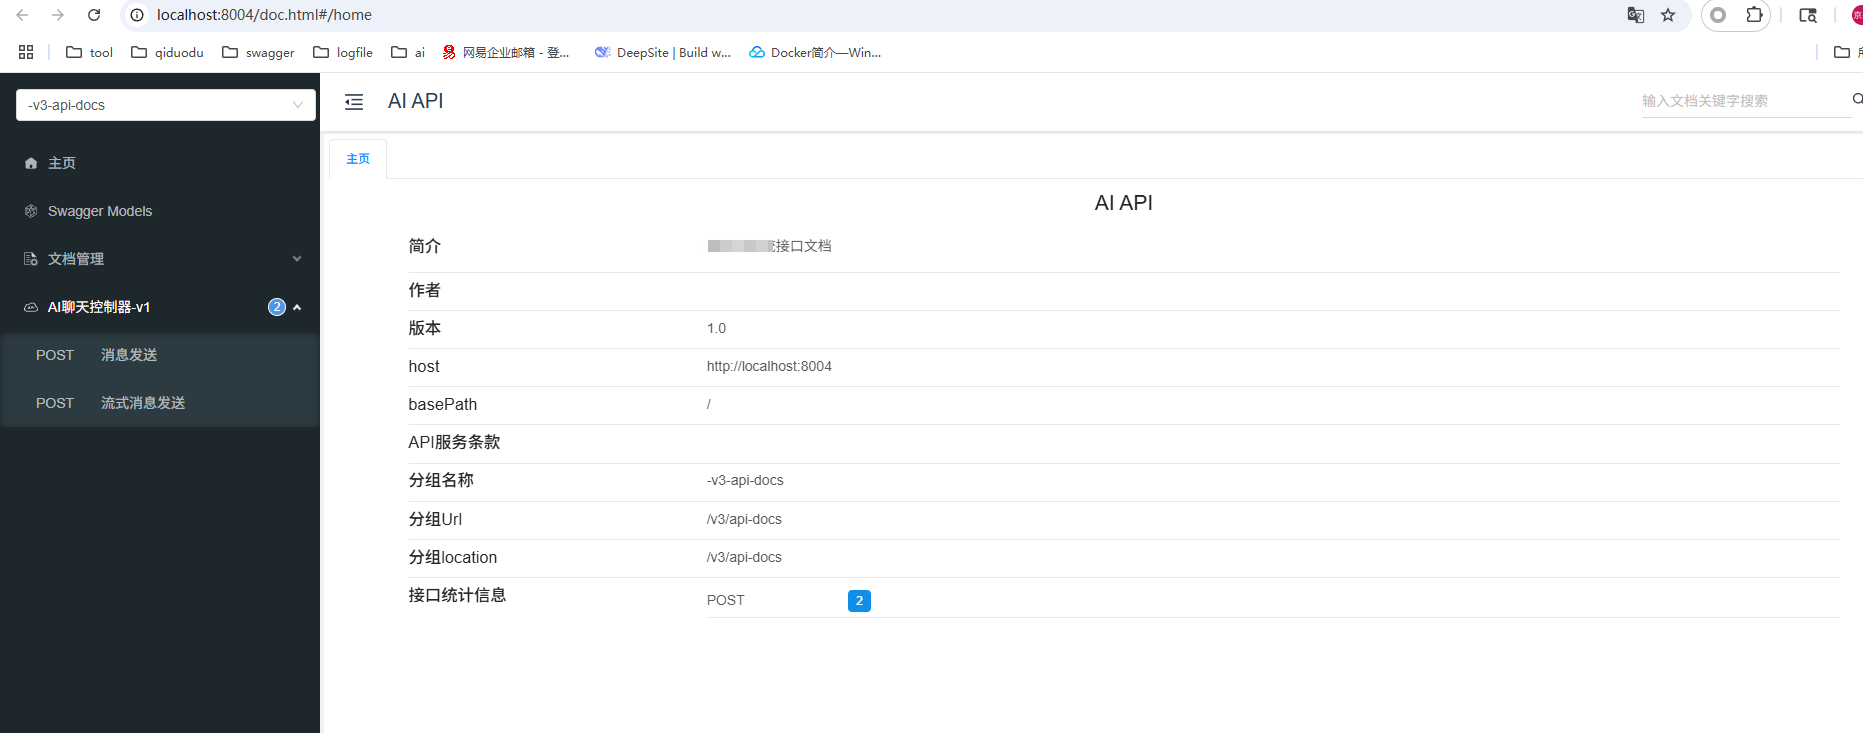
(3),kinfe4j的启动效果


 803
803

 被折叠的 条评论
为什么被折叠?
被折叠的 条评论
为什么被折叠?
 到【灌水乐园】发言


