


vue 图片上传
vue 的组件框架是 ant design vue版本,组件库见这里:
https://www.antdv.com/components/upload-cn/
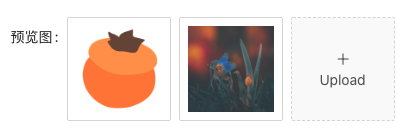
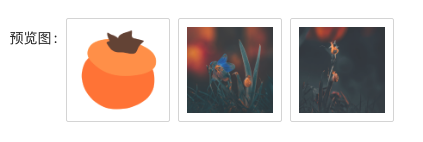
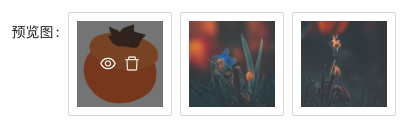
效果图
前端代码
多个图片,限制为3个
<template>
....
		<a-form-item label="预览图">
          <a-upload
            list-type="picture-card"
            :file-list="prePicList"
            :beforeUpload="beforeUpload"
            :customRequest="customRequestReview"
            @preview="handlePreviewPreviewPic"
            @change="handleChangePreviewPic"
          >
            <div v-if="prePicList !== undefined && prePicList.length < 3">
              <a-icon type="plus"/>
              <div class="ant-upload-text">
                Upload
              </div>
            </div>
          </a-upload>
          <a-modal :visible="previewReviewVisible" :footer="null" @cancel="handleCancelReview">
            <img alt="example" style="width: 100%" :src="previewImageReview" />
          </a-modal>
        </a-form-item>
....
     </template>

<script>
// 引用相关的向后端调用的接口
import { insertPublishInfo, uploadImage } from '@/api/project'
...
  data() {
    return {
      loading: false,

      form: this.$form.createForm(this),

      // 预览图的东西
      prePicList: [],
      previewImageReview: '',
      previewReviewVisible: false
    }
  },

...

    // 上传头像前校验
    beforeUpload(file) {
      const isJpgOrPng = file.type === 'image/jpeg' || file.type === 'image/jpg' || file.type === 'image/png'
      if (!isJpgOrPng) {
        this.$message.error('只能上传jpg/png格式的头像!')
      }
      const isLt2M = file.size / 1024 / 1024 < 2
      if (!isLt2M) {
        this.$message.error('图片不得大于2MB!')
      }
      return isJpgOrPng && isLt2M
    },

   // 图片上传到后端
    async customRequestLogo (data) {
      this.avatarLoading = true
      const formData = new FormData()
      formData.append('file', data.file)
      uploadImage(formData).then(res => {
        if (res) {
          for (let i = 0; i < this.iconList.length; i++) {
            if (this.iconList[i].status === 'uploading') {
              this.iconList[i].url = res.data
              this.iconList[i].status = 'done'
            }
          }
        }
      })
    },

	// 点击预览展示预览按钮
    async handlePreviewLogoPic(file) {
      if (!file.url && !file.preview) {
        file.preview = await getBase64(file.originFileObj)
      }
      this.previewImage = file.url || file.preview
      this.previewReviewVisible = true
    },

	// 点击多个图片中的删除等
	handleChangeLogoPic({ fileList }) {
      this.iconList = fileList
    },

	// 预览图的展示
	handleCancelLogo() {
      this.previewLogoVisible = false
    },

</script>
后端代码:
/**
 * 图片上传
 */
@PostMapping("uploadImage")
public String uploadImage(PicUploadReq picUploadReq) {
    return appPublishInfoservice.uploadPic(picUploadReq.getFile());
}
@Data
public class PicUploadReq {

    private MultipartFile file;
}
@Getter
@Setter
@ConfigurationProperties("panda.oss")
public class OssProperties {

    private String endpoint;
    private String accessKeyId;
    private String accessKeySecret;
    private String bucketName;
}
// 记得引用的位置添加当前的配置注入
@EnableConfigurationProperties(OssProperties.class)

...
@Autowired
private OssProperties ossProperties;

...

public String uploadPic(MultipartFile appFile) {
        if (appFile == null) {
            throw new BusinessException("数据为空");
        }
        String endpoint = ossProperties.getEndpoint();
        String accessKeyId = ossProperties.getAccessKeyId();
        String accessKeySecret = ossProperties.getAccessKeySecret();
        String bucketName = ossProperties.getBucketName();

        InputStream fileContent;
        try {
            fileContent = appFile.getInputStream();
            //获取图片名称
            String filename = appFile.getOriginalFilename();
            if (null == filename || "".equals(filename)) {
                throw new BusinessException("文件为空");
            }

            //获取图片扩展名
            String ext = filename.substring(filename.lastIndexOf(".") + 1);
            //生成图片的存放在服务器的路径
            String picName = "img/panda/" + UUID.randomUUID().toString() + "." + ext;

            OSS ossClient = new OSSClientBuilder().build(endpoint, accessKeyId, accessKeySecret);
            ossClient.putObject(bucketName, picName, fileContent);
            ossClient.shutdown();

            //生成直链
            Date date = new Date();
            date.setTime(date.getTime() + 100L * 365 * 24 * 3600 * 1000);
            GeneratePresignedUrlRequest request = new GeneratePresignedUrlRequest(bucketName, picName, HttpMethod.GET);
            request.setExpiration(date);
            URL signedUrl = ossClient.generatePresignedUrl(request);
            log.info("[生成OSS直链]对象名:{},直链地址:{}", picName, signedUrl.toString());
            return signedUrl.toString();
        } catch (IOException e) {
            e.printStackTrace();
        }
        return null;
    }
参考:
https://blog.youkuaiyun.com/hfhwfw161226/article/details/105089005


 3354
3354

 被折叠的 条评论
为什么被折叠?
被折叠的 条评论
为什么被折叠?
 到【灌水乐园】发言


