


注:学习笔记,欢迎指正
目录
一、pytest介绍
1、基于python的单元测试框架,它可以和selenium,requests,appium结合自身实现自动化测试
2、实现用例跳过和失败用例重跑
3、可以结合allure_pytest插件生成allure报告
4、方便和jenkins实现持续集成
5、有很多强大的插件
pytest-html 生成测试报告
pytest-xdist 多线程执行测试用例
pytest-ordering 改变测试用例执行顺序
pytest-rerunfailures 失败用例重跑
安装所需的插件方法:
项目根目录下创建requirements.text,如下
pytest-html
pytest-xdist
pytest-ordering
pytest-rerunfailures
allure-pytest
通过命令行输入 pip install -r requirements.text
二、测试用例命名规则
2.1、pytest命名规则
1、模块名必须以test_开头或者_test结尾。
2、测试类必须以Test开头,并且不能带有init方法。
3、测试用例必须以test_开头。
2.2、python命名规范
1、模块名:一般全小写:多个英文之间用_隔开。
2、类名:类名一般是首字母大写
3、方法名:一般全小写:多个英文之间用_隔开。
三、pytest运行方式
3.1、主函数方式
import pytest

class TestApi:

    def test_sheshou(self):
        print("鲁班")

    def test_fashi(self):
        print("安琪拉")

if _name_ == '_main_':
    pytest.main()
常见参数
| 参数 | 描述 | 案例 |
|---|---|---|
| -v | 输出更加详细的信息,比如文件和用例名称等 | pytest.main([‘-v’]) |
| -s | 输出调试信息。打印信息等 | pytest.main([‘-s’]) |
| –reruns N | 失败重跑N次(N是数字) | |
| –x | 只要有一个用例执行失败,就停止执行测试 | |
| –maxfail=N | 出现N个失败就终止测试(N是数字) | |
| –html=report.html | 生成html的测试报告 | |
| -n | 多线程 | |
| -k | 运行测试用例名称中包含指定字符串的用例 ,可以使用and或or | pytest.main([‘-vs’,‘-k’,'one or two’]) |
指定模块运行
if _name_ == '_main_':
    pytest.main(['-vs','testcases/test_api2.py'])
指定整个文件夹运行
if _name_ == '_main_':
    pytest.main(['-vs','testcases/'])
通过node id的方式运行测试用例。
if _name_ == '_main_':
    pytest.main(['-vs','testcases/test_api.py::TestApi::test_sheshou'])
3.2、命令行方式
3.3、通过pytest.ini的配置文件运行(常用)
注:不管是命令行还是主函数都会读取这个配置文件
pytest.ini:全局配置文件,通常放在项目的根目录下,用于改变pytest的运行方式和设置配置信息
[pytest]
addopts = -vs
testpaths =testcases/
python_files = test_*.py
python_classes = Test*
python_functions = test
markers =
  smoke:冒烟用例     # 中文可有可无,标记字段说明
  usermanage:用户管理模块
  productmanage:商品管理模块
| 参数 | 描述 |
|---|---|
| addopts | 命令行参数,多个参数之间用空格分隔 |
| testpaths | 配置搜索测试用例的范围 |
| python_files | 改变默认的文件搜索规则 |
| python_classes | 改变默认的类搜索规则 |
| python_function | 改变默认的测试用例的搜索规则 |
| markers | 标记,用于指定用例执行,与装饰器@pytest.mark.标记名 配合使用,需要在addopts中使用【-m smoke】才能生效,其中smoke是标记名,可以替换 |
特别提示:此文件中最好不要出现中文, 如果有中文的情况下,可使用notpad++改成GBK的编码。
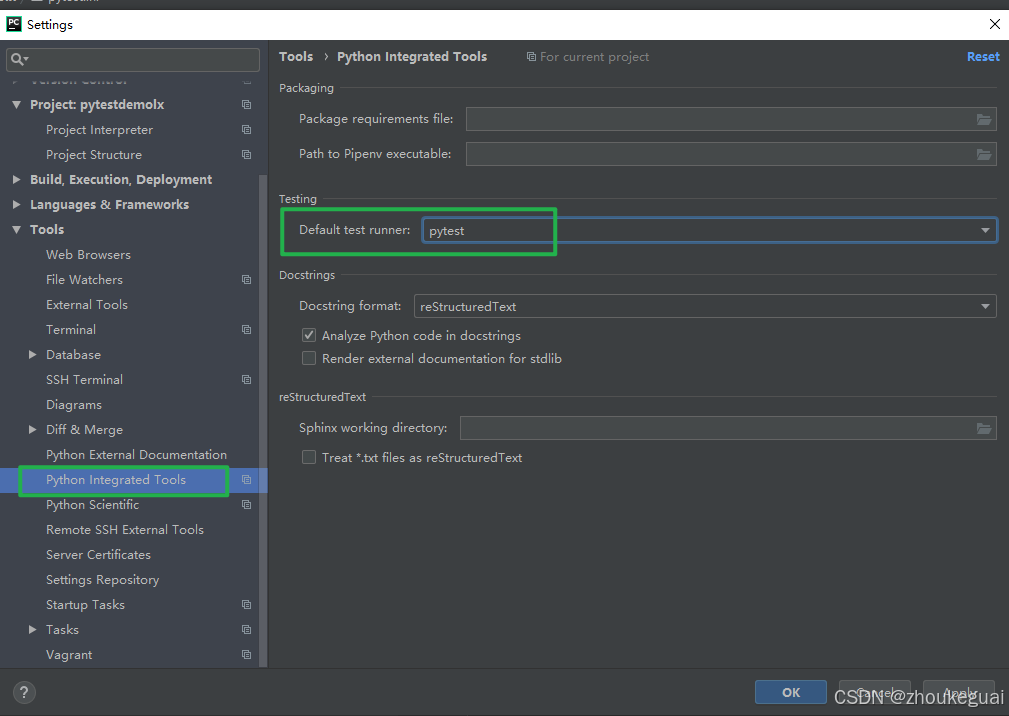
pycharm运行设置
四、pytest执行测试用例顺序
默认从上到下
改变默认的顺序,在用例上添加标记:@pytest.mark.run(order=1)
注:需安装插件pytest-ordering
例:
import pytest

class TestApi:

    @pytest.mark.run(order=2)
    def test_ad(self):
        print("鲁班")

    @pytest.mark.run(order=1)
    def test_fs(self):
        print("安琪拉")

五、自定义标记mark
pytest 支持自定义标记,自定义标记可以把一个 web 项目划分多个模块,然后指定模块名称执行
test_api3.py用例里面加标记
import pytest

class TestApi:

    @pytest.mark.smoke
    def test_sheshou(self):
        print("鲁班")

    @pytest.mark.productmanage
    def test_fashi(self):
        print("安琪拉")

    def test_zhanshi(self):
        print("典韦")
pytest.ini中通过-m参数指定标记
[pytest]
addopts=-vs -m smoke
testpaths=testcases
markers =
  smoke:冒烟用例
  usermanage:用户管理模块
  productmanage:商品管理模块
all.py文件运行
import pytest

if __name__ == '__main__':
    pytest.main()
运行后,可以看到运行了有标记的用例
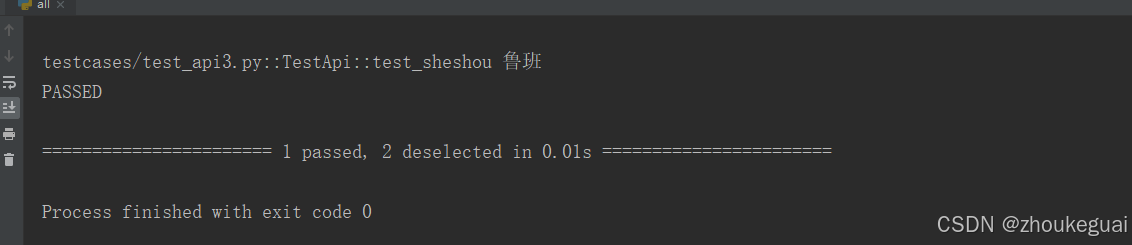
如果想执行多个自定义标记的用例
addopts=-vs -m "smoke or productmanage"
如果不想执行自定义标记smoke的用例
addopts=-vs -m "not smoke"
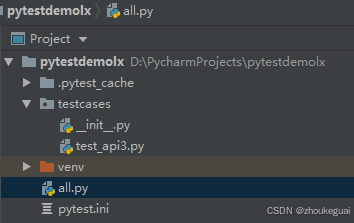
目录结构
六、跳过测试用例
6.1 无条件跳过
class TestApi:
	@pytest.mark.skip(reason="粒度不需要")
    @pytest.mark.smoke
    def test_sheshou():
        print("鲁班")
6.2 有条件跳过
class TestApi:
	@pytest.mark.skipif(age>2,reason="以后版本都不执行")
    @pytest.mark.productmanage
    def test_fashi():
        print("安琪拉")
七、用例的前后置fixture
fixture是 pytest 用于将测试前后进行预备、清理工作的代码处理机制
7.1、fixture优势
区别于unnitest的框架的(setup/teardown)只针对全局生效,fixture有以下几点优势
1、命名灵活
2、数据共享:在conftest.py配置里写的方法可以实现数据共享,不需要import导入,可以跨文件共享
3、fixture的范围从简单的单元测试到复杂的功能测试,可以对fixture配置参数,或者跨函数function,类class,模块module或整个测试session范围
7.2、fixture方法
fixture(scope="function", params=None, autouse=False, ids=None, name=None)
- scope:作用域,参数值有function、class、module、session
- params:一个可选的参数列表,它将导致多个参数调用fixture功能和所有测试使用它。
- autouse:默认为False,需要用例手动调用,如果为True,则作用域内所有用例都会自动调用
- ids:每个字符串id的列表,每个字符串对应于params这样他们就是测试ID的一部分。如果没有提供ID它们将从params自动生成
- name:装饰器的名称,同一模块的fixture相互调用建议写不同的name
function:在每个方法(测试用例)的前后执行一次
class:在每个方法(测试用例)的前后执行一次
module:在每个py文件的前后执行一次
session:在每个package的前后执行一次
7.3、定义fixture
定义fixture,在函数上添加@pytest.fixture()即可,其中yield区分前后置,即yield前面代码为前置,后面代码为后置
在conftest.py文件写入代码:
import pytest

@pytest.fixture(scope="function", params=None, autouse=None, ids=None, name=None)
def login():
    print("开始登录...")
    yield
    print("退出登录...")
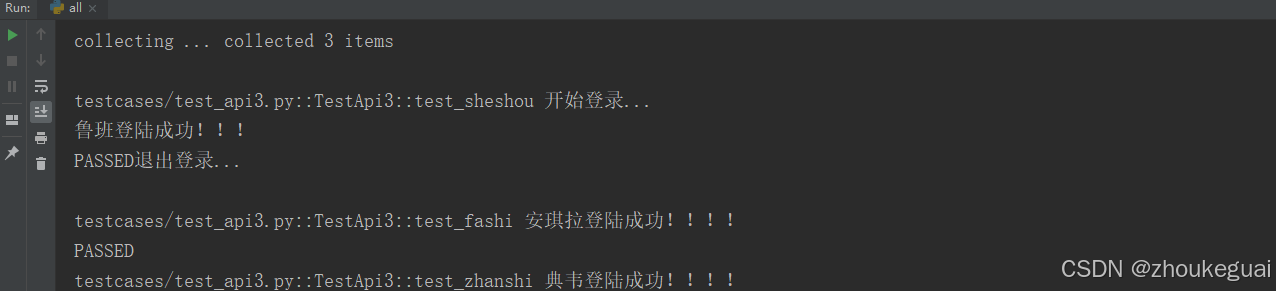
7.4、fixture调用
方法一:在测试用例/测试类上面加装饰器:@pytest.mark.usefixture(“fixture函数名”)
import pytest

class TestApi3:

    @pytest.mark.usefixtures("login")
    def test_sheshou(self):
        print("鲁班登陆成功!!!")

    def test_fashi(self):
        print("安琪拉登陆成功!!!!")

    def test_zhanshi(self):
        print("典韦登陆成功!!!!")
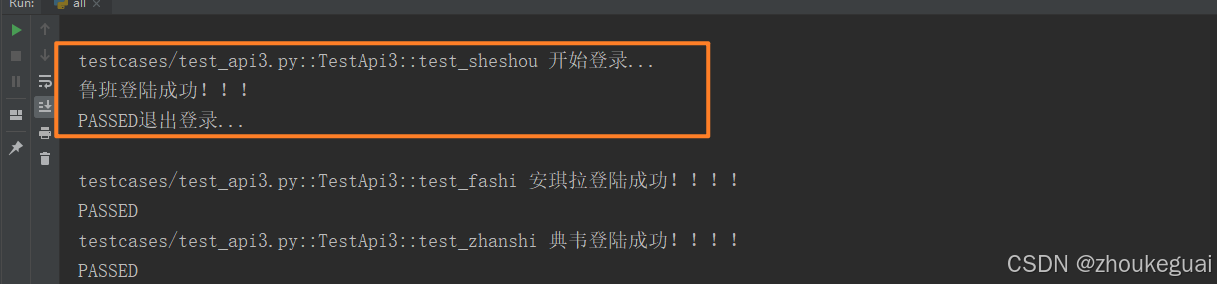
运行后
方法二:将fixture函数名,作为测试用例的参数,如果fixture有返回值,那么测试用例将会接受返回值
import pytest

class TestApi3:

    def test_sheshou(self,login):
        print("鲁班登陆成功!!!")

    def test_fashi(self):
        print("安琪拉登陆成功!!!!")

    def test_zhanshi(self):
        print("典韦登陆成功!!!!")
运行后:
七、接口框架实战(二):fixture和conftest
八、接口框架实战(三):allure和数据驱动
九、接口框架实战(四):requests详解和封装
9.1、requests库安装
用于发送http请求的第三方库
安装:pip install requests
9.2、requests库常用的方法
1、requests.get(url, params=None, **kwargs) 发送get请求(通过params传参)
2、requests.post(url, data=None, json=None, **kwargs) 发送post请求(通过data和json传参)
请求头:
2.1、请求正文格式:multipart/form-data 文件上传
ContentType:multipart/form-data 一般用于传价值对和文件
2.2、请求正文格式:application/x-www-form-urlencoded 键值对
ContentType:application/x-www-form-urlencoded 以表单的方式传参,数据格式:
key1=value1&key2=value2
2.3、请求正文格式:raw
Content-Type:application/json
Content-Type:text/plain
Content-Type:application/javascript
Content-Type:text/html
Content-Type:application/xml
2.4、请求正文格式:binary
Content-Type:application/octet-stream 二进制流的数据
3、requests.put() 发送put请求
4、requests.delete() 发送delete请求
5、requests.request() 发送任意请求,最核心的方法
常用参数:
method, 请求方式
url, 请求路径
params=None, get方式传参
data=None, post,put,patch传参
headers=None, 请求头
cookies=None, 请求的cookie信息
files=None, 文件上传
json=None post传参
不常用参数:
auth=None, 鉴权
timeout=None, 超时
allow_redirects=True, 重定向
proxies=None, 代理
hooks=None,
stream=None, 文件下载
verify=None, 是否需要验证证书
cert=None, CA证书
6、requests.session() 发送任意请求,最核心的方法
9.3、发送请求后返回response对象的常用属性和方法
| 属性或方法 | 描述 |
|---|---|
| response.text | 返回响应的内容,以字符串形式表示 |
| response.json() | 返回响应的内容,以JSON格式表示 |
| response.content | 返回响应的内容,以字节形式表示 |
| response.status_code | 返回响应的状态码 |
| response.headers | 返回响应头信息,以字典形式表示 |
| response.request.headers | 返回发送请求的请求头 |
| response.encoding | 返回响应的编码格式 |
| response.reason | 返回响应的状态信息 |
| response.raise_for_status() | 如果响应状态码不是200,则抛出异常 |
| response.url | 返回响应的URL |
| response.cookies | 返回响应的cookies,以字典形式表示 |
| response.request | 返回发送请求的request对象 |
| response.history | 返回响应的历史记录,以列表形式表示 |
9.4、实战(发送get,post<data传参,json传参,传文件>)
json.dumps(data) 序列化,把字典转换成str字符串
json.loads(data) 反序列化,把字符串转换成字典
testcases包下创建test_001.py。里面代码如下
发送get请求
import requests

class TestjuheApi:
    # 查询手机号归属地
    def test_phone(self):
        url="http://apis.juhe.cn/mobile/get"
        params={
            "phone":"15502806983",
            "key":"输入你自己的key"
        }
        res = requests.get(url,params=params)
        print(res.json())
发送post请求
    def test_sxpd(self):
        url = "http://apis.juhe.cn/laohuangli/d"
        json = {
            "key":"输入你自己的key",
            "data": "2014-06-09"
        }
        headers = {"Content-Type":"application/x-www-form-urlencoded"}
        res = requests.post(url,json=json,headers=headers)
        print(res.json())
运行all.py文件后,2条用例均通过

post:
data (键值对的字典)
默认:ContentType:application/x-www-form-urlencoded
数据格式:key1=value1&key2=value2
当使用json.dumps(data)转换之后,那么默认:‘ContentType’: ‘application/json’
json(有嵌套的字典):
默认:‘ContentType’: ‘application/json’
files:(文件上传)
默认:ContentType’: 'multipart/form-data
十、接口框架实战(五):请求和接口关联封装
十一、接口框架实战(六):分析yaml用例封装
十二、接口框架实战(七):热加载以及断言封装
十三、接口框架实战(八):csv数据驱动封装


 214
214

 被折叠的 条评论
为什么被折叠?
被折叠的 条评论
为什么被折叠?
 到【灌水乐园】发言


