


 本文深入解析SpringBoot配置机制,涵盖application.properties与application.yml文件使用,包括配置格式、数据类型及映射方式。同时,提供了查询配置信息的方法及常用配置项示例。
一、SpingBoot配置介绍
SpringBoot是基于约定的,所以很多配置都有默认值,但如果想使用自己的配置替换默认配置的话,就可以使用application.properties或者application.yml(application.yaml)进行配置。
SpringBoot默认会从Resources目录下加载application.properties或application.yml(application.yaml)文件
其中,application.properties文件是键值对类型的文件,之前一直在使用,所以此处不在对properties文件的格式进行阐述。除了properties文件外,SpringBoot还可以使用yml文件进行配置,下面对yml文件进行讲解。
二、application.yml配置文件
YML文件格式是YAML (YAML Aint Markup Language)编写的文件格式,YAML是一种直观的能够被电脑识别的的数据数据序列化格式,并且容易被人类阅读,容易和脚本语言交互的,可以被支持YAML库的不同的编程语言程序导入,比如: C/C++, Ruby, Python, Java, Perl, C#, PHP等。YML文件是以数据为核心的,比传统的xml方式更加简洁。
YML文件的扩展名可以使用.yml或者.yaml。
yml配置文件的语法
配置普通数据
语法: key: value
示例代码:
name: zhangsan注意:value之前有一个空格
配置对象数据
语法:
- key:
key1: value1
key2: value2
或者:
key: {key1: value1,key2: value2}
示例代码:
person:
  name: zhangsan
  tel: 15244587789
  addr: changsha

#或者
student: {name: James, age: 22, addr: changsha}
注意:key1前面的空格个数不限定,在yml语法中,相同缩进代表同一个级别。
配置Map数据
同上面的对象写法
#Map配置
map:
  key1: value1
  key2: value2
配置数组(List、Set)数据
语法:
- key:
- value1
- value2
或者:
key: [value1,value2]
- 示例代码:
#配置普通字符串
city:
  -changsha
  -wuhang
  -hangzhou
  -xiameng


#或者
citys: [guiyan,shenzhen,xianggang]


#集合中的元素是对象形式
student:
  - name: zhansan
    age: 18
    score: 300
  - name: tom
    age: 25
    score: 1000

students: [{name: zhansan,age: 18,score: 300},{name: tom, age: 25,score: 1000}]
- 注意:value1与之间的 - 之间存在一个空格 。
三、SpringBoot配置信息的查询
上面提及过,SpringBoot的配置文件,主要的目的就是对配置信息进行修改的,但在配置时的key从哪里去查询呢?我们可以查阅SpringBoot的官方文档。
常用的配置摘抄如下:
# QUARTZ SCHEDULER (QuartzProperties)
spring.quartz.jdbc.initialize-schema=embedded # Database schema initialization mode.
spring.quartz.jdbc.schema=classpath:org/quartz/impl/jdbcjobstore/tables_@@platform@@.sql # Path to the SQL file to use to initialize the database schema.
spring.quartz.job-store-type=memory # Quartz job store type.
spring.quartz.properties.*= # Additional Quartz Scheduler properties.

# ----------------------------------------
# WEB PROPERTIES
# ----------------------------------------

# EMBEDDED SERVER CONFIGURATION (ServerProperties)
server.port=8080 # Server HTTP port.
server.servlet.context-path= # Context path of the application.
server.servlet.path=/ # Path of the main dispatcher servlet.

# HTTP encoding (HttpEncodingProperties)
spring.http.encoding.charset=UTF-8 # Charset of HTTP requests and responses. Added to the "Content-Type" header if not set explicitly.

# JACKSON (JacksonProperties)
spring.jackson.date-format= # Date format string or a fully-qualified date format class name. For instance, `yyyy-MM-dd HH:mm:ss`.

# SPRING MVC (WebMvcProperties)
spring.mvc.servlet.load-on-startup=-1 # Load on startup priority of the dispatcher servlet.
spring.mvc.static-path-pattern=/** # Path pattern used for static resources.
spring.mvc.view.prefix= # Spring MVC view prefix.
spring.mvc.view.suffix= # Spring MVC view suffix.

# DATASOURCE (DataSourceAutoConfiguration & DataSourceProperties)
spring.datasource.driver-class-name= # Fully qualified name of the JDBC driver. Auto-detected based on the URL by default.
spring.datasource.password= # Login password of the database.
spring.datasource.url= # JDBC URL of the database.
spring.datasource.username= # Login username of the database.

# JEST (Elasticsearch HTTP client) (JestProperties)
spring.elasticsearch.jest.password= # Login password.
spring.elasticsearch.jest.proxy.host= # Proxy host the HTTP client should use.
spring.elasticsearch.jest.proxy.port= # Proxy port the HTTP client should use.
spring.elasticsearch.jest.read-timeout=3s # Read timeout.
spring.elasticsearch.jest.username= # Login username.
我们可以通过配置application.porperties 或者 application.yml 来修改SpringBoot的默认配置
例如:
application.properties文件
#修改默认端口
server.port=8888
#增加项目名字
server.servlet.context-path=demo
四、配置文件与配置类的属性映射方式
1、使用注解@Value映射
我们可以通过@Value注解将配置文件中的值映射到一个Spring管理的Bean的字段上
例如:
application.yml配置如下:
#对象数据配置
person:
  name: zhangsan
  tel: 15244587789
  addr: changsha
实体Bean代码如下:
@Controller
public class Quick2Controller {
@Value("${name}")
private String name;
@Value("${person.addr}")
private String addr;
@RequestMapping("/quick2")
@ResponseBody
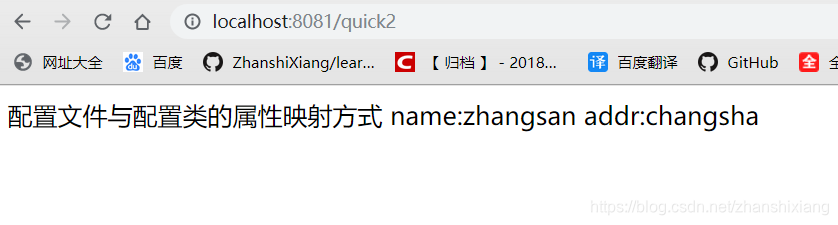
public String quick2() {
return "配置文件与配置类的属性映射方式 name:" + name + " addr:" + addr;
}
}启动项目 访问http://localhost:8081/quick2
如果配置文件中的实体属性过多,那么使用${person.addr}去拿属性的方式就显得比较复杂。接下来看第二个
2、使用注解@ConfigurationProperties映射
通过注解@ConfigurationProperties(prefix="配置文件中的key的前缀")可以将配置文件中的配置自动与实体进行映射
#对象数据配置
person:
  name: zhangsan
  tel: 15244587789
  addr: changsha
对象Controller配置
@Controller
@ConfigurationProperties(prefix = "person")
public class Quick3Controller {
private String name;
private String addr;
public String getName() {
return name;
}
public void setName(String name) {
this.name = name;
}
public String getAddr() {
return addr;
}
public void setAddr(String addr) {
this.addr = addr;
}
@RequestMapping("/quick3")
@ResponseBody
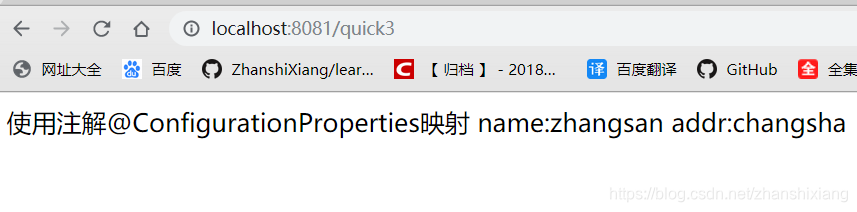
public String quick3() {
return "使用注解@ConfigurationProperties映射 name:" + name + " addr:" + addr;
}
}还需在POM文件中加入
 <dependency>
            <!--@ConfigurationProperties的执行器的配置-->
            <groupId>org.springframework.boot</groupId>
            <artifactId>spring-boot-configuration-processor</artifactId>
            <optional>true</optional>
        </dependency>
在写yaml 配置Person时,
就会自动提示我们Controller中配置的属性
来看一下访问效果。
yaml的配置语法就写完了。


 937
937

 被折叠的 条评论
为什么被折叠?
被折叠的 条评论
为什么被折叠?
 到【灌水乐园】发言


