


 本文详细介绍Memcached的安装步骤,包括前置库libevent的安装验证,以及Memcached服务的安装、启动参数详解。此外,还提供了Python客户端的安装方法。
注:Memcache是项目名,memcached是服务名。
- 先安装libevent
- #wget https://github.com/libevent/libevent/releases/download/release-2.1.8-stable/libevent-2.1.8-stable.tar.gz
# tar zxvf libevent-2.1.8-stable.tar.gz
# cd libevent-2.1.8-stable
# ./configure --prefix=/usr
# make
# make install、
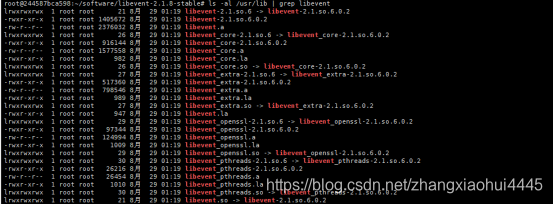
- 验证libevent 是否安装成功,安装成功后进行下一步计划
ls -al /usr/lib | grep libeven
- 安装memcached
sudo apt-get install memcached - 启动
memcached -p 11211 -u root (之前启动过会显示端口被占用)
![]()
参数说明:
-p 监听的端口
-l 连接的IP地址, 默认是本机
-d start 启动memcached服务
-d restart 重起memcached服务
-d stop|shutdown 关闭正在运行的memcached服务
-d install 安装memcached服务
-d uninstall 卸载memcached服务
-u 以的身份运行 (仅在以root运行的时候有效)
-m 最大内存使用,单位MB。默认64MB
-M 内存耗尽时返回错误,而不是删除项
-c 最大同时连接数,默认是1024
-f 块大小增长因子,默认是1.25-n 最小分配空间,key+value+flags默认是48
-h 显示帮助
如果用python使用memcached需要进行包下载:pip install python-memcached


 292
292

 被折叠的 条评论
为什么被折叠?
被折叠的 条评论
为什么被折叠?
 到【灌水乐园】发言


