


 本文介绍如何使用MyBatis Generator自动生成entity、mapper和xml文件,包括配置maven依赖、数据库连接、自动生成配置文件等步骤,以及生成后的代码示例。
使用mybatis-generator自动生成entity、mapper和xml文件
1、使用IDE(比如eclipse,IDEA)创建maven工程testMybatisGenerator
在pom.xml里添加spring boot相关依赖,见下:
<dependency>
        <groupId>org.springframework.boot</groupId>
        <artifactId>spring-boot-starter-web</artifactId>
    </dependency>

    <dependency>
        <groupId>org.mybatis.spring.boot</groupId>
        <artifactId>mybatis-spring-boot-starter</artifactId>
        <version>1.3.1</version>
    </dependency>
修改App.java如下:
@SpringBootApplication
public class App
{
    public static void main( String[] args )
    {
        SpringApplication.run(App.class, args);
    }
}
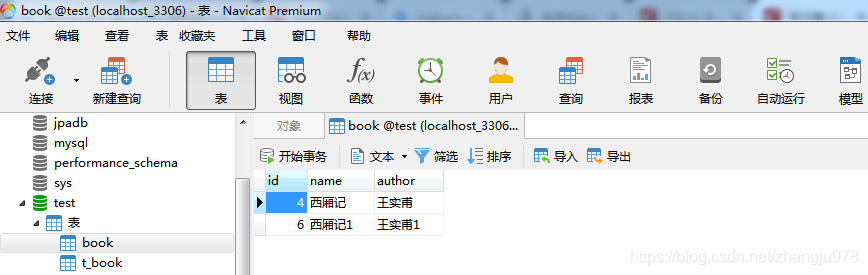
2、 数据库环境(连接windows本地mysql数据库)
3、修改pom.xml
添加mybatis-generator依赖和mysql数据库连接依赖,以及spring boot依赖
    <dependency>
        <groupId>org.mybatis.generator</groupId>
        <artifactId>mybatis-generator-core</artifactId>
        <version>1.3.5</version>
    </dependency>

    <dependency>
        <groupId>mysql</groupId>
        <artifactId>mysql-connector-java</artifactId>
        <version>5.1.47</version>
    </dependency>
备注:
这里采用的mysql数据库连接版本号为5.1.47,如果采用低版本,可能会出现版本太低或者不兼容问题,导致连接不上。
(本次windows的mysql安装版本是mysql-8.0.16-winx64.zip)。
4、添加配置application.yml
server:
  port: 8080

spring:
#配置数据源
  datasource:
#    url: jdbc:mysql://localhost:3306/test?useUnicode=true&characterEncoding=utf8&serverTimezone=Asia/Shanghai
    url: jdbc:mysql://localhost:3306/test
    username: root
    password: 123456
    driver-class-name: com.mysql.jdbc.Driver

#开启驼峰转换
mybatis:
  configuration:
    map-underscore-to-camel-case: true
  mapper-locations: classpath:mapper/*.xml
5、添加自动生成配置generatorConfig.xml
<?xml version="1.0" encoding="UTF-8"?>
<!DOCTYPE generatorConfiguration
        PUBLIC "-//mybatis.org//DTD MyBatis Generator Configuration 1.0//EN"
        "http://mybatis.org/dtd/mybatis-generator-config_1_0.dtd">
<generatorConfiguration>

    <properties resource="application.yml" />
    <!-- mysql驱动的位置 这个是MySQL连接的jar包,你需要指定你自己计算机上的jar包的位置-->
    <!-- <classPathEntry location="/Users/tslong/repository/localRepository/mysql/mysql-connector-java/5.1.30/mysql-connector-java-5.1.30.jar" /> -->

    <classPathEntry location="D:\Program Files\Apache\maven-repository\mysql\mysql-connector-java\5.1.47\mysql-connector-java-5.1.47.jar" />

    <context id="Tables" targetRuntime="MyBatis3">

        <!-- 注释 -->
        <commentGenerator>
            <!-- 是否生成注释代时间戳 -->
            <property name="suppressDate" value="true"/>
            <!-- 是否去除自动生成的注释 true:是 : false:否 -->
            <property name="suppressAllComments" value="true"/>
        </commentGenerator>

        <!-- JDBC连接 其中connectionURL后面的newtest改为你创建的数据库,紧跟在后面是数据库连接的账户和密码-->
        <jdbcConnection
                driverClass="com.mysql.jdbc.Driver"
                connectionURL="jdbc:mysql://localhost:3306/test"
                userId="root"
                password="123456">
        </jdbcConnection>

        <!-- 非必需,类型处理器,在数据库类型和java类型之间的转换控制-->
        <!-- 默认false,把JDBC DECIMAL 和 NUMERIC 类型解析为 Integer,为 true时把JDBC DECIMAL 和
         NUMERIC 类型解析为java.math.BigDecimal -->
        <javaTypeResolver>
            <!-- 是否使用bigDecimal, false可自动转化以下类型(Long, Integer, Short, etc.) -->
            <property name="forceBigDecimals" value="false" />
        </javaTypeResolver>

        <!-- 生成实体类地址 这里需要你改动,其中targetPackage需要根据你自己创建的目录进行改动 -->
        <javaModelGenerator targetPackage="com.stone.testMybatisGenerator.entity" targetProject="src/main/java">
            <!-- 从数据库返回的值被清理前后的空格 -->
            <property name="trimStrings" value="true" />
            <!-- enableSubPackages:是否让schema作为包的后缀 -->
            <property name="enableSubPackages" value="false" />
        </javaModelGenerator>

        <!-- 生成mapper xml文件 这里不需要改动 -->
        <sqlMapGenerator targetPackage="mapper"  targetProject="src/main/resources">
            <!-- enableSubPackages:是否让schema作为包的后缀 -->
            <property name="enableSubPackages" value="false" />
        </sqlMapGenerator>

        <!-- 生成mapper 对应Client   这里需要改动targetPackage,依据你自己的工程-->
        <javaClientGenerator targetPackage="com.stone.testMybatisGenerator.mapper" targetProject="src/main/java" type="XMLMAPPER">
            <!-- enableSubPackages:是否让schema作为包的后缀 -->
            <property name="enableSubPackages" value="false" />
        </javaClientGenerator>

        <!-- 配置表信息 -->
        <!-- schema即为数据库名  tableName为对应的数据库表  domainObjectName是要生成的实体类  enable*ByExample
            是否生成 example类 -->
        <table schema="test" tableName="book"
               domainObjectName="Book" enableCountByExample="false"
               enableDeleteByExample="false" enableSelectByExample="false"
               enableUpdateByExample="false">
        </table>

       <!--  <table schema="test" tableName="t_book"
               domainObjectName="T_Book" enableCountByExample="false"
               enableDeleteByExample="false" enableSelectByExample="false"
               enableUpdateByExample="false">
        </table> -->
    </context>
</generatorConfiguration>
6、添加自动生成类Generator.java
在src/java/main下,添加此文件。
public class Generator {
    public static void main(String[] args){
        List<String> warnings = new ArrayList<>();
        boolean overwrite = true;
        String genCfg = "/generatorConfig.xml";
        try {
        	File configFile = new File(Generator.class.getResource(genCfg).getFile());
            ConfigurationParser cp = new ConfigurationParser(warnings);
            Configuration config = null;
            config = cp.parseConfiguration(configFile);
            DefaultShellCallback callback = new DefaultShellCallback(overwrite);
            MyBatisGenerator myBatisGenerator = null;
            myBatisGenerator = new MyBatisGenerator(config, callback, warnings);
            myBatisGenerator.generate(null);
        } catch (Exception e) {
			// TODO: handle exception
        	e.printStackTrace();
		}
    }
}
7、运行Generator.java的main方法
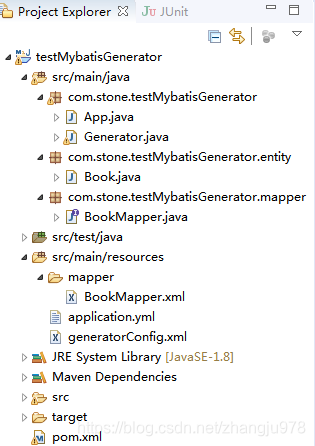
在Generator.java上点击右键,选择Run as->Java application,执行完毕后,再按F5,即可看到自动生成的entity、mapper和xml文件。
8、生成结果
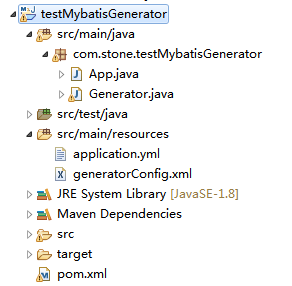
原始代码目录结构:
自动生成后:
1) Book.java内容如下:
public class Book {
    private Integer id;

    private String name;

    private String author;

    public Integer getId() {
        return id;
    }

    public void setId(Integer id) {
        this.id = id;
    }

    public String getName() {
        return name;
    }

    public void setName(String name) {
        this.name = name == null ? null : name.trim();
    }

    public String getAuthor() {
        return author;
    }

    public void setAuthor(String author) {
        this.author = author == null ? null : author.trim();
    }
}
2) BookMapper.java内容如下:
public interface BookMapper {
    int deleteByPrimaryKey(Integer id);

    int insert(Book record);

    int insertSelective(Book record);

    Book selectByPrimaryKey(Integer id);

    int updateByPrimaryKeySelective(Book record);

    int updateByPrimaryKey(Book record);
}
3) BookMapper.xml内容如下:
<?xml version="1.0" encoding="UTF-8"?>
<!DOCTYPE mapper PUBLIC "-//mybatis.org//DTD Mapper 3.0//EN" "http://mybatis.org/dtd/mybatis-3-mapper.dtd">
<mapper namespace="com.stone.testMybatisGenerator.mapper.BookMapper">
  <resultMap id="BaseResultMap" type="com.stone.testMybatisGenerator.entity.Book">
    <id column="id" jdbcType="INTEGER" property="id" />
    <result column="name" jdbcType="VARCHAR" property="name" />
    <result column="author" jdbcType="VARCHAR" property="author" />
  </resultMap>
  <sql id="Base_Column_List">
    id, name, author
  </sql>
  <select id="selectByPrimaryKey" parameterType="java.lang.Integer" resultMap="BaseResultMap">
    select
    <include refid="Base_Column_List" />
    from book
    where id = #{id,jdbcType=INTEGER}
  </select>
  <delete id="deleteByPrimaryKey" parameterType="java.lang.Integer">
    delete from book
    where id = #{id,jdbcType=INTEGER}
  </delete>
  <insert id="insert" parameterType="com.stone.testMybatisGenerator.entity.Book">
    insert into book (id, name, author
      )
    values (#{id,jdbcType=INTEGER}, #{name,jdbcType=VARCHAR}, #{author,jdbcType=VARCHAR}
      )
  </insert>
  <insert id="insertSelective" parameterType="com.stone.testMybatisGenerator.entity.Book">
    insert into book
    <trim prefix="(" suffix=")" suffixOverrides=",">
      <if test="id != null">
        id,
      </if>
      <if test="name != null">
        name,
      </if>
      <if test="author != null">
        author,
      </if>
    </trim>
    <trim prefix="values (" suffix=")" suffixOverrides=",">
      <if test="id != null">
        #{id,jdbcType=INTEGER},
      </if>
      <if test="name != null">
        #{name,jdbcType=VARCHAR},
      </if>
      <if test="author != null">
        #{author,jdbcType=VARCHAR},
      </if>
    </trim>
  </insert>
  <update id="updateByPrimaryKeySelective" parameterType="com.stone.testMybatisGenerator.entity.Book">
    update book
    <set>
      <if test="name != null">
        name = #{name,jdbcType=VARCHAR},
      </if>
      <if test="author != null">
        author = #{author,jdbcType=VARCHAR},
      </if>
    </set>
    where id = #{id,jdbcType=INTEGER}
  </update>
  <update id="updateByPrimaryKey" parameterType="com.stone.testMybatisGenerator.entity.Book">
    update book
    set name = #{name,jdbcType=VARCHAR},
      author = #{author,jdbcType=VARCHAR}
    where id = #{id,jdbcType=INTEGER}
  </update>
</mapper>
说明
自动配置能满足一些基本的查插删改需求,部分特殊需求则需要手动添加查询语句。


 360
360

 被折叠的 条评论
为什么被折叠?
被折叠的 条评论
为什么被折叠?
 到【灌水乐园】发言


