


 本文详细介绍了在Windows操作系统中如何配置nginx服务器和安装php,包括下载安装nginx,修改配置文件,设置虚拟主机,安装php并调整配置,以及通过批处理文件实现快速启动和停止服务。
1.安装nginx
(1)下载nginx http://nginx.org/en/download.html,解压安装;
(2)修改nginx配置文件,解析域名;
server {
		#默认端口
        listen       80;
		#域名解析
        server_name  phps.php.com;
		#网站根目录(放在这里,该server下所有的location都能生效)
        root   /SOFT/nginx-1.16.0/html/php123;
        #charset koi8-r;

        #access_log  logs/host.access.log  main;

		#配置默认访问页
        location / {
			#网站根目录
            #root   html;
            index  index.html index.htm;
        }

        #error_page  404              /404.html;

        # redirect server error pages to the static page /50x.html
        #
        error_page   500 502 503 504  /50x.html;
		#配置错误页面
        location = /50x.html {
            root   html;
        }

        # proxy the PHP scripts to Apache listening on 127.0.0.1:80
        #
        #location ~ \.php$ {
        #    proxy_pass   http://127.0.0.1;
        #}

        # pass the PHP scripts to FastCGI server listening on 127.0.0.1:9000
        #
        location ~ \.php$ {
        #    root           html;
            fastcgi_pass   127.0.0.1:9000;
            fastcgi_index  index.php;
        #前面设置路径为root,这里要用$document_root
            fastcgi_param  SCRIPT_FILENAME  $document_root$fastcgi_script_name;
            include        fastcgi_params;
        }

        # deny access to .htaccess files, if Apache's document root
        # concurs with nginx's one
        #
        #location ~ /\.ht {
        #    deny  all;
        #}
}(3)建立网站目录,建立![]() 文件夹,在此文件夹下创建index.html文件,写入hello!!!;
文件夹,在此文件夹下创建index.html文件,写入hello!!!;
(4)在C:\Windows\System32\drivers\etc\hosts文件中配置虚拟域名127.0.0.1 phps.php.com;
(5)启动nginx,命令为start nginx。访问phps.php.com则访问的就是php123文件夹下的index.html,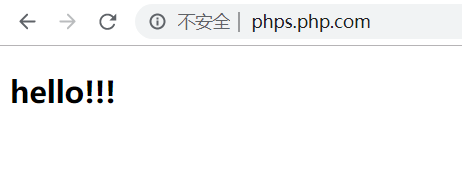
2.安装php
(1)下载解压安装PHP,https://windows.php.net/download/;
(2)修改php.ini-development文件,将文件名修改为php.ini。
搜索“extension_dir”,找到: e;xtension_dir = "ext" 先去前面的分号再改为 extension_dir = "./ext"
搜索“enable_dl”,找到:enable_dl = Off 改为 enable_dl = On
搜索“cgi.force_redirect” ;cgi.force_redirect = 1 先去前面的分号再改为 cgi.force_redirect = 0
搜索“fastcgi.impersonate”,找到: ;fastcgi.impersonate = 1 去掉前面的分号
搜索“cgi.rfc2616_headers”,找到:;cgi.rfc2616_headers = 0 先去前面的分号再改为 cgi.rfc2616_headers = 1
(3)切换到PHP安装目录启动PHP,php-cgi.exe -b 127.0.0.1:9000 -c php.ini;
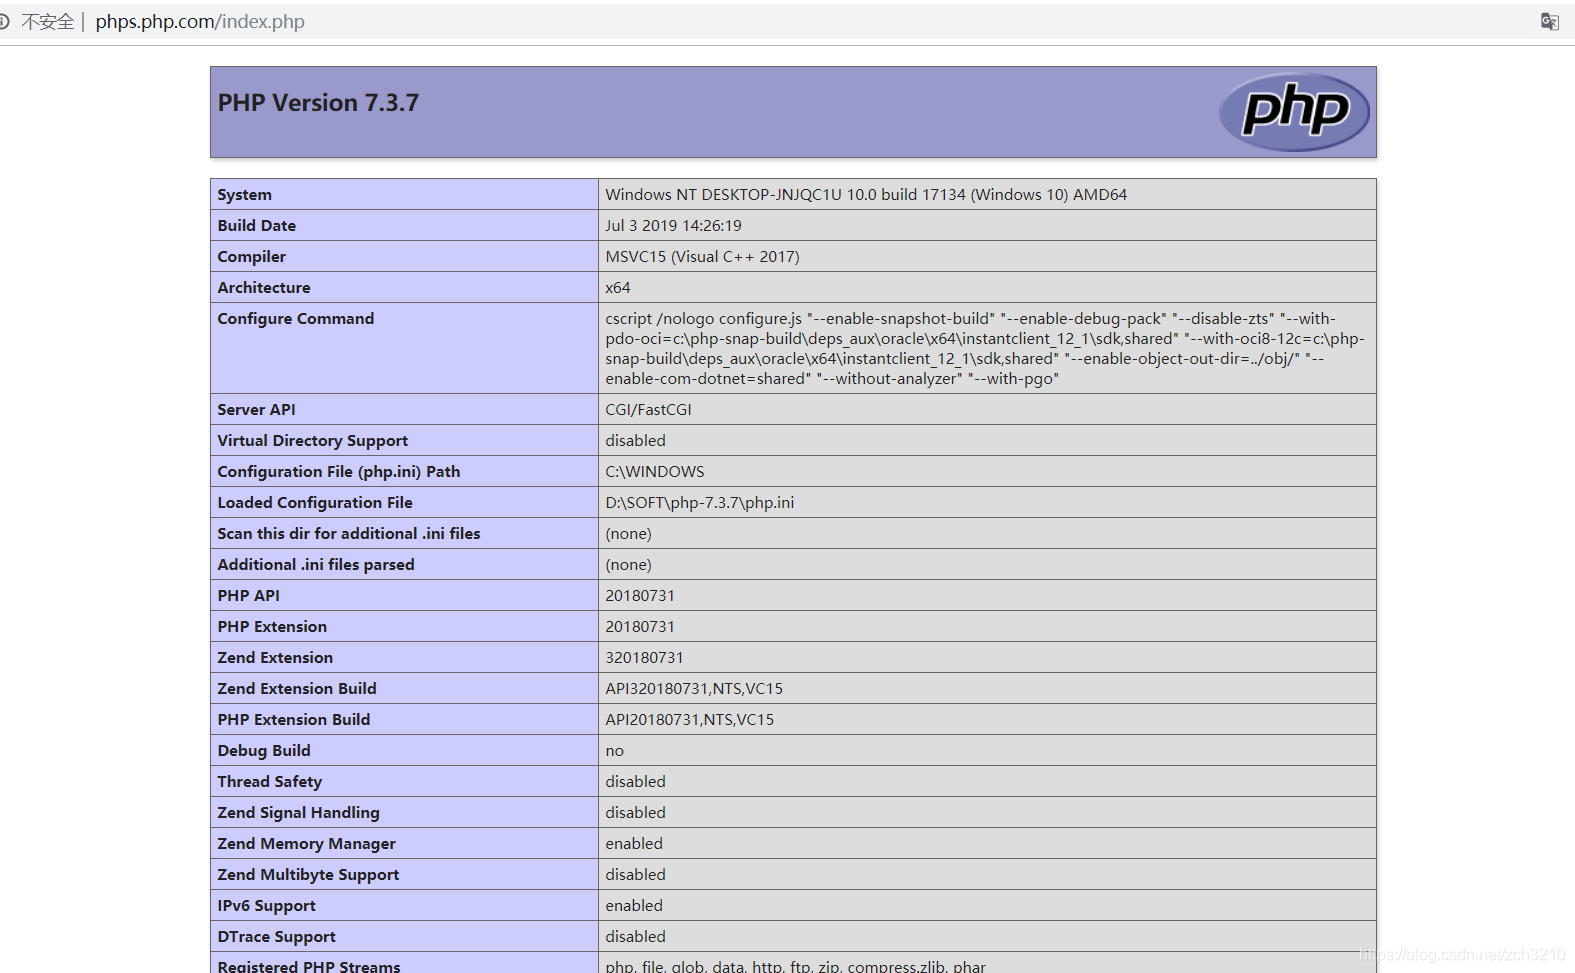
(4)在php123目录下创建index.php,访问http://phps.php.com/index.php,打印phpinfo信息,看是否安装成功;
扩展:Windows下Nginx和php-cgi的bat批处理快速启动方法
这里选择放在了nginx目录下:
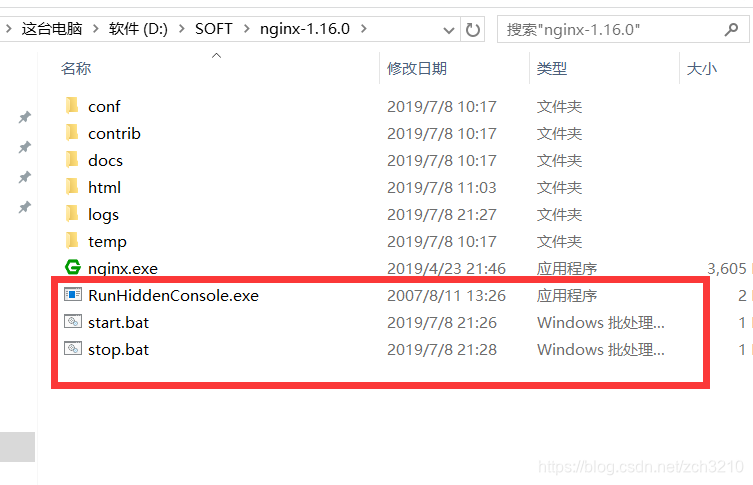
下载RunHiddenConsole,地址http://redmine.lighttpd.net/attachments/660/RunHiddenConsole.zip,
(1)开启php-cgi和nginx.exe,保存为start.bat(注意修改为自己的路径)
@echo off
echo Starting PHP FastCGI...
D:\SOFT\nginx-1.16.0\RunHiddenConsole.exe D:\SOFT\php-7.3.7\php-cgi.exe -b 127.0.0.1:9000-c D:\SOFT\php-7.3.7\php.ini
echo Starting nginx...
D:\SOFT\nginx-1.16.0\RunHiddenConsole.exe D:\SOFT\nginx-1.16.0\nginx.exe -p D:\SOFT\nginx-1.16.0
(2)停止php-cgi和nginx.exe,保存为stop.bat
@echo off
echo Stopping nginx...
taskkill /F /IM nginx.exe > nul
echo Stopping PHP FastCGI...
taskkill /F /IM php-cgi.exe > nul
exit


 1716
1716

 被折叠的 条评论
为什么被折叠?
被折叠的 条评论
为什么被折叠?
 到【灌水乐园】发言


