


本来不想总结关于vue路由的,但是啊,vue路由虽然简单,但是进行参数的传递时,有多方式,想想还是要记录一下比较好。此处先不写关于嵌套路由的内容。
一.路由的基本使用
此时有这样一个例子,有两个页面,HelloWorld页面与PageDetail两个页面,我想通过HelloWorld页面的一个链接,跳转到PageDetail页面上,此时就需要路由机制了。
1.创建DetailPage页面
<template>
    <div>
      this is the detail page!!!!!
    </div>
</template>
<script>
    export default {
        name: "DetailPage"
    }
</script>
<style scoped>
</style>
2.创建HelloWorld页面
<template>
  <div class="hello">
    hello world<br/>
      <!--通过router-link跳转到PageDetail上-->
      <router-link to="/detail-page"> to detail</router-link>
    <router-view></router-view>
  </div>
</template>

<script>
export default {
  name: 'HelloWorld',
  data () {
    return {
      dataList:[]
    }
  },
  mounted(){
  }
}
</script>
<style scoped>
</style>
3.创建一个router目录下创建index.js,存放路由信息,将HelloWorld与PageDetail注册进去
import Vue from 'vue'
import Router from 'vue-router'
import HelloWorld from '@/components/HelloWorld'
import DetailPage from '@/components/DetailPage'
Vue.use(Router)

export default new Router({
  routes: [
    {
      path: '/',           //路径
      name: 'HelloWorld',  //别名
      component: HelloWorld //组件名称
    },
    {
      path: '/detail-page',
      name: 'DetailPage',
      component: DetailPage
    },
  ]
})
4.在main.js添加路由
import Vue from 'vue'
import App from './App'
import router from './router'

new Vue({
  el: '#app',
  router,
  components: { App },
  template: '<App/>'
})
5.在App.vue中,添加router-view标签,让页面显示其中
<template>
  <div id="app">
    <router-view/>
  </div>
</template>

<script>
export default {
  name: 'App'
}
</script>

<style>
</style>
我们运行此vue项目,然后打开HelloWold页面就可以跳转到PageDetail页面了。
二.路由参数的传递(重点!!!!)
1.我们将PageDetail传递一个ID参数,修改router路由配置文件
{
    path: '/detail-page/:id',   //url后面加上ID
    name: 'DetailPage',
    component: DetailPage
},
2.修改PageDetail页面,获得传过来的参数
<template>
    <div>
      this is the detail page!!!!!<br/>
      get id from hello world,{{$route.params.id}}

    </div>
</template>

<script>
    export default {
        name: "DetailPage"
    }
</script>

<style scoped>

</style>
3.修改HelloWorld页面,进行参数参数
参数的传递可以有两种方式,第一种可以通过<router-link>进行参数的传递并跳转,第二种通过js进行参数的传递并跳转
<template>
<div class="hello">
hello world<br/>
<!--通过router-link进行跳转并传递参数-->
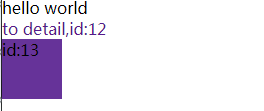
<router-link :to="{name:'DetailPage',params:{id:12}}"> to detail,id:12</router-link>
<div @click="linkClick" style="width: 60px;height: 60px;background-color: rebeccapurple">
id:13
</div>
</div>
</template>
<script>
export default {
name: 'HelloWorld',
data () {
return {
dataList:[]
}
},
mounted(){
},
methods:{
linkClick(){
this.$router.push({name: 'DetailPage', params: {id:13}}) //通过js进行参数跳转逼格传递参数
}
}
}
</script>
<style scoped>
</style>
最终效果是这样的,通过链接跳转获取的id为12,通过方块点击跳转获取的id是13
三.总结
总结的话,就总结路由跳转参数的传递。
路由跳转有两种方式:
1.通过router-link标签进行跳转。里面设置两个参数,第一个:跳转组件在router.js中注册的名称,第二个:参数名称以及值
<router-link :to="{name:'DetailPage',params:{id:12}}"> 跳转</router-link>
2.通过js进行跳转。
this.$router.push({name: 'DetailPage', params: {id:13}})
路由跳转后,获取参数值:
1.直接显示
{{$route.params.id}}
2.在js中获取
this.$route.params.id
github上有我更多的笔记:Raray-chuan (兮川) · GitHub,欢迎stars与following,如果有问题可以在issue中向我咨询

关注我的公众号,获取更多关于后端、大数据的知识


 1515
1515

 被折叠的 条评论
为什么被折叠?
被折叠的 条评论
为什么被折叠?
 到【灌水乐园】发言


