SpringBoot对一个URL通过method(GET、POST、PUT、DELETE)实现增删改查操作

本文介绍了如何在SpringMVC应用中启用POST请求的PUT和DELETE方法,通过添加隐藏域_method并配置文件来实现,同时提供了一个实战示例和HTML表单演示。

摘要生成于 C知道 ,由 DeepSeek-R1 满血版支持, 前往体验 >

1. rest风格基础

我们都知道GET、POST、PUT、DELETE分别对应查、增、改、删除

虽然Postman这些工具可以直接发送GET、POST、PUT、DELETE请求。但是@RequestMapping并不支持PUT和DELETE请求操作。需要我们手动开启

2. 开启方法

PUT和DELETE还是通过method=POST进行请求,但是需要添加对应的隐藏域_method=PUT/DELETE

然后配置文件进行参数的配置:spring.mvc.hiddenmethod.filter.enabled=true

3. 实战练习

  1. 添加如下参数到application.properties文件。表示开启隐藏方法使用
spring.mvc.hiddenmethod.filter.enabled=true
  1. 编写Controller。在一个请求路径上,分别定义了GET、POST、PUT、DELETE四种method

其中GetMapping、PostMapping、PutMapping、DeleteMapping等同于@RequestMapping对应的method。如下所示:

package com.hh.springboottest.myController;

import org.springframework.web.bind.annotation.*;

@RestController
public class HelloController {

    // @GetMapping("/user")
    @RequestMapping(value="/user", method = RequestMethod.GET)
    public String getUser() {
        return "get user";
    }

    // @PostMapping("/user")
    @RequestMapping(value="/user", method = RequestMethod.POST)
    public String saveUser() {
        return "save user";
    }

    // @PutMapping("/user")
    @RequestMapping(value="/user", method = RequestMethod.PUT)
    public String editUser() {
        return "edit user";
    }

    // @DeleteMapping("/user")
    @RequestMapping(value="/user", method = RequestMethod.DELETE)
    public String deleteUser() {
        return "delete user";
    }
}
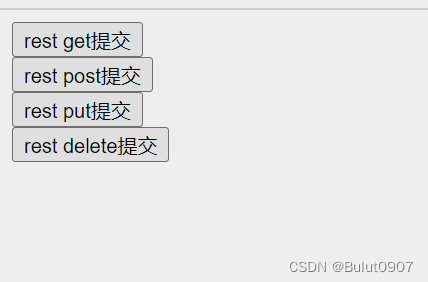
  1. 编写resources/static/index.html页面。PUT和DELETE还是通过method=POST进行请求,但是需要添加对应的隐藏域_method=PUT/DELETE。还支持的一个隐藏域是_method=PATCH
<!DOCTYPE html>
<html lang="zh-CN">
<head>
    <meta charset="UTF-8">
    <title>test title</title>
</head>
<body>

<form action="/user" method="get">
    <input value="rest get提交" type="submit" />
</form>
<form action="/user" method="post">
    <input value="rest post提交" type="submit" />
</form>
<form action="/user" method="post">
    <input name="_method" type="hidden" value="PUT" />
    <input value="rest put提交" type="submit" />
</form>
<form action="/user" method="post">
    <input name="_method" type="hidden" value="DELETE" />
    <input value="rest delete提交" type="submit" />
</form>

</body>
</html>
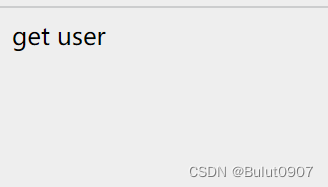
  1. 然后访问http://localhost:8080/,点击rest get提交。如下所示:
    rest get提交
    得到的结果如下:
    rest get提交结果
好的,以下是一个简单的SpringBoot + Thymeleaf 实现增删改查的示例代码: (1)实体类: ```java @Entity //告诉JPA这是一个实体类(和数据表映射的类) public class Book { @Id //这是主键 @GeneratedValue(strategy = GenerationType.IDENTITY) //自增主键 private Integer id; private String name; private String author; //省略getter和setter方法 } ``` (2)控制层: ```java @Controller public class BookController { @Autowired private BookRepository bookRepository; //查询所有图书列表 @GetMapping("/books") public String list(Model model) { model.addAttribute("books", bookRepository.findAll()); return "book/list"; } //跳转到添加图书页面 @GetMapping("/book") public String toAddPage() { return "book/add"; } //添加图书操作 @PostMapping("/book") public String addBook(Book book) { bookRepository.save(book); return "redirect:/books"; } //根据id查询图书 @GetMapping("/book/{id}") public String toEditPage(@PathVariable("id") Integer id, Model model) { Book book = bookRepository.getOne(id); model.addAttribute("book", book); return "book/edit"; } //修改图书操作 @PutMapping("/book") public String editBook(Book book) { bookRepository.save(book); return "redirect:/books"; } //删除图书操作 @DeleteMapping("/book/{id}") public String deleteBook(@PathVariable("id") Integer id) { bookRepository.deleteById(id); return "redirect:/books"; } } ``` (3)视图层: (3.1)图书列表页面(list.html): ```html <!DOCTYPE html> <html lang="en" xmlns:th="http://www.thymeleaf.org"> <head> <meta charset="UTF-8"> <title>图书列表</title> </head> <body> <div align="center"> <h2>图书列表</h2> <table border="1"> <thead> <tr> <th>ID</th> <th>书名</th> <th>作者</th> </tr> </thead> <tbody> <tr th:each="book : ${books}"> <td th:text="${book.id}"></td> <td th:text="${book.name}"></td> <td th:text="${book.author}"></td> <td><a th:href="@{'/book/'+${book.id}}" th:text="编辑"></a></td> <td><a th:href="@{'/book/'+${book.id}}" th:text="删除" method="DELETE"></a></td> </tr> </tbody> </table> <br> <a href="/book">新增图书</a> </div> </body> </html> ``` (3.2)添加图书页面(add.html): ```html <!DOCTYPE html> <html lang="en" xmlns:th="http://www.thymeleaf.org"> <head> <meta charset="UTF-8"> <title>新增图书</title> </head> <body> <div align="center"> <h2>新增图书</h2> <form th:action="@{/book}" th:object="${book}" method="POST"> <table> <tr> <td>书名</td> <td><input type="text" th:field="*{name}" /></td> </tr> <tr> <td>作者</td> <td><input type="text" th:field="*{author}" /></td> </tr> <tr> <td colspan="2" align="center"> <input type="submit" value="提交"/> </td> </tr> </table> </form> </div> </body> </html> ``` (3.3)编辑图书页面(edit.html): ```html <!DOCTYPE html> <html lang="en" xmlns:th="http://www.thymeleaf.org"> <head> <meta charset="UTF-8"> <title>编辑图书</title> </head> <body> <div align="center"> <h2>编辑图书</h2> <form th:action="@{/book}" th:object="${book}" method="PUT"> <input type="hidden" th:field="*{id}" /> <table> <tr> <td>书名</td> <td><input type="text" th:field="*{name}" /></td> </tr> <tr> <td>作者</td> <td><input type="text" th:field="*{author}" /></td> </tr> <tr> <td colspan="2" align="center"> <input type="submit" value="保存"/> </td> </tr> </table> </form> </div> </body> </html> ``` 以上便是一个简单的 SpringBoot + Thymeleaf 实现增删改查的示例代码,希望能对您有所帮助。
评论
添加红包

请填写红包祝福语或标题

红包个数最小为10个

红包金额最低5元

当前余额3.43前往充值 >
需支付:10.00
成就一亿技术人!
领取后你会自动成为博主和红包主的粉丝 规则
hope_wisdom
发出的红包
实付
使用余额支付
点击重新获取
扫码支付
钱包余额 0

抵扣说明:

1.余额是钱包充值的虚拟货币,按照1:1的比例进行支付金额的抵扣。
2.余额无法直接购买下载,可以购买VIP、付费专栏及课程。

余额充值