


 本文记录了在Linux(CentOS)虚拟机中安装Docker的过程,包括检查内核版本、安装Docker、解决启动失败的SELinux问题,以及设置Docker开机启动的步骤。在遇到因SELinux不支持overlay2导致的启动错误时,通过修改配置禁用了SELinux以使Docker正常运行,并展示了如何查看Docker版本号。
docker镜像参考:https://hub.docker.com 更多的命令参考:https://docs.docker.com/engine/reference/commandline/docker/ |
1、简介 Docker是一个开源的应用容器引擎;是一个轻量级容器技术; 运行中的这个镜像称为容器,容器启动是非常快速的。
|
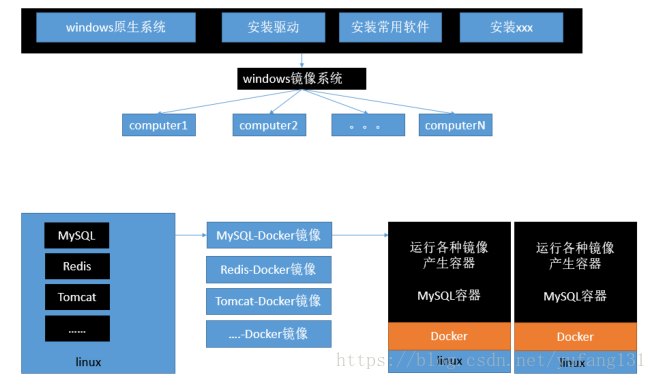
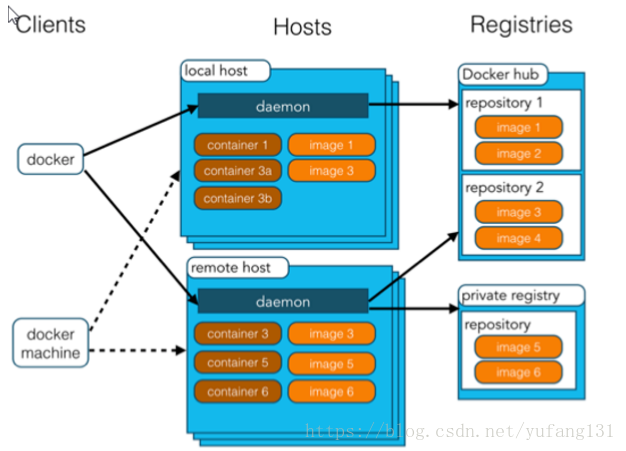
2、核心概念 docker主机(Host):安装了Docker程序的机器(Docker直接安装在操作系统之上); docker容器(Container):镜像启动后的实例称为一个容器;容器是独立运行的一个或一组应用
使用Docker的步骤: |
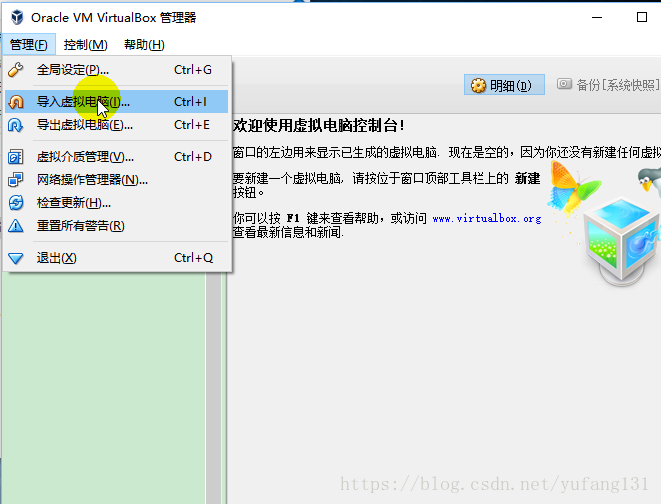
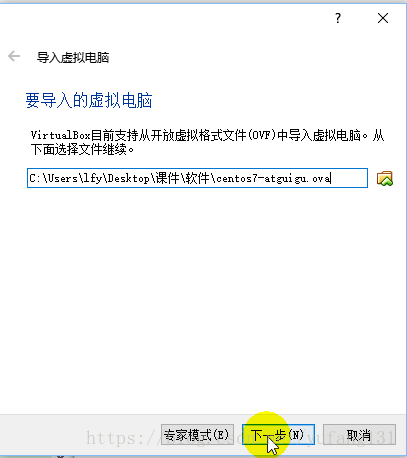
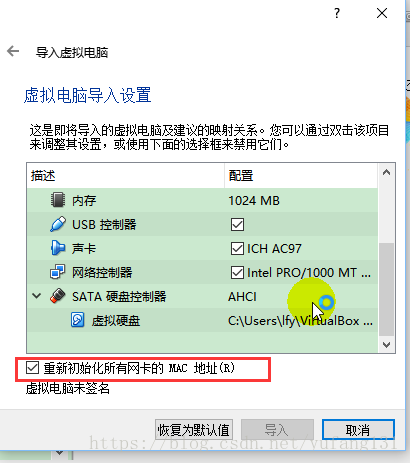
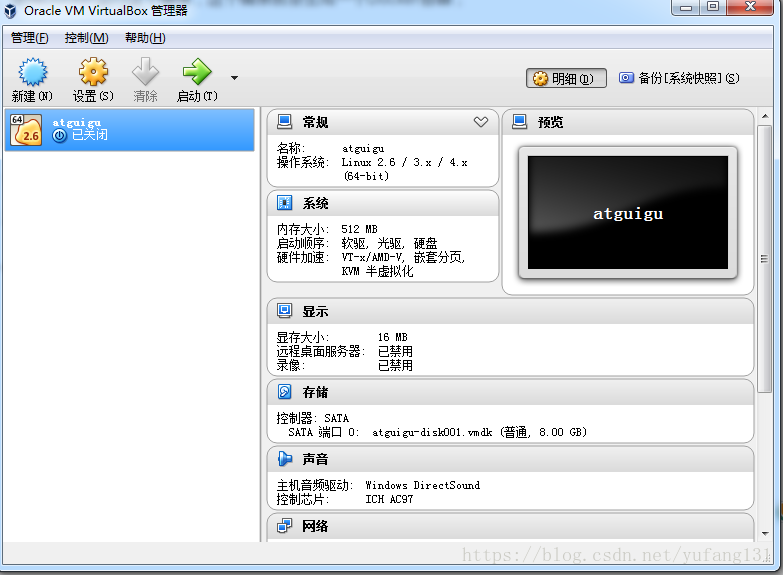
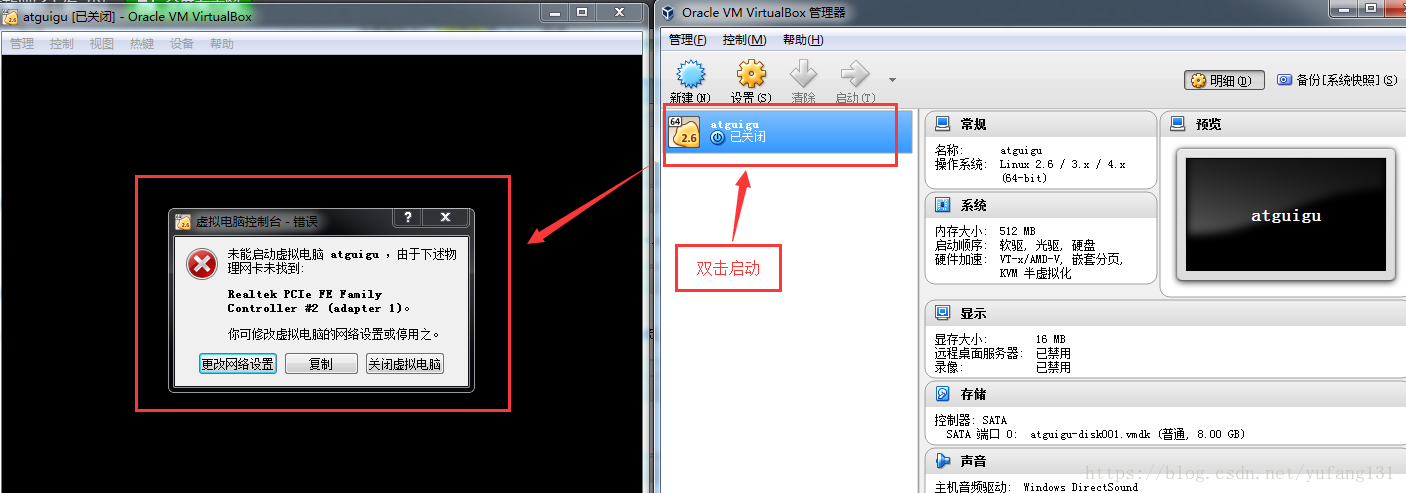
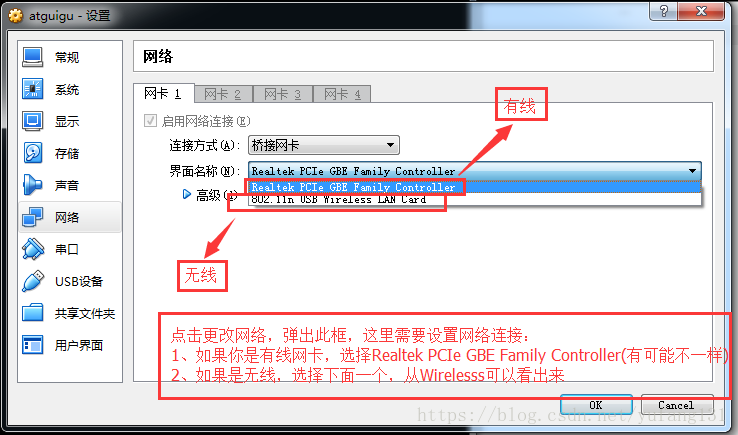
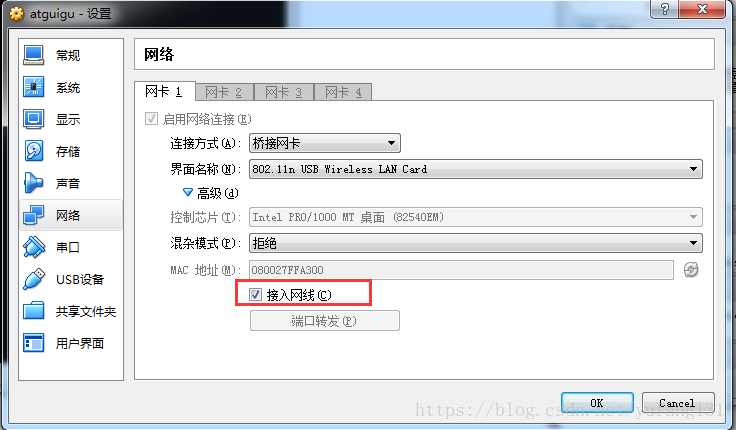
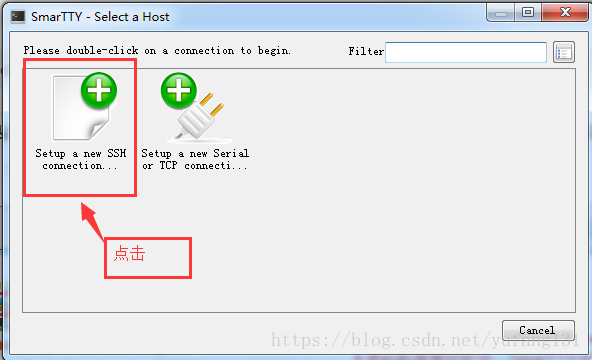
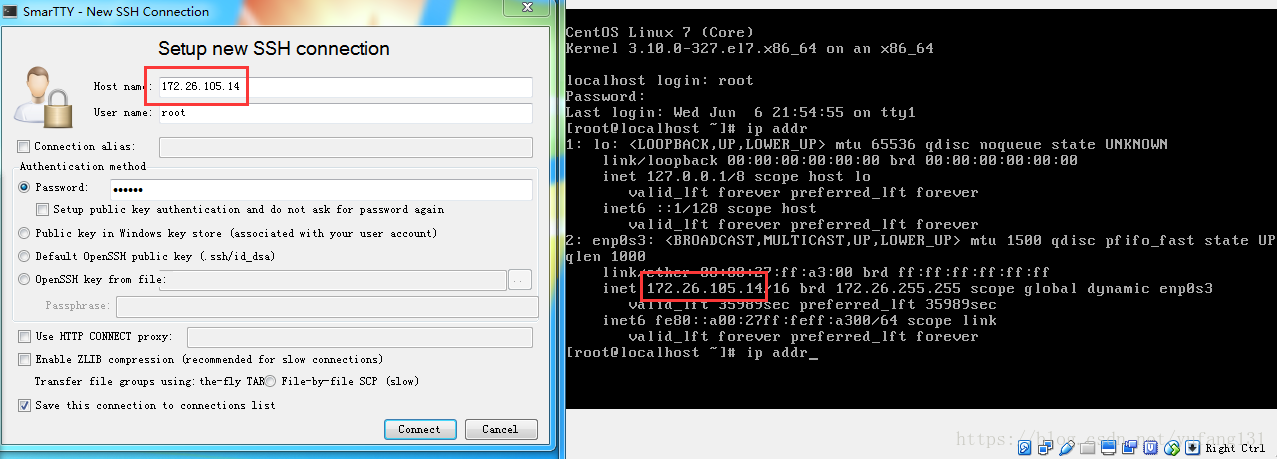
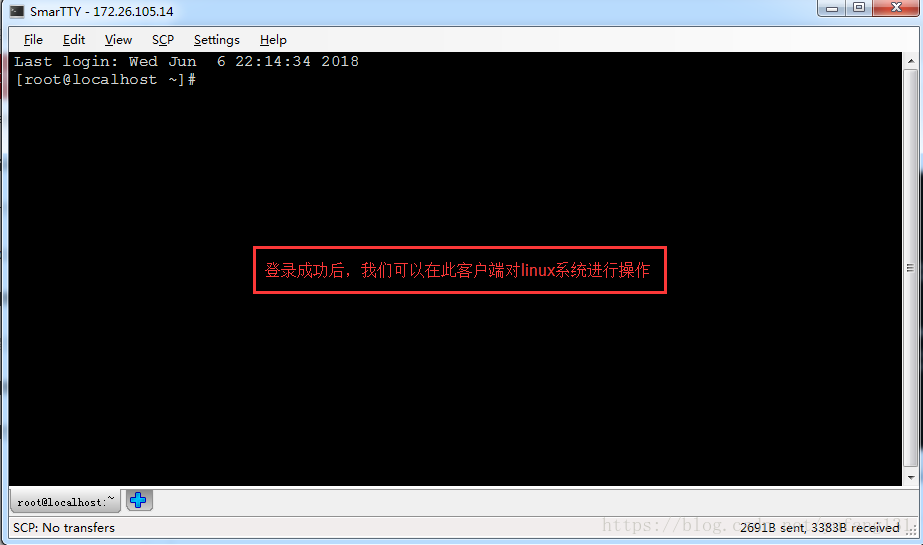
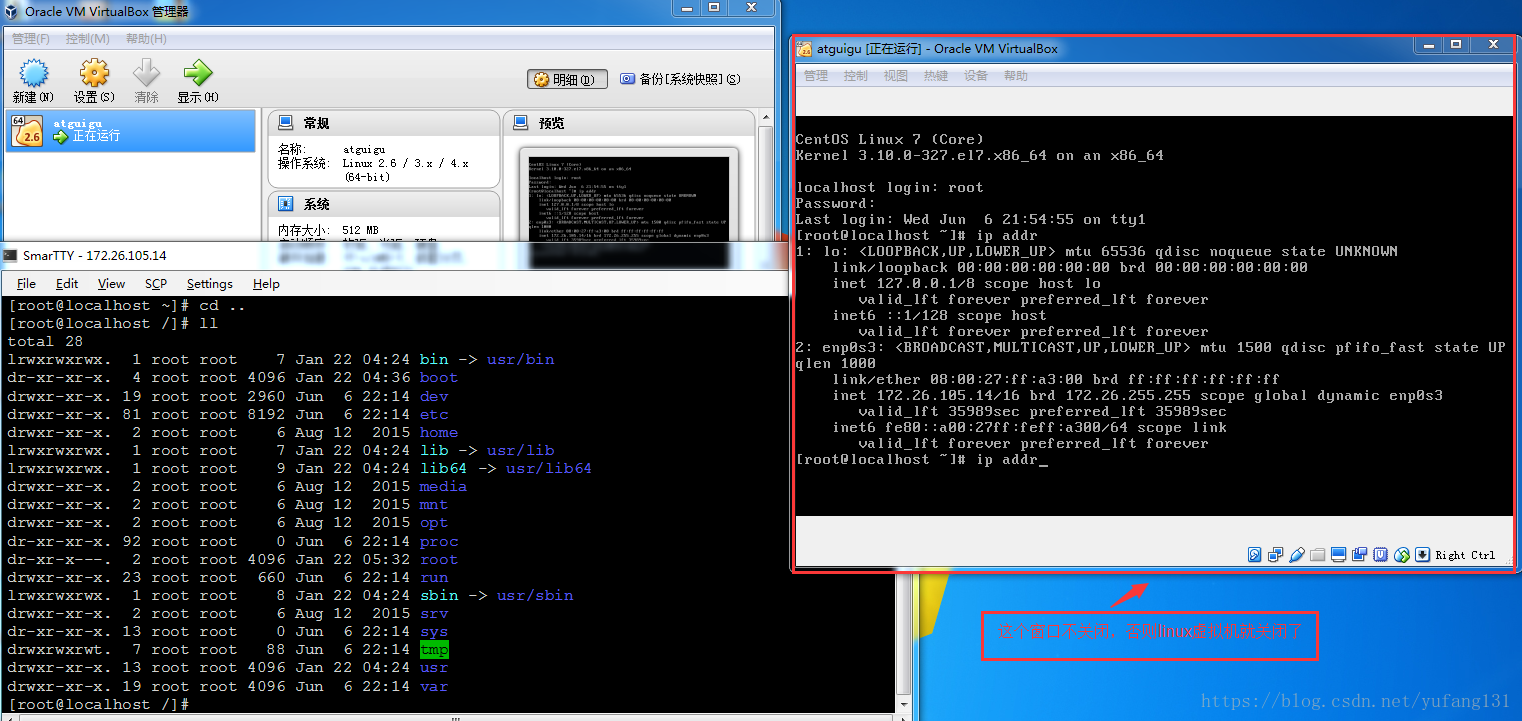
3、安装Docker 1)、安装linux虚拟机 桥接网络=选好网卡==接入网线; 6)、设置好网络以后使用命令重启虚拟机的网络 7)、查看linux的ip地址 |

-------------------------------------------------------------------------------------------------------------------------------------------------------------
2)、在linux虚拟机上安装docker
1、查看centos内核版本(Docker 要求 CentOS 系统的内核版本高于3.10):
uname -r
如果CentOS系统内核低于3.10,可以升级软件包及内核,通过
yum update2、安装docker (前提是连上网),通过下面命令安装:
yum install docker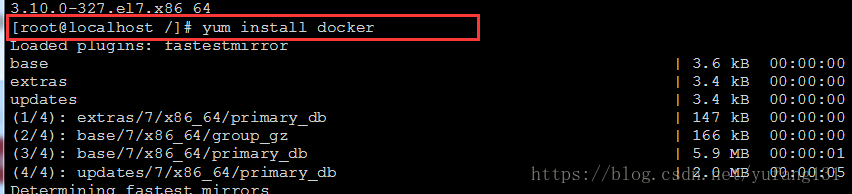
安装过程中,输入y确认安装
 安装成功。
安装成功。
3、启动 docker:
systemctl start docker
启动失败,报错:
Job for docker.service failed because the control process exited with error code. See "systemctl status docker.service" and "journalctl -xe" for details.
按照提示执行:systemctl status docker.service
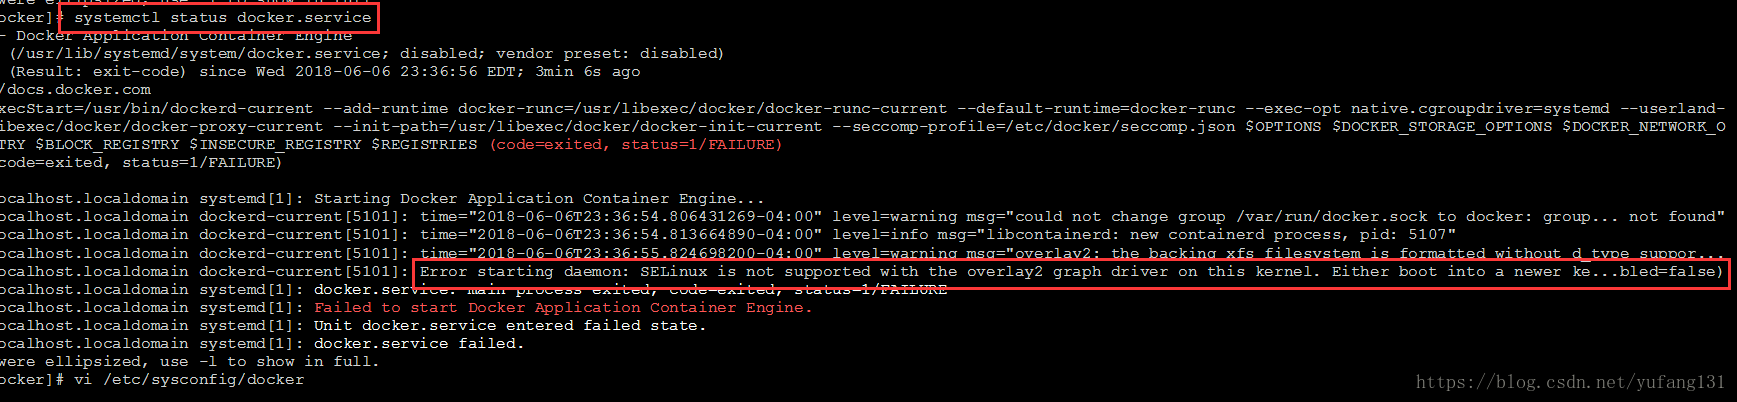
红色部分告诉我们此linux的内核中的SELinux不支持 overlay2 graph driver,解决方法有两个,要么启动一个新内核,要么就在docker里禁用selinux,设置--selinux-enabled=false。我们采用第二种方式。
vi /etc/sysconfig/docker
然后将--selinux-enabled设置成false,保存并退出。

重新启动ok。
查看docker版本号:
docker -v
4、设置 docker 服务开机启动:
systemctl enable docker
5、停止 docker:
systemctl stop docker

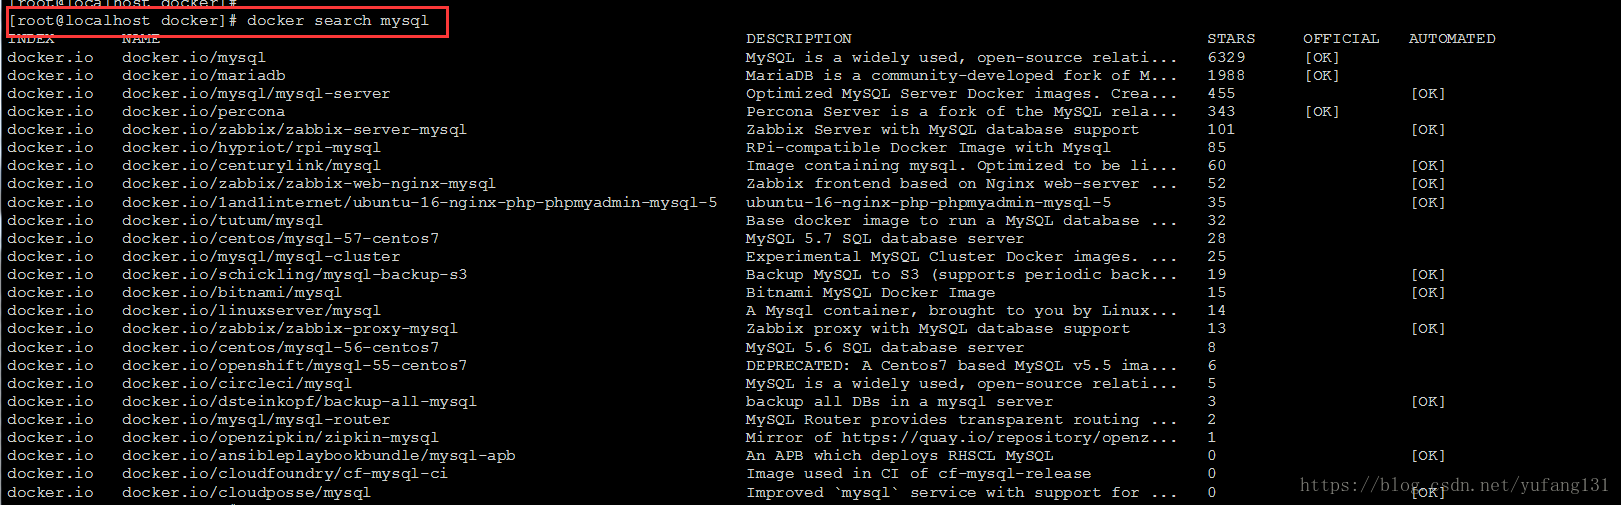
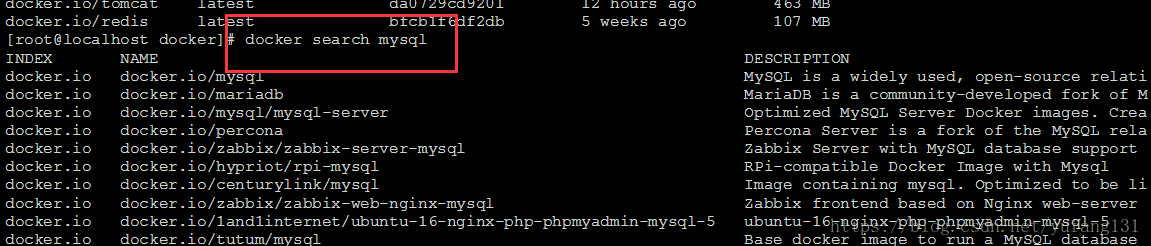
4、常用操作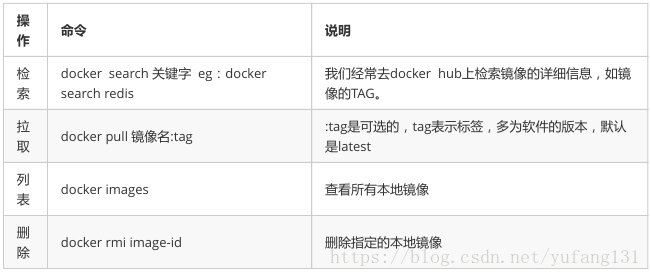 1、镜像操作(相应的镜像信息都可以在 https://hub.docker.com 中查询) 1.1、 查索操作-- search命令:docker search 关键字 搜索mysql镜像信息:docker search mysql
INDEX: 索引 AUTOMATED: 是不是自动构建的,OK代表自动化的,一运行所有的配置都配置好了 会到其 https://hub.docker.com 搜索
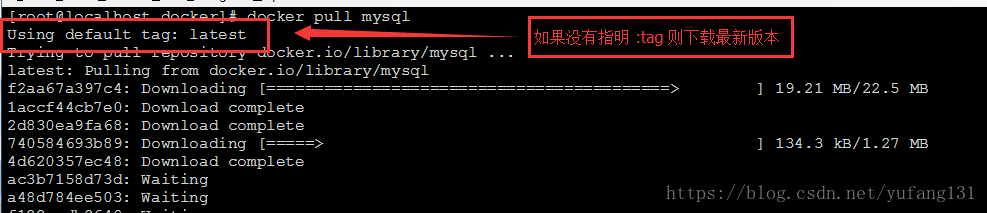
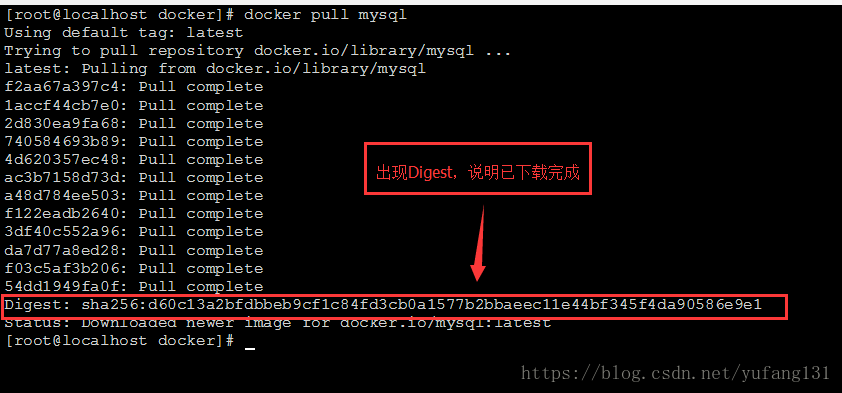
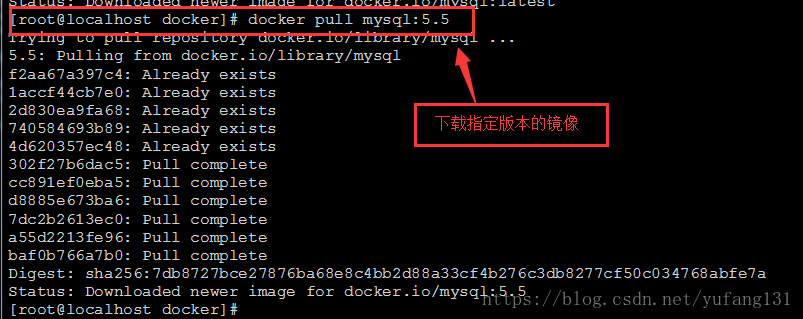
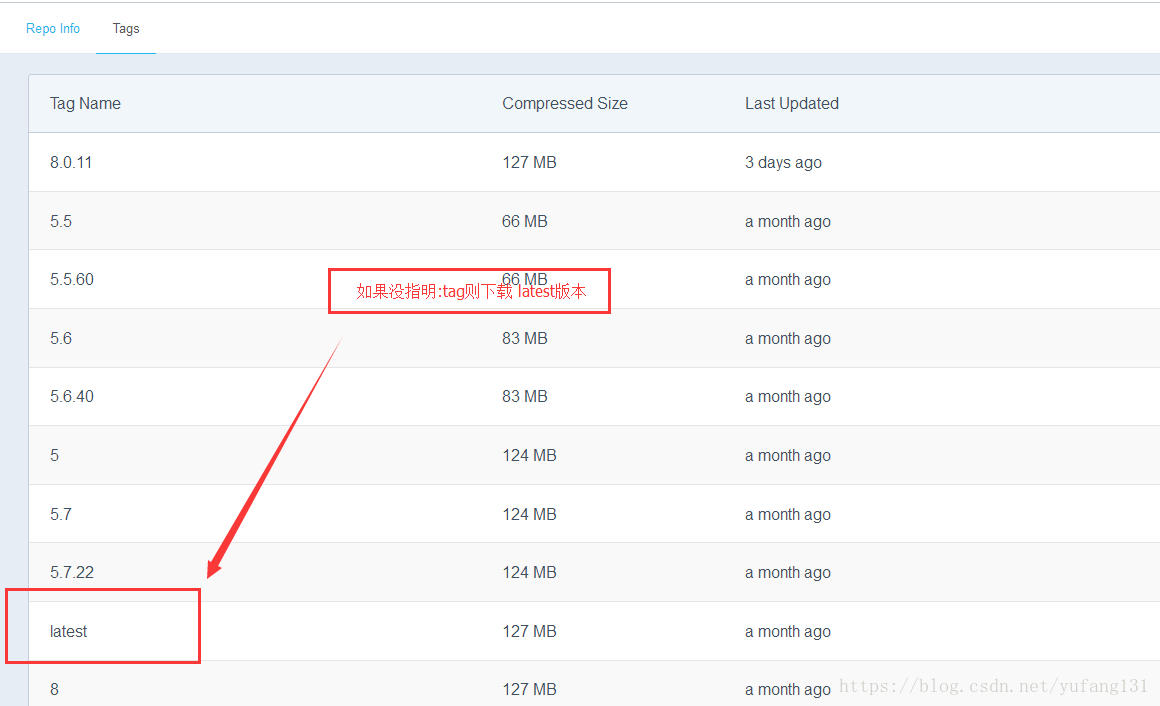
----------------------------------------------------- 1.2、 拉取操作-- pull命令:docker pull 镜像名:tag :tag是可选的,tag表示标签,多为软件版本号,如果不加 :tag,默认下载latest(下载最新版本)。 下载mysql:
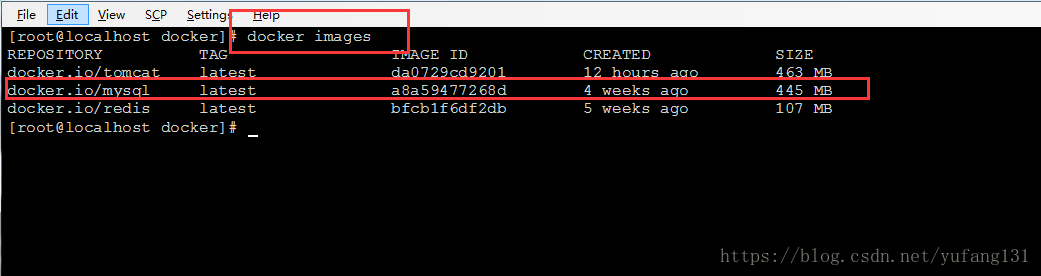
----------------------------------------------------- 1.3、 查看所有本地镜像操作-- images命令:docker images  REPOSITORY: 从哪里下载的镜像 TAG: 标签(版本号) IMAGE ID: 镜像ID CREATE: 镜像创建时间 SIZE: 镜像大小 ----------------------------------------------------- 1.4、 删除镜像操作-- rmi image-id命令:docker rmi image-id
-------------------------------------------------------------------------------------------------------------------------------------------------------- 2、容器操作 软件镜像相当于QQ安装程序 运行镜像,就产生一个容器(正在运行的软件,运行的QQ) 步骤: 1、搜索镜像
2、拉取镜像
3、根据镜像启动容器 3.1、镜像运行: docker run --name container-name -d image-name : --name:自定义容器名 -d:后台运行 image-name:指定镜像模板 例如:docker run --name mytomcat -d tomcat 如果tomcat有标签TAG,则需要加个TAG
3.2、查看运行中的容器 docker ps (查看运行中的容器)
docker ps -a (查看所有的容器,包括运行中的,停止的)
3.3、停止运行中的容器 docker stop container-name/container-id 停止当前运行的容器(推荐使用ID) 3.4、启动容器 docker start container-name/container-id 启动容器(推荐使用ID)
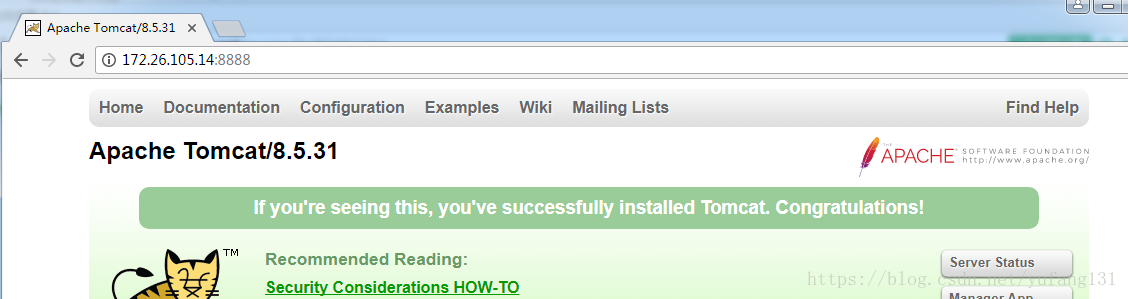
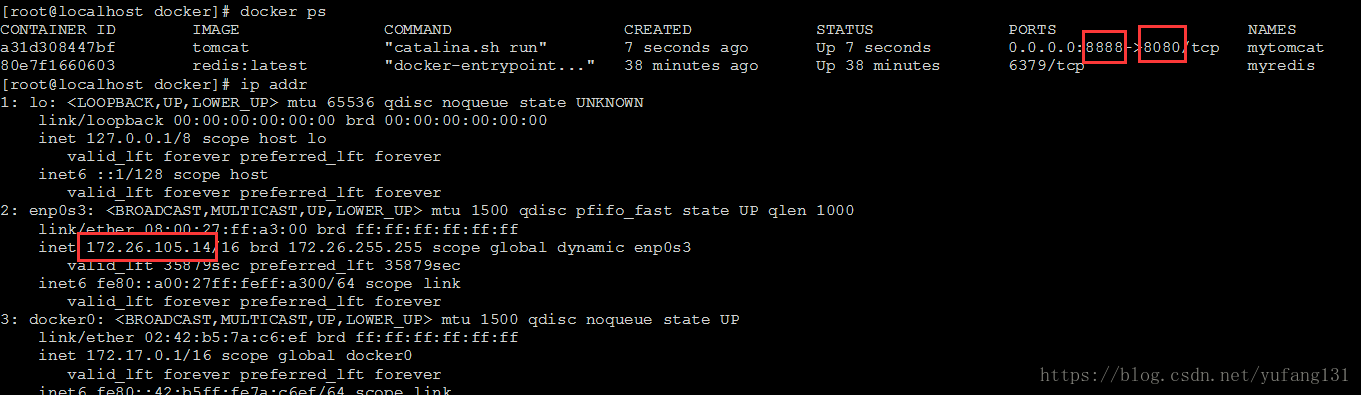
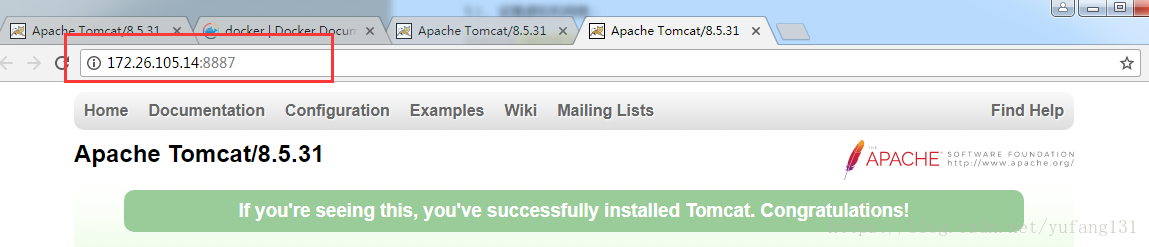
3.5、删除容器 docker rm container-id 删除指定容器 3.6、启动一个做了端口映射的tocmat docker run -d -p 8888:8080 --name mytomcat tomcat -p:主机端口映射到容器内部的端口 (主机端口:容器内部端口)
通过端口映射,我们就可以访问tomcat:
注:如果访问不了,可能是防火墙原因(为了演示简单,我这里关闭了防火墙):
service firewalld status:查看防火墙状态 service firewalld stop:关闭防火墙 一个镜像可以启动多个容器:
都可以成功访问 3.7、查看容器日志 docker logs container-name/container-id (推荐使用ID)
更多的命令参考:https://docs.docker.com/engine/reference/commandline/docker/ |


5、docker安装mysql举例: 步骤: 1、搜索mysql:docker search mysql
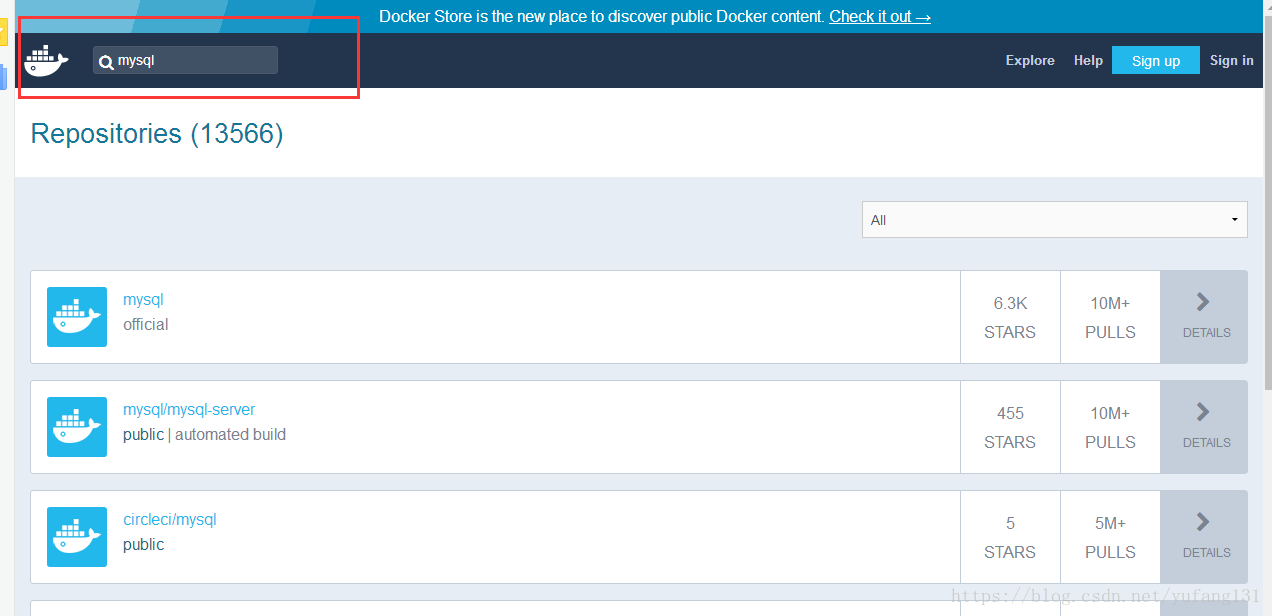
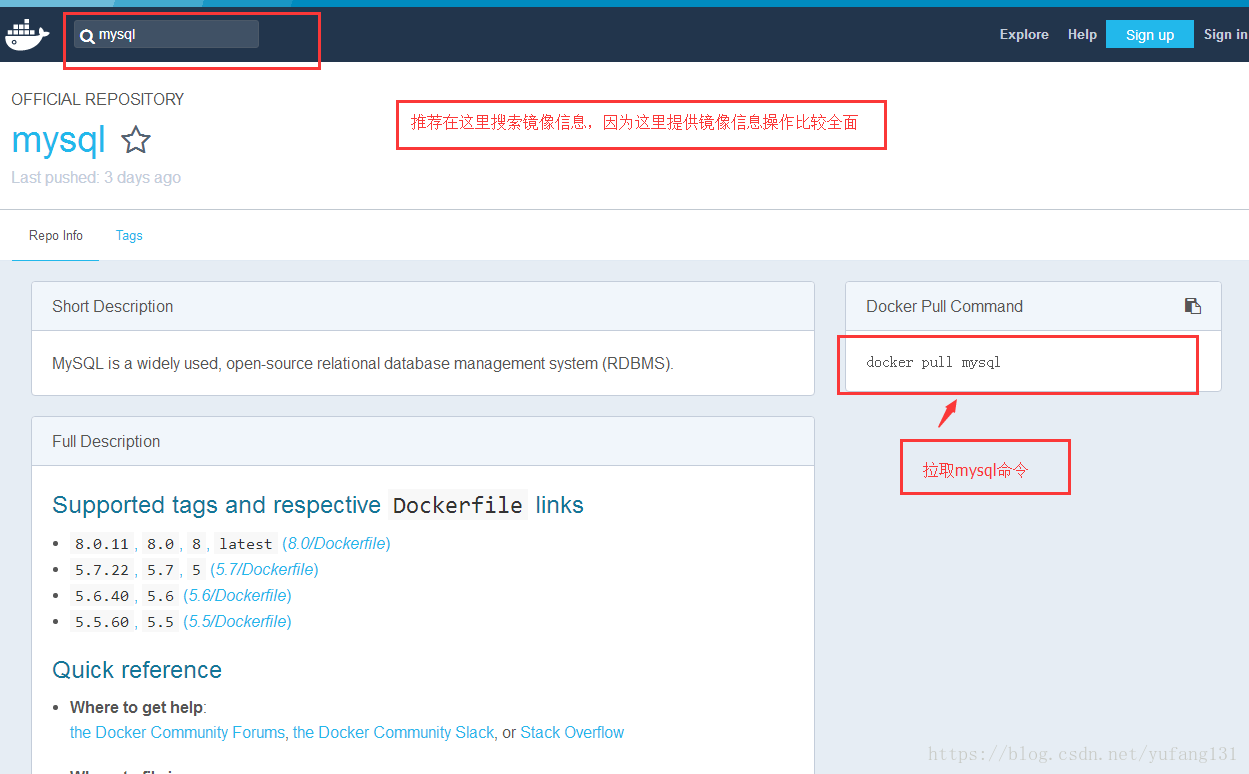
不过呢?我们推荐在 https://hub.docker.com 中搜索:
2、拉取mysql:docker pull mysql
3、查看本地镜像:docker images
4、启动mysql镜像:docker run --name mysql01 -d mysql
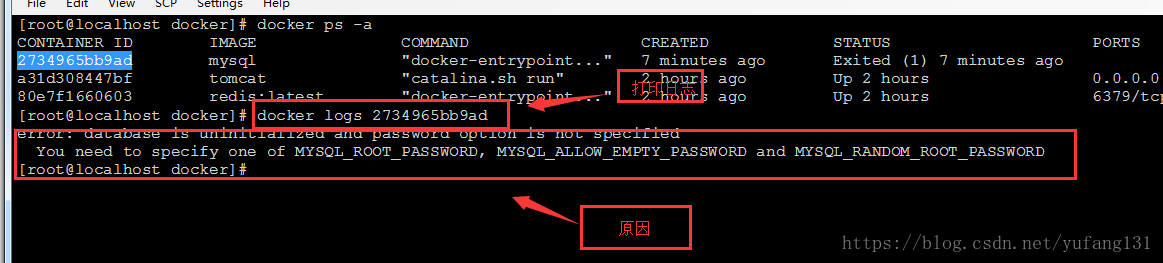
5、查看启动镜像信息:docker ps
这里发现mysql并没有启动成功。为什么没有启动成功呢?我们下面一步一步的排查。通过 docker ps -a 命令查看所有的容器信息,发现mysql退出了,具体看看日志是什么原因?
6、查看容器日志:docker logs container-name/container-id (推荐使用ID)
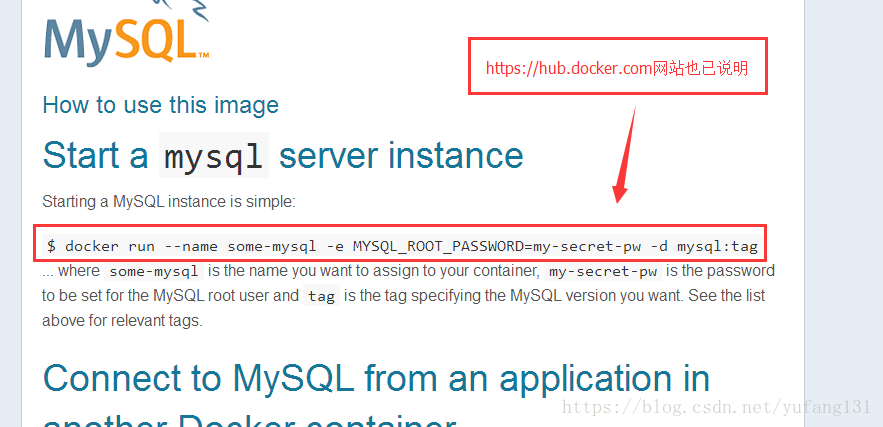
error: database is uninitialized and password option is not specified 7、正确启动:docker run --name mysql01 -e MYSQL_ROOT_PASSWORD=123456 -d mysql
这里需要,设置容器开机启动:
docker run --restart=always --name mysql01 -e MYSQL_ROOT_PASSWORD=123456 -d mysql
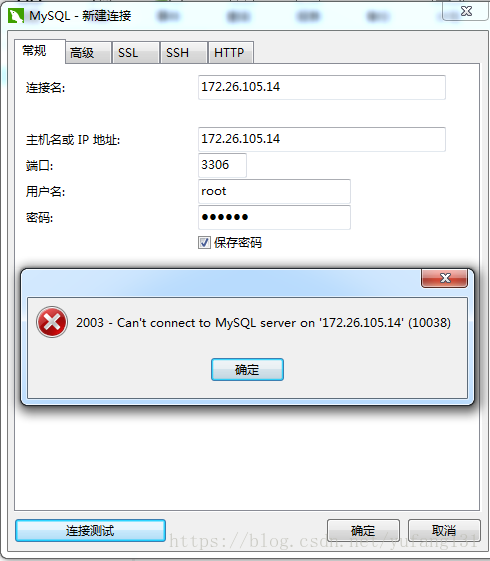
到这一步时,其实mysql也不能使用,因为我们还没有做端口映射。通过 Navicat Premium 软件连接不上mysql:
端口映射:
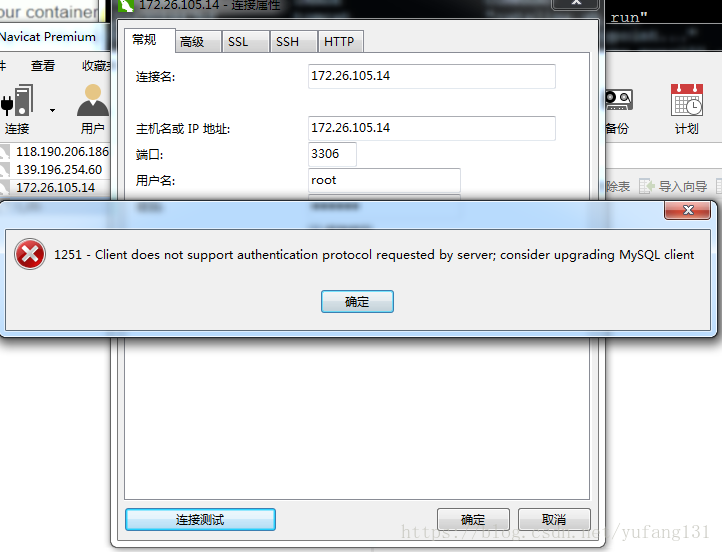
再次通过 Navicat Premium 软件连接不上mysql:
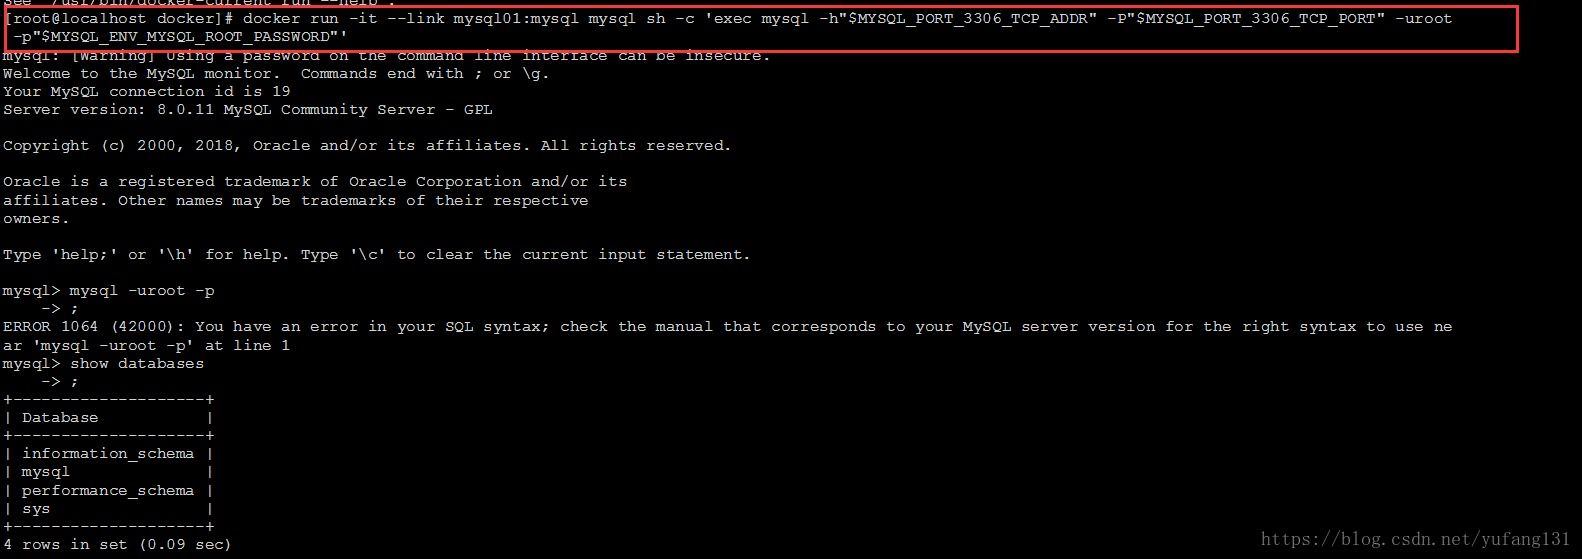
这时我们需要修改mysql配置,输入命令进入mysql: docker run -it --link mysql01:mysql mysql sh -c 'exec mysql -h"$MYSQL_PORT_3306_TCP_ADDR" -P"$MYSQL_PORT_3306_TCP_PORT" -uroot -p"$MYSQL_ENV_MYSQL_ROOT_PASSWORD"'
1、查看用户信息:select host,user,plugin,authentication_string from mysql.user;
备注:host为 % 表示不限制ip localhost表示本机使用 plugin非mysql_native_password 则需要修改密码 2、修改用户密码 1.如果想要设置远程这样设置:ALTER USER 'root'@'%' IDENTIFIED WITH mysql_native_password BY 'newpassword'; #更新一下用户的密码 root用户密码为newpassword 2.如果要设置本地plugin为mysql_native_password这样设置: ALTER USER 'root'@'localhost' IDENTIFIED WITH mysql_native_password BY 'newpassword'; #更新一下用户的密码 root用户密码为newpassword flush privileges;  再次查看用户信息:
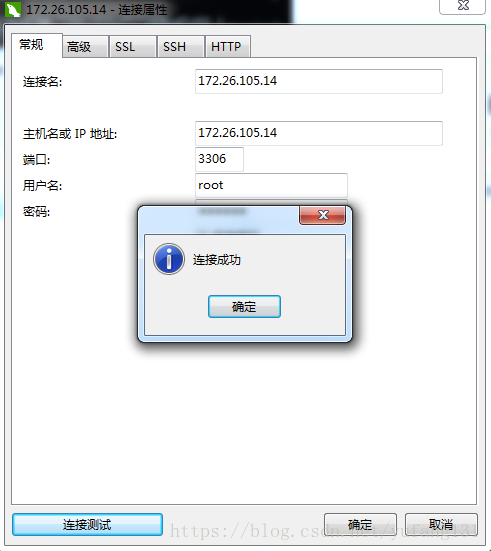
再交连接测试:
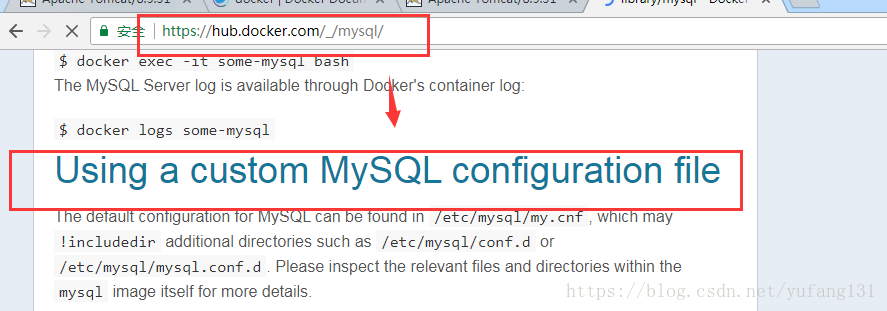
--------------------------------------------------------------------------------------------------------------------------------------- 高级操作: 使用自定义的MySQL配置文件 具体的细节使用,参考:https://hub.docker.com/_/mysql/
|


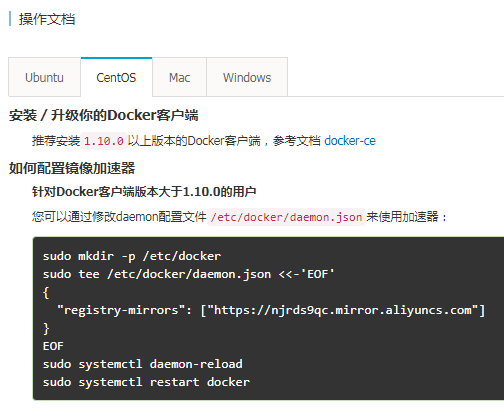
扩展--修改Docker镜像加速器:因为国外的docker镜像访问太慢,所以我们需要修改成阿里云的docker镜像。这样从国内镜像拉取速度会快点。 1.打开阿里云docker仓库地址https://dev.aliyun.com/search.html 2.淘宝账号即可登录,登录后点击自己的管理中心。 3.点击管理中心左侧菜单栏的“镜像加速器”,右边面板会有你的加速地址,面板下面有详细设置步骤。如下图:
[root@localhost ~]# vi /etc/docker/daemon.json将下面整行字符拷贝进去,保存并退出。 "registry-mirrors": ["https://njrds9qc.mirror.aliyuncs.com"] 刷新daemon [root@localhost ~]# systemctl daemon-reload 重启docker [root@localhost ~]# systemctl restart docker 拉取镜像以hello-world为例  [root@localhost tmp]# docker pull hello-world Using default tag: latest Trying to pull repository docker.io/library/hello-world ... latest: Pulling from docker.io/library/hello-world 9bb5a5d4561a: Pull complete Digest: sha256:f5233545e43561214ca4891fd1157e1c3c563316ed8e237750d59bde73361e77 Status: Downloaded newer image for docker.io/hello-world:latest 表示成功拉取 运行镜像[root@localhost tmp]# docker run hello-world Hello from Docker! This message shows that your installation appears to be working correctly. To generate this message, Docker took the following steps: 1. The Docker client contacted the Docker daemon. 2. The Docker daemon pulled the "hello-world" image from the Docker Hub. (amd64) 3. The Docker daemon created a new container from that image which runs the executable that produces the output you are currently reading. 4. The Docker daemon streamed that output to the Docker client, which sent it to your terminal. To try something more ambitious, you can run an Ubuntu container with: $ docker run -it ubuntu bash Share images, automate workflows, and more with a free Docker ID: https://hub.docker.com/ For more examples and ideas, visit: https://docs.docker.com/engine/userguide/ 成功运行。 |
| 感谢--尚硅谷 |


 6657
6657

 被折叠的 条评论
为什么被折叠?
被折叠的 条评论
为什么被折叠?
 到【灌水乐园】发言


