 简易半透明Activity实现


转自:https://blog.youkuaiyun.com/sunalongl/article/details/20544177
在做项目时,常需要用到对话框之类的效果,然而对话框不容易写,所以就想写个半透明的Activity来代替对话框效果,这样的好处至少有三个:
一:布局容易
二:各种控件容易控制
三:代码简练:不至于将控制对话框的代码写在一坨,各种控制也不用写在一坨,易于维护
而现在在网上搜索半透明的Activity时,都是需要在style中写样式,在color中定义颜色,当然,最后还得在Mainfest中配置好,结果一个小小的半透明Activity效果写的好零乱,而且网上来来去去就那几种方法,看得蛋疼,因此为了装逼,我介绍一种简易的半透明Activity效果:
步骤:
一:在Activity的布局的根标签中写入透明颜色:
android:background="#80000000"
二:在清单文件中相应的activity中配置:
android:theme="@android:style/Theme.Translucent.NoTitleBar"
ok,就这两步,
这样的效果好处在于:
一:简单,就两行代码
二:易修改,就两行代码,只需修改一处即可。
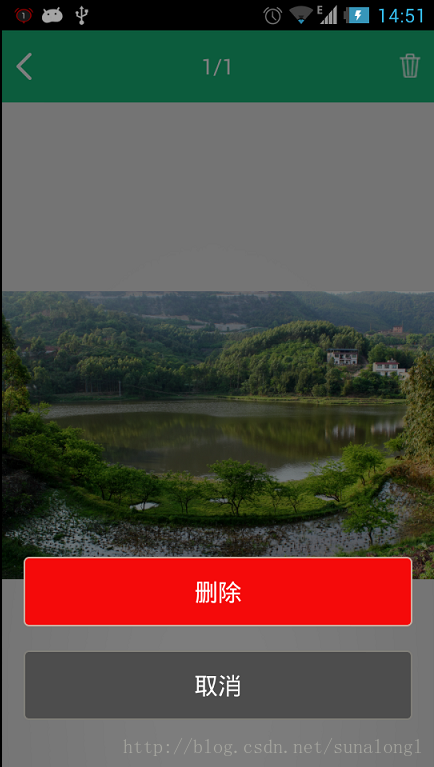
效果图:
详细代码:
一:布局:
- <?xml version="1.0" encoding="utf-8"?>
- <RelativeLayout xmlns:android="http://schemas.android.com/apk/res/android"
- android:layout_width="match_parent"
- android:layout_height="match_parent"
- android:background="#80000000" >
- <LinearLayout
- android:layout_width="match_parent"
- android:layout_height="wrap_content"
- android:layout_alignParentBottom="true"
- android:layout_marginBottom="40dp"
- android:layout_marginLeft="18dp"
- android:layout_marginRight="18dp"
- android:orientation="vertical" >
- <TextView
- android:id="@+id/tv_delete"
- android:layout_width="match_parent"
- android:layout_height="wrap_content"
- android:background="@drawable/rect_delete_red"
- android:gravity="center"
- android:paddingBottom="15dp"
- android:paddingTop="15dp"
- android:text="删除"
- android:textColor="#FFFFFF"
- android:textSize="20sp" />
- <TextView
- android:id="@+id/tv_cancel"
- android:layout_width="match_parent"
- android:layout_height="wrap_content"
- android:layout_marginTop="20dp"
- android:background="@drawable/rect_delete_gray"
- android:gravity="center"
- android:paddingBottom="15dp"
- android:paddingTop="15dp"
- android:text="取消"
- android:textColor="#FFFFFF"
- android:textSize="20sp" />
- </LinearLayout>
- </RelativeLayout>
二:清单文件:
- <activity android:name="com.itcode.DialogActivity"
- android:theme="@android:style/Theme.Translucent.NoTitleBar" ></activity>
设置透明效果三种方式
1、用android系统的透明效果
XML代码
android:background="@android:color/transparent" - 1
2、用ARGB来控制
XML代码
半透明<Button android:background="#e0000000" />
透明<Button android:background="#00000000" />
3、设置alpha
Java代码
View v = findViewById(R.id.content);//找到你要设透明背景的layout 的id
v.getBackground().setAlpha(100);//0~255透明度值 - 1
- 2
android 窗体透明的,黑暗度等的设置技巧
设置透明度(这是窗体本身的透明度,非背景)
WindowManager.LayoutParams lp=getWindow().getAttributes();
lp.alpha=0.3f;
getWindow().setAttributes(lp);- 1
- 2
- 3
alpha在0.0f到1.0f之间。1.0完全不透明,0.0f完全透明
设置黑暗度
WindowManager.LayoutParams lp=getWindow().getAttributes();
lp.dimAmount=0.5f;
getWindow().setAttributes(lp);
getWindow().addFlags(WindowManager.LayoutParams.FLAG_DIM_BEHIND);- 1
- 2
- 3
- 4
dimAmount在0.0f和1.0f之间,0.0f完全不暗,1.0f全暗
设置背景模糊
getWindow().setFlags(WindowManager.LayoutParams.FLAG_BLUR_BEHIND,
WindowManager.LayoutParams.FLAG_BLUR_BEHIND);- 1
- 2
以上设置对dialog对话框同样有效
Activity的透明、半透明效果的设置transparent
res/values/styles.xml
<resources>
  <style name="Transparent">
    <item name="android:windowBackground">
       @color/transparent_background
    </item>
    <item name="android:windowNoTitle">true</item>
    <item name="android:windowIsTranslucent">true</item>
    <item name="android:windowAnimationStyle">
         @+android:style/Animation.Translucent
   </item>
  </style>
</resources>- 1
- 2
- 3
- 4
- 5
- 6
- 7
- 8
- 9
- 10
- 11
- 12
res/values/color.xml
<?xml version="1.0" encoding="utf-8"?>
<resources>
  <color name="transparent_background">#50000000</color>
</resources> - 1
- 2
- 3
- 4
//注意:
//color.xml的#5000000前两位是透明的效果参数从00–99(透明–不怎么透明),
//后6位是颜色的设置
manifest.xml
<activity
    android:name=".TransparentActivity"
    android:theme="@style/Transparent">
</activity>- 1
- 2
- 3
- 4
java代码
public void onCreate(Bundle savedInstanceState) {
        super.onCreate(savedInstanceState);
        setTheme(R.style.Transparent);
        setContentView(R.layout.transparent);
}- 1
- 2
- 3
- 4
- 5
原文链接:


 455
455

 被折叠的 条评论
为什么被折叠?
被折叠的 条评论
为什么被折叠?
 到【灌水乐园】发言


