


1.引言
在这里我是参考了官方的教程,在Windows10 安装的 Python为3.9版本TensorFlow为2.10.0版本
2.创建虚拟环境
conda create -n tensorflow pip python=3.9#创建一个新的虚拟环境
conda activate tensorflow#激活窗口
pip install --ignore-installed --upgrade tensorflow==2.10.0#安装TensorFlow
我这里是使用cpu版本,如果需要安装gpu版本参考官方教程
3.下载工作空间
在本地新建一个名字为TensorFlow的文件夹,先下载GitHub - tensorflow/models: Models and examples built with TensorFlow这个文件到TensorFlow文件夹,解压打开这个文件,将models-master文件夹改名为models,最终得到的目录如下
TensorFlow/
└─ models/
   ├─ community/
   ├─ official/
   ├─ orbit/
   ├─ research/
   └── ...
4.protobuf安装
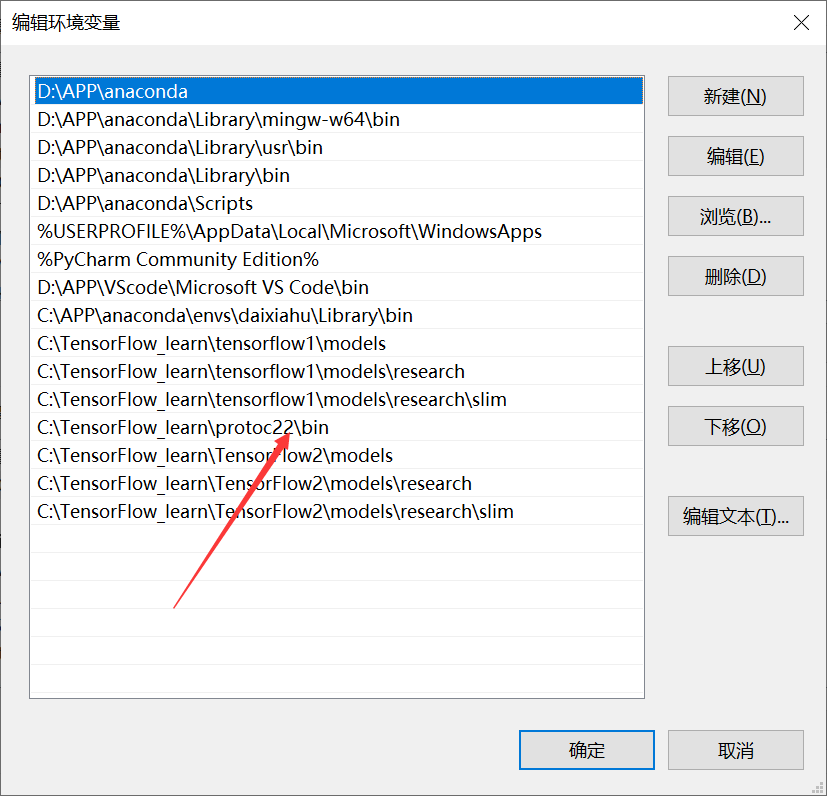
在Releases · protocolbuffers/protobuf网站下载protobuf到本地,在这里我是选择v22版本的,因为我发现安装最新版本会在下面进行测试的时候会出现ImportError: cannot import name 'runtime_version' from 'google.protobuf'这个问题,解压文件夹,在系统变量了添加路径,只要把bin文件添加就行
完成之后打开anaconda中断,激活虚拟环境,cd 到TensorFlow/models/research/(注意这里我省略了前面的路径,要根据你安装的路径来),这个就是第三步下载文件的目录,
conda activate tensorflow
cd C:\TensorFlow_learn\TensorFlow2\models\research
protoc object_detection/protos/*.proto --python_out=.5.COCO API 安装
pip install cython
pip install git+https://github.com/philferriere/cocoapi.git#subdirectory=PythonAPI6.object API 安装
还是cd 到TensorFlow/models/research/目录,先负责object_detection/packages/tf2/setup.py文件到该目录
copy object_detection/packages/tf2/setup.py .
python -m pip install .
7.测试一下
python object_detection/builders/model_builder_tf2_test.py如果出现ImportError: cannot import name 'runtime_version' from 'google.protobuf,请参考
https://github.com/tensorflow/models/issues/11192https://stackoverflow.com/questions/71759248/importerror-cannot-import-name-builder-from-google-protobuf-internal
先更新protobuf到最新版本,从anaconda的安装目录,D:\APP\anaconda\envs\tensorflow_object_1\Lib\site-packages\google\protobuf复制builder.py ,然后再重新下载适合自己环境的protobuf版本,然后将builder.py复制到新的protobuf 路径还是D:\APP\anaconda\envs\tensorflow_object_1\Lib\site-packages\google\protobuf
pip install --upgrade protobuf
pip install protobuf==3.19.4更具体的解释,在这位老哥的文章解决验证object_detection API安装时出现“ImportError: cannot import name ‘runtime_version‘ from ‘google.protob”-优快云博客
下一篇文章开始训练自己的模型


 1625
1625

 被折叠的 条评论
为什么被折叠?
被折叠的 条评论
为什么被折叠?
 到【灌水乐园】发言


