maven就像是一个jar包的仓库
搭建Maven:
Maven的核心配置文件是settings.xml,


然后在eclipde配置jdk,配置maven:
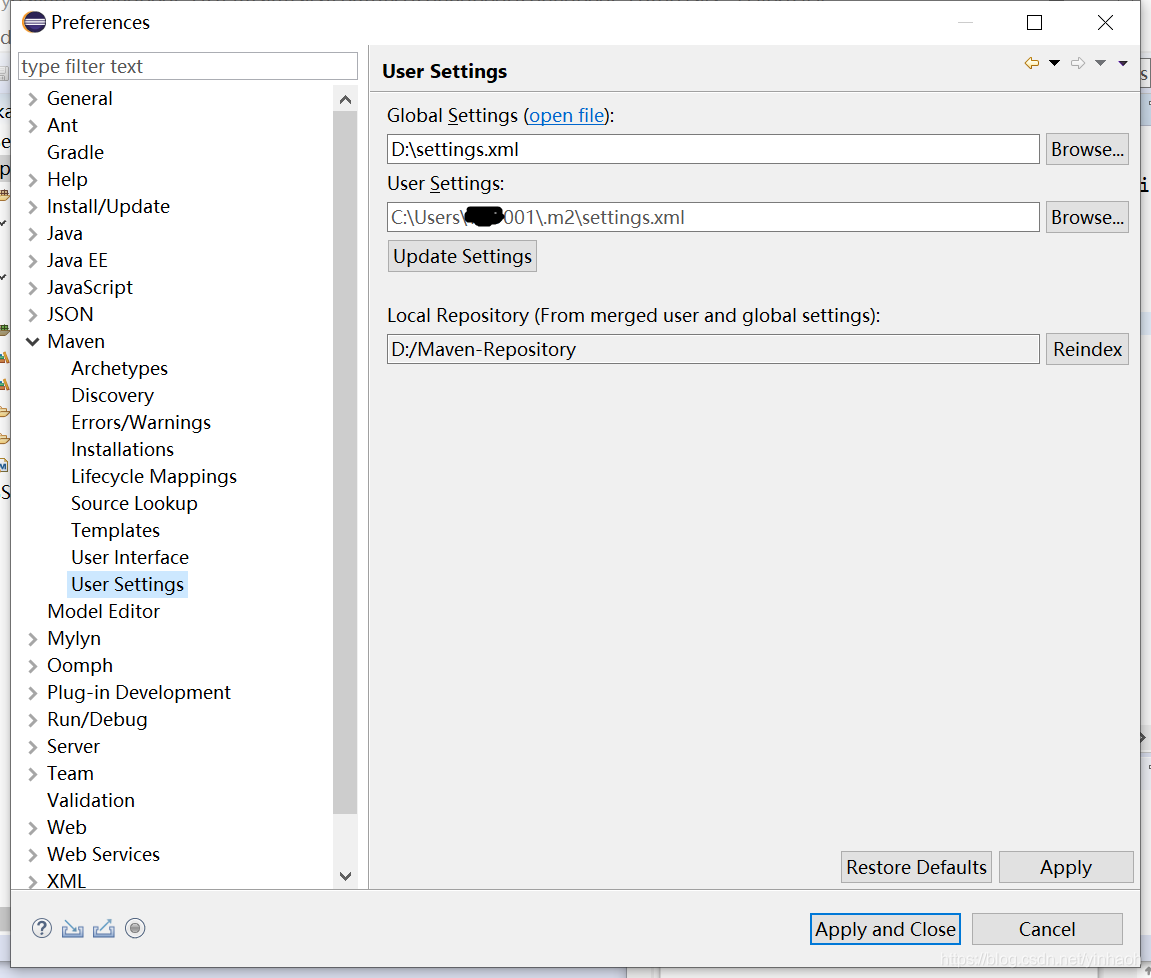
一、创建Maven项目:
1、在eclipes中创建Maven Project
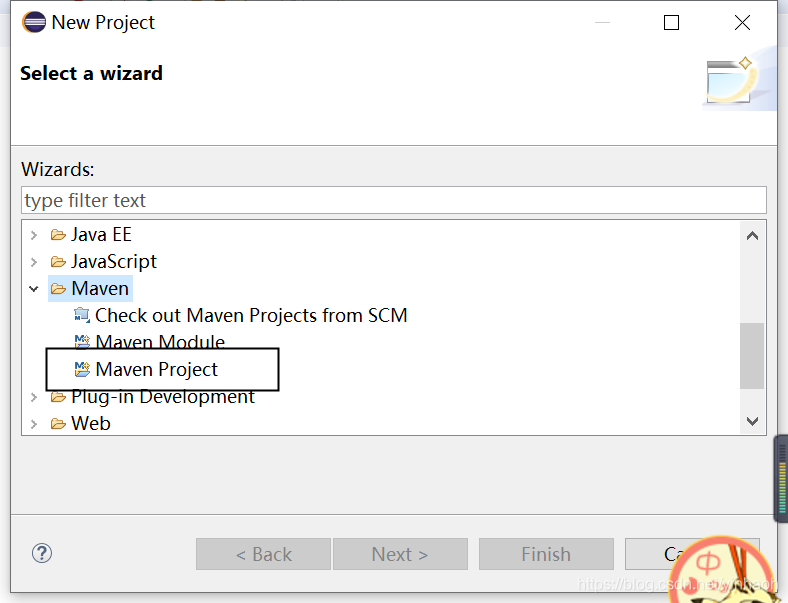
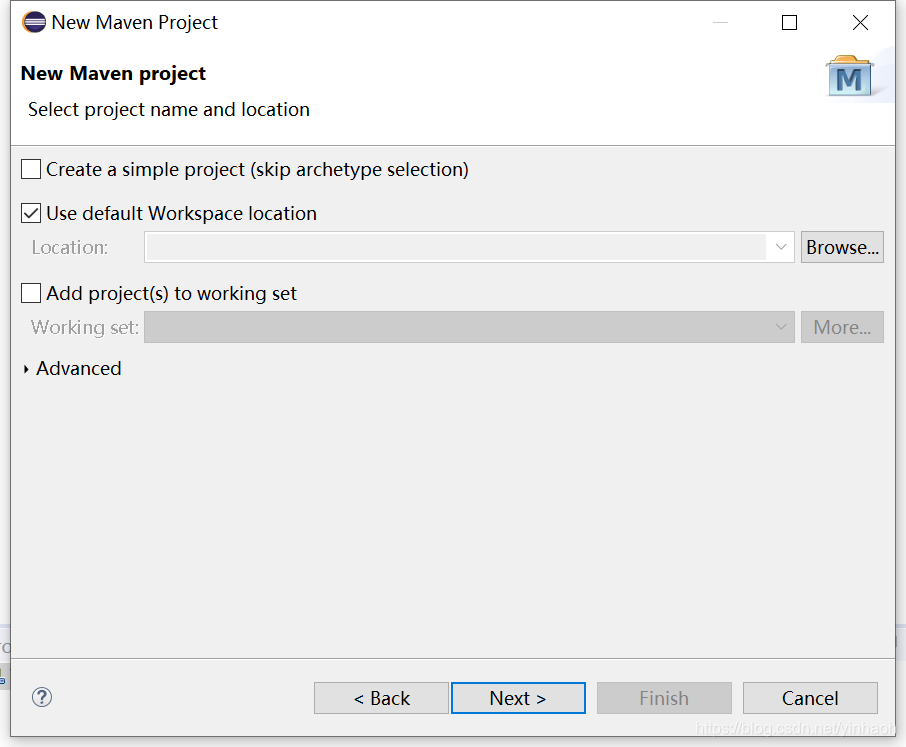
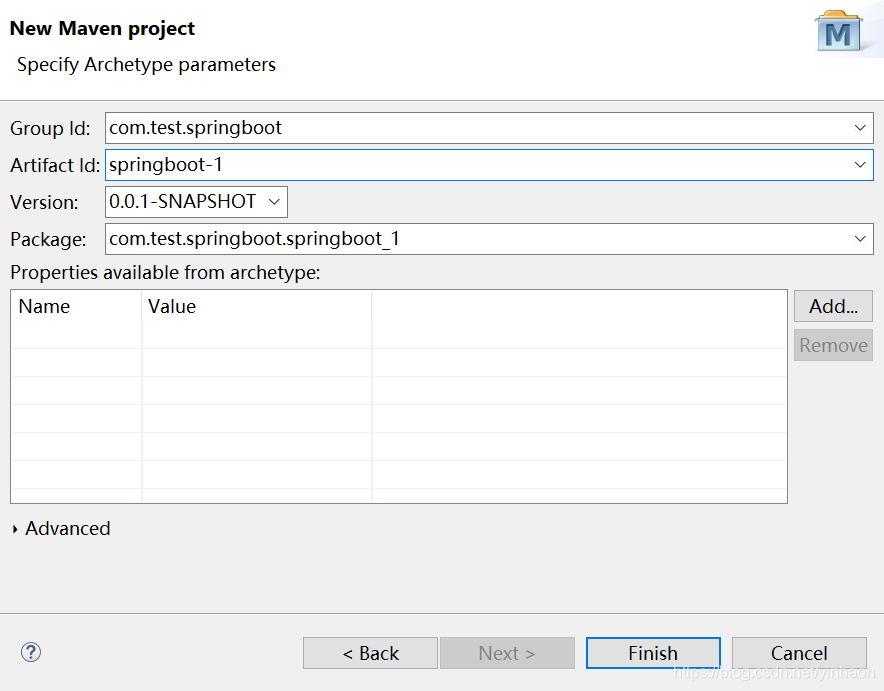
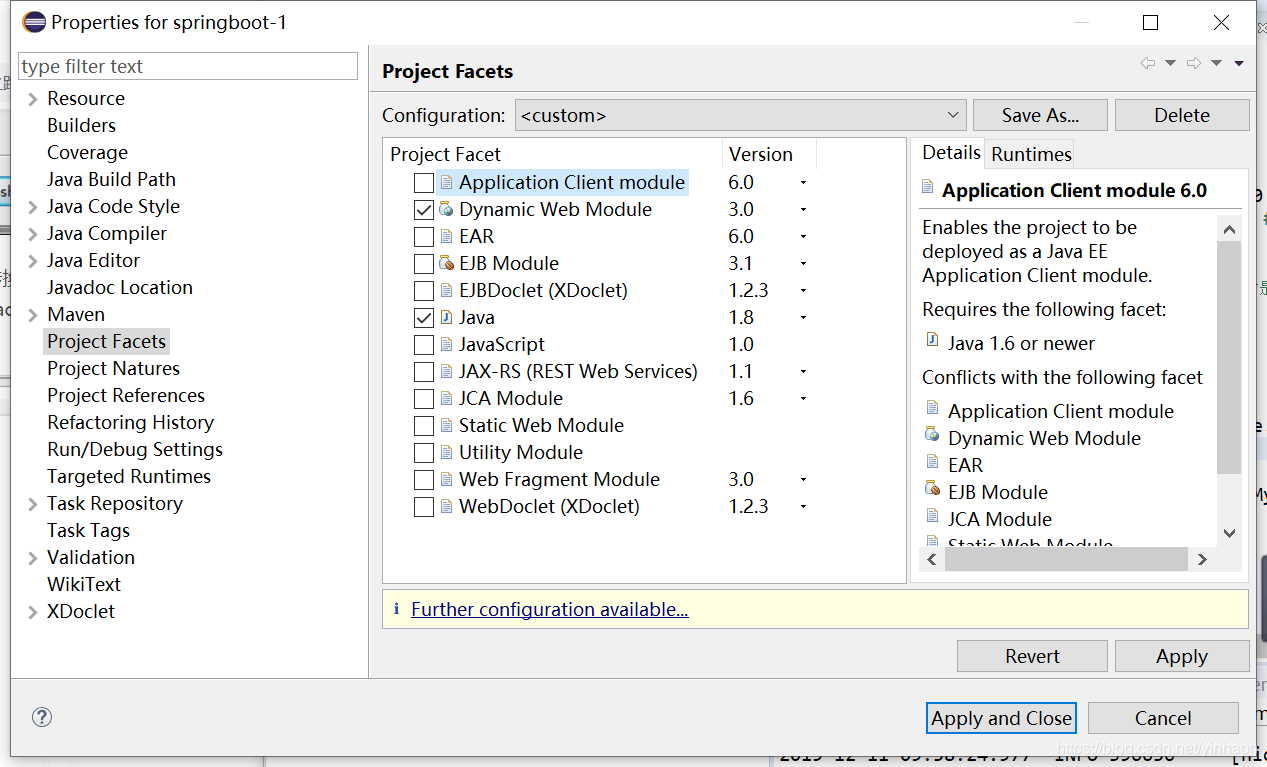
要开发基于web的项目,就可以转一下:点击项目,右击选择Configure,选择convert to faceted form,再弹出框勾选Dynamic Web Modua。
2、修改pom.xml文件
添加依赖
<project xmlns="http://maven.apache.org/POM/4.0.0" xmlns:xsi="http://www.w3.org/2001/XMLSchema-instance"
  xsi:schemaLocation="http://maven.apache.org/POM/4.0.0 http://maven.apache.org/xsd/maven-4.0.0.xsd">
  <modelVersion>4.0.0</modelVersion>

  <!-- spring boot基本环境 -->
  <parent>
    <groupId>org.springframework.boot</groupId>
    <artifactId>spring-boot-starter-parent</artifactId>
    <version>1.5.6.RELEASE</version>
  </parent>

  <groupId>com.test.springboot</groupId>
  <artifactId>springboot-1</artifactId>
  <version>0.0.1-SNAPSHOT</version>
  <packaging>jar</packaging>

  <name>springboot-1</name>
  <url>http://maven.apache.org</url>

  <properties>
    <project.build.sourceEncoding>UTF-8</project.build.sourceEncoding>
  </properties>

  <dependencies>
    <dependency>
      <groupId>junit</groupId>
      <artifactId>junit</artifactId>
      <version>3.8.1</version>
      <scope>test</scope>
    </dependency>

    <!--web应用基本环境配置 -->
	<dependency>
     <groupId>org.springframework.boot</groupId>
   	 <artifactId>spring-boot-starter-web</artifactId>
	</dependency>
  </dependencies>

    <build>
     <plugins>
        <!-- 打包spring boot应用 -->
        <plugin>
            <groupId>org.springframework.boot</groupId>
            <artifactId>spring-boot-maven-plugin</artifactId>
        </plugin>
     </plugins>
	</build>
</project>
目录结构
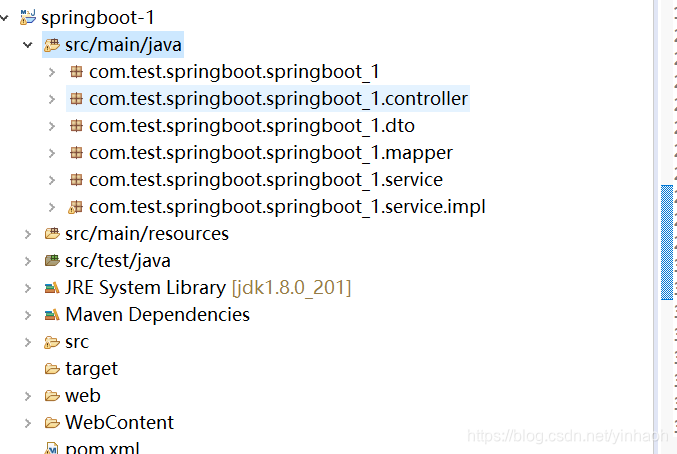
SpringBootApplicationTest.java
package com.test.springboot.springboot_1;

import org.springframework.boot.SpringApplication;
import org.springframework.boot.autoconfigure.SpringBootApplication;

@SpringBootApplication
public class TestSpringBootApplication {
    public static void main( String[] args )
    {
    	SpringApplication.run(TestSpringBootApplication.class, args);
    }

}
UserController.java
package com.test.springboot.springboot_1.web;

import org.springframework.stereotype.Controller;
import org.springframework.web.bind.annotation.RequestMapping;
import org.springframework.web.bind.annotation.ResponseBody;

@Controller
public class UserController {

	@RequestMapping("/")
	@ResponseBody
	public String index() {
		return "hello world";
	}
}
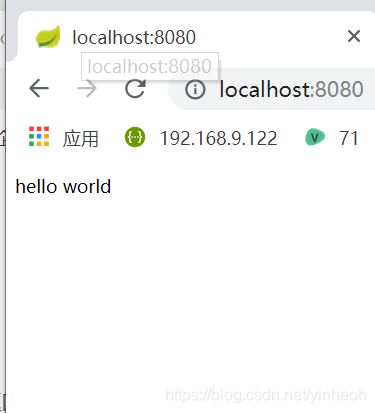
启动之后在浏览器访问,返回hello world
项目创建成功了,然后整合mybatis
二、整合mybatis
1、在pom.xml文件中加入mybatis依赖
	<!-- mybatis依赖 -->
	<dependency>
	    <groupId>org.mybatis.spring.boot</groupId>
	    <artifactId>mybatis-spring-boot-starter</artifactId>
	    <version>1.1.1</version>
	</dependency>
	<dependency>
	    <groupId>mysql</groupId>
	    <artifactId>mysql-connector-java</artifactId>
	    <version>5.1.21</version>
	</dependency>
	<!--Druid连接池-->
	<dependency>
	     <groupId>com.alibaba</groupId>
	     <artifactId>druid</artifactId>
	     <version>${druid.version}</version>
	</dependency>
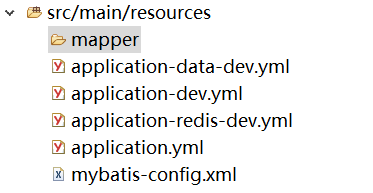
2、配置文件application.yml
修改启动参数profiles的值可配不同的环境。dev表示使用 application-dev.yml 的配置。
spring:
  profiles:
    include: dev
application-dev.yml
server:
  port: 8126
spring:
  application:
    name: spring-boot-test # 服务名称
  profiles:
    include: data-dev,redis-dev # 引用配置文件
application-data-dev.yml:
spring:
  datasource:
    url: jdbc:mysql://localhost:3306/test?rewriteBatchedStatements=true&useUnicode=true&characterEncoding=utf8&useSSL=false # 数据库连接地址
    username: root # 用户名
    password: "root" # 密码
    type: com.alibaba.druid.pool.DruidDataSource # 使用druid数据源
    driverClassName: com.mysql.jdbc.Driver # 数据库驱动
    druid:
     filters: stat
     max-active: 20
     initial-size: 1
     max-wait: 60000
     min-idle: 1
     time-between-eviction-runs-millis: 60000
     min-evictable-idle-time-millis: 300000
     validation-query: select 'x'
     test-while-idle: true
     test-on-borrow: false
     test-on-return: false
     pool-prepared-statements: true
     max-open-prepared-statements: 20

mybatis:
  mapper-locations: classpath:mapper/*.xml   # mapper映射xml文件的所在路径
  type-aliases-package: com.test.springboot.springboot_1.dto # 实体类的路径
mybatis-config.xml:
这里可以直接写入mapper的配置,因为之前已经在application.yml中批量指定了,就不用再添加了。
<?xml version="1.0" encoding="UTF-8" ?>
<!DOCTYPE configuration
        PUBLIC "-//mybatis.org//DTD Config 3.0//EN"
        "http://mybatis.org/dtd/mybatis-3-config.dtd">
<configuration>
    <typeAliases>
        <package name="com.test.springboot.springboot_1.dto"/>
    </typeAliases>
</configuration>
然后就写业务代码,在数据库创建表
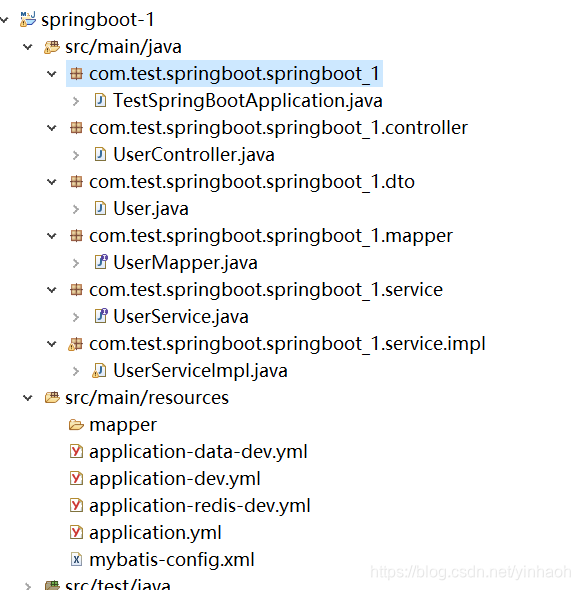
我的目录结构是:
实体类:User.java
package com.test.springboot.springboot_1.dto;

import java.io.Serializable;

public class User implements Serializable{

	/**
	 *
	 */
	private static final long serialVersionUID = 1L;

	private Integer id;

	private String userName;

	private String userGender;

	public Integer getId() {
		return id;
	}

	public void setId(Integer id) {
		this.id = id;
	}

	public String getUserName() {
		return userName;
	}

	public void setUserName(String userName) {
		this.userName = userName;
	}

	public String getUserGender() {
		return userGender;
	}

	public void setUserGender(String userGender) {
		this.userGender = userGender;
	}


}
mapper:
mapper用来和数据库进行交互,有两种形式。
1)用注解的方式来进行交互
package com.test.springboot.springboot_1.mapper;

import java.util.List;

import org.apache.ibatis.annotations.Mapper;
import org.apache.ibatis.annotations.Param;
import org.apache.ibatis.annotations.Result;
import org.apache.ibatis.annotations.Results;
import org.apache.ibatis.annotations.Select;

import com.test.springboot.springboot_1.dto.User;

@Mapper
public interface UserMapper {

	@Select("select * from User where userName = #{userName}")
	@Results({
		@Result(property = "id", column = "ID"),
		@Result(property = "userName", column = "UserName")
	})
	User findByUserName(@Param("userName")  String userName);

	@Select("select * from User ")
	List<User> findAll();

}
2)用xml方式
package com.test.springboot.springboot_1.mapper;

import java.util.List;

import org.apache.ibatis.annotations.Mapper;

import com.test.springboot.springboot_1.dto.User;


public interface UserMapper {

	User findByUserName(String userName);

	List<User> findAll();

}
UserMapper.xml
<?xml version="1.0" encoding="UTF-8" ?>
<!DOCTYPE mapper
        PUBLIC "-//mybatis.org//DTD Mapper 3.0//EN"
        "http://mybatis.org/dtd/mybatis-3-mapper.dtd">
<mapper namespace="com.test.springboot.springboot_1.mapper.UserMapper">
    <resultMap id="BaseResultMap" type="com.test.springboot.springboot_1.dto.User" >
        <result column="id" property="id" />
        <result column="userName" property="userName" />
    </resultMap>
    <select id="findByUserName" resultMap="BaseResultMap">
        select * from User where userName = #{userName}
    </select>
    <select id="findAll" resultMap="BaseResultMap">
        select * from User
    </select>
</mapper>
service:
UserService.java
package com.test.springboot.springboot_1.service;

import java.util.List;

import com.test.springboot.springboot_1.dto.User;


public interface UserService {

	User findByUserName(String userName);

	List<User> findAll();
}
UserServiceImpl.java
package com.test.springboot.springboot_1.service.impl;

import java.util.List;

import org.springframework.beans.factory.annotation.Autowired;
import org.springframework.stereotype.Service;

import com.test.springboot.springboot_1.dto.User;
import com.test.springboot.springboot_1.mapper.UserMapper;
import com.test.springboot.springboot_1.service.UserService;

@Service
public class UserServiceImpl implements UserService {
	@Autowired
	private UserMapper userMapper;

	@Override
	public User findByUserName(String userName) {
		return userMapper.findByUserName(userName);
	}

	@Override
	public List<User> findAll() {
		return userMapper.findAll();
	}
}
UserController.java
package com.test.springboot.springboot_1.controller;

import java.util.List;

import org.springframework.beans.factory.annotation.Autowired;
import org.springframework.stereotype.Controller;
import org.springframework.web.bind.annotation.GetMapping;
import org.springframework.web.bind.annotation.PathVariable;
import org.springframework.web.bind.annotation.ResponseBody;

import com.test.springboot.springboot_1.dto.User;
import com.test.springboot.springboot_1.service.UserService;

@Controller
public class UserController {

	@Autowired
	private UserService userService;
	@GetMapping("users")
	@ResponseBody
	public List<User> users(){
		return userService.findAll();
	}

	@GetMapping("user/{userName}")
	@ResponseBody
	public User user(@PathVariable String userName) {
		return userService.findByUserName(userName);
	}
}
如果在Application上加上注释@MapperScan就不需要在买每个mapper文件中加这个注释了
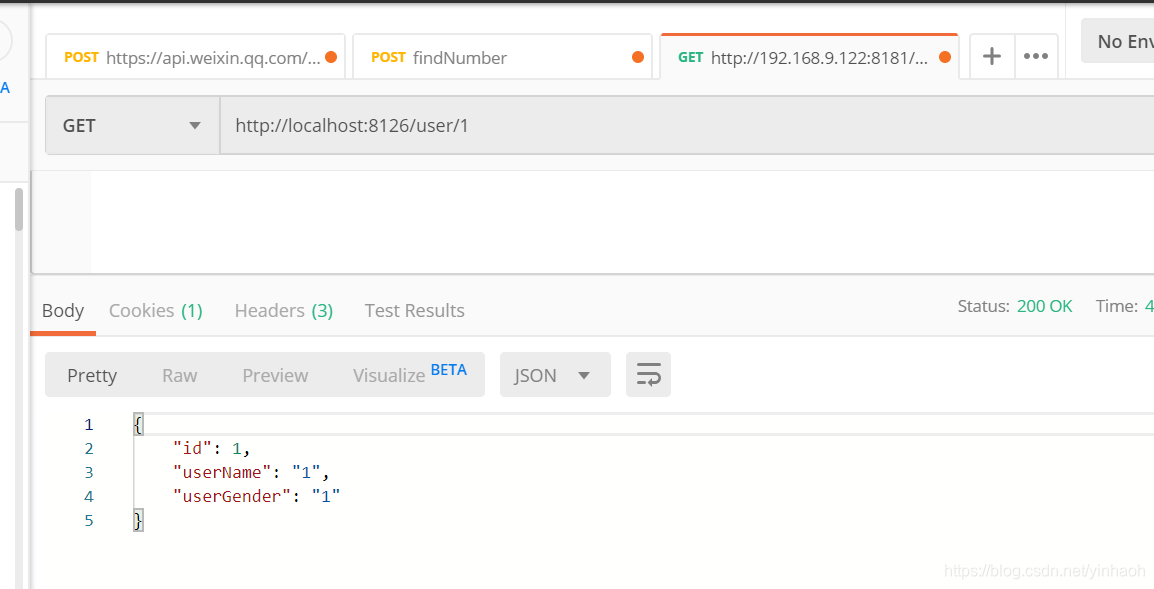
加一个请求结果:
三、整合redis:
1、添加依赖:
<dependency>
    	<groupId>org.springframework.boot</groupId>
    	<artifactId>spring-boot-starter-data-redis</artifactId>
	</dependency>
配置文件:application-redis-dev.yml
spring:
  redis:
    database: 0  # Redis数据库索引(默认为0)
    host: xxxx  # Redis服务器地址
    port: 6379  # Redis服务器连接端口
    password: xxx  # Redis服务器连接密码(默认为空)
    jedis:
      pool:
        max-active: 1000 # 连接池最大连接数(使用负值表示没有限制)
        max-wait: 2000  # 连接池最大阻塞等待时间(使用负值表示没有限制-1)
        max-idle: 100 # 连接池中的最大空闲连接
        min-idle: 10 # 连接池中的最小空闲连接
    timeout: 3000  # 连接超时时间(毫秒)


 本文介绍了如何在Eclipse中利用Maven创建Spring Boot项目,详细步骤包括配置Maven和JDK,创建Maven项目并转换为Web项目,添加相关依赖。接着,文章讲述了如何整合Mybatis,包括配置文件和实体类、Mapper的设置。最后,讨论了项目中整合Redis的操作,涉及依赖添加和配置文件设定。


 1万+
1万+

 被折叠的 条评论
为什么被折叠?


