


迁移原因,停用操作系统为CentOs6 的服务器,迁移到UOS操作系统服务器
官网升级说明
https://help.sonatype.com/en/upgrade-from-nexus-repository-2.html
旧CentOs6 服务器 x.x.10.54 Sonatype Nexus 2.5.0-04
新UOS 服务器 x.x.1.116 Sonatype Nexus 2.15 和 3.76
根据官方说明 2.x 系列在2025.6.30 停止维护,且不能直接升级到3.x。需要2.5升级到2.15最新版本,由2.15升级到3.76。
升级思路:
新服务器安装2.x系列最新版本,将旧服务器nexus2.5版本的仓库数据上传到新服务器nexus。新服务安装nexus3.76版本,由2.15 升级到3.76。
nexus 2.5 数据需要先备份,后面上传到新服务器目录
10.54 /root/sonatype-work
1.116 /data/app/sonatype-work
一、迁移服务器并升级nexus 2.15
1、新服务器安装nexus2.15
下载 nexus-2.15.2-03-bundle.tar.gz
#cd /usr/local/
#tar -xvzf nexus-2.15.2-03-bundle.tar.gz
解压出文件夹nexus-2.15.2-03 、sonatype-work
2、迁移数据到新服务器,配置nexus2.15
#cd /data/app
复制sonatype-work 到当前app文件夹
cp /usr/local/sonatype-work . 配置nexus2.15 sonatype-work目录
cd /usr/local/nexus-2.15.2-03/conf/修改nexus-work目录为/data/app/sonatype-work
vi nexus.properties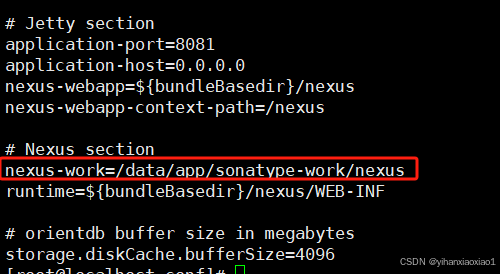
将10.54 的备份的nexus的sonatype-work 传输到1.116 /data/app/sonatype-work
启动nexus
cd /usr/local/nexus-2.15.2-03/bin
./nexus start
启动警告
****************************************
WARNING - NOT RECOMMENDED TO RUN AS ROOT
****************************************
If you insist running as root, then set the environment variable RUN_AS_USER=root before running this script.
添加export RUN_AS_USER=root
vi /etc/profile末尾添加export RUN_AS_USER=root
source /etc/profile再次启动
./nexus start****************************************
WARNING - NOT RECOMMENDED TO RUN AS ROOT
****************************************
Starting Nexus Repository Manager...
Started Nexus Repository Manager.
启动成功!默认用户名密码 admin/admin123
如果无法访问。查看logs 里面的日志
cd /usr/local/nexus-2.15.2-03/logs
more wrapper.log
wrapper | JVM exited while loading the application.
jvm 5 | wrapper | Unable to start JVM: No such file or directory (2)
wrapper | There were 5 failed launches in a row, each lasting less than 300 seconds. Giving up.
wrapper | There may be a configuration problem: please check the logs.
我这里是新服务器忘记安装jdk。nexus2.15版本可以安装jdk1.8
3、安装jdk1.8,配置环境变量
下载jdk-8u191-linux-x64.tar.gz 安装包
cd /usr/local/java
tar -zxvf jdk-8u191-linux-x64.tar.gz
配置环境变量
vi /etc/profileexport JAVA_HOME=/usr/local/java/jdk1.8.0_191
export PATH=$JAVA_HOME/bin:$PATH
export CLASSPATH=.:$JAVA_HOME/lib/dt.jar:$JAVA_HOME/lib/tools.jar
source /etc/profile
java -version
java version "1.8.0_191"
Java(TM) SE Runtime Environment (build 1.8.0_191-b12)
Java HotSpot(TM) 64-Bit Server VM (build 25.191-b12, mixed mode)
启动nexus
/usr/local/nexus-2.15.2-03/bin

./nexus start
注意服务器防火墙如果是打开状态,需要配置端口tcp协议。
二、新服务器安装nexus 3.76
2.x 升级到3.x 必须是3.76版本以下。3.76 和3.77数据库有差别,不能安装3.76以上版本。
1、安装 nexus3.76 和jdk17
下载nexus3.76安装包:
下载jdk17安装包
nexus3.76版本安装,不能和2.15在同一个目录
cd /usr/local/nexus3/
tar -xzvf nexus-3.76.1-01-unix.tar.gz
解压出 nexus-3.76.1-01、sonatype-work两个文件夹。
这里可以使用sonatype-work默认目录,也可以迁移到别的地方,我选择迁移到其他目录
mv sonatype-work /data/app/nexus3/安装jdk17
cd /usr/local/java

tar -zxvf jdk-17.0.14_linux-x64_bin.tar.gz
解压出文件夹jdk-17.0.14
2、修改nexus3.76配置文件
修改端口号
cd /usr/local/nexus3/nexus-3.76.1-01/etc

vi nexus-default.properties
修改端口号为8080,默认是8081。nexus2.15使用的8081,这里修改为8080
application-port=8080
cd /usr/local/nexus3/nexus-3.76.1-01/bin配置jdk17
服务器已经为2.15的nexus配置了jdk1.8环境变量。想要两个nexus同时运行,需要修改nexus3.76的配置文件!
vi nexus找到INSTALL4J_JAVA_HOME_OVERRIDE,取消注释,配置jdk17
INSTALL4J_JAVA_HOME_OVERRIDE=/usr/local/java/jdk-17.0.14
修改sonatype-work目录
黄色加粗部分是修改后的目录地址(如果没有迁移sonatype-work目录不用修改)
vi nexus.vmoptions-Xms2703m
-Xmx2703m
-XX:+UnlockDiagnosticVMOptions
-XX:+LogVMOutput
-XX:LogFile=/data/app/nexus3/sonatype-work/nexus3/log/jvm.log
-XX:-OmitStackTraceInFastThrow
-Dkaraf.home=.
-Dkaraf.base=.
-Dkaraf.etc=etc/karaf
-Djava.util.logging.config.file=etc/karaf/java.util.logging.properties
-Dkaraf.data=/data/app/nexus3/sonatype-work/nexus3
-Dkaraf.log=/data/app/nexus3/sonatype-work/nexus3/log
-Djava.io.tmpdir=/data/app/nexus3/sonatype-work/nexus3/tmp
-Dkaraf.startLocalConsole=false
-Djdk.tls.ephemeralDHKeySize=2048
启动nexus
# ./nexus run (调试时使用,可以查看启动日志)
# ./nexus start(正常启动)
WARNING: ************************************************************
WARNING: Detected execution as "root" user. This is NOT recommended!
WARNING: ************************************************************
Starting nexus
不用管提示,会启动成功!
如果访问不成功,可以查看启动日志
cd /data/app/nexus3/sonatype-work/nexus3/log
tail -f -n300 nexus.log
三、开始迁移nexus3.76 仓库
参考资料:原文链接:https://blog.youkuaiyun.com/ljq354004063/article/details/103580358
1.开始迁移,配置2的升级能力
设置2的nexus的升级功能。进入nexus2.15
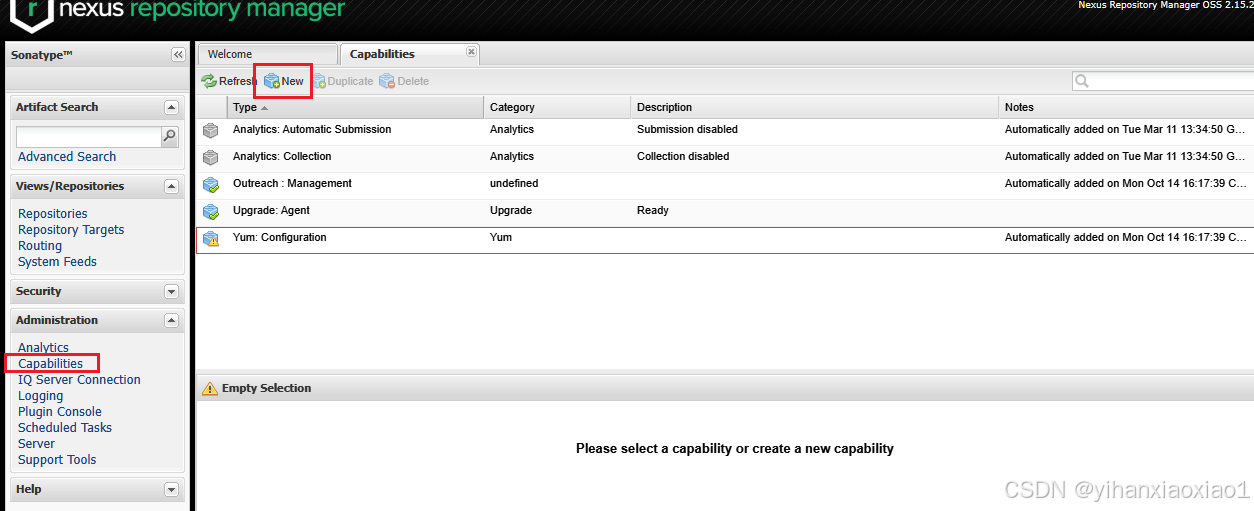
Click to expand Administration in the left-hand panel. 点击打开左侧的Administration菜单
Click the Capabilities menu item to open the respective screen. 点击Capabilities菜单
Click the New button to access the Create new capability modal. 点击new按钮新建功能模块
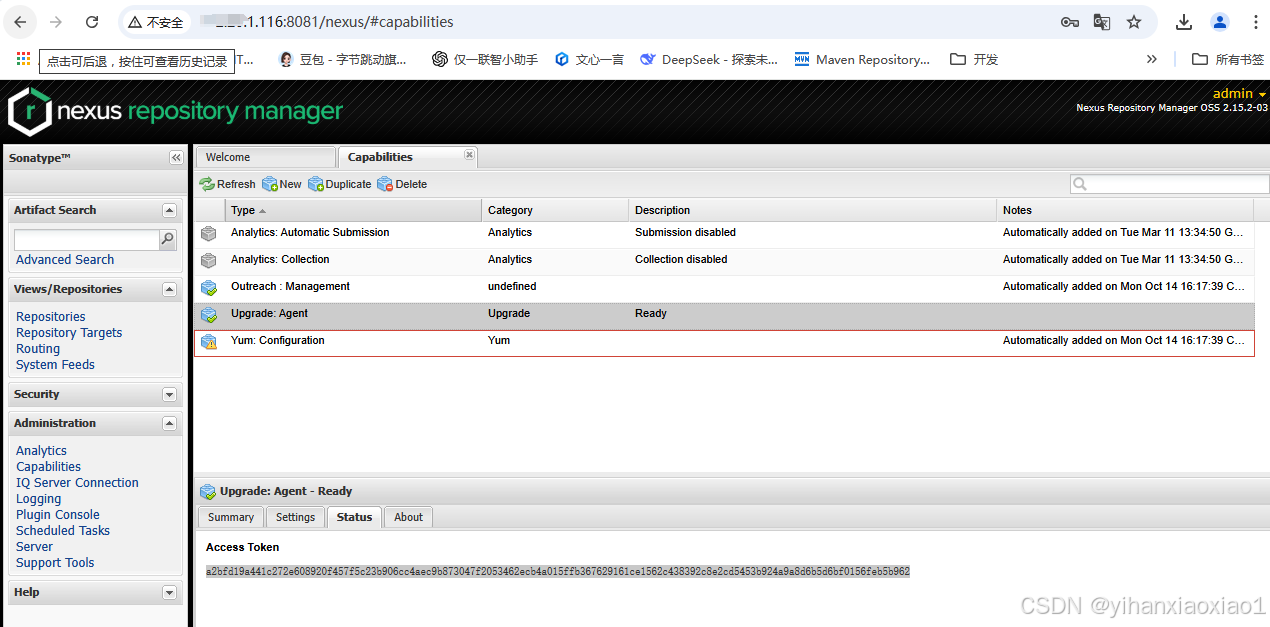
Select Upgrade: Agent as your capability Type. 新的功能模块的类型选择Upgrade: Agent,如下图:
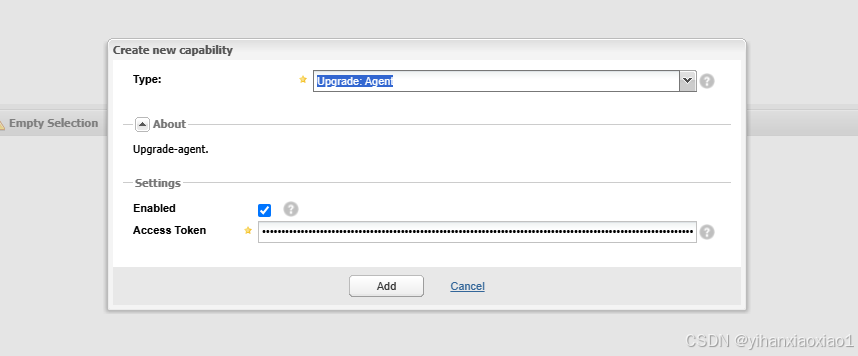


Click Add to close the modal and add the capability. 点击Add结束
Copy and save the Access Token found on the Status tab for your new capability. You need it to configure the Upgrade tool in
version 3. 将Access token复制下来,在3版本中会使用到
2.开始迁移,配置3的升级能力
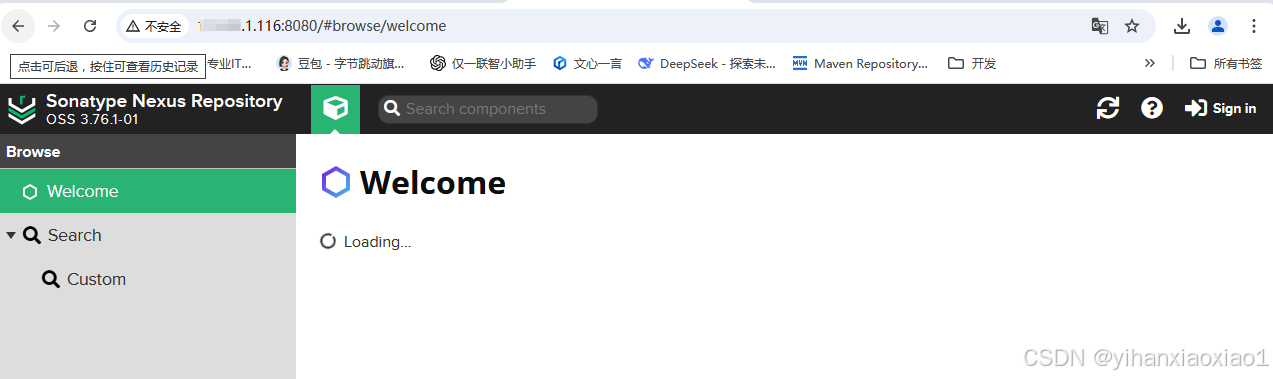
用admin登录,密码在sonatype-work/nexus3/admin.password文件内,随后根据提示修改密码。
点击绿色设置
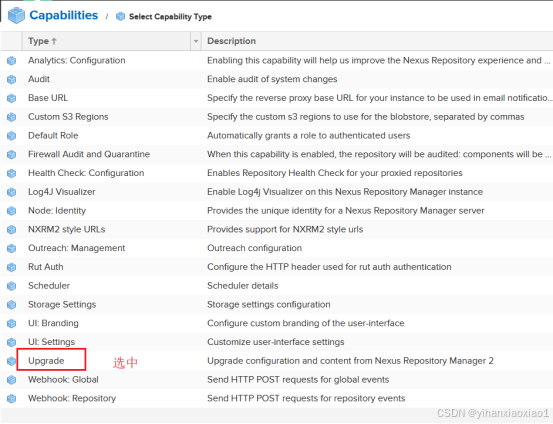
Click Capabilities in the System section of the Administration main menu to open the Capabilities feature view. 用admin账号登录,并且打开System下的 Capabilities 菜单
Click Create capability.

Select Upgrade, then click Create capability to enable the upgrade capability. 也创建一个 Upgrade
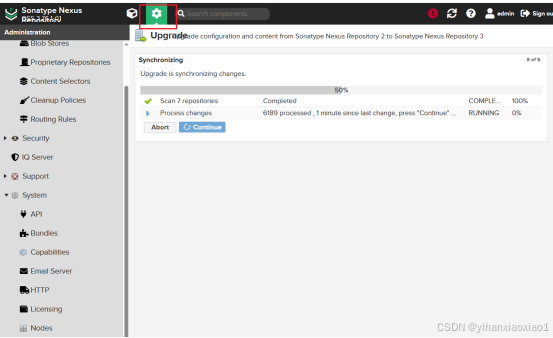
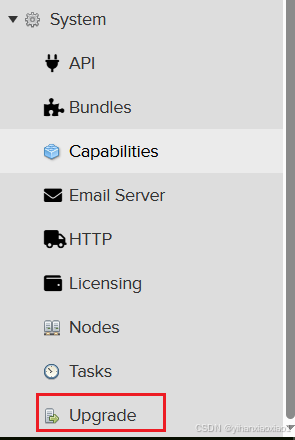
随后,可以看到多出来的upgrade菜单,如下图
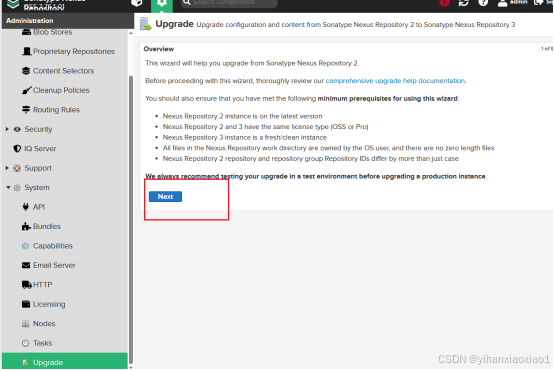
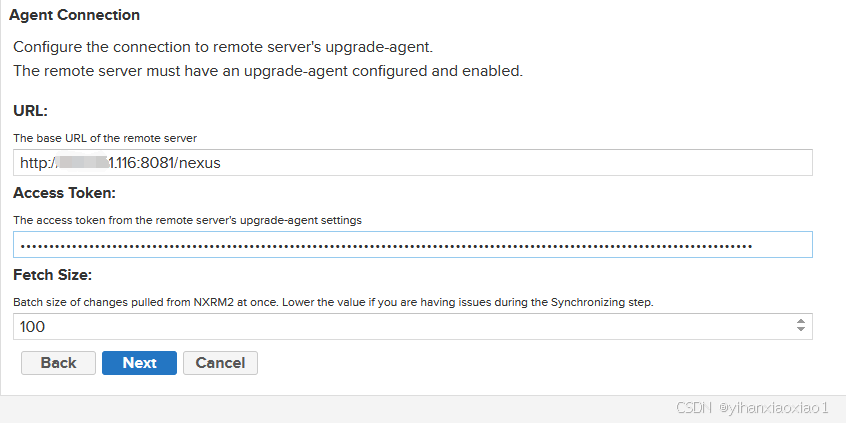
输入2的地址以及token
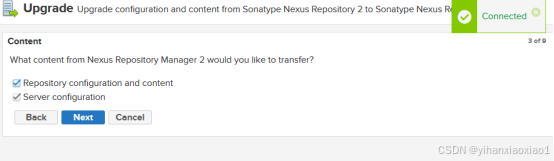
选择内容,不需要修改
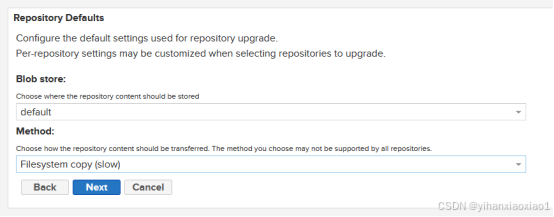
选择仓库传递的三种方式,建议如果是同一台服务器选择copy,比较好
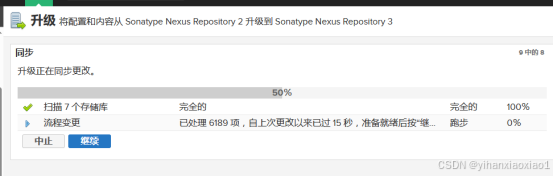
随后选择需要迁移的repository仓库,耐心等待结束即可.
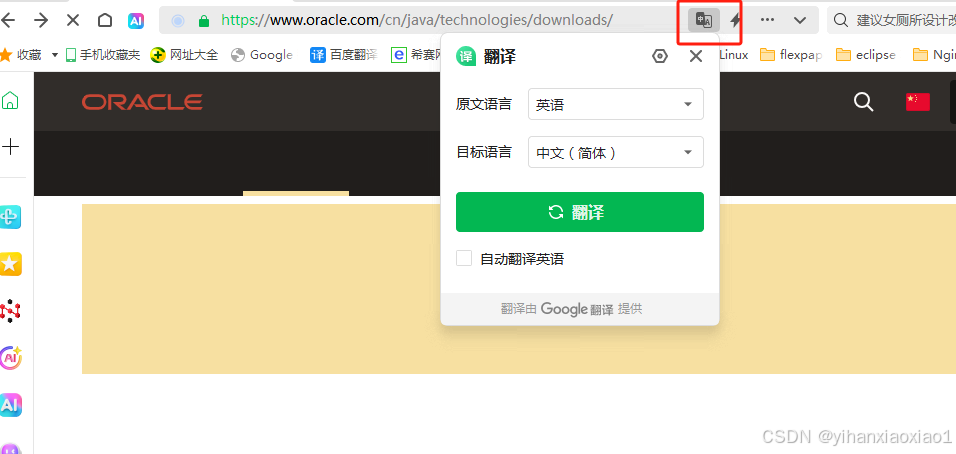
360 浏览器带有翻译功能,查看英文费劲的话可以点下这个
升级完成
配置nexus开启启动和启动命令
vim /etc/systemd/system/nexus.service[Unit]
Description=Sonatype Nexus Repository Manager
After=network.target
[Service]
Type=forking
ExecStart=/usr/local/nexus3/nexus-3.76.1-01/bin/nexus start
ExecStop=/usr/local/nexus3/nexus-3.76.1-01/bin/nexus stop
User=nexus
Group=nexus
Restart=always
LimitNOFILE=65536
[Install]
WantedBy=multi-user.targetsystemctl daemon-reload
systemctl start nexus


 1104
1104

 被折叠的 条评论
为什么被折叠?
被折叠的 条评论
为什么被折叠?
 到【灌水乐园】发言


