


尽管现在提倡前后端分离,但是对于一些面向后端的应用系统,由于缺少前端人力,只能自己搭建。所以,SpringBoot提供的模板引擎,非常有帮助。 在实际项目中,由于时间比较早,还在使用Veloctiy。但是在新版本的SpringBoot中,推荐的还是thymeleaf,所以简单写了个demo,有助于后续在项目中使用。
1、增加thymeleaf starter依赖
<dependency>
			<groupId>org.springframework.boot</groupId>
			<artifactId>spring-boot-starter-thymeleaf</artifactId>
</dependency>
2、配置thymeleaf
基本上SpringBoot对于thymeleaf属于开箱即用的方式,很多配置值使用默认值即可,这里主要介绍几个重要的参数。
// 通常本地调试时,可以设置为false,便于每次看到新的结果,线上可以设置为true
{
      "name": "spring.thymeleaf.cache",
      "type": "java.lang.Boolean",
      "description": "Whether to enable template caching.",
      "sourceType": "org.springframework.boot.autoconfigure.thymeleaf.ThymeleafProperties",
      "defaultValue": true
 }
// content-type,由于是页面,所以使用text/html即可。
{
  "name": "spring.thymeleaf.servlet.content-type",
  "type": "org.springframework.util.MimeType",
  "description": "Content-Type value written to HTTP responses.",
  "sourceType": "org.springframework.boot.autoconfigure.thymeleaf.ThymeleafProperties$Servlet",
  "defaultValue": "text\/html"
}
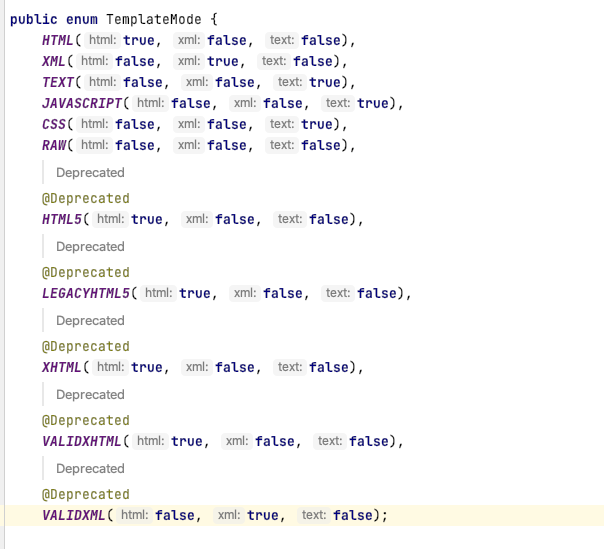
// 模板文件的格式
{
  "name": "spring.thymeleaf.mode",
  "type": "java.lang.String",
  "description": "Template mode to be applied to templates. See also Thymeleaf's TemplateMode enum.",
  "sourceType": "org.springframework.boot.autoconfigure.thymeleaf.ThymeleafProperties",
  "defaultValue": "HTML"
}
可选列表:
// 该参数用户设置thymeleaf模板文件的前缀,默认为classpath:templates路径即可。
 {
      "name": "spring.thymeleaf.prefix",
      "type": "java.lang.String",
      "description": "Prefix that gets prepended to view names when building a URL.",
      "sourceType": "org.springframework.boot.autoconfigure.thymeleaf.ThymeleafProperties",
      "defaultValue": "classpath:\/templates\/"
  }
// 对应模板文件的后缀,默认为html
{
      "name": "spring.thymeleaf.suffix",
      "type": "java.lang.String",
      "description": "Suffix that gets appended to view names when building a URL.",
      "sourceType": "org.springframework.boot.autoconfigure.thymeleaf.ThymeleafProperties",
      "defaultValue": ".html"
}
所以,项目中我只在application.properties中设置了cache属性
spring.thymeleaf.cache=false
3、编写模板文件
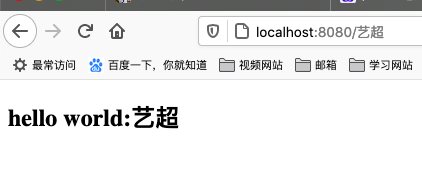
这里主要是html和vm文件的语法,简单的helloworld示例如下
<!DOCTYPE html>
<html lang="en" xmlns:th="http://www.thymeleaf.org">
<head>
    <meta charset="UTF-8">
    <title>hello world</title>
</head>
<body>

<h2> <span th:text="'hello world:' + ${name}"/></h2>

</body>
</html>
4、编写controller
@GetMapping("/{name}")
    public String helloWorld(@PathVariable(value = "name") String name, Model model) {
        // 设置模板文件中使用的参数
        model.addAttribute("name", name);
        // 返回模板文件名词,spring会指向 spring.thymeleaf.prefix + view name + spring.thymeleaf.suffix
        // 此处即为,classpath:templates/hellworld.html
        return "helloworld";
 }
5、测试
最后,还是想说一下。个人感觉,服务端同学掌握一定的前端知识是有必要的,但是如果要求比较高,还是专业的人干专业的事吧。


 被折叠的 条评论
为什么被折叠?
被折叠的 条评论
为什么被折叠?
 到【灌水乐园】发言


