


 超级会员免费看
 本文档提供Zabbix6.0在CentOS上的安装步骤,包括环境准备、部署nginx+php、安装数据库、编译安装Zabbix-server以及解决访问页面中文乱码问题。在部署过程中,特别注意Zabbix6.0对数据库版本的要求,并提供了解决中文显示异常的解决方案。
目录
Zabbix6.0新特性点击传送门查看 —> 传送门 。这里我不过多介绍Zabbix了,直接进行6.0安装步骤。
环境准备
配置要求:
| 规模 | 系统 | CPU/内存 | 能监控的主机数量 |
|---|---|---|---|
| 小型 | Centos | 1C1G | 100 |
| 中型 | Centos | 2C2G | 500 |
| 大型 | Redhat、Centos | 4C8G | >1000 |
| 极大型 | Redhat、Centos | 8C16G | >1000 |
初始环境
1.关闭系统防火墙
[root@Zabbix ~]# systemctl  stop firewalld
[root@Zabbix ~]# systemctl  disable firewalld
[root@Zabbix ~]# vim /etc/selinux/config
SELINUX=disabled
2.关闭交换分区
[root@Zabbix ~]# swapoff  -a
[root@Zabbix ~]# vim /etc/fstab
#/dev/mapper/centos-swap swap                    swap    defaults        0 0
部署各类软件
部署nginx+php环境
1.安装配置nginx
[root@Zabbix ~]# rpm -Uvh http://nginx.org/packages/centos/7/x86_64/RPMS/nginx-1.20.0-1.el7.ngx.x86_64.rpm
[root@Zabbix ~]# mkdir /web
[root@Zabbix ~]# vim /etc/nginx/conf.d/zabbix.conf
server {
    listen       80;
    server_name  localhost;
    root         /web;
    location / {
        index  index.php index.html index.htm;
    }
    location ~ \.php$ {
        #root    /web;
        fastcgi_pass   127.0.0.1:9000;
        fastcgi_index  index.php;
        fastcgi_param  SCRIPT_FILENAME  $document_root$fastcgi_script_name;
        include        fastcgi_params;
    }
}
[root@Zabbix ~]# systemctl  enable nginx
[root@Zabbix ~]# systemctl  start nginx
2.安装并配置php
[root@Zabbix ~]# curl -o /etc/yum.repos.d/CentOS-Base.repo http://mirrors.aliyun.com/repo/Centos-7.repo
[root@Zabbix ~]# yum -y install epel-release
[root@Zabbix ~]# curl -o /etc/yum.repos.d/epel.repo http://mirrors.aliyun.com/repo/epel-7.repo
[root@Zabbix ~]# rpm -Uvh https://mirror.webtatic.com/yum/el7/webtatic-release.rpm   #webtatic源,一个web服务的源

#安装php7及其它依赖软件
[root@Zabbix ~]# yum -y install gcc gcc-c++ php72w-cli php72w-fpm php72w-gd php72w-mbstring php72w-bcmath php72w-xml php72w-ldap php72w-mysqlnd

[root@Zabbix ~]# cd /web/
[root@Zabbix web]# vim index.php   #创建php测试页
<?php
phpinfo();
?>
[root@Zabbix web]# systemctl  enable php-fpm
[root@Zabbix web]# systemctl  start php-fpm

部署数据库
注:zabbix6.0不支持mariadb5.5,要安装新版本数据库
1.配置mariadb源
[root@Zabbix web]# vim  /etc/yum.repos.d/mariadb.repo
[mariadb]
name = MariaDB
baseurl = https://mirrors.aliyun.com/mariadb/yum/10.5/centos7-amd64/
gpgkey = https://mirrors.aliyun.com/mariadb/yum/RPM-GPG-KEY-MariaDB?spm=a2c6h.25603864.0.0.33b75602iN6BeE
gpgcheck = 1
enable = 1
2.下载并启动
[root@Zabbix web]# yum -y install mariadb-server
[root@Zabbix web]# systemctl  enable mariadb
Created symlink from /etc/systemd/system/multi-user.target.wants/mariadb.service to /usr/lib/systemd/system/mariadb.service.
[root@Zabbix web]# systemctl  start mariadb
3.初始化数据库
[root@Zabbix web]# mysql_secure_installation
Enter current password for root (enter for none):   #回车
Switch to unix_socket authentication [Y/n] n       #是否更改套接字
Change the root password? [Y/n] y       #改root密码
Remove anonymous users? [Y/n] y      #清除匿名用户
Disallow root login remotely? [Y/n] y   #是否允许root远程登录
Remove test database and access to it? [Y/n] y    #清除测试数据库
Reload privilege tables now? [Y/n] y    #刷新表权限
4.创建zabbix用户及数据库
[root@Zabbix web]# mysql -uroot -padmin@123
MariaDB [(none)]> create database zabbix charset utf8 collate utf8_bin;
Query OK, 1 row affected (0.001 sec)

MariaDB [(none)]> grant all on zabbix.* to zabbix@'10.10.10.%' identified by 'zabbix';
Query OK, 0 rows affected (0.001 sec)

MariaDB [(none)]> grant all on zabbix.* to zabbix@'localhost' identified by 'zabbix';
Query OK, 0 rows affected (0.001 sec)
编译安装Zabbix-server
1.下载zabbix6.0包
[root@Zabbix web]# wget https://cdn.zabbix.com/zabbix/sources/stable/6.0/zabbix-6.0.9.tar.gz
2.安装依赖
[root@Zabbix web]# yum -y install mysql-devel pcre-devel openssl-devel zlib-devel libxml2-devel net-snmp-devel net-snmp libssh2-devel OpenIPMI-devel libevent-devel openldap-devel libcurl-devel
3.编译安装zabbix
[root@Zabbix web]# tar xzf zabbix-6.0.9.tar.gz
[root@Zabbix web]# cd zabbix-6.0.9
[root@Zabbix zabbix-6.0.9]# ./configure --sysconfdir=/etc/zabbix --enable-server --with-mysql --with-net-snmp --with-libxml2 --with-ssh2 --with-openipmi --with-zlib --with-libpthread --with-libevent --with-openssl --with-ldap --with-libcurl --with-libpcre
[root@Zabbix zabbix-6.0.9]# make install
4.修改zabbix服务端配置文件
[root@Zabbix zabbix-6.0.9]# vim /etc/zabbix/zabbix_server.conf
[root@Zabbix zabbix-6.0.9]# grep -n '^[a-Z]' /etc/zabbix/zabbix_server.conf
12:ListenPort=10051
38:LogFile=/tmp/zabbix_server.log
87:DBHost=localhost
99:DBName=zabbix
115:DBUser=zabbix
123:DBPassword=zabbix
507:Timeout=4
593:LogSlowQueries=3000
708:StatsAllowedIP=127.0.0.1
5.向数据库中导入zabbix的库表及数据
#注意导入的顺序
[root@Zabbix zabbix-6.0.9]# cd database/mysql/
[root@Zabbix mysql]# mysql -uroot -pzabbix zabbix < schema.sql
[root@Zabbix mysql]# mysql -uroot -pzabbix zabbix < images.sql
[root@Zabbix mysql]# mysql -uroot -pzabbix zabbix < data.sql
[root@Zabbix mysql]# mysql -uroot -pzabbix zabbix < double.sql
[root@Zabbix mysql]# mysql -uroot -pzabbix zabbix < history_pk_prepare.sql
6.移动zabbix前端页面到网站根目录
[root@Zabbix ~]# cp -r /web/zabbix-6.0.9/ui/*  /web/
[root@Zabbix ~]# chmod -R 777 /web/
7.配置zabbix系统启停命令
[root@Zabbix mysql]# vim /usr/lib/systemd/system/zabbix.service
[Unit]
Description=Zabbix Server with MySQL DB
After=syslog.target network.target mysqld.service
[Service]
Type=simple
ExecStart=/usr/local/sbin/zabbix_server -f
User=zabbix
[Install]
WantedBy=multi-user.target
[root@Zabbix mysql]# systemctl daemon-reload     #加载配置文件
[root@Zabbix mysql]# systemctl enable zabbix
Created symlink from /etc/systemd/system/multi-user.target.wants/zabbix.service to /usr/lib/systemd/system/zabbix.service.
[root@Zabbix mysql]# systemctl start zabbix
进入访问页面及后续问题解决
浏览器访问zabbix
1.网页输入IP自动跳转安装页面

2.点击下一步会遇到报错如下图,这时候需要修改php配置文件

[root@Zabbix mysql]# vim /etc/php.ini
[root@Zabbix mysql]# egrep -n '^max_.*_time|post_max' /etc/php.ini
368:max_execution_time = 300
378:max_input_time = 600
656:post_max_size = 80M
[root@Zabbix mysql]# systemctl  restart php-fpm
3.配置数据库

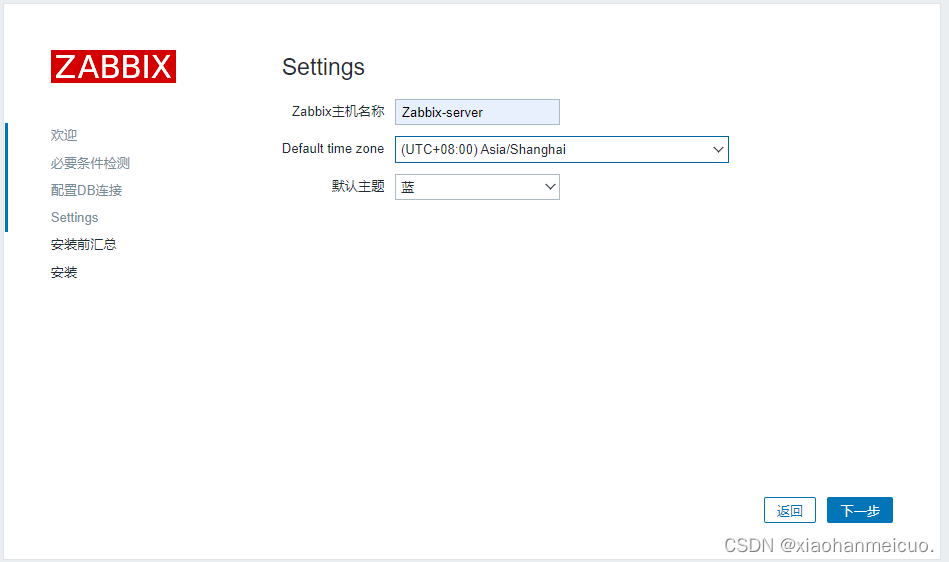
4.其它设置
5.安装完成需要创建zabbix.conf.php文件,可以根据页面提示保存到相对位置下
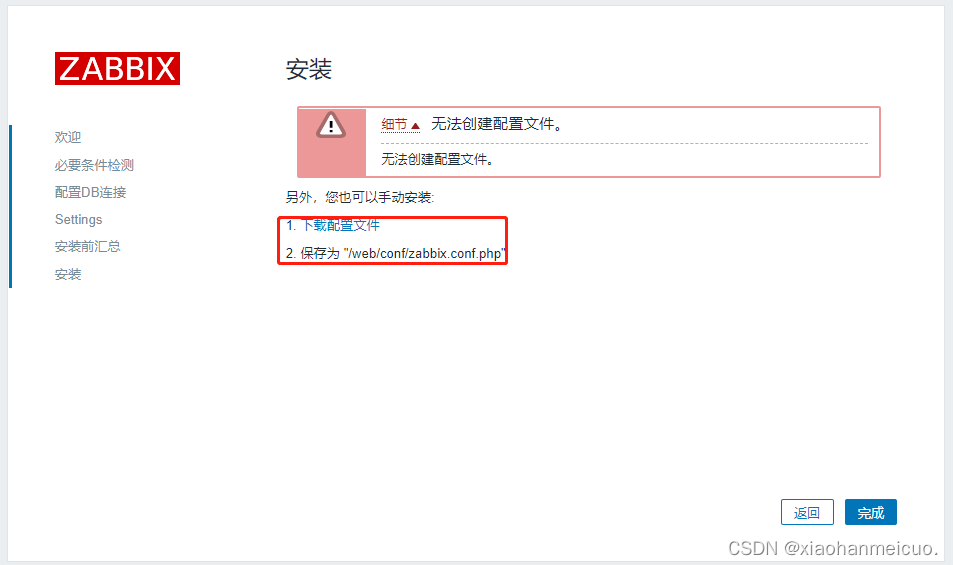
[root@Zabbix mysql]# cd /web/conf/
[root@Zabbix conf]# ll
总用量 12
drwxr-xr-x 2 root root    6 10月 14 15:30 certs
-rw-r--r-- 1 root root 1036 10月 14 15:30 maintenance.inc.php
-rw-r--r-- 1 root root 1732 10月 14 15:48 zabbix.conf.php
-rw-r--r-- 1 root root 1710 10月 14 15:30 zabbix.conf.php.example
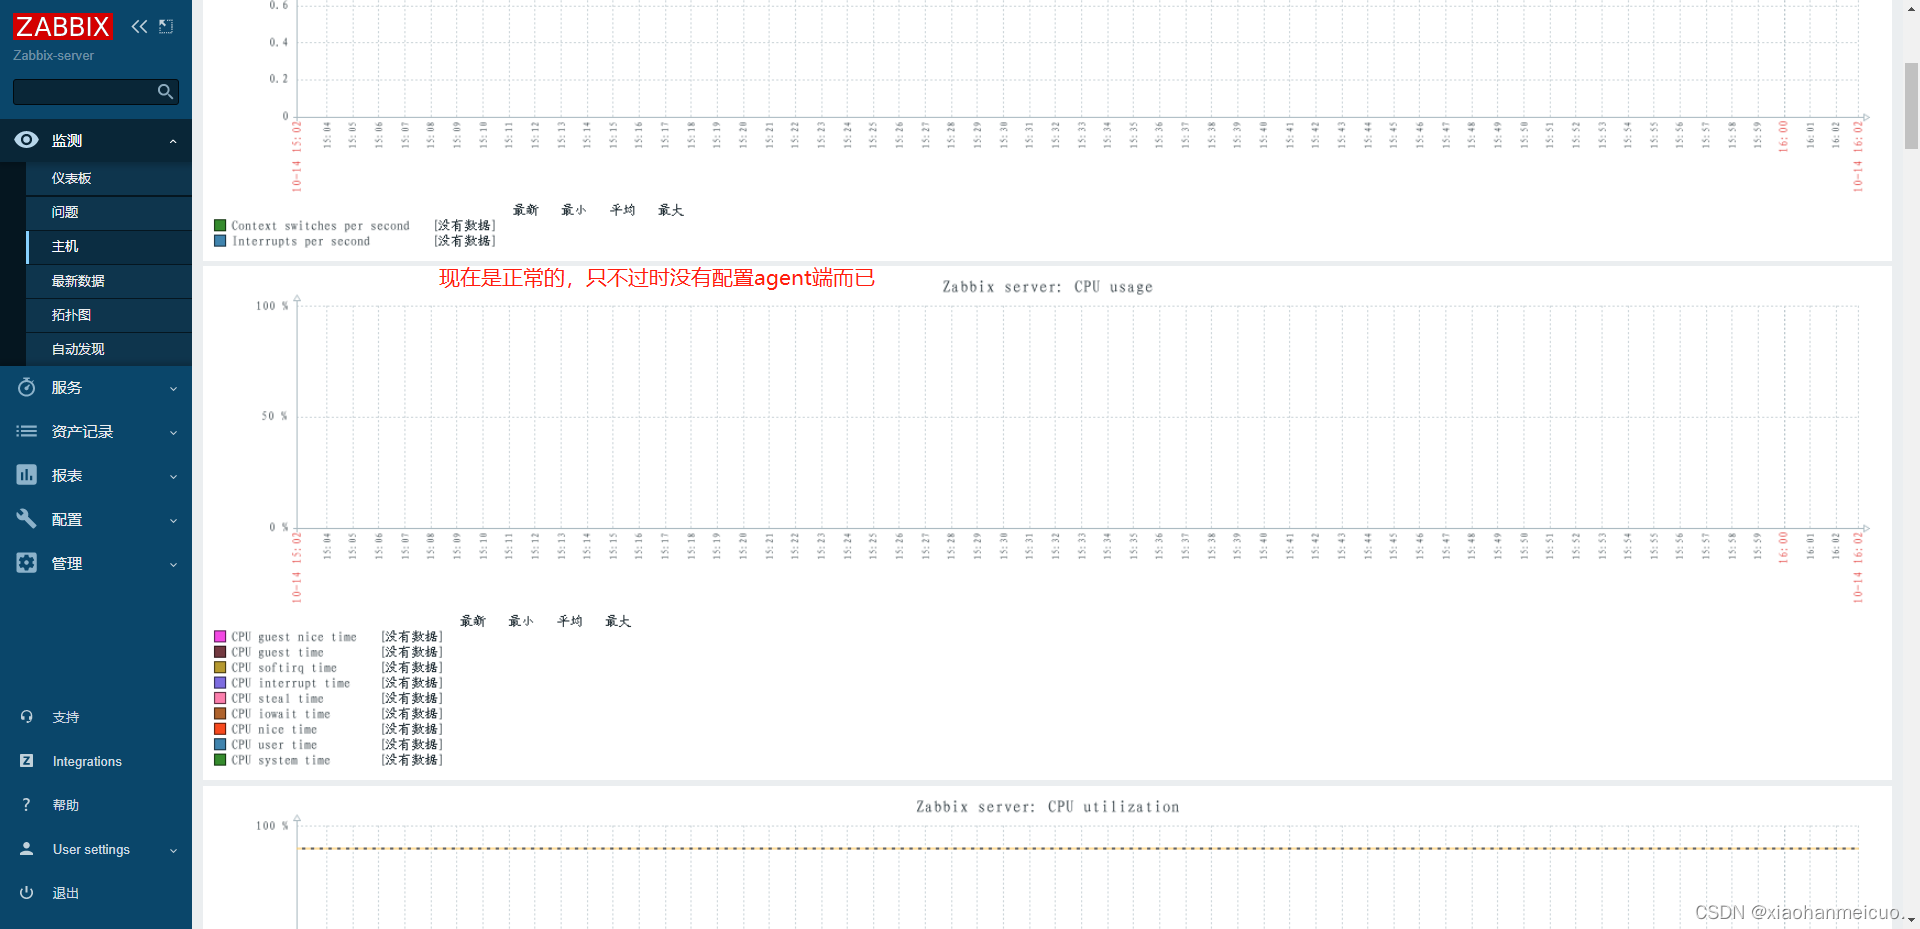
6.登录

解决Zabbix中文乱码问题
1.字体设置中文后查看图标会出现如下图的问题
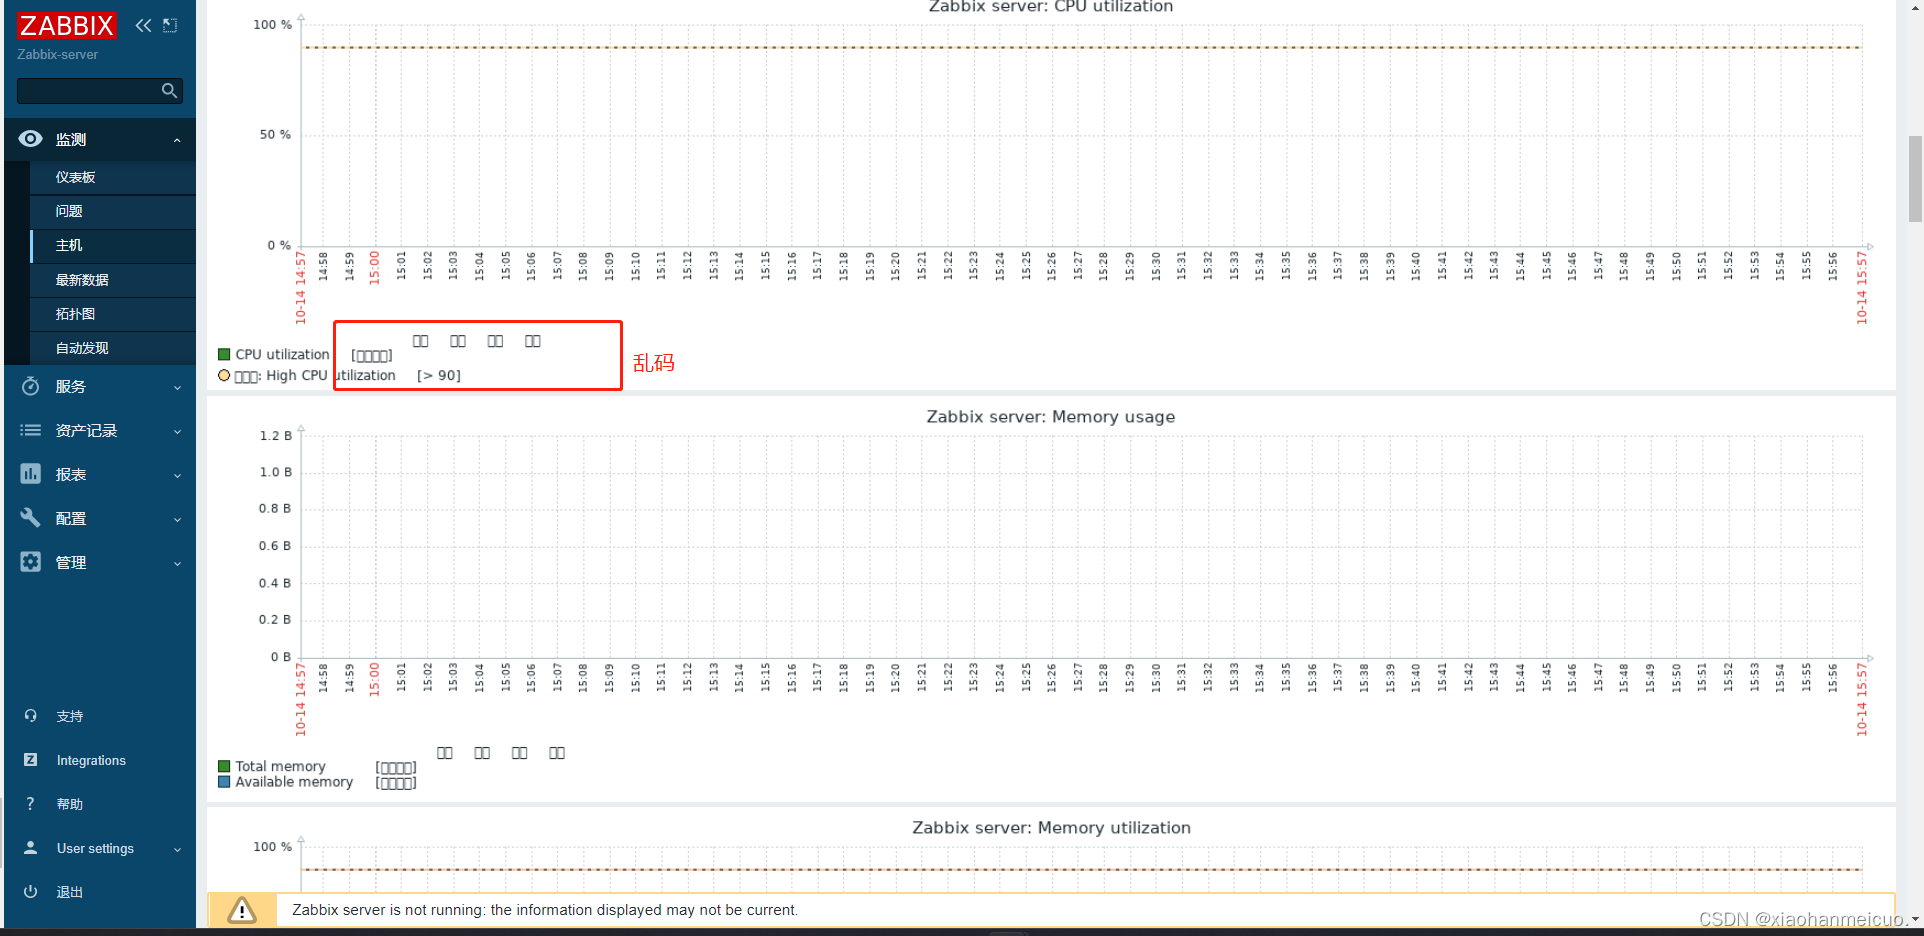
2.上传一个中文的ttf字体替换zabbix自用的字体即可
[root@Zabbix conf]# cd /web/assets/fonts/
[root@Zabbix fonts]# ll
总用量 740
-rw-r--r-- 1 root root 756072 10月 14 15:30 DejaVuSans.ttf
[root@Zabbix fonts]# rz -E
rz waiting to receive.
[root@Zabbix fonts]# ll
总用量 4780
-rw-r--r-- 1 root root  756072 10月 14 15:30 DejaVuSans.ttf
-rw-r--r-- 1 root root 4135804 3月   9 2020 simkai.ttf
[root@Zabbix fonts]# rm -rf DejaVuSans.ttf
[root@Zabbix fonts]# mv simkai.ttf DejaVuSans.ttf


 1349
1349

 被折叠的 条评论
为什么被折叠?
被折叠的 条评论
为什么被折叠?
 到【灌水乐园】发言


