


更新时间:2021-12-29
通过include可以重复使用某个布局,相同的页面不需要重复的去写了,复用。
1. 使用方式示例
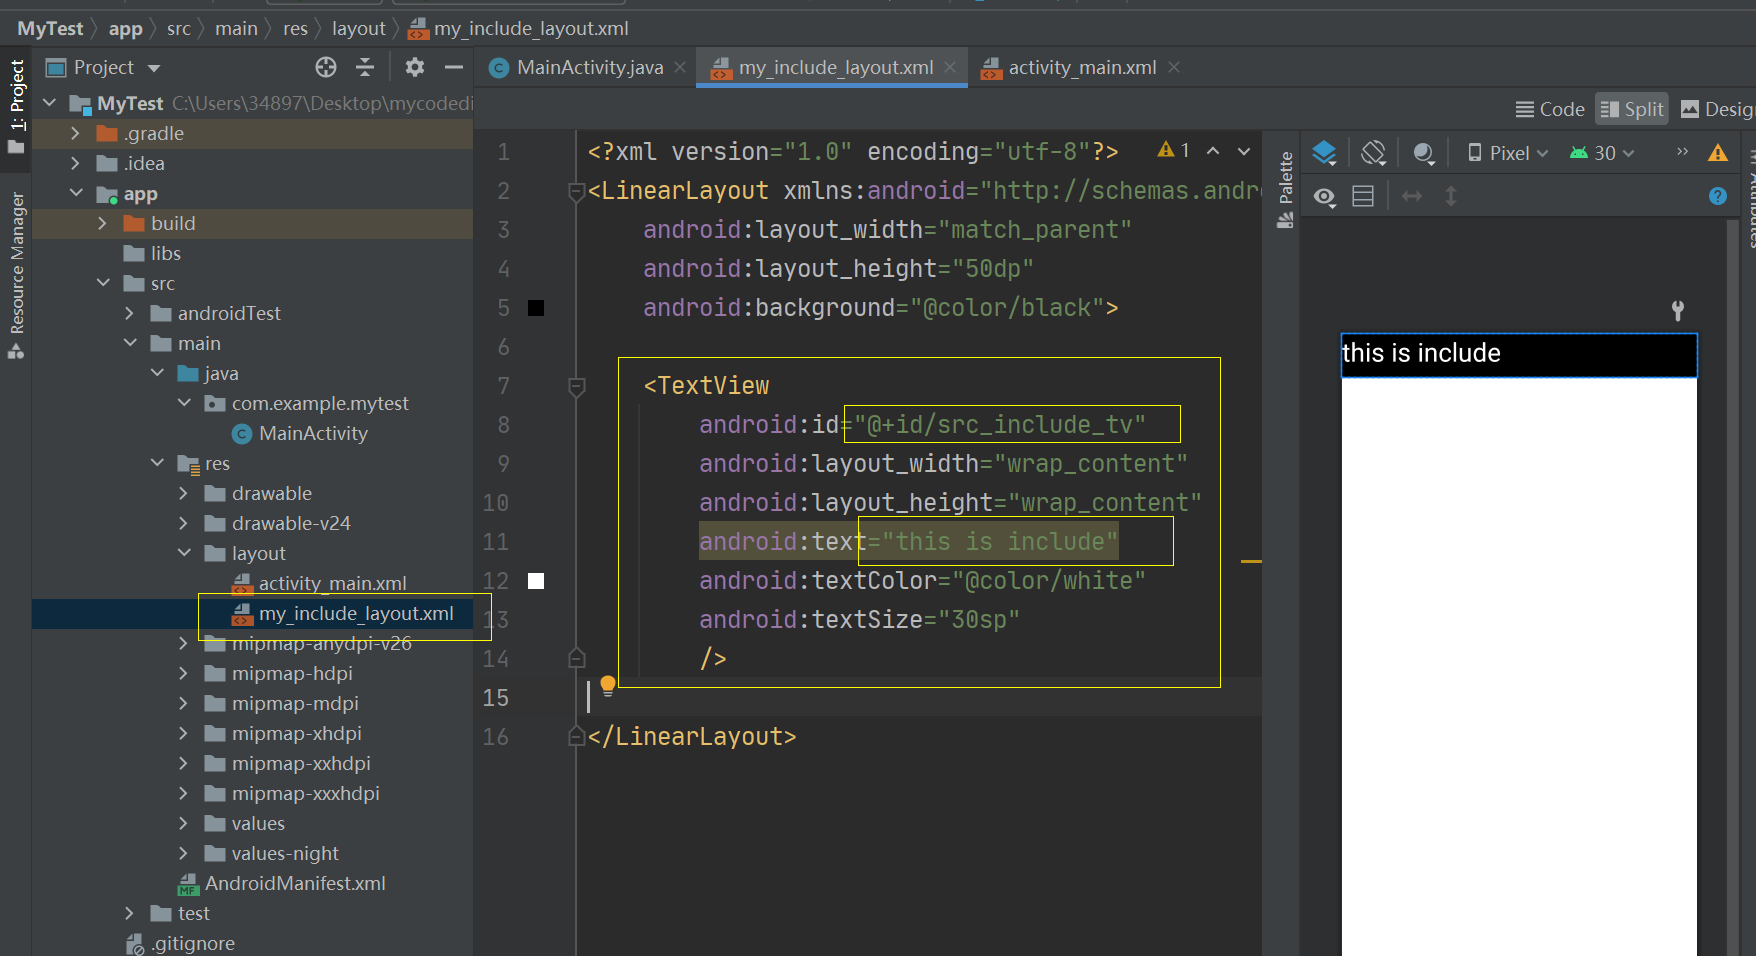
1)创建一个layout,如:my_include_layout.xml
<?xml version="1.0" encoding="utf-8"?>
<LinearLayout xmlns:android="http://schemas.android.com/apk/res/android"
    android:layout_width="match_parent"
    android:layout_height="50dp"
    android:background="@color/black">

    <TextView
        android:id="@+id/src_include_tv"
        android:layout_width="wrap_content"
        android:layout_height="wrap_content"
        android:text="this is include"
        android:textColor="@color/white"
        android:textSize="30sp"
        />

</LinearLayout>
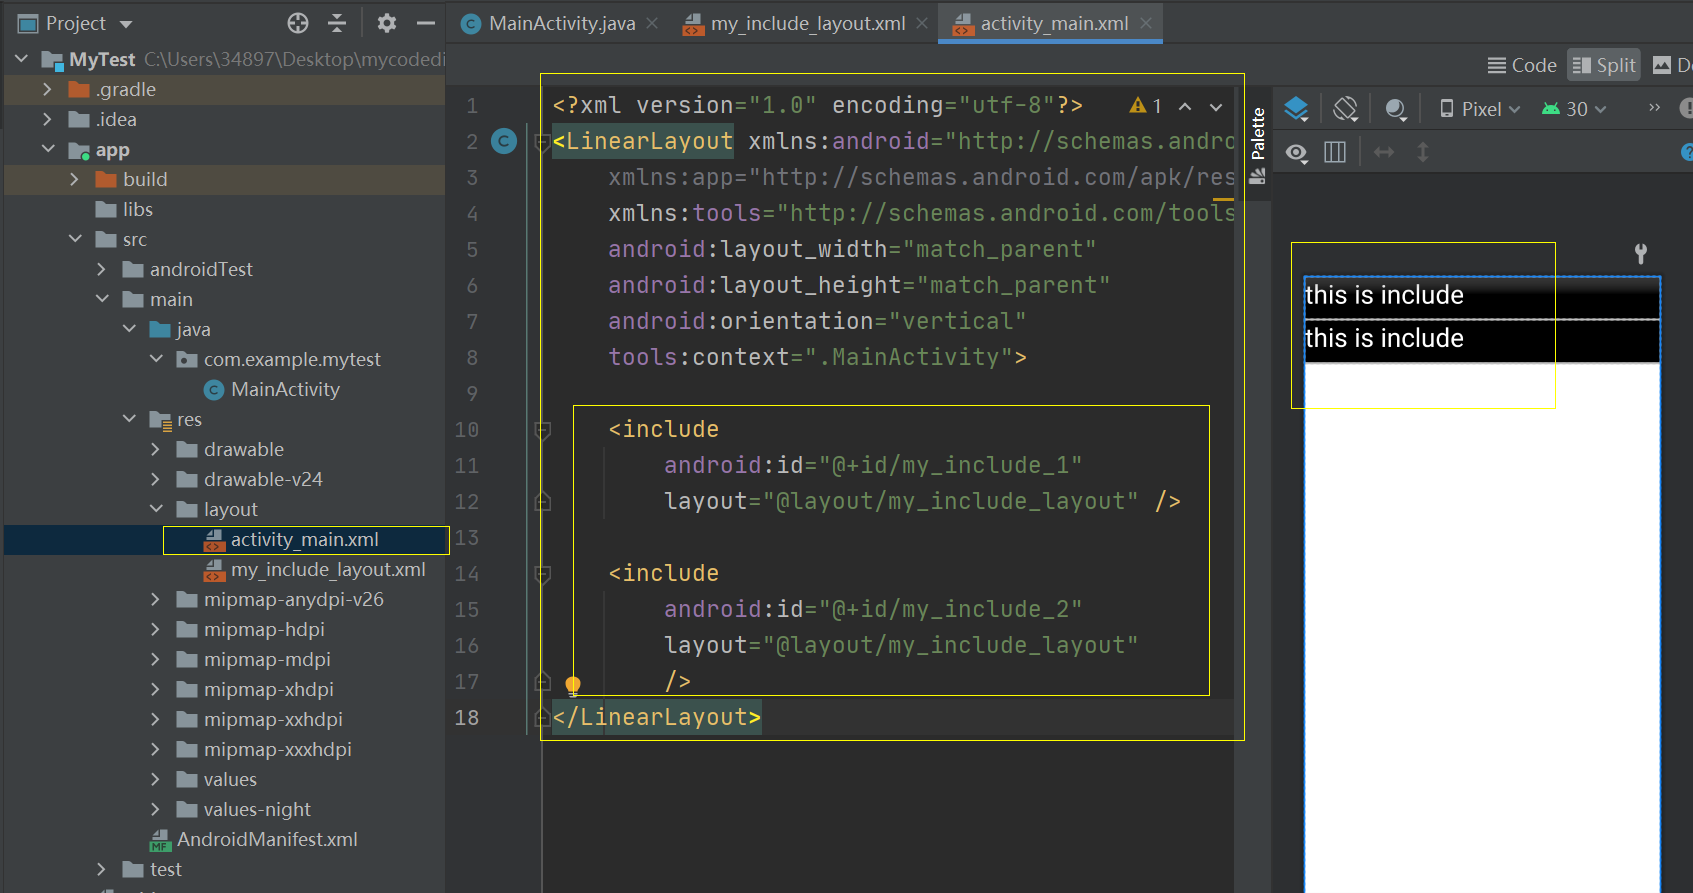
2)通过include重复使用上方的布局
在 activity_main.xml中通过include重复使用布局
<?xml version="1.0" encoding="utf-8"?>
<LinearLayout xmlns:android="http://schemas.android.com/apk/res/android"
    xmlns:app="http://schemas.android.com/apk/res-auto"
    xmlns:tools="http://schemas.android.com/tools"
    android:layout_width="match_parent"
    android:layout_height="match_parent"
    android:orientation="vertical"
    tools:context=".MainActivity">

    <include
        android:id="@+id/my_include_1"
        layout="@layout/my_include_layout" />

    <include
        android:id="@+id/my_include_2"
        layout="@layout/my_include_layout"
        />
</LinearLayout>
3)通过activity操作
public class MainActivity extends AppCompatActivity {
    @Override
    protected void onCreate(Bundle savedInstanceState) {
        super.onCreate(savedInstanceState);
        setContentView(R.layout.activity_main);

        // id为include处设置的
        View include_1 = findViewById(R.id.my_include_1);
        View include_2 = findViewById(R.id.my_include_2);

        // 通过view去查找子控件
        TextView include_1_tv = include_1.findViewById(R.id.src_include_tv);
        TextView include_2_tv = include_2.findViewById(R.id.src_include_tv);

        // 给子控件TextView设置text
        include_1_tv.setText("new include1 text value");
        include_2_tv.setText("new include2 text value");
    }
}
4)效果

5)注意
当在include中添加如下代码,即增加 layout_margin 没有效果的
    <include
        android:id="@+id/my_include_2"
        layout="@layout/my_include_layout"
        android:layout_margin="10dp"
        />
如果要使用 标记来替换布局属性,您必须同时替换 android:layout_height 和 android:layout_width 才能让其他布局属性生效。

地址: https://developer.android.google.cn/training/improving-layouts/reusing-layouts
改为如下代码:
<include
    android:id="@+id/my_include_2"
    layout="@layout/my_include_layout"
    android:layout_width="match_parent"
    android:layout_height="50dp"
    android:layout_margin="10dp"
    />
效果如下:

2. 参考文档:
Re-using layouts with :https://developer.android.google.cn/training/improving-layouts/reusing-layouts
好记性不如烂笔头!


 被折叠的 条评论
为什么被折叠?
被折叠的 条评论
为什么被折叠?
 到【灌水乐园】发言


