


※自动配置原理
配置文件到底能写什么?怎么写?
SpringBoot官方文档中有大量的配置,我们无法全部记住
6.1分析自动配置原理
我们以**HttpEncodingAutoConfiguration(Http编码自动配置)**为例解释自动配置原理;
@Configuration //表示这是一个配置类,和以前编写的配置文件一样,也可以给容器中添加组件;

//启动指定类的ConfigurationProperties功能;
  //进入这个HttpProperties查看,将配置文件中对应的值和HttpProperties绑定起来;
  //并把HttpProperties加入到ioc容器中
@EnableConfigurationProperties({HttpProperties.class})

//Spring底层@Conditional注解
  //根据不同的条件判断,如果满足指定的条件,整个配置类里面的配置就会生效;
  //这里的意思就是判断当前应用是否是web应用,如果是,当前配置类生效
@ConditionalOnWebApplication(type = Type.SERVLET)

//判断当前项目有没有这个类CharacterEncodingFilter;SpringMVC中进行乱码解决的过滤器;
@ConditionalOnClass({CharacterEncodingFilter.class})

//判断配置文件中是否存在某个配置:spring.http.encoding.enabled;
  //如果不存在,判断也是成立的
  //即使我们配置文件中不配置spring.http.encoding.enabled=true,也是默认生效的;
@ConditionalOnProperty(
    prefix = "spring.http.encoding",
    value = {"enabled"},
    matchIfMissing = true
)

public class HttpEncodingAutoConfiguration {
    //他已经和SpringBoot的配置文件映射了
    private final Encoding properties;
    //只有一个有参构造器的情况下,参数的值就会从容器中拿
    public HttpEncodingAutoConfiguration(HttpProperties properties) {
        this.properties = properties.getEncoding();
    }

    //给容器中添加一个组件,这个组件的某些值需要从properties中获取
    @Bean
    @ConditionalOnMissingBean //判断容器没有这个组件?
    public CharacterEncodingFilter characterEncodingFilter() {
        CharacterEncodingFilter filter = new OrderedCharacterEncodingFilter();
        filter.setEncoding(this.properties.getCharset().name());
        filter.setForceRequestEncoding(this.properties.shouldForce(org.springframework.boot.autoconfigure.http.HttpProperties.Encoding.Type.REQUEST));
        filter.setForceResponseEncoding(this.properties.shouldForce(org.springframework.boot.autoconfigure.http.HttpProperties.Encoding.Type.RESPONSE));
        return filter;
    }
    //。。。。。。。
}
一句话总结 :根据当前不同的条件判断,决定这个配置类是否生效!
- 一但这个配置类生效;这个配置类就会给容器中添加各种组件;
- 这些组件的属性是从对应的properties类中获取的,这些类里面的每一个属性又是和配置文件绑定的;
- 这样就可以形成我们的配置文件可以动态的修改springboot的内容。
- 所有在配置文件中能配置的属性都是在xxxxProperties类中封装着;
- 配置文件能配置什么就可以参照某个功能对应的这个属性类
通俗理解:把我们原先需要在bean中手打的属性(property)封装成了一个类,然后通过yaml文件进行自动注入,而我们也可以在application.yaml文件中对这些property进行赋值。
//从配置文件中获取指定的值和bean的属性进行绑定
@ConfigurationProperties(prefix = "spring.http")
public class HttpProperties {
    // .....
}
我们去配置文件里面试试前缀,看提示!
6.2精髓
1.SpringBoot启动时会加载大量的自动配置类
2.我们看我们需要的功能有没有在SpringBoot默认写好的自动配置类当中
3.我们再来看这个自动配置类中到底配置了哪些组件;(只要我们要用的组件存在其中,我们就不需要再去手动配置了,如果不存在我们再手动配置)
4.给容器中自动配置类添加组件的时候,会从properties类中获取某些属性,我们只需要在配置文件中指定这些属性即可;
XXXXAutoConfiguration:自动配置类:给容器添加组件,这些组件要赋值就需要绑定一个XXXXProperties类
XXXXProperties:里面封装配置文件中相关属性;
怎么去修改这些属性呢:说白了就是SpringBoot配置,---->.yaml、.properties这些文件
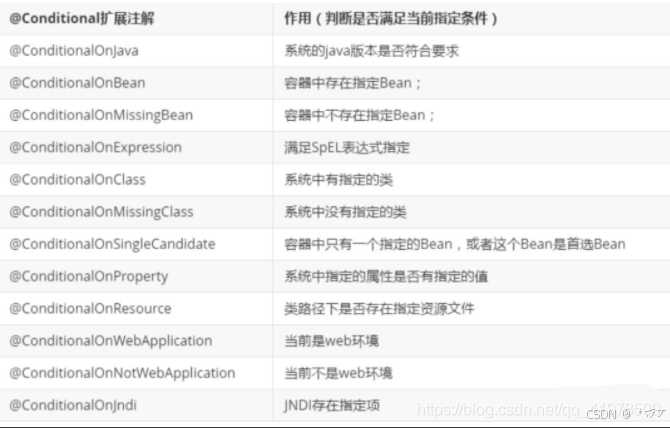
6.3了解:@Conditional
了解完自动装配的原理后,我们来关注一个细节问题,*自动配置类必须在一定的条件下才能生效;
@Conditional派生注解(Spring注解版原生的@Conditional作用)
作用:必须是@Conditional指定的条件成立,才给容器中添加组件,配置配里面的所有内容才生效;
那么多的自动配置类,必须在一定的条件下才能生效;也就是说,我们加载了这么多的配置类,但不是所有的都生效了。
我们怎么知道哪些自动配置类生效?
我们可以通过启用 debug=true属性;来让控制台打印自动配置报告,这样我们就可以很方便的知道哪些自动配置类生效;
#开启springboot的调试类
debug=true
Positive matches:(自动配置类启用的:正匹配)
Negative matches:(没有启动,没有匹配成功的自动配置类:负匹配)
Unconditional classes: (没有条件的类)
【演示:查看输出的日志】
掌握吸收理解原理,即可以不变应万变!
6.4自定义Starter启动器
我们分析完毕了源码以及自动装配的过程,我们可以尝试自定义一个启动器来玩玩!
说明
启动器模块是一个 空 jar 文件,仅提供辅助性依赖管理,这些依赖可能用于自动装配或者其他类库;
命名归约:
官方命名:
- 前缀:spring-boot-starter-xxx
- 比如:spring-boot-starter-web…
自定义命名:
- xxx-spring-boot-starter
- 比如:mybatis-spring-boot-starter
编写启动器
1、在IDEA中新建一个空项目 spring-boot-starter-diy
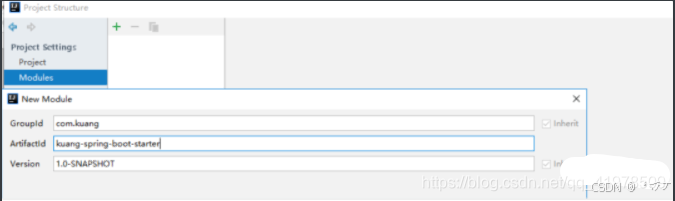
2、新建一个普通Maven模块:kuang-spring-boot-starter
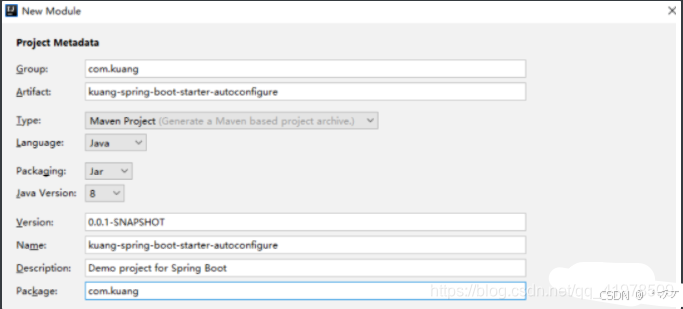
3、新建一个Springboot模块:kuang-spring-boot-starter-autoconfigure
4、点击apply即可,基本结构
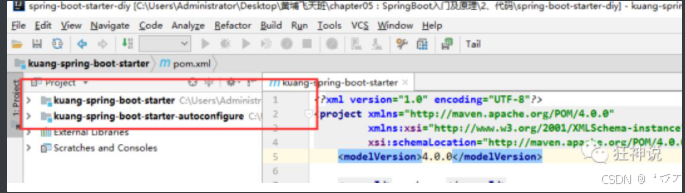
5、在我们的 starter 中 导入 autoconfigure 的依赖!
<!-- 启动器 -->
<dependencies>
    <!--  引入自动配置模块 -->
    <dependency>
        <groupId>com.kuang</groupId>
        <artifactId>kuang-spring-boot-starter-autoconfigure</artifactId>
        <version>0.0.1-SNAPSHOT</version>
    </dependency>
</dependencies>
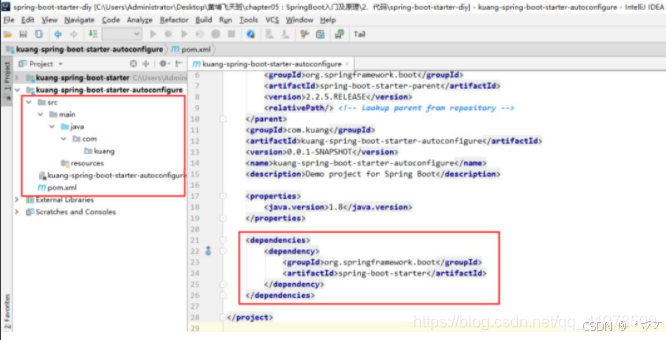
6、将 autoconfigure 项目下多余的文件都删掉,Pom中只留下一个 starter,这是所有的启动器基本配置!
7、我们编写一个自己的服务
package com.kuang;

public class HelloService {

    HelloProperties helloProperties;

    public HelloProperties getHelloProperties() {
        return helloProperties;
    }

    public void setHelloProperties(HelloProperties helloProperties) {
        this.helloProperties = helloProperties;
    }

    public String sayHello(String name){
        return helloProperties.getPrefix() + name + helloProperties.getSuffix();
    }

}
8、编写HelloProperties 配置类
package com.kuang;

import org.springframework.boot.context.properties.ConfigurationProperties;

// 前缀 kuang.hello
@Component
@ConfigurationProperties(prefix = "kuang.hello")
public class HelloProperties {

    private String prefix;
    private String suffix;

    public String getPrefix() {
        return prefix;
    }

    public void setPrefix(String prefix) {
        this.prefix = prefix;
    }

    public String getSuffix() {
        return suffix;
    }

    public void setSuffix(String suffix) {
        this.suffix = suffix;
    }
}
9、编写我们的自动配置类并注入bean,测试!
package com.kuang;

import org.springframework.beans.factory.annotation.Autowired;
import org.springframework.boot.autoconfigure.condition.ConditionalOnWebApplication;
import org.springframework.boot.context.properties.EnableConfigurationProperties;
import org.springframework.context.annotation.Bean;
import org.springframework.context.annotation.Configuration;

@Configuration
@ConditionalOnWebApplication //web应用生效
@EnableConfigurationProperties(HelloProperties.class)
public class HelloServiceAutoConfiguration {

    @Autowired
    HelloProperties helloProperties;

    @Bean
    public HelloService helloService(){
        HelloService service = new HelloService();
        service.setHelloProperties(helloProperties);
        return service;
    }

}


 被折叠的 条评论
为什么被折叠?
被折叠的 条评论
为什么被折叠?
 到【灌水乐园】发言


