


 本文详细介绍了如何使用Spring Boot结合注解配置,实现数据库中一对一和一对多的关联映射关系,包括创建实体类、DAO接口、Service和Controller,以及配置启动和测试过程。
使用工具
IDEA+MySQL
表和表关系
class(班级表)

student(学生表)

关联关系

1.搭建环境

在pom.xml文件中导入相关依赖
 <!-- spring boot 父类项目-->
    <parent>
        <groupId>org.springframework.boot</groupId>
        <artifactId>spring-boot-starter-parent</artifactId>
        <version>2.0.5.RELEASE</version>
        <relativePath/> <!-- lookup parent from repository -->
    </parent>
    <properties>
        <project.build.sourceEncoding>UTF-8</project.build.sourceEncoding>
        <project.reporting.outputEncoding>UTF-8</project.reporting.outputEncoding>
        <java.version>1.8</java.version>
    </properties>
    <dependencies>
        <!-- spring boot -->
        <dependency>
            <groupId>org.springframework.boot</groupId>
            <artifactId>spring-boot-starter-web</artifactId>
        </dependency>
        <!-- mybatis -->
        <dependency>
            <groupId>org.mybatis.spring.boot</groupId>
            <artifactId>mybatis-spring-boot-starter</artifactId>
            <version>1.3.2</version>
        </dependency>
        <!-- mysql -->
        <dependency>
            <groupId>mysql</groupId>
            <artifactId>mysql-connector-java</artifactId>
            <scope>runtime</scope>
        </dependency>
        <!-- lombok插件 -->
        <dependency>
            <groupId>org.projectlombok</groupId>
            <artifactId>lombok</artifactId>
            <version>1.16.20</version>
            <scope>provided</scope>
        </dependency>
    </dependencies>
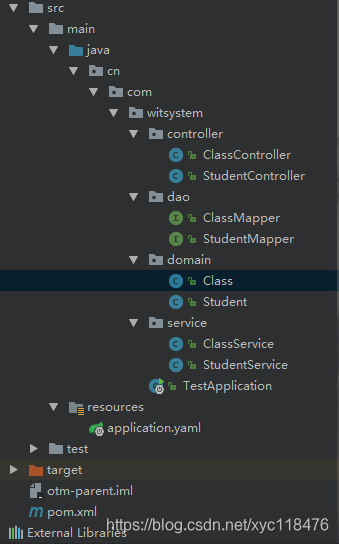
2.根据表和表关系创建实体类
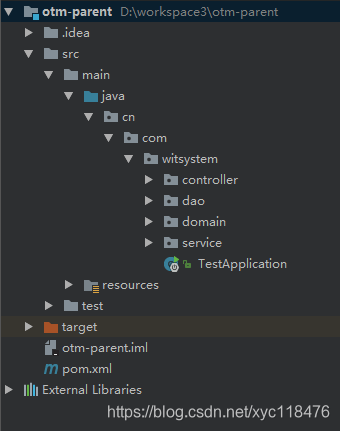
项目大体结构
2.1在domain包下创建Class班级类
//使用了lombok插件
@Data   //生成set和get方法
@ToString   //生成tostring方法
@JsonIgnoreProperties(value = {"hibernateLazyInitializer", "handler"})
public class Class {

    private Integer Id;
    private String name;
    private Integer num;

    private List<Student> list;

}
此处我使用了lombok插件,通过注解可以直接生成set和get方法,tostring方法,既简单快捷又避免了代码冗长。如果没有的话可以直接在空白处右键,选择Generate,然后选择Getter and Setter,全选点击ok,tostring方法类似,右键选择Generate,点击tostring就行了.@JsonIgnoreProperties(value = {“hibernateLazyInitializer”, “handler”})这个注解是为了防止lombok插件的问题会导致序列化错误会报错:com.fasterxml.jackson.databind.exc.InvalidDefinitionException,如果你没有用这个插件就可以不用加上这个注解。
此处就是一对多的情况,需要在班级类里面添加学生类的集合,一个班级中有多个学生。
2.2在domain包下创建Student学生类
@Data
@ToString
@JsonIgnoreProperties(value = {"hibernateLazyInitializer", "handler"})
public class Student {
    private Integer id;
    private String name;
    private Integer age;
    private String gender;
    private String cid;

   private Class aClass;

}
此处就是一对一的情况,一个学生对应一个班级,所以在学生类里面需要有一个班级的对象,因为class为关键字,所以属性名换成了aClass。
3.根据实体类创建对应的dao接口并关联关系(一对一)
3.1在dao包下创建StudentMapper接口,创建findAll查询所有方法
@Mapper
public interface StudentMapper {
    /**
     * 查询所有学生
     * @return
     */
    @Select("select * from student")
    @Results({
            @Result(id = true,property = "id",column = "id"),
            @Result(property = "name",column = "name"),
            @Result(property = "age",column = "age"),
            @Result(property = "gender",column = "gender"),
            @Result(property = "cid",column = "cid"),
            //用cid字段通过配置的路径去查找这个aClass对象
            @Result(property = "aClass",column = "cid",one = @One(select = "",
                    fetchType = FetchType.LAZY)),
    })
    })
    List<Student> findAll();
编写查询所有方法,在方法上写上对应的sql语句,通过@Result设置对应的映射关系,如果实体类的属性和表的字段相同的话可以省略,但是为了规范和格式,所以全都写上了。property是实体类的属性名,column是数据库的字段。aClass是班级对象,但是在数据库中我们是没有这个字段的,只有学生表和班级表的关联关系,所以我们就要通过表与表的关联关系来找到对应的班级类,表与表之间是通过外键来进行关联的,此处的外键为cid,也就是班级的id,通过班级id去找到对应的班级类,所以我们在column出写上cid,再在后边加上一个一对一的关联路径,one=@One(select=" "),在里面写上方法的路径名,此时我们还没有这个方法,所以我们得去创建这个方法,fetchType为加载的方式,默认为立即加载,但是为了效率更高,不消耗更多内存,有需要用到的时候我们才查询,所以我们选择懒加载,FetchType.LAZY。
3.2在dao包下创建ClassMapper接口,并创建findClassById方法
@Mapper
public interface ClassMapper {
    /**
     * 通过id查找班级
     * @param id
     * @return
     */
    @Select("select * from class where id=#{id}")
    Class findClassById(Integer id);
}
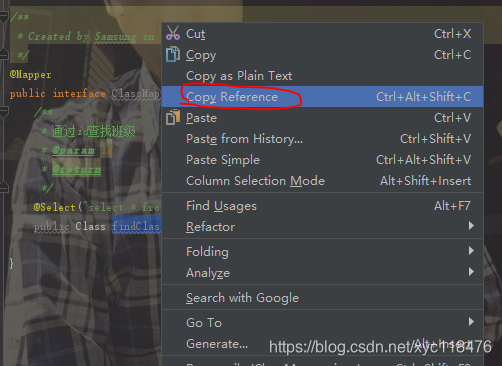
双击方法名选中,右键选择Copy Reference,复制方法的路径名到StudentMapper中,
 /**
     * 查询所有学生
     * @return
     */
    @Select("select * from student")
    @Results({
            @Result(id = true,property = "id",column = "id"),
            @Result(property = "name",column = "name"),
            @Result(property = "age",column = "age"),
            @Result(property = "gender",column = "gender"),
            @Result(property = "cid",column = "cid"),
             @Result(property = "aClass",column = "cid",one = @One(select = "cn.com.witsystem.dao.ClassMapper.findClassById",
                    fetchType = FetchType.LAZY)),
    })
    })
    List<Student> findAll();
粘贴到对应位置,这样我们的一对一关系就配置好了。然后进行测试。
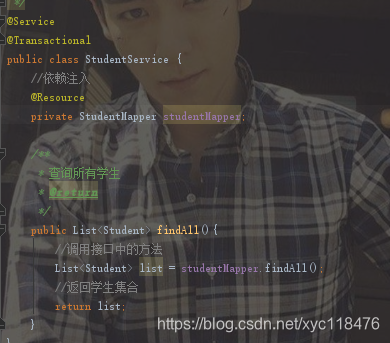
3.3在service包下创建StudentService类
@Service
@Transactional
public class StudentService {
    //依赖注入
    @Resource
    private StudentMapper studentMapper;

    /**
     * 查询所有学生
     * @return
     */
    public List<Student> findAll(){
        //调用接口中的方法
        List<Student> list = studentMapper.findAll();
        //返回学生集合
        return list;
    }
}
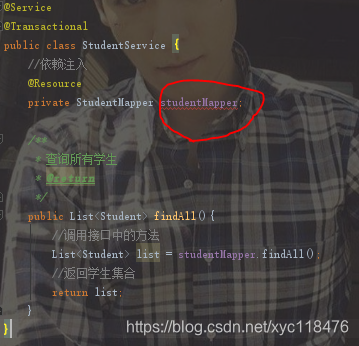
此时将接口注入后,如图所示,可能会出现报错,这是IDEA误报,可以不用理会。
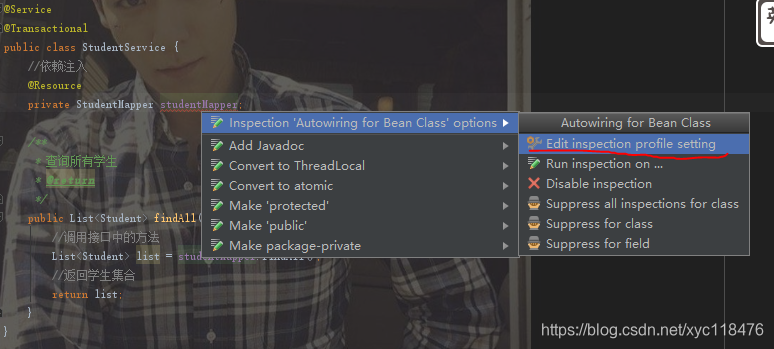
如果实在想解决的话,可以选中报错的地方,alt+回车,再回车选择第一个。
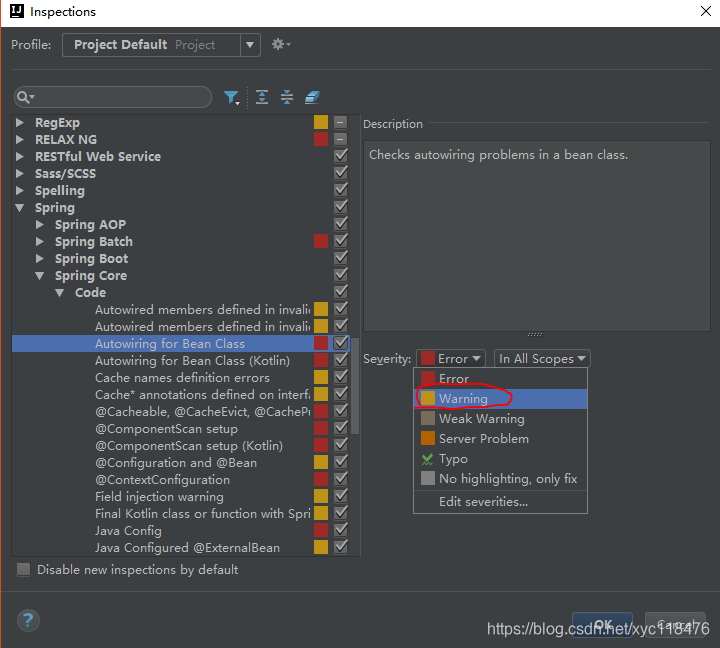
选择Severity将Error换成Warning
报错消失
3.4在controller包下创建StudentController类
//添加了这个注解后所有方法返回json格式
@RestController
//一级路径
@RequestMapping("/student")
public class StudentController {
    @Resource
    private StudentService studentService;


	//get访问,方法的访问名称为/findAll
    @GetMapping("/findAll")
    public ResponseEntity<List<Student>> findAll(){
    	//调用方法返回学生集合
        List<Student> list = studentService.findAll();
       //返回数据
        return ResponseEntity.ok(list);
    }
}
3.5创建启动类TestApplication
@SpringBootApplication
public class TestApplication {
    public static void main(String[] args) {
        SpringApplication.run(TestApplication.class,args);
    }
}

创建的启动类不能和其他包在同一级,要在controller包的上一级也就是witsystem包下。不然启动类就扫描不到其他包了。
3.6在resources下创建application.yaml文件
server:
  port: 8080

spring:
  datasource:
    url: jdbc:mysql://127.0.0.1:3306/test17?useUnicode=true&characterEncoding=utf8&autoReconnect=true&allowMultiQueries=true
    username: root
    password: 123
    driver-class-name: com.mysql.jdbc.Driver
    druid:
      initial-size: 5
      min-idle: 5
      max-active: 20
      max-wait: 1000
      test-on-borrow: true
  servlet:
    multipart:
      max-file-size: 5MB
mybatis:
  type-aliases-package: cn.com.witsystem.domain
mapper:
  not-empty: false
  identity: mysql
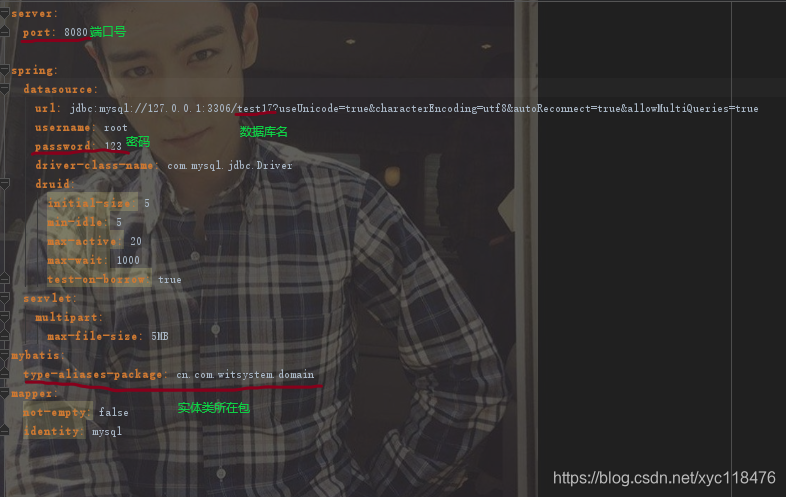
数据库换成自己的,账号密码换成自己的,还有实体类的包路径。
3.7在浏览器测试,也可以在IDEA自带的REST client中测试
首先右键启动类运行项目,项目启动完成后在浏览器输入路径访问方法:http://localhost:8080/student/findAll
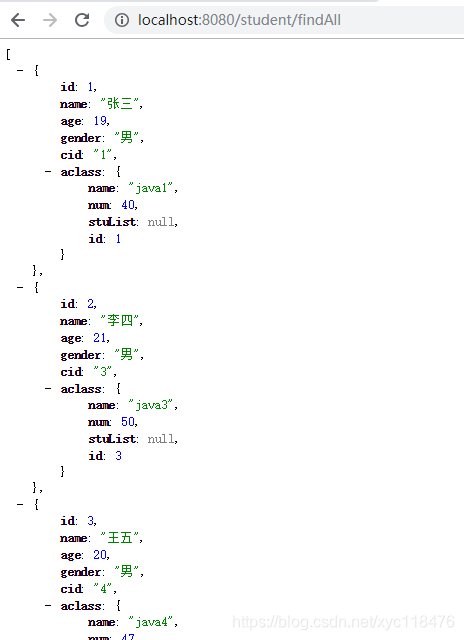
因为我用了一个JSONView的浏览器扩展程序,可以将json字符串自动转成json对象,所以显示出这种效果,如果你也想要这种效果,可以百度 json在线解析,将json字符串复制过去就行了。
4根据实体类创建对应的dao接口并关联关系(一对多)
4.1(和前面步骤类似,就不详细说了)在ClassMapper接口中创建findAll方法
/**
 * Created by Samsung on 2019/04/24.
 */
@Mapper
public interface ClassMapper {
    /**
     * 通过id查找班级
     * @param id
     * @return
     */
    @Select("select * from class where id=#{id}")
    public Class findClassById(Integer id);

    @Select("select * from class")
    @Results({
            @Result(id = true,property = "id",column = "id"),
            @Result(property = "name",column = "name"),
            @Result(property = "num",column = "num"),
            @Result(property = "stuList",column = "id", many = @Many(select = "",
                    fetchType = FetchType.LAZY)),
    })
    List<Class> findAll();

}
关联的方法和一对一相似,此时的property换成了集合,查询多个,所有换成的many,通过班级id去查询该班级的学生,此时我们还没有这个方法,所有我们要在StudentMapper中创建该方法.
4.2在StudentMapper接口中创建findStuByCid方法
   /**
     * 根据班级id查找对应班级的学生
     * @param cid
     * @return
     */
    @Select("select * from student where cid= #{cid}")
    List<Student> findStuByCid(Integer cid);
4.3复制方法路径到对应位置粘贴
   @Select("select * from class where id=#{id}")
    public Class findClassById(Integer id);

    @Select("select * from class")
    @Results({
            @Result(id = true,property = "id",column = "id"),
            @Result(property = "name",column = "name"),
            @Result(property = "num",column = "num"),
            @Result(property = "stuList",column = "id", many = @Many(select = "cn.com.witsystem.dao.StudentMapper.findStuByCid",
                    fetchType = FetchType.LAZY)),
    })
    List<Class> findAll();
此时一对多关系就已经关联映射完成了。
4.4在service包下创建ClassService类并调用接口中的方法
@Service
@Transactional
public class ClassService {
    @Resource
    private ClassMapper classMapper;

    /**
     * 查询所有班级和该班的学生
     * @return
     */
    public List<Class> findAll(){
        //调用方法返回班级集合
        List<Class> list = classMapper.findAll();
        //返回集合数据
        return list;
    }
}
4.5在controller包下创建ClassController类并返回json数据
@RestController
@RequestMapping("/class")
public class ClassController {

    @Resource
    private ClassService classService;

    //get请求的方法
    @GetMapping("/findAll")
    public ResponseEntity<List<Class>> findAll(){
        //调用方法
        List<Class> list = classService.findAll();
        //返回数据
        return ResponseEntity.ok(list);
    }
}
4.6重启项目然后在浏览器或者REST client中访问方法
访问http://localhost:8080/class/findAll
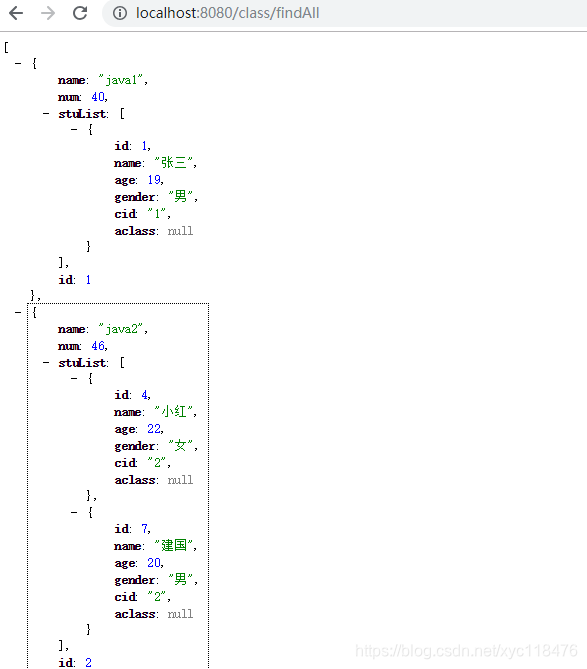
部分效果展示。。
5.整体项目结构


 2万+
2万+

 被折叠的 条评论
为什么被折叠?
被折叠的 条评论
为什么被折叠?
 到【灌水乐园】发言


