


springboot 官方建议springboot官方推出的starter 以spring-boot-starter-xxx的格式来命名,第三方开发者自定义的starter则以xxxx-spring-boot-starter的规则来命名
写第三方的starter首先明确项目是一个SpringBoot的项目,这里我将创建父子模块来进行演示,父类创建为springboot项目,dependencyManagement对第三方包的版本进行管理
其实起什么名字不是主要的,重要的是要规范命名,这里我写的starter为
TokenX-spring-boot-starter 没有实现什么功能,重要的是starter的一个基本写法
这是模块中的pom文件的一部分
<parent>
        <groupId>org.springframework.boot</groupId>
        <artifactId>spring-boot-starter-parent</artifactId>
        <version>2.3.11.RELEASE</version>
        <relativePath/>
    </parent>

		<groupId>com.creawse</groupId>
    <artifactId>Root-creawse</artifactId>
    <version>1.0-SNAPSHOT</version>

    <packaging>pom</packaging>
    <modules>
        <module>TokenX-spring-boot-starter</module>
    </modules>
在子模块中,可以随意创建,这里我就创建一个空的maven项目
以下为该项目用到的包和starter必备的包
 <parent>
        <groupId>com.creawse</groupId>
        <artifactId>Root-creawse</artifactId>
        <version>1.0-SNAPSHOT</version>
        <relativePath>../pom.xml</relativePath>
    </parent>

    <artifactId>TokenX-spring-boot-starter</artifactId>

    <properties>
        <maven.compiler.source>8</maven.compiler.source>
        <maven.compiler.target>8</maven.compiler.target>
        <project.build.sourceEncoding>UTF-8</project.build.sourceEncoding>
    </properties>

    <dependencies>
        <dependency>
            <groupId>cn.hutool</groupId>
            <artifactId>hutool-all</artifactId>
        </dependency>
        <dependency>
            <groupId>org.projectlombok</groupId>
            <artifactId>lombok</artifactId>
            <optional>true</optional>
        </dependency>
        <dependency>
            <groupId>org.springframework.boot</groupId>
            <artifactId>spring-boot-configuration-processor</artifactId>
            <optional>true</optional>
        </dependency>
        <dependency>
            <groupId>org.springframework</groupId>
            <artifactId>spring-webmvc</artifactId>
        </dependency>
        <dependency>
            <groupId>org.apache.tomcat.embed</groupId>
            <artifactId>tomcat-embed-core</artifactId>
        </dependency>
        <dependency>
            <groupId>org.springframework.boot</groupId>
            <artifactId>spring-boot-autoconfigure</artifactId>
        </dependency>
        <dependency>
            <groupId>com.creawse</groupId>
            <artifactId>creawseModel-core</artifactId>
            <version>1.0-SNAPSHOT</version>
            <scope>compile</scope>
        </dependency>
    </dependencies>

    <build>
        <plugins>
            <plugin>
                <groupId>org.apache.maven.plugins</groupId>
                <artifactId>maven-compiler-plugin</artifactId>
            </plugin>
            <plugin>
                <groupId>org.apache.maven.plugins</groupId>
                <artifactId>maven-source-plugin</artifactId>
                <executions>
                    <execution>
                        <id>attach-sources</id>
                        <phase>package</phase>
                        <goals>
                            <goal>jar</goal>
                        </goals>
                    </execution>
                </executions>
            </plugin>
        </plugins>
    </build>
再bulid中的为打包策略build
spring-boot-autoconfigure为spring中的自动配置类,必须引入
spring-boot-configuration-processor根据写的*******Properties.class配置生成相应的json文件,建议引入,生成的json文件可以再写配置时给予编译器提示。
在写注释时建议使用Javadoc注释格式去写
 在一个starter程序中最为核心的为这三个文件
在TokenXProperties文件中
creawse.token是我们在使用这个starter的时候写的配置的前缀
在加载过程中,这个类会读取对应的配置信息,加载到这个starter中从而实现一定的功能,将需要的一些属性写上即可。
同时我们也可以给予默认值。
@Data
@ConfigurationProperties(prefix = TokenXProperties.TOKEN_PREFIX)
public class TokenXProperties {
    /**
     * 配置设置
     */
    public static final String TOKEN_PREFIX = "creawse.token";

    /**
     * 设置开关
     */
    private boolean enable = false;
    /**
     * 设置密钥
     */
    private String key = "creawse";
    /**
     * 设置拦截名单
     */
    private String pathPatterns = "/**";
    /**
     * 设置白名单
     * 列如/api/user/login,/api/user/register
     */
    private String excludePathPatterns = "";
    /**
     * 设置拦截等级
     */
    private int order = 1;
}
在spring.factories中,内容如下,前面的蓝色为固定格式,下面的为自己写的导入的自动配置类 cn.creawse.autoConfigure.TokenXAutoConfiguration指向的就是他
@ConditionalOnProperty(prefix = TokenXProperties.TOKEN_PREFIX, value = "enable",
        havingValue = "true", matchIfMissing = false)
@Import(WebConfig.class)
public class TokenXAutoConfiguration {
}
在这个类中,@ConditionalOnProperty注解是一个条件注解
通过@ConditionalOnProperty注解,我们可以根据配置文件中的属性值来决定是否启用或禁用某个组件,特定的配置选项或条件。
前面两个值没什好说的
matchIfMissing 表示默认值,默认是否开启starter
这个havingValue 表示只有creawse.token.enable的属性为true时才开启这个starter
(在使用的时候写配置信息)
注意在写TokenXProperties文件时设置开关的enable属性名要和TokenXAutoConfiguration文件中注解@ConditionalOnProperty的value值对应。
至此starter的基本框架已经搭建完成
其他的写实现的功能就可以了
为了事starter完整,这里我们将拦截器的功能实现,目录结构如下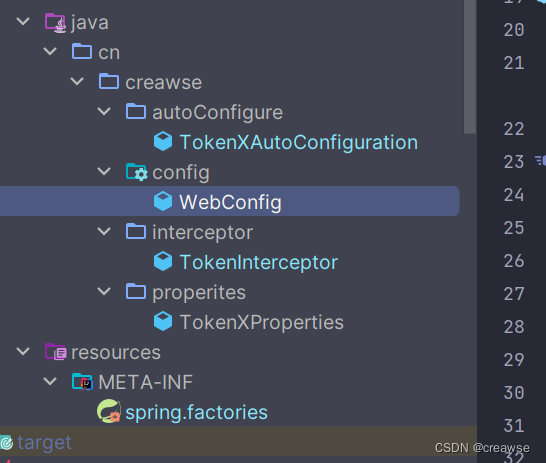 在WebMvc中
@Import(TokenXProperties.class)
public class WebConfig implements WebMvcConfigurer {

    @Resource
    private TokenXProperties tokenXProperties;


    @Override
    public void addInterceptors(InterceptorRegistry registry) {
        String excludePathPatterns = tokenXProperties.getExcludePathPatterns();
        String[] excludePathPatternArray = excludePathPatterns.split("\\.");
        registry.addInterceptor(new TokenInterceptor())
                .addPathPatterns(tokenXProperties.getPathPatterns())
                .excludePathPatterns(excludePathPatternArray)
                .order(tokenXProperties.getOrder());
    }
}
在TokenInterceptor中
public class TokenInterceptor implements HandlerInterceptor {

    @Resource
    private TokenXProperties tokenXProperties;

    @Override
    public boolean preHandle(javax.servlet.http.HttpServletRequest request, javax.servlet.http.HttpServletResponse response, Object handler) throws Exception {
        String token = request.getHeader("token");
        if (StrUtil.isEmpty(token)) {
            throw new BizException(401, "token必传");
        }
        boolean verify = false;
        verify = JWTUtil.verify(token, tokenXProperties.getKey().getBytes());
        if (verify) {
            return verify;
        }
        throw new BizException(402, "token 不正确");
    }
}
BizException是我自己定义的异常类,没在这个starter下,在其他模块下。
在这我只做了一个简单的token验证。
至此,一个简单的starter就写完了。
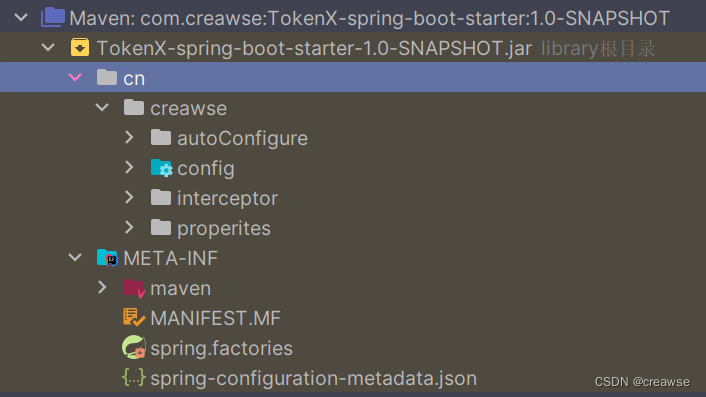
在引用的时候目录结构如下


 1590
1590

 被折叠的 条评论
为什么被折叠?
被折叠的 条评论
为什么被折叠?
 到【灌水乐园】发言


