


BeanDefinition
BeanDefinition是Spring中很重要的一个概念。顾名思义,就是对Bean进行定义的,它描述了Spring应该创建一个什么样的Bean。
BeanDefinition是一个接口,有许多的实现类。主要包括了
- beanNameClass:表示Bean的类型
- scope:表示Bean的作用域,是单例还是多例的
- lazyInit:表示Bean是否是懒加载的
- dependsOn:表示Bean是否显示的依赖其他Bean,这是个string数组
- InitMethodName:初始化时执行的方法名
- role:Bean的角色
- fallBack:是否是fallBack
- …
在我们使用@Bean @Component <bean>等方式定义Bean是,Spring底层会解析这些定义并生成BeanDefinition,用于在生成Bean的时候根据BeanDefinition这个模板来创建Bean
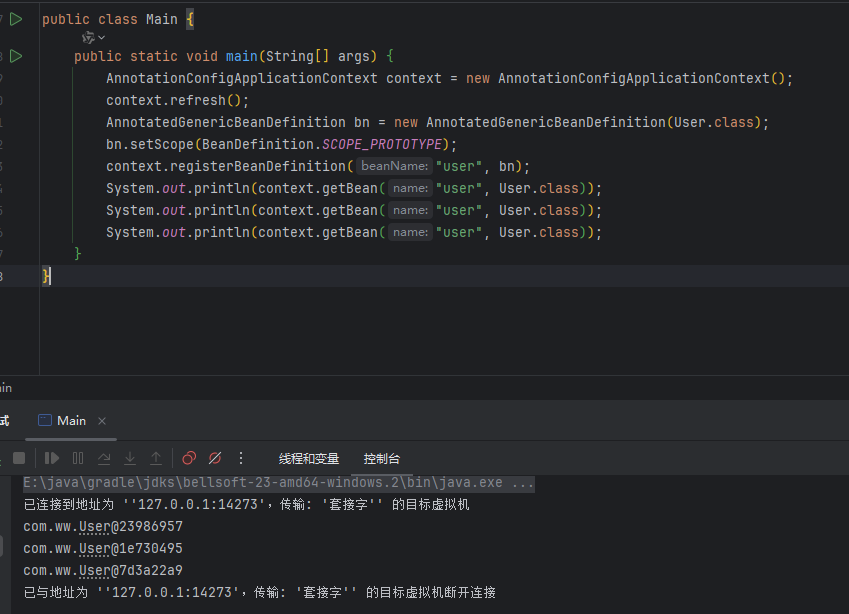
我们也可以手动创建一个BeanDefinition,这里用常用的@Component解析后生成的AnnotatedGenericBeanDefinition为例子。这里将自己定义的BeanDefinition的scope属性设置为了prototype,可以看到在多次调用getBean方法是,获取到的都是不一样的Bean。
可以看到这里的
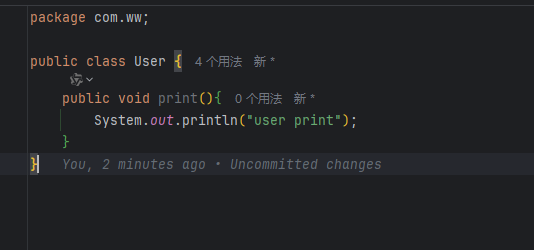
User类上没有任何注解也可以被托管给Spring
public static void main(String[] args) {
    AnnotationConfigApplicationContext context = new AnnotationConfigApplicationContext();
    context.refresh();
    AnnotatedGenericBeanDefinition bn = new AnnotatedGenericBeanDefinition(User.class);
    bn.setScope(BeanDefinition.SCOPE_PROTOTYPE);
    context.registerBeanDefinition("user", bn);
    System.out.println(context.getBean("user", User.class));
    System.out.println(context.getBean("user", User.class));
    System.out.println(context.getBean("user", User.class));
}
BeanDefinitionReader
BeanDefinitionReader在我们平常并不特别多的使用,但在Spring的Bean的生命周期中,它的作用是将 Spring 配置文件(如 XML)或其他资源中的 Bean 定义解析为 BeanDefinition 对象,并注册到 Spring 容器的 BeanDefinitionRegistry 中,其中包含了两个主要的实现类
- AnnotatedBeanDefinitionReader
- XmlBeanDefinitionReader
AnnotatedBeanDefinitionReader
这个类主要用于解析注解或声明式的Bean,会解析@Component @DependsOn @Lzay @Scope @FallBack等注解
public static void main(String[] args) {
    AnnotationConfigApplicationContext context = new AnnotationConfigApplicationContext();
    context.refresh();
    AnnotatedBeanDefinitionReader bdReader = new AnnotatedBeanDefinitionReader(context);
    bdReader.registerBean(User.class);
    System.out.println(context.getBean("user"));
    System.out.println(context.getBean("user"));
    System.out.println(context.getBean("user"));
}
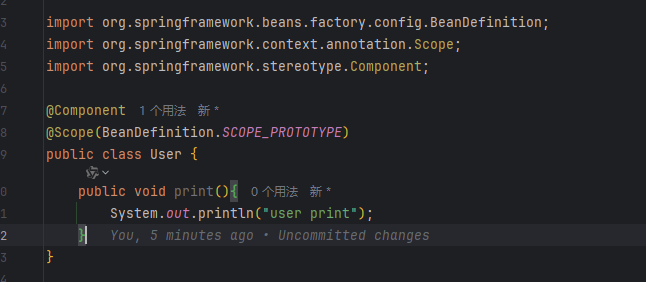
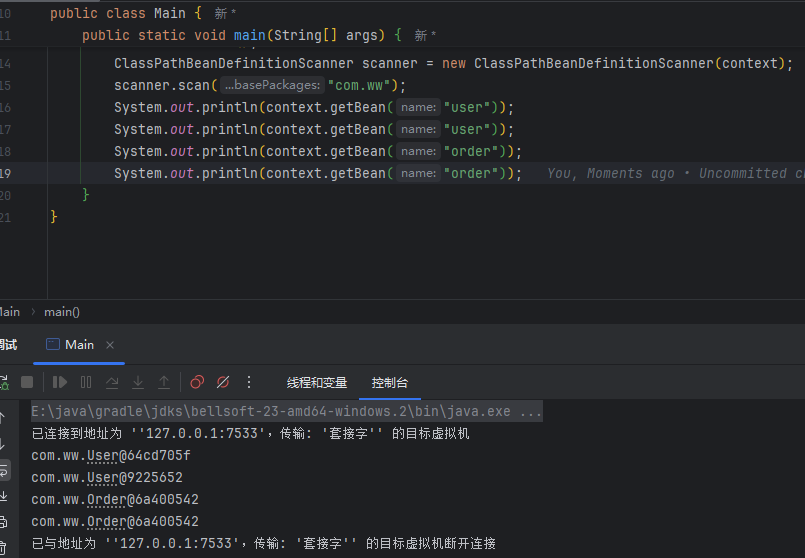
这里的User类上添加了@Component和@Scope注解,因此可以被reader读取并生成BeanDefinition,同时多次获取Bean时,每次获取到的都不一样
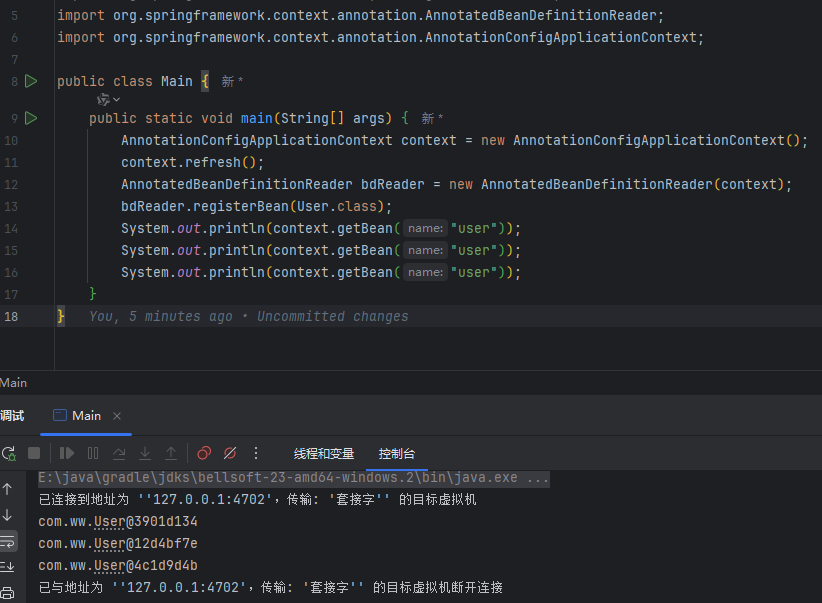
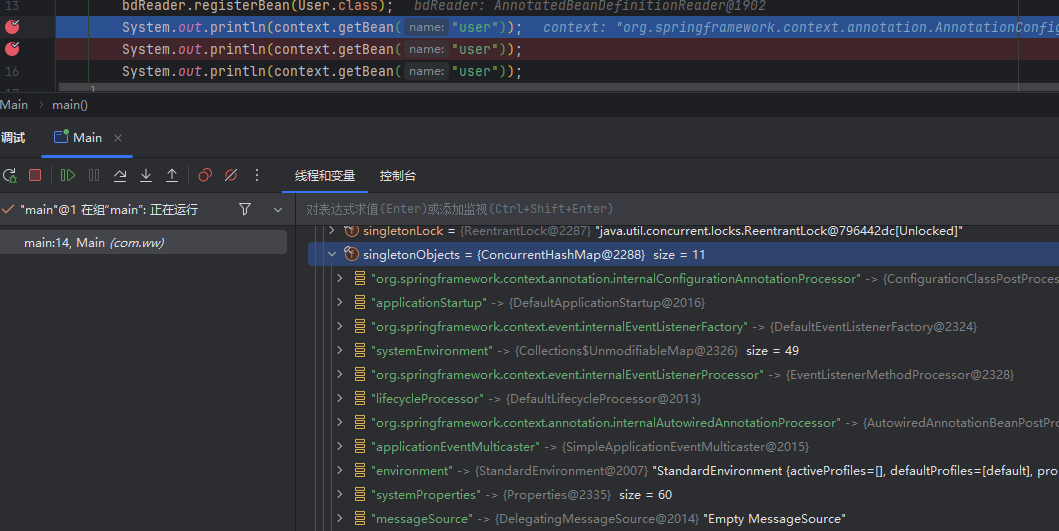
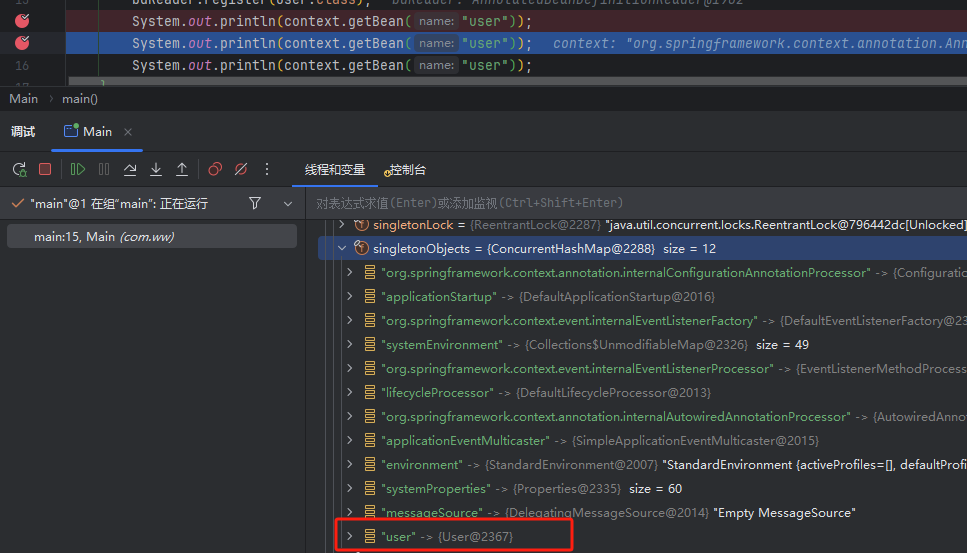
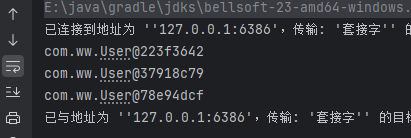
值得一提的是这种Bean生成方式。当Bean是单例Bean时,在BeanDefinitionReader的register方法执行完成之后,如果不执行ApplicationContext的refresh()方法来刷新Spring,并不会立即生成单例的Bean对象放入单例池中,而是在第一次获取Bean时生成的,具体如下两张图所示
XmlBeanDefinitionReader
XmlBeanDefinitionReader的作用和AnnotatedBeanDefinition的相似,只是AnnotatedBeanDefinitionReader主要是解析类的,而XmlBeanDefinitionReader主要是解析XML文件的。我们知道,当使用Spring的XML文件配置Bean可以配置标签上较多的属性,这些都由XmlBeanDefinitionReader来解析
其使用方法和AnnotatedBeanDefinition类似
<?xml version="1.0" encoding="UTF-8"?>
<beans xmlns="http://www.springframework.org/schema/beans"
	   xmlns:xsi="http://www.w3.org/2001/XMLSchema-instance"
	   xsi:schemaLocation="http://www.springframework.org/schema/beans
        https://www.springframework.org/schema/beans/spring-beans.xsd">

	<bean id="order" class="com.ww.Order" init-method="initOrder"/>

</beans>
public static void main(String[] args) {
    AnnotationConfigApplicationContext context = new AnnotationConfigApplicationContext();
    context.refresh();
    XmlBeanDefinitionReader xmlReader = new XmlBeanDefinitionReader(context);
    xmlReader.loadBeanDefinitions("spring.xml");
    System.out.println(context.getBean("order"));
    System.out.println(context.getBean("order"));
    System.out.println(context.getBean("order"));
}

public class Order {
	public void print() {
		System.out.println("order print");
	}
	public void initOrder(){
		System.out.println("order init ...");
	}
}

ClassPathBeanDefinitionScanner
ClassPathBeanDefinitionScanner主要用于在Java类路径中扫描组件类(如带有@Controller、@Service、@Repository、@Component等注解的类),并将其转换为Bean定义,供Spring容器管理,从而实现自动装配和简化配置。
public class Main {
	public static void main(String[] args) {
		AnnotationConfigApplicationContext context = new AnnotationConfigApplicationContext();
		context.refresh();
		ClassPathBeanDefinitionScanner scanner = new ClassPathBeanDefinitionScanner(context);
		scanner.scan("com.ww");
		System.out.println(context.getBean("user"));
		System.out.println(context.getBean("user"));
		System.out.println(context.getBean("order"));
        System.out.println(context.getBean("order"));
	}
}
package com.ww;


import org.springframework.beans.factory.config.BeanDefinition;
import org.springframework.context.annotation.Scope;
import org.springframework.stereotype.Component;

@Component
@Scope(BeanDefinition.SCOPE_PROTOTYPE)
public class User {
	public void print(){
		System.out.println("user print");
	}
}
package com.ww;

import org.springframework.stereotype.Component;

@Component
public class Order {
	public void print() {
		System.out.println("order print");
	}
	public void initOrder(){
		System.out.println("order init ...");
	}
}
自定义注解
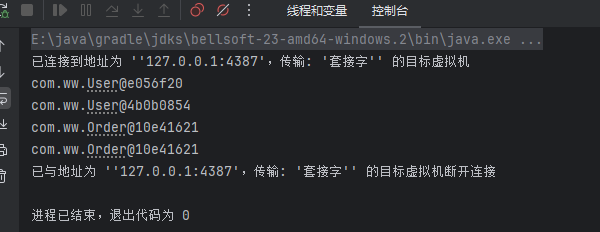
如果想要自己定义的注解可以被scanner扫描到,可以在scanner中添加includeFilter来实现,效果和@Component一致
public static void main(String[] args) {
    AnnotationConfigApplicationContext context = new AnnotationConfigApplicationContext();
    context.refresh();
    ClassPathBeanDefinitionScanner scanner = new ClassPathBeanDefinitionScanner(context);
    scanner.addIncludeFilter((metadataReader, metadataReaderFactory) -> metadataReader.getAnnotationMetadata().hasAnnotation(Ww.class.getName()));

    scanner.scan("com.ww");
    System.out.println(context.getBean("user"));
    System.out.println(context.getBean("user"));
    System.out.println(context.getBean("order"));
    System.out.println(context.getBean("order"));
}
package com.ww;

import java.lang.annotation.ElementType;
import java.lang.annotation.Retention;
import java.lang.annotation.RetentionPolicy;
import java.lang.annotation.Target;

@Target(ElementType.TYPE)
@Retention(RetentionPolicy.RUNTIME)
public @interface Ww {
}
package com.ww;

import org.springframework.stereotype.Component;

@Ww
public class Order {
	public void print() {
		System.out.println("order print");
	}
	public void initOrder(){
		System.out.println("order init ...");
	}
}
BeanDefinition的合并
BeanDefinition还有个属性就是parentName,这里类似java的父子继承一样,当父BeanDefinition中定义了某些属性后,子BeanDefinition就可以继承也可以覆盖父BeanDefinition的相关属性。Spring在生成最终的RootBeanDefinition时,会进行父子合并,确定最终的BeanDefinition。
这里子类BeanDefinition没有设置scope属性为prototype,但从Spring获取Bean时候还是多例的;而且也没有设置子BeanDefinition的class也就是Bean对象,但仍然可以在Spring中获取到子BeanDefinition生成的Bean。这里就是子BeanDefinition的继承属性。
public static void main(String[] args) {
    AnnotationConfigApplicationContext context = new AnnotationConfigApplicationContext();
    context.refresh();
    AnnotatedGenericBeanDefinition parentBd = new AnnotatedGenericBeanDefinition(User.class);
    parentBd.setScope(BeanDefinition.SCOPE_PROTOTYPE);
    context.registerBeanDefinition("parentUser", parentBd);

    ChildBeanDefinition childBd = new ChildBeanDefinition("parentUser");
    context.registerBeanDefinition("childUser", childBd);

    System.out.println(context.getBean("childUser"));
    System.out.println(context.getBean("childUser"));
    System.out.println(context.getBean("childUser"));
}
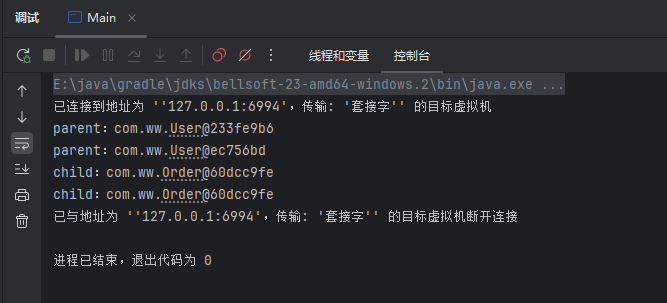
当我在子BeanDefinition中设置了class属性和scope属性后。在Spring中获取Bean的时候,就使用的是子BeanDefiniton的配置属性,而不是父BeanDefinition中配置的属性
public static void main(String[] args) {
    AnnotationConfigApplicationContext context = new AnnotationConfigApplicationContext();
    context.refresh();
    AnnotatedGenericBeanDefinition parentBd = new AnnotatedGenericBeanDefinition(User.class);
    parentBd.setScope(BeanDefinition.SCOPE_PROTOTYPE);
    context.registerBeanDefinition("parent", parentBd);

    ChildBeanDefinition childBd = new ChildBeanDefinition("parent");
    childBd.setBeanClass(Order.class);
    childBd.setScope(BeanDefinition.SCOPE_SINGLETON);
    context.registerBeanDefinition("child", childBd);

    System.out.println("parent:"+context.getBean("parent"));
    System.out.println("parent:"+context.getBean("parent"));
    System.out.println("child:"+context.getBean("child"));
    System.out.println("child:"+context.getBean("child"));

}
BeanFactory和ApplicationContext
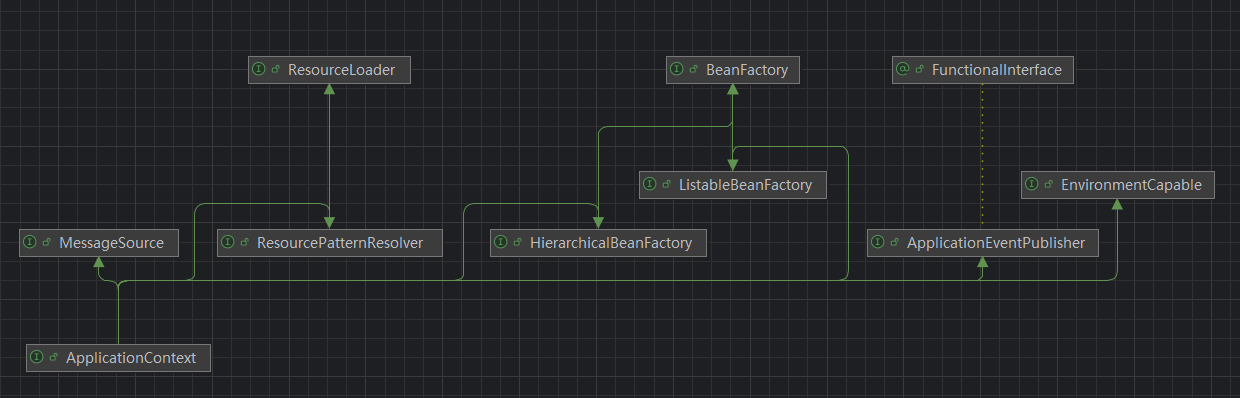
BeanFactory就是Bean的工厂,主要作用是用于创建和获取Bean的,而根据关系图可以看到,ApplicationContext继承于BeanFactory,因此ApplicationContext不但具备了BeanFactory的功能,同时因为也继承了其他如MessageSource、ResourceLoader``ApplicationEventPublishe``EnvironmentCapable等接口,使得ApplicationContext具备了国际化、资源加载、事件发布、获取环境变量等功能。
在Spring中,一个重要的的BeanFactory实现类就是DefaultListableBeanFactory在AnnotationConfigApplicationContext的父类GenericApplicationContext中的beanFactory属性,就是DefaultListableBeanFactory类。
国际化
Spring支持国际化,使得对不同国家可以展示不同的语言
- 在resource目录下添加i18n文件夹
- 在i18n文件夹右键>新建>资源包
- 选择需要国际化的语言
- 然后通过
@Bean的方法,创建一个MessageResource对象,其中baseName是国际化的配置文件的前缀名称 - 代码中通过
context.getMessage()来获取对应配置文件中的国际化字段,也可以使用依赖注入获取MessageResource来使用
package com.ww;

import org.springframework.context.MessageSource;
import org.springframework.context.annotation.Bean;
import org.springframework.context.annotation.ComponentScan;
import org.springframework.context.support.ResourceBundleMessageSource;

@ComponentScan("com.ww")
public class AppConfig {
	@Bean
	public MessageSource messageSource(){
		ResourceBundleMessageSource messageSource = new ResourceBundleMessageSource();
		messageSource.setBasename("i18n/messages");
		messageSource.setDefaultEncoding("UTF-8");
		return messageSource;
	}
}
public static void main(String[] args) {
    AnnotationConfigApplicationContext context = new AnnotationConfigApplicationContext(AppConfig.class);
    String message = context.getMessage("message", null, Locale.CHINA);
    System.out.println(message);
}
@Component
public class User {
	@Autowired
	private MessageSource messageSource;

	public void print(){
		System.out.println(messageSource.getMessage("name", null, Locale.ENGLISH));
	}
}
资源加载
因为ApplicationContext实现了ResourceLoader接口,因此ApplicationContext也可以用于加载本地资源或远程资源。Spring会将请求到的数据统一封装为Resource对象。
比如加载本地资源
public static void main(String[] args) throws IOException {
    AnnotationConfigApplicationContext context = new AnnotationConfigApplicationContext(AppConfig.class);
    Resource resource = context.getResource("file:E:\\java\\workspace\\spring-framework\\spring-ww\\src\\main\\resources\\spring.xml");
    System.out.println(resource.getFilename());
    System.out.println(resource.contentLength());
}
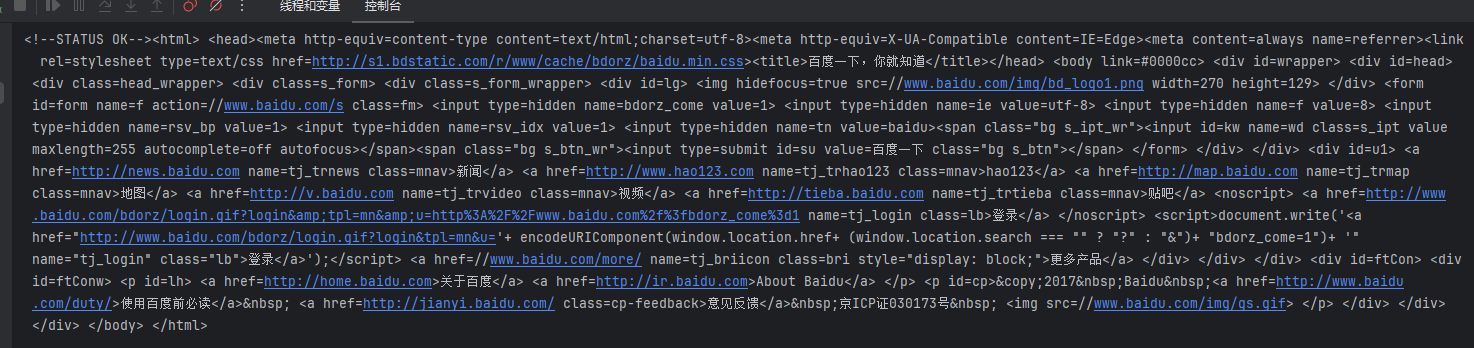
也可以通过http加载远程资源
public static void main(String[] args) throws IOException {
    AnnotationConfigApplicationContext context = new AnnotationConfigApplicationContext(AppConfig.class);
    Resource resource = context.getResource("http://www.baidu.com");
    System.out.println(resource.getContentAsString(StandardCharsets.UTF_8));
}
获取环境变量
在程序运行当中,如果我们需要获取环境变量,则可以使用Spring的ApplicationContext来进行获取,ApplicationContext可以获取包括JVM变量``系统变量``项目配置文件等信息。
如果需要获取项目的配置文件信息,需要在配置类上添加@PropertySource("classpath:*.properties")注解,括号内配置需要加载项目的配置文件路径
- 使用ApplicationContext.getEnvironment().getSystemEnvironment()来获取系统环境变量
- 使用ApplicationContext.getEnvironment().getSystemProperties()来获取JVM运行时变量
- 使用ApplicationContext.getEnvironment().getPropertySources()来获取项目的配置文件
- 依赖注入使用
@Value("${propertie.name}")获取配置文件配置
public static void main(String[] args) throws IOException {
    AnnotationConfigApplicationContext context = new AnnotationConfigApplicationContext(AppConfig.class);
    System.out.println(context.getEnvironment().getSystemProperties());
    System.out.println("==================");
    System.out.println(context.getEnvironment().getSystemEnvironment());
    System.out.println("==================");
    System.out.println(context.getEnvironment().getPropertySources());
    context.getBean(User.class).print();

}
application.name=Spring-WW
@ComponentScan("com.ww")
@PropertySource("classpath:spring.properties")
public class AppConfig {
	@Bean
	public MessageSource messageSource(){
		ResourceBundleMessageSource messageSource = new ResourceBundleMessageSource();
		messageSource.setBasename("i18n/messages");
		messageSource.setDefaultEncoding("UTF-8");
		return messageSource;
	}
}
@Component
public class User {
	@Autowired
	private MessageSource messageSource;

	@Value("${application.name}")
	private String name;

	public void print(){
		System.out.println(name);
	}
}
事件发布
ApplicationContext还可以发布事件。事件监听器通过监听事件可以获得发布的事件。
Spring在启动过程中也会发布一些事件,如ContextStartedEvent``ContextRefreshedEvent``ContextStoppedEvent``ContextClosedEvent等事件。其中有些事件需要配置到
public static void main(String[] args) throws IOException {
    AnnotationConfigApplicationContext context = new AnnotationConfigApplicationContext(AppConfig.class);

    context.publishEvent("hello listener");
    context.close();
}
@Bean
public ApplicationListener<PayloadApplicationEvent<String>> applicationListener(){
    return new ApplicationListener<>() {
        @Override
        public void onApplicationEvent(PayloadApplicationEvent<String> event) {
            System.out.println("接收事件" + event.getPayload());
        }
    };
}
@Component
public class ApplicationCloseListener implements ApplicationListener<ContextClosedEvent> {
	@Override
	public void onApplicationEvent(ContextClosedEvent event) {
		System.out.println("接收到容器关闭事件:"+event);
	}
}
类型转化
SpringBoot中有较多的类型转化,比如
- HTTP参数到Java类型:在Controller中,通过
@RequestParam、@PathVariable或表单绑定(@ModelAttribute)接收到的请求参数通常是字符串形式。Spring自动将其转换为目标类型(如int、date、自定义对象等),无需手动解析。 - 表单字符串到对象属性:前端提交的表单数据(如
<input name="age" value="25">)会自动绑定到后端对象的属性(如Integer age),也支持复杂类型(如日期格式转换)。 - 外部配置到Java类型:在
application.properties或application.yml中配置的属性(如server.port=8080)通过@Value或@ConfigurationProperties注入时,Spring会将字符串值转换为目标类型(如int、boolean或自定义类型)。 - 动态类型计算:在Spring表达式语言(SpEL)中,类型转换确保表达式中的值能正确匹配目标类型,例如
@Value("#{systemProperties['port']}")可以将属性值转换为整数。
PropertyEditor
PropertyEditor是JDK自带的类型转化工具,可将String转为对应的数据类型。
比如将String字符串设置到User类中的name并返回User对象
import java.beans.PropertyEditorSupport;

public class StringToUserPropertyEditor extends PropertyEditorSupport {

	@Override
	public void setAsText(String text) throws IllegalArgumentException {
		User user = new User();
		user.setName(text);
		this.setValue(user);
	}
}
在Spring中,需要新增一个CustomEditorConfigurer类行的Bean
@Bean
public CustomEditorConfigurer customEditorConfigurer(){
    Map<Class<?>, Class<? extends PropertyEditor>> customerConfigs = new HashMap<>();
    customerConfigs.put(User.class, StringToUserPropertyEditor.class);

    CustomEditorConfigurer customEditorConfigurer = new CustomEditorConfigurer();
    customEditorConfigurer.setCustomEditors(customerConfigs);

    return customEditorConfigurer;
}
@Component
public class User {


	private String name;

	public String getName() {
		return name;
	}

	public void setName(String name) {
		this.name = name;
	}

	public void print(){
		System.out.println(name);
	}
}
@Component
public class Order {

	@Value("李四")
	private User user;

	public void print() {
		System.out.println(user.getName());
	}
}
public class Main {
	public static void main(String[] args) throws IOException {
		AnnotationConfigApplicationContext context = new AnnotationConfigApplicationContext(AppConfig.class);

		context.getBean(Order.class).print();
		context.stop();
		context.close();
	}
}
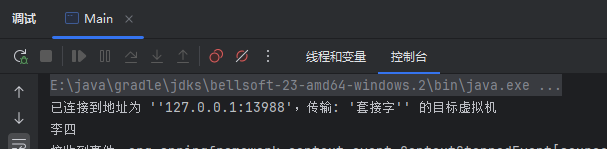
这样,当获取到Ordr后,执行print方法后,打印出来的就是User中的name属性
ConversionService
JDK中的类型转换,只能将String转成其他类型,而Spring中的ConversionService则可以将对象转为对象,也可以自己定义转换规则。
- 首先自定义转换类实现
ConditionalGenericConverter接口,它可以根据源和目标TypeDescriptor的特性有条件地执行。 - 需要实现
ConditionalGenericConverter接口中的matches``getConvertibleTypes``convert三个方法- matches方法:需要实现是否要将sourceType类型转为targetType类型,如果是,则返回true来让Spring使用这个转换器进行转换
- getConvertibleTypes方法:返回此转换器可在sourceType和targetType之间转换目标类型集合。集合中的每个元素都是可转换的源到目标类型对
- convert方法:用于类型转换的方法,可由自己实现。返回转换后的类
- 将自定义的转换器注册到Spring;bean的名字需要是conversionService。
@Component
public class StringToUserConverter implements ConditionalGenericConverter {

	@Override
	public boolean matches(TypeDescriptor sourceType, TypeDescriptor targetType) {
		return sourceType.getType().equals(String.class) && targetType.getType().equals(User.class);
	}

	@Override
	public @Nullable Set<ConvertiblePair> getConvertibleTypes() {
		ConvertiblePair convertiblePair = new ConvertiblePair(String.class, User.class);
		return Set.of(convertiblePair);
	}
	@Override
	public @Nullable Object convert(@Nullable Object source, TypeDescriptor sourceType, TypeDescriptor targetType) {
		String s = (String) source;
		User user = new User();
		user.setName(s);
		return user;
	}
}
@Bean
public ConversionServiceFactoryBean conversionService(){
    ConversionServiceFactoryBean conversionServiceFactoryBean = new ConversionServiceFactoryBean();
    conversionServiceFactoryBean.setConverters(Collections.singleton(new StringToUserConverter()));
    return conversionServiceFactoryBean;
}
TypeConverter
TypeConverter整合了PropertyEditor和ConversionService。Spring中使用的就是TypeConverter来处理类型转换的
public static void main(String[] args){
// 设置conversionService
DefaultConversionService defaultConversionService = new DefaultConversionService();
defaultConversionService.addConverter(new StringToUserConverter());
//设置TypeConverter
SimpleTypeConverter typeConverter = new SimpleTypeConverter();
typeConverter.setConversionService(defaultConversionService);
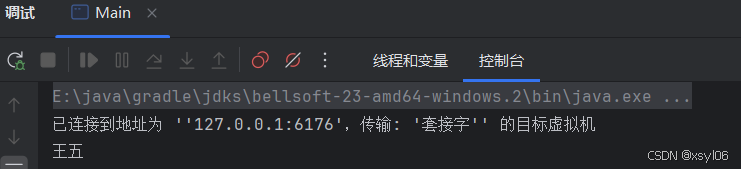
User user = typeConverter.convertIfNecessary("王五", User.class);
user.print();
}
Order比较器
在Spring中,Bean可以实现Ordered接口中的getOrder()方法来进行Bean的排序。使用Ordr排序的一个典型的场景就是在Spring-Cloud-Gateway中的过滤器链,当你需要将自定义的过滤器定义到某个默认过滤器的前面时,就可以实现该接口并返回一个较小值。
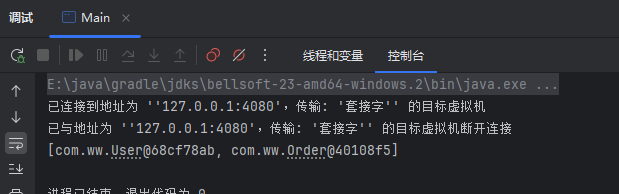
下面的例子中,当User类和Order类都实现了getOrder()方法,并返回不同的int值。就可以使用OrderComparator来进行排序。
可以看到,虽然list中先将order加入,后将user加入,但排序后,按照getOrder()方法的返回值,list进行了升序排列
@Component
public class User implements Ordered {


	private String name;

	public String getName() {
		return name;
	}

	public void setName(String name) {
		this.name = name;
	}

	public void print(){
		System.out.println(name);
	}

	@Override
	public int getOrder() {
		return 2;
	}
}
@Component
public class Order implements Ordered {

	@Value("李四")
	private User user;

	public void print() {
		System.out.println(user.getName());
	}

	@Override
	public int getOrder() {
		return 10;
	}
}
public class Main {
	public static void main(String[] args) throws IOException {
		ArrayList<Object> list = new ArrayList<>();
		list.add(new Order());
		list.add(new User());

		list.sort(new OrderComparator());
		System.out.println(list);
	}
}
OrderComparator
刚刚的例子,是使用了Spring中的OrderComparator来进行排序的,这里可以看下OrderComparator#doCompare()方法
在该方法中:
- 先判断是否是实现了
PriorityOrdered接口的类,如果是,则顺序在实现了Ordered或者没有实现任何Ordered接口的类前面 - 分别获取实现类中
getOrder()方法中返回的值,如果没有实现接口,则默认返回Integer.MAX_VALUE(2147483647)这个值 - 返回两个值的比较
以下是OrderComparator中的部分源码注释
private int doCompare(@Nullable Object o1, @Nullable Object o2, @Nullable OrderSourceProvider sourceProvider) {
    // 判断是否是PriorityOrdered实现类
    // PriorityOrdered接口继承了Ordered接口,两个是一回事
    // 但根据下面代码可以看到,实现了PriorityOrdered接口的类,可以优先排序,其顺序在实现了Ordered接口的类前面
    boolean p1 = (o1 instanceof PriorityOrdered);
    boolean p2 = (o2 instanceof PriorityOrdered);
    if (p1 && !p2) {
        return -1;
    }
    else if (p2 && !p1) {
        return 1;
    }
    // 获取两个对象的优先级,如果优先级相同,则按照顺序排序
    int i1 = getOrder(o1, sourceProvider);
    int i2 = getOrder(o2, sourceProvider);
    return Integer.compare(i1, i2);
}
private int getOrder(@Nullable Object obj, @Nullable OrderSourceProvider sourceProvider) {
    Integer order = null;
    // 这里sourceProvider普通使用时一般为null
    if (obj != null && sourceProvider != null) {
        // 获取orderSource
        Object orderSource = sourceProvider.getOrderSource(obj);
        if (orderSource != null) {
            // 判断orderSource是否是数组
            if (orderSource.getClass().isArray()) {
                //将orderSource转换为数组然后循环遍历
                for (Object source : ObjectUtils.toObjectArray(orderSource)) {
                    // 这里如果source实现了Ordered接口,会返回Ordered#getOrder()方法的返回值
                    order = findOrder(source);
                    if (order != null) {
                        // 找到一个就跳出
                        break;
                    }
                }
            }
            else {
                // 不是数组,则直接找
                order = findOrder(orderSource);
            }
        }
    }
    // 这里order 不为空,则返回order,否则返回Ordered#getOrder()方法的返回值,如果obj没有实现Ordered接口,则返回Integer.MAX_VALUE
    return (order != null ? order : getOrder(obj));
}
protected int getOrder(@Nullable Object obj) {
    if (obj != null) {
        // obj 不为空,通过findOrder来获取值
        Integer order = findOrder(obj);
        if (order != null) {
            return order;
        }
    }
    // 否则返回 Integer.MAX_VALUE
    return Ordered.LOWEST_PRECEDENCE;
}
protected @Nullable Integer findOrder(Object obj) {
    // 判断obj是否是Ordered接口,如果是,利用JDK17语法糖进行强转后,执行接口的getOrder()方法
    //不是返回null,让上层返回Integer.MAX_VALUE
    return (obj instanceof Ordered ordered ? ordered.getOrder() : null);
}
AnnotationAwareOrderComparator
在Spring中,可以通过@Order注解来进行排序,主要完成这个功能的类就是AnnotationAwareOrderComparator
这个类继承了OrderComparator类并重写了findOrder(Object obj)方法,这个类兼容原有的实现接口方法排序。从源码中也可以看出,如果同时实现了接口和存在@Order注解。在AnnotationAwareOrderComparator处理时,以接口优先,因为会先调用父类OrderComparator#findOrder(Object obj)方法
@Override
protected @Nullable Integer findOrder(Object obj) {
    // 调用父类的findOrder方法
    // 也就是说,如果即实现了接口,在类上又有注解,则以接口的为准
    Integer order = super.findOrder(obj);
    if (order != null) {
        return order;
    }
    // 返回的null表示类没有实现Ordered接口
    return findOrderFromAnnotation(obj);
}
private @Nullable Integer findOrderFromAnnotation(Object obj) {
    // 确定要扫描的注解元素,如果入参是AnnotatedElement类型的,强转后直接使用
    // 不是则用对象的class类
    AnnotatedElement element = (obj instanceof AnnotatedElement ae ? ae : obj.getClass());
    // 使用类型继承策略收集所有合并注解(包含父类/接口的注解)
    MergedAnnotations annotations = MergedAnnotations.from(element, SearchStrategy.TYPE_HIERARCHY);
    // 从注解集合中解析order值
    Integer order = OrderUtils.getOrderFromAnnotations(element, annotations);
    if (order == null && obj instanceof DecoratingProxy decoratingProxy) {
        // order的值为null,同时传入的类是Spring中的DecoratingProxy代理类,则继续将代理类中的目标对象处理
        return findOrderFromAnnotation(decoratingProxy.getDecoratedClass());
    }
    return order;
}


 1098
1098

 被折叠的 条评论
为什么被折叠?
被折叠的 条评论
为什么被折叠?
 到【灌水乐园】发言


