


Kivy tutorial 002: Improving appearance, customising widgets using Kivy Properties – Kivy Blog
Central themes: Modifying Widget appearance, Kivy properties
中心主题: 修改组件外观, kivy属性
It’s great to say Hello World, but it looks pretty boring, and you’d expect that you’d be able to customise the appearance of text. Fortunately, you’d be right…so let’s do it.
说 Hello World 真是太好了, 但是它看起来有点无聊, 并且 以希望你能够自定text的外观。幸运的是,你是对的....因此让我们来干他。
We’ll continue modifying the code from last time, which was:
我们将继续修改上次的代码, 上次的代码是:
from kivy.app import App
from kivy.uix.label import Label

class YourApp(App):
    def build(self):
    root_widget = Label(text='Hello world!')
    return root_widget

YourApp().run()
The basic way to modify things in Kivy is to change Kivy properties of the widgets. As far as we’re concerned right now, we can set these by passing arguments at instantiation, or by treating them as attributes of the class. For instance, we could also have set the text as follows:
在Kivy中修改东西的最基础的方式是改变组件的kivy属性。 就我们现在考虑的而言,我们可以设置这些通过传递变量给实例, 或者通过把它们当作类的属性来对待。 举例,我们也可以像下面这样设置text:
root_widget = Label()
root_widget.text = 'Hello world!'
Let’s set ourselves three goals: 让我们设置我们3个目标:
- Make the text larger 让text更大
- Italicise the text 倾斜text
- Colour "Hello" and "world!" differently 让Hello 和World 不同颜色
To customise the Label appearance, we must check the documentation to find an appropriate Kivy property. For the text size, check the Label doc and find the font_size listing. It looks something like the following:
为了自定义标签外观,我们必须检查文档来找到一个合适的Kivy属性。 对于text的大小,检查Label文档,并且发现font_size 在列表中。 它看起来像下面这样:
Following the documentation, this lets us set the font size in pixels, and it defaults to '15sp'. This is a special Kivy syntax, the sp units automatically scale the font size according to the DPI of the display and the user’s font size setting (on some platforms); on desktop on a non-hidpi display, it is just 15 pixels. For now let’s just set a simple pixel number:
在下面的文档中,这让我们以pixels为单位设置 字体的大小,并且它默认是 '15sp'。 这是一个特别的kivy语法, sp单位根据 展示和用户设置的字体大小的 DPI自动地缩放字体的size大小。在桌面在一个没有dpi展示的,他就是15pixels像素。 从现在开始让我们只是设置一个简单地pixel像素数字:
root_widget = Label(
    text='Hello world!',
    font_size=100)
You can run the code now to see the result. 现在你可以运行代码来看看结果。
To make the text italic, the procedure is the same. Check the Label doc and find the italic property entry. you’ll see that this is a BooleanProperty that defaults to False; just set it to True to enable the underline:
为了使text斜体,步骤是一样的。检查Label文档,找到 italic属性入口。你将看到这是一个BooleanProperty,这类型默认是False;就把它设为True来激活:
root_widget = Label(
    text='Hello world!',
    font_size=100,
    italic=True)
Finally, we want to colour Hello and world! differently. Things are a little different here as we can’t use a single property setting to modify the whole string, since the two words should be treated differently.
最终,我们想要给Hello 和World上色儿!不同的! 这不大一样因为我们不能使用一个单一的属性来设置修改整个字符串,因此2个单词应该被不容对待。
Instead we enable the markup property:
作为替代我们激活markup property:
root_widget = Label(
    text='Hello world!',
    font_size=100,
    underline=True,
    markup=True)
You can now use Kivy’s markup syntax to modify the text within the Label. Try the following:
现在你可以使用kivy的Markup 语法来修改文本在标签内。 像下面这样尝试:
root_widget = Label(
font_size=100,
italic=True,
markup=True)
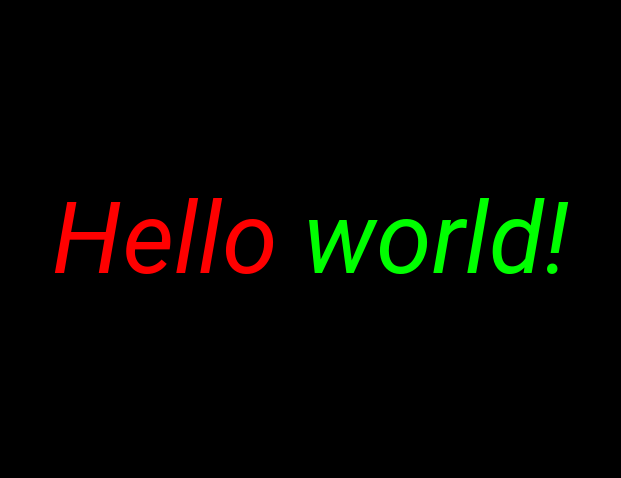
root_widget.text = '[color=#ff0000]Hello[/color] [color=#00ff00]world![/color]'Now run the application again, python your_filename.py. The result should now look something like the following image.
现在再次运行程序, 现在结果应该看起来像下面这样.
Note
This is just a basic introduction to customising Kivy widgets, you can use similar methods to accomplish many different changes in many different scenarios. Kivy properties also have other important functionality, covered later in these tutorials.
这只是一个简单介绍来自定义kivy组件,你可以使用相同的方法来实现不同的改变在不同的情境。Kivy属性也有其他重要的功能, 在之后的导师课中会被覆盖。
Full code
The full code for this exercise was:
from kivy.app import App
from kivy.uix.label import Label

class YourApp(App):

    def build(self):
        root_widget = Label(
            font_size=100,
            italic=True,
            markup=True)
        root_widget.text = '[color=#ff0000]Hello[/color] [color=#00ff00]world![/color]'
        return root_widget

YourApp().run()


 被折叠的 条评论
为什么被折叠?
被折叠的 条评论
为什么被折叠?
 到【灌水乐园】发言


