


 本文介绍如何使用自定义布局实现带有颜色变化效果的TabLayout组件。通过设置TextView显示文字,并利用View作为下划线来区分选中状态,实现了美观的切换效果。
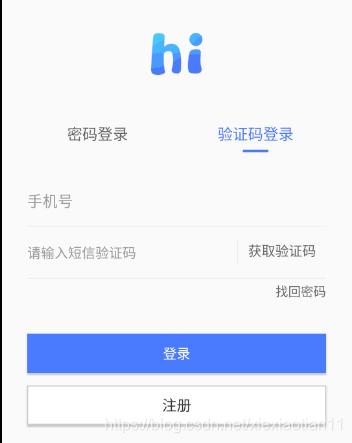
首先我给出效果图
先上代码:
布局文件就很简单的
代码中的添加tabView,设置自定义布局view_tab_item_layout
        tablayout.addTab(tablayout.newTab().setCustomView(R.layout.view_tab_item_layout))
        tablayout.addTab(tablayout.newTab().setCustomView(R.layout.view_tab_item_layout))
        tablayout.getTabAt(0)!!.customView!!.findViewById<TextView>(R.id.tv).text = resources.getString(R.string.password_login)
        tablayout.getTabAt(1)!!.customView!!.findViewById<TextView>(R.id.tv).text=resources.getString(R.string.verification_login)
然后看下这个自定义布局
<?xml version="1.0" encoding="utf-8"?>
<LinearLayout xmlns:android="http://schemas.android.com/apk/res/android"
              android:layout_width="match_parent"
              android:layout_height="match_parent"
              android:gravity="center"
              android:orientation="vertical">
    <TextView android:layout_width="match_parent"
              android:gravity="center"
              android:layout_height="@dimen/dp25"
              android:id="@+id/tv"
              android:textColor="@drawable/selector_tab_item_color1"
              android:textSize="18sp"/>
    <View android:layout_width="30dp"
          android:gravity="center"
          android:layout_marginTop="@dimen/dp6"
          android:layout_height="3dp"
          android:background="@drawable/selector_tab_item_color"/>
</LinearLayout>
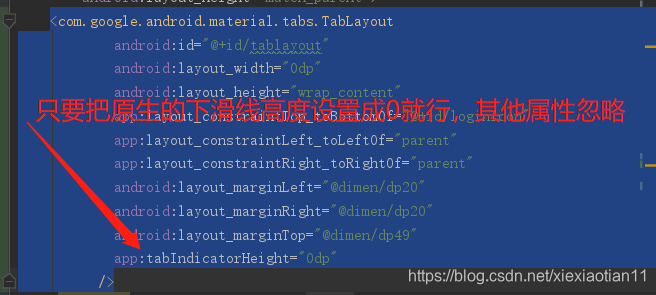
这里关键的就是2个颜色的配置
上面是个TextView,添加文字,下面是自定义的下划线,用的View。
selector_tab_item_color1.xml的代码如下
<?xml version="1.0" encoding="utf-8"?>
<selector xmlns:android="http://schemas.android.com/apk/res/android">
    <item
            android:state_selected="true"
            android:color="@color/color_4b7bfe"/>

    <item
            android:color="@color/color_666666"
    android:state_selected="false"/>
</selector>
selector_tab_item_color.xml 的代码如下
<?xml version="1.0" encoding="utf-8"?>
<selector xmlns:android="http://schemas.android.com/apk/res/android">
    <item
            android:state_selected="true"
            android:drawable="@drawable/shape_4b7bfe"/>

    <item
            android:drawable="@drawable/shape_transparent"
    android:state_selected="false"/>
</selector>
shape_transparent.xml.xml代码如下
<?xml version="1.0" encoding="utf-8"?>
<shape xmlns:android="http://schemas.android.com/apk/res/android">
    <solid android:color="@color/alpha_00"/>
</shape>
shape_4b7bfe.xml的代码如下:
<?xml version="1.0" encoding="utf-8"?>
<shape xmlns:android="http://schemas.android.com/apk/res/android">
    <solid android:color="@color/color_4b7bfe"/>
</shape>
颜色配置如下:
 <color name="color_4b7bfe">#4b7bfe</color><!-- app主色调 -->
 <color name="color_666666">#666666</color>  灰色
 <color name="alpha_00">#00000000</color> 透明色
为什么View的背景色selector 不用color 而用drawable,因为直接给View的背景设置 color会报找不到资源的错误,具体原因没找到,搜到一篇相关的文章https://blog.youkuaiyun.com/weixin_33701617/article/details/85830217
搞定!
喜欢的话点赞!


 903
903

 被折叠的 条评论
为什么被折叠?
被折叠的 条评论
为什么被折叠?
 到【灌水乐园】发言


