


 本文详细介绍了如何使用npm初始化项目,安装Webpack及其CLI,并引入Lodash库。通过配置Express和Webpack中间件,实现了一个简单的热更新开发服务器。文章还展示了基本的目录结构和源文件编写方式,以及如何在浏览器中加载由Webpack打包后的bundle.js文件。
1.环境创建和命令
//基本环境
npm init -y
npm install --save-dev webpack
npm install --save-dev webpack-cli
npm install --save lodash
//本课环境
npm install --save-dev express webpack-dev-middleware
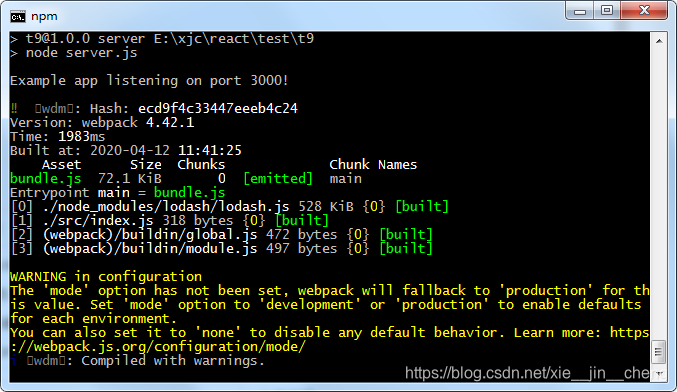
//运行的命令
npm run server
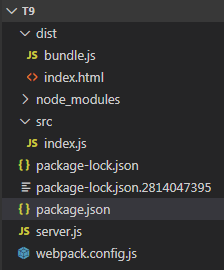
2.目录结构
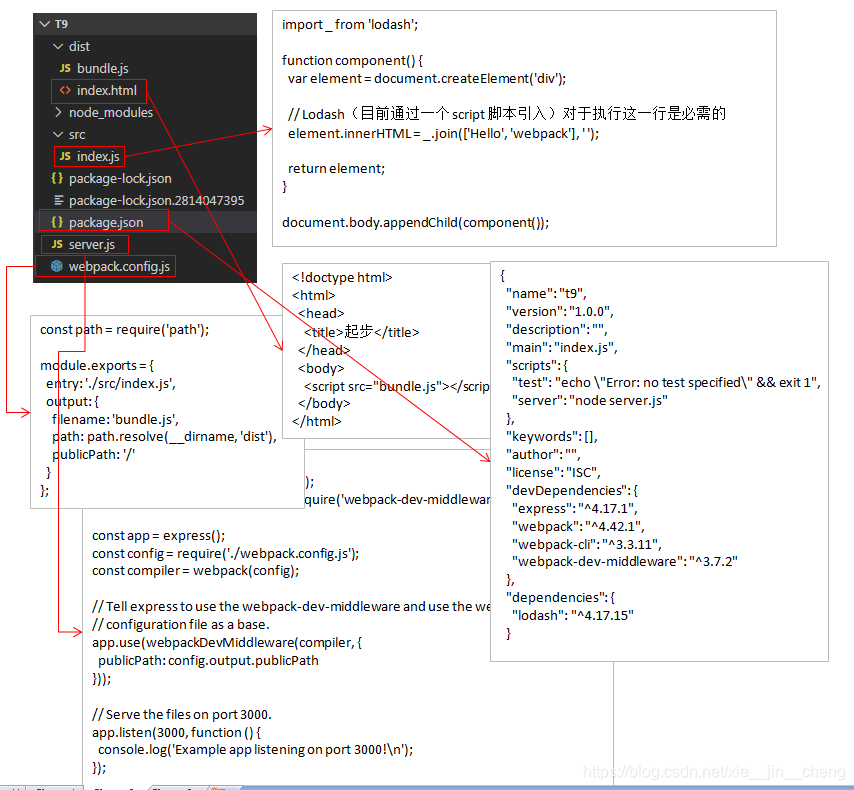
3.源文件
<!doctype html>
<html>
  <head>
    <title>起步</title>
  </head>
  <body>
    <script src="bundle.js"></script>
  </body>
</html>
import _ from 'lodash';

function component() {
  var element = document.createElement('div');

  // Lodash(目前通过一个 script 脚本引入)对于执行这一行是必需的
  element.innerHTML = _.join(['Hello', 'webpack'], ' ');

  return element;
}

document.body.appendChild(component());
{
  "name": "t9",
  "version": "1.0.0",
  "description": "",
  "main": "index.js",
  "scripts": {
    "test": "echo \"Error: no test specified\" && exit 1",
    "server": "node server.js"
  },
  "keywords": [],
  "author": "",
  "license": "ISC",
  "devDependencies": {
    "express": "^4.17.1",
    "webpack": "^4.42.1",
    "webpack-cli": "^3.3.11",
    "webpack-dev-middleware": "^3.7.2"
  },
  "dependencies": {
    "lodash": "^4.17.15"
  }
}
const express = require('express');
const webpack = require('webpack');
const webpackDevMiddleware = require('webpack-dev-middleware');

const app = express();
const config = require('./webpack.config.js');
const compiler = webpack(config);

// Tell express to use the webpack-dev-middleware and use the webpack.config.js
// configuration file as a base.
app.use(webpackDevMiddleware(compiler, {
  publicPath: config.output.publicPath
}));

// Serve the files on port 3000.
app.listen(3000, function () {
  console.log('Example app listening on port 3000!\n');
});
const path = require('path');

module.exports = {
  entry: './src/index.js',
  output: {
    filename: 'bundle.js',
    path: path.resolve(__dirname, 'dist'),
    publicPath: '/'
  }
};
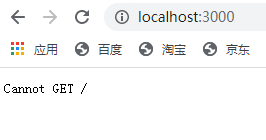
4 运行效果
5.代码分析


 3189
3189

 被折叠的 条评论
为什么被折叠?
被折叠的 条评论
为什么被折叠?
 到【灌水乐园】发言


