


 本文介绍HAProxy的安装、配置及应用,展示如何通过HAProxy实现高可用性和负载均衡,特别适合于处理大规模Web流量的场景。
HAProxy简介
HAProxy是一个使用C语言编写的自由及开放源代码软件,其提供高可用性、负载均衡,以及基于TCP和HTTP的应用程序代理。
HAProxy特别适用于那些负载特大的web站点,这些站点通常又需要会话保持或七层处理。HAProxy运行在当前的硬件上,完全可以支持数以万计的并发连接。并且它的运行模式使得它可以很简单安全的整合进您当前的架构中, 同时可以保护你的web服务器不被暴露到网络上。
HAProxy实现了一种事件驱动, 单一进程模型,此模型支持非常大的并发连接数。多进程或多线程模型受内存限制 、系统调度器限制以及无处不在的锁限制,很少能处理数千并发连接。事件驱动模型因为在有更好的资源和时间管理的用户空间(User-Space) 实现所有这些任务,所以没有这些问题。此模型的弊端是,在多核系统上,这些程序通常扩展性较差。这就是为什么他们必须进行优化以 使每个CPU时间片(Cycle)做更多的工作。
包括 GitHub、Bitbucket、Stack Overflow[4]、Reddit、Tumblr、Twitter和 Tuenti在内的知名网站,及亚马逊网络服务系统都使用了HAProxy。
HAProxy配置文件解析:
根据功能、用途不同,其配置文件主要由5部分组成,分别为global部分,defautls部分,frontend部分、backend部分、listen部分
global:用于设置全局配置参数,属于进程级的配置,通常用操作系统配置相关
proxles 代理配置段,如下:
–defaults ::默认参数的配置部分。这些部分设置的参数,默认会自动引用到下面的frontend, backend和listen部分
–frontend :用于设置接收用户请求的前端虚拟节点。frontend可以根据ACL规则直接指定要使用的后端backend
–backend:用于设置集群后端服务集群的配置,也就是用来添加一组真实服务器,以处理前端用户的请求
–listen :此部分是frontend和backend部分的结合体,它既是前端(frontend)又是后端(backend),它们是一对一的关系
实验环境:
| HAproxy | 192.168.147.131 |
|---|---|
| Web1 | 192.168.147.132 |
| Web2 | 192.168.147.133 |
一、安装HAproxy
这是使用yum方式安装。
查看HAproxy版本信息
[root@centos7 ~]# yum info haproxy
Loaded plugins: fastestmirror
Repodata is over 2 weeks old. Install yum-cron? Or run: yum makecache fast
Determining fastest mirrors
Available Packages
Name        : haproxy
Arch        : x86_64
Version     : 1.5.18
Release     : 6.el7
Size        : 834 k
Repo        : base
Summary     : TCP/HTTP proxy and load balancer for high availability environments
URL         : http://www.haproxy.org/
License     : GPLv2+
Description : HAProxy is a TCP/HTTP reverse proxy which is particularly suited for high
            : availability environments. Indeed, it can:
            :  - route HTTP requests depending on statically assigned cookies
            :  - spread load among several servers while assuring server persistence
            :    through the use of HTTP cookies
            :  - switch to backup servers in the event a main server fails
            :  - accept connections to special ports dedicated to service monitoring
            :  - stop accepting connections without breaking existing ones
            :  - add, modify, and delete HTTP headers in both directions
            :  - block requests matching particular patterns
            :  - report detailed status to authenticated users from a URI
            :    intercepted by the application
安装
[root@centos7 ~]# yum install -y haproxy
二、配置HAproxy
查看HAproxy的相关文件。
[root@centos7 ~]# rpm -ql haproxy
/etc/haproxy
/etc/haproxy/haproxy.cfg
/etc/logrotate.d/haproxy
/etc/sysconfig/haproxy
/usr/bin/halog
/usr/bin/iprange
/usr/lib/systemd/system/haproxy.service
/usr/sbin/haproxy
/usr/sbin/haproxy-systemd-wrapper
/usr/share/doc/haproxy-1.5.18
/usr/share/doc/haproxy-1.5.18/CHANGELOG
/usr/share/doc/haproxy-1.5.18/LICENSE
/usr/share/doc/haproxy-1.5.18/README
/usr/share/doc/haproxy-1.5.18/ROADMAP
/usr/share/doc/haproxy-1.5.18/VERSION
/usr/share/doc/haproxy-1.5.18/acl.fig
/usr/share/doc/haproxy-1.5.18/architecture.txt
/usr/share/doc/haproxy-1.5.18/close-options.txt
/usr/share/doc/haproxy-1.5.18/coding-style.txt
/usr/share/doc/haproxy-1.5.18/configuration.txt
/usr/share/doc/haproxy-1.5.18/cookie-options.txt
/usr/share/doc/haproxy-1.5.18/design-thoughts
...
主程序:/usr/sbin/haproxy
主配置文件:/etc/haproxy/haproxy.cfg
Unit file:/usr/lib/systemd/system/haproxy.service
1、配置反向代理
编辑/etc/haproxy/haproxy.cfg
[root@centos7 haproxy]# vim /etc/haproxy/haproxy.cfg

    maxconn     4000        ##最大并发连接数
    user        haproxy
    group       haproxy
    daemon                  ##运行为守护进程

    # turn on stats unix socket
    stats socket /var/lib/haproxy/stats

#---------------------------------------------------------------------
# common defaults that all the 'listen' and 'backend' sections will
# use if not designated in their block
#---------------------------------------------------------------------
defaults
    mode                    http   ##默认实验http代理,即7层代理模式
    log                     global
    option                  httplog
    option                  dontlognull
    option http-server-close
    option forwardfor       except 127.0.0.0/8
    option                  redispatch
    retries                 3
    timeout http-request    10s
    timeout queue           1m
    timeout connect         10s
    timeout client          1m
    timeout server          1m
    timeout http-keep-alive 10s
    timeout check           10s
    maxconn                 3000

#---------------------------------------------------------------------
# main frontend which proxys to the backends
#---------------------------------------------------------------------
frontend  eshop *:80
    default_backend             websrvs

#---------------------------------------------------------------------
# static backend for serving up images, stylesheets and such
#---------------------------------------------------------------------
backend websrvs
    balance     roundrobin
    server      web1 192.168.147.132:80 check
    server      web2 192.168.147.133:80 check
配置后端web服务
web1主机:
[root@centos7 html]# yum install httpd
[root@centos7 html]# pwd
/var/www/html
[root@centos7 html]# vim index.html
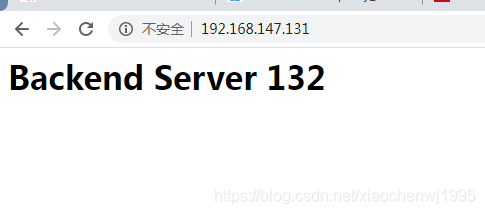
<h1>Backend Server 132<h1>
[root@centos7 html]# systemctl start httpd
web2主机:
[root@centos7 html]# yum install httpd
[root@centos7 html]# pwd
/var/www/html
[root@centos7 html]# vim index.html
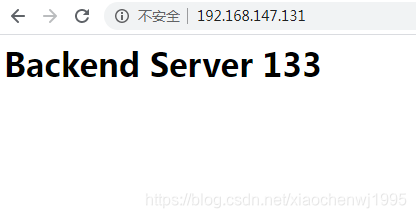
<h1>Backend Server 133<h1>
[root@centos7 html]# systemctl start httpd
启动HAproxy服务,因为frontend中定义了是启动80端口,因此服务启动时会开启80端口。
[root@centos7 haproxy]# systemctl start haproxy
[root@centos7 haproxy]# ss -ntl| grep 80
LISTEN     0      128          *:80                       *:*
LISTEN     0      80          :::3306                    :::*
访问测试
使用curl命令进行测试。
for i in {1…50}; do curl 192.168.147.131 ;done
[root@centos7 haproxy]# for i in {1..50}; do curl 192.168.147.131 ;done
<h1>Backend Server 132<h1>
<h1>Backend Server 133<h1>
<h1>Backend Server 132<h1>
<h1>Backend Server 133<h1>
<h1>Backend Server 132<h1>
<h1>Backend Server 133<h1>
<h1>Backend Server 132<h1>
<h1>Backend Server 133<h1>
<h1>Backend Server 132<h1>
<h1>Backend Server 133<h1>
<h1>Backend Server 132<h1>
<h1>Backend Server 133<h1>
<h1>Backend Server 132<h1>
<h1>Backend Server 133<h1>
<h1>Backend Server 132<h1>
<h1>Backend Server 133<h1>
<h1>Backend Server 132<h1>
<h1>Backend Server 133<h1>
<h1>Backend Server 132<h1>
<h1>Backend Server 133<h1>
<h1>Backend Server 132<h1>
<h1>Backend Server 133<h1>
<h1>Backend Server 132<h1>
<h1>Backend Server 133<h1>
<h1>Backend Server 132<h1>
<h1>Backend Server 133<h1>
...
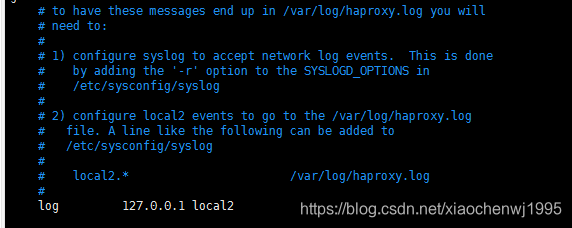
2、配置日志服务
在centos7 系统上日志服务使用的是rsyslog,centos5使用的是syslog。根据HAproxy中的配置文件信息上面写的是syslog日志服务的配置方法。因此这里我们不能完全按照配置文件的提示信息操作。
修改rsyslog的配置文件/etc/rsyslog.conf
[root@centos7 ~]# vim /etc/rsyslog.conf
##把以下两行注释掉,使用udp模式
$ModLoad imudp
$UDPServerRun 514


local7.*                                                /var/log/boot.log
##在local7.* 添加以下这行
local2.*                                                /var/log/haproxy.log
重启rsyslog服务,此时514端口处于监听状态
[root@centos7 ~]# ss -unl
State       Recv-Q Send-Q                                        Local Address:Port                                                       Peer Address:Port
UNCONN      0      0                                                         *:514                                                                   *:*
UNCONN      0      0                                                         *:50917                                                                 *:*
UNCONN      0      0                                                         *:68                                                                    *:*
UNCONN      0      0                                                 127.0.0.1:323                                                                   *:*
UNCONN      0      0                                                        :::514                                                                  :::*
UNCONN      0      0                                                        :::11565                                                                :::*
UNCONN      0      0                                                       ::1:323                                                                  :::*
此时日志已经开始记录。
[root@centos7 ~]# tail -f /var/log/haproxy.log
May  4 13:40:39 localhost haproxy[2384]: Proxy dbserver started.


 1590
1590

 被折叠的 条评论
为什么被折叠?
被折叠的 条评论
为什么被折叠?
 到【灌水乐园】发言


