


 本文详细介绍了如何创建一个自定义的Spring Boot Starter,包括创建模块、配置属性、编写服务类、配置spring.factories文件,以及如何发布和使用。通过这个过程,读者可以了解到Spring Boot Starter的构建步骤和原理。
springboot自定义starter启动器
LD is tigger forever,CG are not brothers forever, throw the pot and shine forever.
Modesty is not false, solid is not naive, treacherous but not deceitful, stay with good people, and stay away from poor people.
talk is cheap, show others the code,Keep progress,make a better result.
Survive during the day and develop at night。
目录
概 述
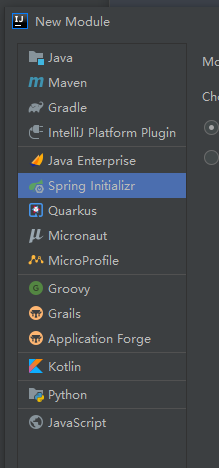
第一步、创建 xxx-spring-boot-starter 的spring Initializr模块
2.修改gav信息即可
###。什么也不选,直接一个空的模块
第二步、删除不需要的内容(启动类、除下面spring-boot-starter的其它依赖,maven编译插件)
<dependency>
	<groupId>org.springframework.boot</groupId>
	<artifactId>spring-boot-starter</artifactId>
</dependency>
以下是完整的POM.xml
实际上如果当前starter需要引用其它依赖加入到dependences里面即可,这里只做演示项目:
<?xml version="1.0" encoding="UTF-8"?>
<project xmlns="http://maven.apache.org/POM/4.0.0" xmlns:xsi="http://www.w3.org/2001/XMLSchema-instance"
         xsi:schemaLocation="http://maven.apache.org/POM/4.0.0 https://maven.apache.org/xsd/maven-4.0.0.xsd">
    <modelVersion>4.0.0</modelVersion>
    <parent>
        <groupId>org.springframework.boot</groupId>
        <artifactId>spring-boot-starter-parent</artifactId>
        <version>2.3.4.RELEASE</version>
        <relativePath/> <!-- lookup parent from repository -->
    </parent>
    <groupId>top.huashengshu</groupId>
    <artifactId>my-spring-boot-starter</artifactId>
    <version>0.0.1-SNAPSHOT</version>
    <name>my-spring-boot-starter</name>
    <description>Demo project for Spring Boot</description>

    <properties>
        <java.version>11</java.version>
    </properties>

    <dependencies>
        <!--   保留这个依赖即可,其它依赖都删除     -->
        <dependency>
            <groupId>org.springframework.boot</groupId>
            <artifactId>spring-boot-starter</artifactId>
        </dependency>

    </dependencies>
</project>
第三步:
只保留一个一个骨架,对外提供一些自己写的类
创建HelloProperties.java,直接复制下面代码,然后选择包进行粘贴,Idea会自动创建对应类代码设置好包名。
import org.springframework.boot.context.properties.ConfigurationProperties;

@ConfigurationProperties(prefix = "hello") // 对外提供的前缀,相当于其它引入当前starter在properties文件使用hello.属性即可对下面属性进行赋值
public class HelloProperties {

    private String prefix; // 成员属性,意思是前缀名
    private String suffix; // 成员属性,意思是后缀名

    public String getPrefix() {
        return prefix;
    }

    public void setPrefix(String prefix) {
        this.prefix = prefix;
    }

    public String getSuffix() {
        return suffix;
    }

    public void setSuffix(String suffix) {
        this.suffix = suffix;
    }
}
第三步:写代码,对外提供一些自己写的类
第三步、写代码,对外提供一些自己写的类
创建HelloProperties.java,直接复制下面代码,然后选择包进行粘贴,Idea会自动创建对应类代码设置好包名

import org.springframework.boot.context.properties.ConfigurationProperties;

@ConfigurationProperties(prefix = "hello") // 对外提供的前缀,相当于其它引入当前starter在properties文件使用hello.属性即可对下面属性进行赋值
public class HelloProperties {

    private String prefix; // 成员属性,意思是前缀名
    private String suffix; // 成员属性,意思是后缀名

    public String getPrefix() {
        return prefix;
    }

    public void setPrefix(String prefix) {
        this.prefix = prefix;
    }

    public String getSuffix() {
        return suffix;
    }

    public void setSuffix(String suffix) {
        this.suffix = suffix;
    }
}
创建方式HelloService.java 直接复制下面的代码,选择包进行黏贴
public class HelloService {

    HelloProperties helloProperties;

    public HelloProperties getHelloProperties() {
        return helloProperties;
    }

    public void setHelloProperties(HelloProperties helloProperties) {
        this.helloProperties = helloProperties;
    }

    public String sayHello(String name){
        return helloProperties.getPrefix() +" "+name +" "+helloProperties.getSuffix();
    }
}
第四步、在resources资源文件夹下创建一个META-INF文件夹,并创建一个spring.factories文件
内容则是将@Configuration配置类加入,目的是将配置加入到外部的IOC容器中
idea中右键copy–》copy reference,将复制的值填入上面=右边
注意:如果有多个AutoConfiguration则用逗号分开,还有回车小心前面的空格,最好没有其它字符。
例如:
第五步、将该项目发布的maven仓库,或者安装到本地仓库中让其它项目能使用的到
第六步、测试自己定义的启动器使用有效
创建一个springboot项目,勾选web模块即可,然后加入自定义启动器的gav依赖,
properties文件
因为使用了@ConfigurationProperties(prefix = “hello”)注解所以在当前项目的properties文件中使用hello前缀调用即可对成员属性赋值
复制:
hello.prefix=HUASHENGSHU
hello.suffix=Hello World
总结:
相关工具如下:
分析:
小结:
yml配置文件、加载顺序、配置原理~
参考资料和推荐阅读
1.链接: (https://blog.youkuaiyun.com/qq_41813208/article/details/109139783).


 1232
1232

 被折叠的 条评论
为什么被折叠?
被折叠的 条评论
为什么被折叠?
 到【灌水乐园】发言


